Transcription
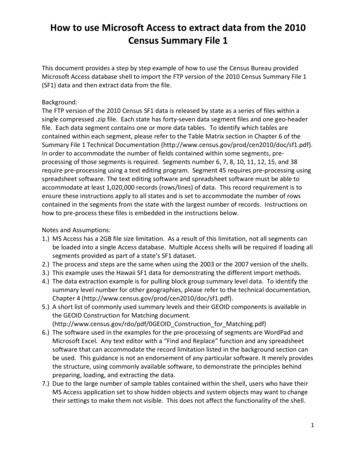
How to use Microsoft Access to extract data from the 2010Census Summary File 1This document provides a step by step example of how to use the Census Bureau providedMicrosoft Access database shell to import the FTP version of the 2010 Census Summary File 1(SF1) data and then extract data from the file.Background:The FTP version of the 2010 Census SF1 data is released by state as a series of files within asingle compressed .zip file. Each state has forty‐seven data segment files and one geo‐headerfile. Each data segment contains one or more data tables. To identify which tables arecontained within each segment, please refer to the Table Matrix section in Chapter 6 of theSummary File 1 Technical Documentation n order to accommodate the number of fields contained within some segments, pre‐processing of those segments is required. Segments number 6, 7, 8, 10, 11, 12, 15, and 38require pre‐processing using a text editing program. Segment 45 requires pre‐processing usingspreadsheet software. The text editing software and spreadsheet software must be able toaccommodate at least 1,020,000 records (rows/lines) of data. This record requirement is toensure these instructions apply to all states and is set to accommodate the number of rowscontained in the segments from the state with the largest number of records. Instructions onhow to pre‐process these files is embedded in the instructions below.Notes and Assumptions:1.) MS Access has a 2GB file size limitation. As a result of this limitation, not all segments canbe loaded into a single Access database. Multiple Access shells will be required if loading allsegments provided as part of a state’s SF1 dataset.2.) The process and steps are the same when using the 2003 or the 2007 version of the shells.3.) This example uses the Hawaii SF1 data for demonstrating the different import methods.4.) The data extraction example is for pulling block group summary level data. To identify thesummary level number for other geographies, please refer to the technical documentation,Chapter 4 .) A short list of commonly used summary levels and their GEOID components is available inthe GEOID Construction for Matching document.(http://www.census.gov/rdo/pdf/0GEOID Construction for Matching.pdf)6.) The software used in the examples for the pre‐processing of segments are WordPad andMicrosoft Excel. Any text editor with a “Find and Replace” function and any spreadsheetsoftware that can accommodate the record limitation listed in the background section canbe used. This guidance is not an endorsement of any particular software. It merely providesthe structure, using commonly available software, to demonstrate the principles behindpreparing, loading, and extracting the data.7.) Due to the large number of sample tables contained within the shell, users who have theirMS Access application set to show hidden objects and system objects may want to changetheir settings to make them not visible. This does not affect the functionality of the shell.1
IMPORTING THE DATAA.) Start by downloading the MS Access shell and the state dataset you want to use. The Accessshell and data files can be found at:http://www2.census.gov/census 2010/04‐Summary File 1/Once the shell and the zipped data file have been downloaded to your working folder, yourworking folder will appear similar to this image.HawaiiSF1DataFileMSAccessShellB.) Open the .zip file and extract the files found inside to your working folder. This exampleuses WinZip. You may use another compression software package or Microsoft Windowsto extract these files. The files must be extracted before beginning the import process.This will create uncompressed files in the folder you select during the extraction process.2
Folder after extraction:3
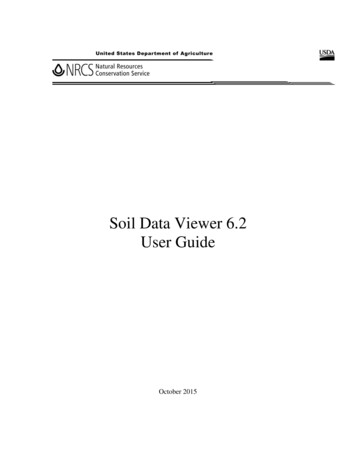
C.) Your Windows environment must be set to show all file extensions. This can be setthrough the Tools‐ Folder Options ‐ View function of Explorer. Make sure the “Hideextensions for known file types” is not checked and then hit Apply to All Folders.4
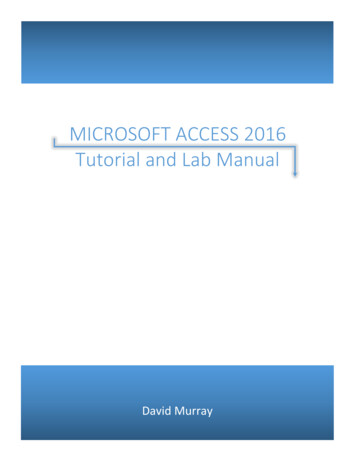
D.) All files with an .sf1 extension must be changed to .txt files. Right click on the first filewith a .sf1 extension. Choose “Rename” and change the .sf1 portion of the name to .txtand hit Enter. Repeat for each file with a .sf1 extension.Folder after renaming:5
E.) Open the MS Access Shell. You’ll see example tables of each segment (SF1 00005,SF1 00006mod, etc) and the geo‐header (GEO HEADER SF1) along with a table version ofthe data dictionary (DATA FIELD DESCRIPTORS). Note: Those segments listed with “mod”in their name require pre‐processing using the Find/Replace method described later inthis document. Segments listed as PT1 and PT2 require pre‐processing using thespreadsheet method, also described later in this document.6
F.) To pre‐process segments 6, 7, 8, 10, 11, 12, 15, and 38 begin with subsection “a” of thisstep (step F). If working with segment 45 go to subsection “b” of this step (step F). Forall other segments, proceed to step G.a. Pre‐processing segments 6, 7, 8, 10, 11, 12, 15, or 38 requires the use of text editingsoftware that has a find and replace function. In order to prepare these segmentsfor use with the Access shell it is necessary to “Find” the data contained within thefirst four fields of the segment and “Replace” them with nothing. The result will be asegment that begins with the field LOGRECNO rather than FILEID. These segmentscan be readily identified within the Access database by the appending of the text“mod” to both the table example and the import script’s name. NOTE: Performingthis modification can take several minutes for smaller states and several hours forlarger states.i. Open the segment using your text editor software. This example usesWordPad. (Notepad is not acceptable software for performing thismodification.)ii. On the Edit menu, select Replace.7
iii. In the “Find what:” entry box type in “SF1ST, ST ,000, Segment ,” where ST is the two letter capitalized postal abbreviation for the state in whichyou are working and Segment is the two digit segment number for thesegment you are preparing. If the segment number is a single digit it shouldbe preceded by a zero. This example shows the entry for Hawaii segment 6.Leave the “Replace with:” field blank and click the Replace All button. Thismay take some time to run as it is processing the entire segment. NOTE: It isimportant that the final comma is included in the string being replaced.iv. Once the operation is complete, click the Cancel button to close theFind/Replace window and then save the file – a suggested file namingconvention is to keep the original name and add “mod” to the end. This willkeep it consistent with the shell’s designations.v. This completes the pre‐processing requirement for the segment. Proceed tostep G of the Importing Data section to complete the import of the segmentinto the Access database.8
b. Pre‐processing segment 45 requires the use of spreadsheet software. In order toprepare this segment for use with the Access shell import scripts it is necessaryto split the segment into a Part 1 and a Part 2. The result will be two segments,one containing all of the tables of segment 45 except for table H17C (Part1) andanother segment containing only table H17C (Part2). These segments can bereadily identified within the Access database by the appending of the text “PT1”and “PT2” to both the table example and the import script’s name. The split ofthe segment must be done precisely as described in order for the file to workwith the import scripts provided.i. Open the segment using your spreadsheet software. This example usesMicrosoft Excel 2007. How you open the file is critical. When using Excel, donot use the Data‐ Import from Text function. This will give you an error andnot allow the import of all columns. It is essential that you use the “OfficeButton” and then select Open.DON’T DO THISDO THIS9
ii. The file is a comma delimited file and the data starts in the first row.iii. There is no text qualifier for this comma delimited file.10
iv. Set the first five columns to “Text” by clicking on their column header andselecting “Text” from the radio buttons. This has to be done for each of thefive columns individually. Once these are set, click the Finish button.11
v. To create the Part 1 file, identify the last 21 columns in the spreadsheet anddelete them from the file. In Excel these will be columns IF to IZ.vi. Use Save As to save the file as a .csv file. It is recommended that whensaving the file you append PT1 to the name to distinguish it from, and notoverwrite, the original. Close Excel.vii. Locate the newly created .csv file and rename it to become a .txt file.viii. To generate the Part 2 version of the file, open the original file in yourspreadsheet software and delete all but the first five and last twenty onecolumns. In Excel this will be deleting columns F to IE. It is important todelete the columns not just the data in the columns. Your new table shouldbe only 26 adjoining columns. In Excel these become columns A to Z.ix. Use Save As to save the file as a .csv file. It is recommended that whensaving the file you append PT2 to the name to distinguish it from the original.Close Excel12
x. Locate the newly created .csv file and rename it to become a .txt file.xi. Proceed to step G of the Importing Data section to complete the import ofthese new “PT1 & PT2” segments into the Access database.G.) To import a data segment, click on the “External Data” menu and select the “Text File”option for import. Importing the geo‐header will come later in these instructions.13
H.) Make sure the radio button selection at the bottom of the import screen is on “Append acopy of the records to the table:” and select the sample segment table you are importinginto in the drop down list. Use the browse button to navigate to the files for import.14
I.) Choose the first file to import. This example imports Hawaii Segment 01. Select the file inthe upper window and click the Open button. The segment naming structure for the datasegments is ST 000 Segment 2010. The geo‐header is ST geo2010. The ST is thetwo letter postal abbreviation for the state represented by the file and Segment is thetwo digit segment number. When the segment number is a single digit it is preceded byan additional zero.15
J.) Click the OK button in the Get External Data – Text File window.16
K.) In the Import Text Wizard window, click the Finish button.17
L.) In the Save Import Steps window leave the checkbox unchecked and click Close.M.) To import the geo‐header file, click on the “External Data” menu and select the “Text File”option for import.18
N.) Make sure the radio button selection at the bottom of the import screen is on “Import thesource data into a new table in the current database.” Use the browse button to navigateto the file for import.O.) Select the ST geo2010.txt in the upper window, where ST is the two letter postalabbreviation for the state with which you are working, and click the Open button.19
P.) Click the OK button in the Get External Data – Text File window.20
Q.) The Import Text Wizard opens. In the lower left hand corner, click the Advanced button.21
R.) The Import Specification window opens. On the right hand side, click the Specs button.S.) In the Import/Export Specifications window that opens, select the GEO Header ImportSpecification and click Open.22
T.) The Import/Export Specification window closes and you are back at the ImportSpecification window. On the right hand side, click the OK button.23
U.) In the Import Text Wizard window, click the Next button.24
V.) Continue clicking the Next button until you reach the Primary Key setting screen. On thisscreen, select “Choose my own primary key” and use the pull down arrow to select theLOGRECNO field. Then click the Finish button. You will end up with a geo‐header tablenamed ST geo2010 where the ST is the two letter postal abbreviation for the state.25
Joining the DataA.) Once the segment and geo‐header have been imported, click on the “Database Tools”menu and select the “Relationships” tool.B.) Click on the Show Table button if the Show Table window hasn’t already opened.26
C.) In the Show Table window, highlight the geo header and data segment table you haveimported and then click the Add button. Both can be selected at the same time byholding the Ctrl key while clicking on the tables. This will add the tables to theunderlying Relationships window. Click the Close button.D.) To create a relationship between the tables, it is necessary to link them using theLOGRECNO field. Click and hold on the LOGRECNO field in the Segment table and dragand release that onto the LOGRECNO field of the geo‐header file.27
E.) In the Edit Relationships window, click the Create button.F.) Once completed you will have a line between the Segment table and the geo‐headerthat represents the relationship you just created.G.) At the top of the screen click the Close button.H.) When prompted to save, click Yes.28
Extracting the DataA.) To pull data from the database you just built it is necessary to construct a query. Startby going to the Create tab and selecting the Query Design tool.B.) In the Show Table window, highlight the geo header and data segment table you haveimported and then click the Add button. Both can be selected at the same time byholding the Ctrl key while clicking on the tables. This will add the tables to theunderlying Query Builder window. Click the Close button.29
C.) You should now have a window with your two tables displayed in the area above athird table which is shown as a collection of empty columns.30
D.) To add fields to the bottom table, double click on the field names in the upper tables.Start building the lower table by adding (double clicking) the field SUMLEV from thegeo‐header.31
E.) In this example we are building a block group level extract so add all of the fields tothe bottom table that go into making a unique GEOID for a block group (STATE,COUNTY, TRACT, and BLKGRP).F.) In order to join this data to the TIGER/Line shapefiles, it is also necessary to constructa GEOID. In the bottom table you are building, right click in the first record (Field:row) of the first empty column and select the Build option from the menu thatappears. If you are not planning to join this data to the TIGER/Line shapefiles proceedto step K of the Extracting the Data section.32
G.) In the Expression Builder type in the name for your GEOID column followed by a colon.This example uses GEOID10. This matches the name of the unique identifier field foreach piece of geography found in the 2010 TIGER/Line shapefiles.H.) Still in the Expression Builder, in the lower left hand window, double click the plus signnext to Tables and then select the ss geo2010 table where ss is the two letterpostal abbreviation for the state in which you are working. This will cause the middlecolumn to populate with the field names from that table.33
I.) Double clicking a field name in the middle window will move it to the expressionwindow at the top. To concatenate multiple fields, use the ampersand between eachfield name entry. When you have added all of your fields and ampersands yourexpression should look similar to the one pictured below. This is an example for ablock group GEOID. (STATE COUNTY TRACT BLKGRP)J.) If your expression contains Expr , you will need to delete it before clicking OK.34
K.) You now have all the geographic components you need for creating a block grouplevel data extract, but now need to restrict the extract to just block group level data.This is done by adding the summary level number for block groups (150) to theSUMLEV field’s criteria. Documentation for this information can be found throughItem 5 of the Notes and Assumptions section at the beginning of this document. Otherfields can be filtered, for example, if you only want one county’s block groups you canadd that county’s three digit FIPS code to the criteria for the COUNTY field.L.) Now that all the geographic components have been set for the block group level dataextract, it is necessary to add the data columns of interest. The data dictionary for thefield codes is available in the technical documentation and/or in the Access databaseshell as a table called “DATA FIELD DESCRIPTORS”. To add the data columns of yourchoice, double click them in the upper tables so they appear in the table below.Field added from SF1 0000135
M.) Once you have added all the data fields of interest, you can view your newly createdtable. In the upper left hand corner of the Access software window click the Viewbutton.N.) You should now see a table with all geo fields you added, the GEOID10 field youcreated, and the data fields you added that shows only block group level data records.O.) You can now save and close your query for future use by right clicking the Query tab inthe upper left of the query screen. To modify an already created query, right click onthe query tab and select “Design View”.36
P.) If the query is not listed in the Table of Contents on the left hand side, click the bannerat the top of the Table of Contents. On the resulting menu pick Queries.37
Q.) If you want to export the table you created, right click on name of the query you savedand select Export. This will provide many format options for your exported table.Note: Some formats may not be compatible with the size of the table you areexporting.38
This document provides a step by step example of how to use the Census Bureau provided Microsoft Access database shell to import the FTP version of the 2010 Census Summa