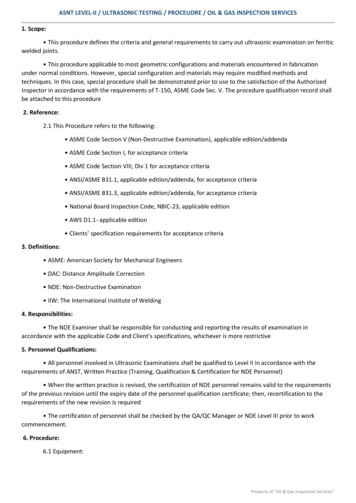
Transcription
ASNT LEVEL-II / ULTRASONIC TESTING / PROCEUDRE / OIL & GAS INSPECTION SERVICES1. Scope: This procedure defines the criteria and general requirements to carry out ultrasonic examination on ferriticwelded joints. This procedure applicable to most geometric configurations and materials encountered in fabricationunder normal conditions. However, special configuration and materials may require modified methods andtechniques. In this case, special procedure shall be demonstrated prior to use to the satisfaction of the AuthorizedInspector in accordance with the requirements of T-150, ASME Code Sec. V. The procedure qualification record shallbe attached to this procedure2. Reference:2.1 This Procedure refers to the following: ASME Code Section V (Non-Destructive Examination), applicable edition/addenda ASME Code Section I, for acceptance criteria ASME Code Section VIII, Div 1 for acceptance criteria ANSI/ASME B31.1, applicable edition/addenda, for acceptance criteria ANSI/ASME B31.3, applicable edition/addenda, for acceptance criteria National Board Inspection Code, NBIC-23, applicable edition AWS D1.1- applicable edition Clients’ specification requirements for acceptance criteria3. Definitions: ASME: American Society for Mechanical Engineers DAC: Distance Amplitude Correction NDE: Non-Destructive Examination IIW: The International Institute of Welding4. Responsibilities: The NDE Examiner shall be responsible for conducting and reporting the results of examination inaccordance with the applicable Code and Client’s specifications, whichever is more restrictive5. Personnel Qualifications: All personnel involved in Ultrasonic Examinations shall be qualified to Level II in accordance with therequirements of ANST, Written Practice (Training, Qualification & Certification for NDE Personnel) When the written practice is revised, the certification of NDE personnel remains valid to the requirementsof the previous revision until the expiry date of the personnel qualification certificate; then, recertification to therequirements of the new revision is required The certification of personnel shall be checked by the QA/QC Manager or NDE Level III prior to workcommencement.6. Procedure:6.1 Equipment:Property of “Oil & Gas Inspection Services”
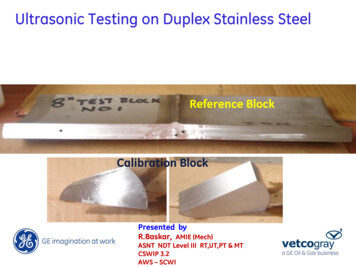
ASNT LEVEL-II / ULTRASONIC TESTING / PROCEUDRE / OIL & GAS INSPECTION SERVICES6.1.1 Ultrasonic examination equipment shall be of the pulse echo type utilizing “A” scanpresentation, capable of generating and receiving frequencies between 1 and 5 MHz as a minimumand shall be capable of recording UT data including the scanning positions6.1.2 The flaw detector shall be calibrated in accordance with the relevant calibration procedure. Acertificate of conformance shall accompany each flaw detector6.1.3 The ultrasonic instrument shall provide linear vertical presentation within 5% of the fullscreen height (FSH) for 20% to 80% FSH and to be recorded in Screen Height Linearity Record FormNo. TNE-UT-Doc-02 Rev ‘0.’ The procedure for evaluating screen height linearity is carried out as perASME section V, article 4, appendix I (and or AWS D1.1-6.30)6.1.4 The ultrasonic instrument shall utilize an amplitude control accurate over its useful range to20% of the nominal amplitude ratio, to allow measurement of indications beyond the linear range ofthe vertical display on the screen. The procedure for evaluating amplitude control linearity shall beperformed as per ASME section V, Article 4, appendix II6.1.5 The requirements of 6.1.3 and 6.1.4 above; shall be met at intervals not to exceed threemonths for analogue type instruments and one year for digital type instrument, or prior to first usethereafter6.1.6 When any part of the examination system is changed, a calibration check shall be made on thebasic calibration block to verify that distance range points and sensitivity setting (s) satisfy therequirements of ASME section V, T-466.36.1.7 A calibration check on at least one of the reflectors in the basic calibration block shall beperformed at the completion of each examination or series of similar examinations, and whenexamination personnel are changed. The distance range and sensitivity values recorded shall satisfythe requirements of ASME section V, T-466.36.1.8 If during any check, it is determined that the examination equipment is not functioningproperly, all the product that has been examined since the last valid equipment calibration shall bere-examined6.2 Materials:6.2.1 Search units shall be electrically matched to the flaw detector6.2.2 Search units shall be in the frequency range 1 MHz to 5 MHz and be free of noise and internalreflections. Twin or single transducer elements may be used dependent upon the configuration ofweld under examination6.2.2.1 In case of AWS D1.1 Straight-beam Search unit transducers shall have an active area of not less than1/2in² nor shall more than 1 in². The transducer must be a round shape or squareshape Angle-Beam Search Units shall consist of a transducer and an angle wedge. Theunit may be comprised of the two separate elements or may be an integral unit.Search Units shall be square or rectangular and may vary from 5/8in to 1in in widthand from 5/8in to13/16in in height. The search unit shall produce a sound beam inthe material being tested within 2 o̊ f one of the following proper angles:70 ,̊ 60 ,̊ or45 .̊ The transducer frequency shall be between 2 and 2.5 MHz6.2.3 Search units with contoured contact wedges may be used to aid the ultrasonic coupling.Calibration shall be done with the contact wedges used during the examinationProperty of “Oil & Gas Inspection Services”
ASNT LEVEL-II / ULTRASONIC TESTING / PROCEUDRE / OIL & GAS INSPECTION SERVICES6.2.4 Each flaw detector shall have a full set of search units with cables; the search units shall be oftype, size and frequency, as required by the governing specification. 6.2.5 Calibration blocks shallinclude but not be limited to “IIW –V2” UT reference Block. The operator shall also have access toIIW-V1, and such others that may be required to ensure compliance regarding calibration of flawdetector and probe characteristics, e.g. beam angle, beam profile, exit point (index). etc.6.2.5 In case of AWS D1.1 the “IIW” UT reference block shall be the standard used for both distanceand sensitivity calibration6.2.6 Basic Calibration Block Material shall be of the same product form, and material specificationor equivalent P-Number grouping as one of the materials being examined. For this procedure PNumbers 1, 3, 4, and 5 materials are considered equivalent. The calibration block shall have thesame heat treatment specification for the type and grade and have the same surface finish6.2.7 Measurements of beam spread for scan indexing limits shall be taken only when required by areferencing code section. Beam spread angles shall be measured once for a search unit wedgecombination in the calculated far field at the beginning of each period of extended use, or every 3months, whichever is less.6.2.8 Search units with worn faces shall not be used.6.2.9 Couplant shall be used to give the maximum acoustic transmission between the probe face andthe material under examination. The couplant shall be cellulose paste, liquid soap, oil, or grease. Inall cases the couplant including additive, shall not be detrimental to the material being examined6.3 Surface Condition:6.3.1 Welds that are being examined using ultrasound shall be prepared to provide a sufficientlysmooth and regular area for scanning to be undertaken. The area shall extend at least the full skipdistance required, and shall be free of any irregularities such as spatter, grinding or chipping marksscale, etc., which may hinder the scanning pattern or cause confusion in the interpretation of theresultant display i.e. excessive surface noise.6.4 Technical Information:6.4.1 Prior to commencement of examination, the following information shall be obtained: Type ofmaterial. Joint configuration. Welding Process. Other information that may have a bearing on theinspection e.g. post weld heat treatment, etc.6.5 Examination Procedure:6.5.1 For examinations in materials where the examination surface diameter is greater than 20 in.(508 mm), a block of essentially the same curvature shall be used, or alternatively, a flat basiccalibration block, may be used, if, gain correction shall be adjusted as described in code section V,Article 4, Appendix B.6.5.2 For examination in materials where the examination surface diameter is 20 in. (508 mm), orless, the calibration block shall be curved. Except where otherwise stated in the reference code, asingle curved basic calibration block may be used to calibrate the examination on surfaces in therange of curvature from 0.9 to 1.5 times the basic calibration block diameter.6.5.3 The scanning shall be 100%. The entire volume shall be examined with a 10% overlap of theprobe. The rate of search unit movement for examination shall not exceed 6 inches per second(152mm/sec) unless calibration is verified at scanning speed6.5.4 For reflectors oriented transverse to the weld the scanning shall be done parallel to the weldaxis. If the weld is not ground flushed the probe shall be controlled such that it faces nearly parallelto the weld body. The search unit shall be manipulated so that the ultrasonic energy passes throughthe required volume of weld and adjacent base material. The search unit shall be rotated 180 degProperty of “Oil & Gas Inspection Services”
ASNT LEVEL-II / ULTRASONIC TESTING / PROCEUDRE / OIL & GAS INSPECTION SERVICESand the examination repeated. If the weld cap is not ground flat, the examination shall beperformed from the base metal on both sides of the weld cap in both weld axis directions6.5.5 Calibration:6.5.5.1 Straight Beam Calibration (0 Probe):(A) The equipment is calibrated using a straight beam probe for a suitable range for thethickness of material being examined. A minimum of two back wall echoes from the materialunder test be noted during the examination.(B) A Distance Amplitude Correction curve (DAC curve) shall be produced using theappropriate calibration block. The gain control is adjusted to produce a response of 80% fullscreen height and the screen is marked. Then the probe is re-positioned to give themaximized response for each of the remaining holes. At each maximized position, mark theposition of maximum response on the screen. Connect the screen marks to produce the DACcurve. This gain setting is primary reference level.6.5.5.2 Angle Beam Calibration:(A) The equipment is calibrated for a suitable range for the beam path length required tosatisfactorily complete the examination, (i.e. Full Skip Distance)(B) Produce a DAC curve in accordance with paragraph 6.5.5.1(B)6.5.5.3 System calibration shall be carried out at the commencement of and at 4 hourlyintervals during, the inspection and on completion of an inspectionIf during the calibration confirmation the sweep range of the DAC curve has changed by thefollowing tolerances:Sweep Range: If a point of the DAC curve has moved on the time base by more than 10% ofits original time base position.DAC Curve: If a point on DAC curve has changed by 20% or 2 dB from its originalamplitude.Then the following action shall be taken:Sweep Range:The calibration shall be corrected with a note of the correction being made on the report. Ifany signals have been recorded, all recorded indications shall be re-examined with thecorrected calibration and their values corrected accordingly on the reportDAC Curve:If any point on the DAC curve has decreased by 20% or 2 dB all recorded data since the lastvalid calibration shall be marked void. A new DAC curve shall be produced with a note to thiseffect on the report and the voided are as shall be re-examined. If any point on the DACCurve has increased following the production of the new DAC curve. A note of this shall bemade on the report6.5.6 Inspection Technique:6.5.6.1 Parent Metal Examination, Prior to any examination of the weldments, the parentmaterial shall be examined. A compression wave 0 examination will be carried out for aminimum of 3 in. (75 mm) either side of the weld to locate any flaws in the parent materialand to determine its thickness.6.5.6.2 Weld Examination. Plate and Pipe Welds:Property of “Oil & Gas Inspection Services”
ASNT LEVEL-II / ULTRASONIC TESTING / PROCEUDRE / OIL & GAS INSPECTION SERVICESA critical root scan shall be carried out from both sides of the weld, with at least oneangle probe directed essentially perpendicular to the weld axis to distinguish between rootvariations and the existence of root cracks or crack-like defects. This may be done wherepracticable with the aid of a magnetic strip placed so that the distance from the probe indexto the root will be constant. The body and fusion faces of the weld shall then be examinedusing a continuous scanning raster from both sides of the weld between the weld center lineor the cap edge whichever is appropriate and full skip plus the cap width using at least twoprobes of differing angles6.5.7 Scanning:6.5.7.1 A Datum reference point shall be clearly marked on the work-piece and shallbe marked with the weld identification. The datum shall be used for a reference forlocating defects, and the reporting of defects.6.5.7.2 The weld and base metal shall be scanned, where required by thereferencing code section to the extent possible with the straight beam search unit.6.5.7.3 Angle beam scanning shall be performed at a gain setting at least two timesthe primary reference level. Evaluation shall be performed with respect to theprimary reference level.6.5.7.4 The angle beam shall be directed at approximate right angles to the weld axisfrom two directions where possible to detect discontinuities oriented parallel to theweld axis.6.5.7.5 The angle beam shall be directed essentially parallel to the weld axis andshall be manipulated so that the angle beam passes through the required volumes ofweld and adjacent base metal specified by the referencing code to detectdiscontinuities oriented transverse to the weld axis. The search unit shall be rotated180º and the examination shall be repeated.6.5.7.6 The rate of search unit movement for examination shall not exceed 6”/sec.unless calibration is verified at scanning speed6.5.8 In case of AWS D1.1 The testing angle and scanning procedure shall be in conformance withthose in AWS D1.1 Table 6.7. The Indication Rating “d” represents the algebraic difference indecibels between the indication level and the deference level with correction for attenuation asindicated in the following expression. Instruments with gain in dB: a - b – c d 6.6 DefectEvaluation and Sizing6.6.1 Any imperfection which causes an indication more than 20% DAC shall be investigatedto the extent that it can be evaluated in terms of the acceptance standards of thereferencing code sectionThe indication shall be investigated to:Confirm its existence. Determine its location regarding the established datum points.Determine its size. Determine its nature. This investigation may require scanning from otherpositions and with different probes. It is highly subjective in its nature and should be carriedout with extreme care. The recommended sizing techniques are as follows: Defect LengthUse the 6 dB drop technique, marking the probe center at the defect end points.Through Thickness Dimension:Use the 20-dB technique in conjunction with an adjustable flaw location slide. The recordinglevels and rejection levels shall be in accordance with the referencing Code or standard. AllProperty of “Oil & Gas Inspection Services”
ASNT LEVEL-II / ULTRASONIC TESTING / PROCEUDRE / OIL & GAS INSPECTION SERVICESdefects shall be assessed in accordance with the requirements of the applicable referencingCode Section6.6.2 In case of AWS D1.1, Each weld discontinuity shall be accepted or rejected based on itsindication rating and its length, in conformance with AWS D1.1 Table 6.2 for statically loadedstructures or Table 6.3 for cyclically loaded structures. The length of such indication shall bedetermined by measuring the distance between the transducer centerline locations wherethe indication rating amplitude drops 50%(6 dB) below the rating for the applicablediscontinuity classification. This length shall be recorded under “discontinuity length”6.7 Acceptance Standards6.7.1 ASME Code, Sec. I Paragraph PW-52: For Power Boilers6.7.2 ASME Code, Sec. VIII Div 1 (Mandatory Appendix 12): For Pressure Vessels6.7.3 ASME B31.1 Paragraph (136.4.6): For Process Piping6.7.4 AWS D1.1, Clause 6. Table 6.2 and 6.3: For Steel Structures6.8 Reporting6.8.1 Upon completion of the examination the examiner shall prepare an examination report, foreach weld or area of weld examined, all restrictions which limit the effectiveness of the test must berecorded.6.8.2 All reflectors greater than 50% of the reference level shall be reported and shall be describedregarding size, shape, location and probable identity/classification6.8.3 In addition, sketches and drawings shall be prepared to support written descriptionsProperty of “Oil & Gas Inspection Services”
ASNT LEVEL-II / ULTRASONIC TESTING / PROCEUDRE / OIL & GAS INSPECTION SERVICES Property of Oil & Gas Inspection Services 6.1.1 Ultrasonic examination equipment shall be of the pulse echo type utilizing A scan presentation, capable of generating a
