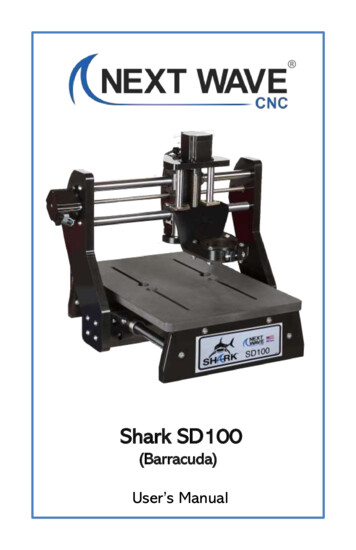
Transcription
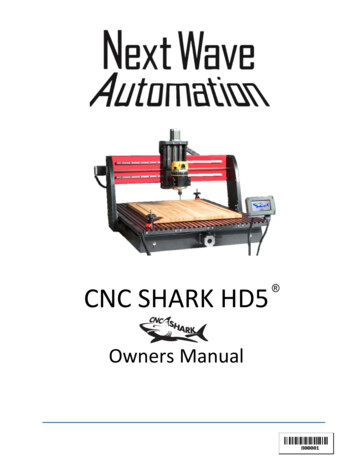
CNC SHARK HD5Owners Manual
Copyright Next Wave Automation All Rights Reserved.July 2019Updates of this manual areAvailable at www.NextWaveAutomation.comFOR THE MOST RECENT MANUALS, DRIVERS, AND OTHER SOFTWARE, PLEASE VISIThttp://nextwaveautomation.com*Information in this manual is subject to change without notice*CNC Shark HD5 is a registered trademark of Next Wave Automation.Software copyright by Next Wave Automation.All rights reserved.All other trademarks are the property of their respective owners.
To Our CustomersThank you for purchasing a CNC Shark HD5! Your Shark HD5 brings the speed and precision ofcomputer-controlled machinery to your shop with the top value CNC system.This manual tells you more about your CNC Shark HD5 system and how to operate and maintain it.Please read the manual carefully. The manual also includes our warranty and important safetyinformation.This manual has been written with the assumption that the owner is familiar with the basic operation ofa computer as well as the basic techniques for the safe operation of woodworking power tools.Information in this manual is subject to change without notice.This manual is also written under the assumption the owner has spent time learning design tutorials andprojects on www.Vectric.com (the makers of the designing software that is supplied with your machine)Please understand our support is designed around making sure your machine is running correctly andthe much of the design process is personal preference. Complicated design questions should be firstdirected via email to Support@Vertic.comAgain, thank you for purchasing the CNC Shark HD5. We are confident you will be pleased with itsperformance, ability to machine a wide variety of signs, doors, and other projects. If you ever have anyquestions or comments, feel free to contact us at the address below.Next Wave Automation, LLC600 W. Boundary St.Perrysburg, Ohio 43551 USAwww.NextWaveAutomation.comFor faster support service please email us atSupport Email – support@nextwaveautomation.comInclude your machine model, date of purchase, .tap files, .crv files, photos, and any other pertinentinformation that may be helpful. Files, pictures etc.Main Phone – (419) 318-4822Sales Email – info@nextwaveautomation.comJuly 2019CNC Shark HD5 1
Serial Number and Software License InformationRecord your CNC Shark HD5 Controller Interface and Vectric software user name and license codes herefor safe keeping. Your software may vary depending on the CNC Shark HD5 model purchased.Controller Serial Number:LCD Pendant Serial Number:VCarve User Name:VCarve License Code:July 2019CNC Shark HD5 2
Table of ContentsTo Our Customers . 1Serial Number and Software License Information . 2Warranty . 4Safety . 4Emergency Stop . 5CNC Shark HD5 Operations Safety Instructions . 6CNC Shark HD5 Hardware and Project Safety Instructions . 7Overview . 8General – The CNC Shark HD5 . 8CNC Shark Controller and LCD Pendant . 9CNC Shark HD5 Assembly Instructions . 11Attaching the Gantry to the Base . 11CNC Shark HD5 Router Mounting . 11Attaching the Pendant . 12Registering your Shark HD5 . 13Workflow Overview . 15Create the Design and Toolpath(s) . 15Machining the Part. 16Using the Touch Plate Accessory . 19Virtual Zero. 21Informational Resources. 26CNC Shark HD5 Maintenance & Trouble Shooting Guide . 27Maintenance . 27No Power – No lights . 27Router Not Auto Powering up . 27Improving Touch Plate Accuracy . 28LCD not Connecting . 28Unable to read USB files . 28Computer Requirements . 29July 2019CNC Shark HD5 3
WarrantyNext Wave Automation warrants to the original retail purchaser of a CNC Shark HD5 machine andpurchased from an authorized CNC Shark HD5 machine distributor that the CNC Shark HD5 and anyShark HD5 accessories purchased with the CNC Shark HD5 machine will be free from defects in materialand workmanship for ONE YEAR from the date of purchase. This warranty is for parts and labor tocorrect the defect and does not cover the cost of shipping the defective item(s) to Next WaveAutomation for repair.This warranty does not apply to defects arising from normal wear and tear, misuse, abuse, negligence,accidents, unauthorized repair or alteration, or lack of maintenance. This warranty is void if the CNCShark HD5 machine or any portion of the CNC Shark HD5 machine is modified without the prior writtenpermission of Next Wave Automation, LLC, or if the CNC Shark HD5 machine is located or has been usedoutside the country of residence of the authorized CNC Shark HD5 machine distributor from whom theCNC Shark HD5 machine was purchased.Please contact Next Wave Automation to take advantage of this warranty. If Next Wave Automationdetermines the CNC Shark HD5 machine or CNC Shark HD5 accessory is defective in material orworkmanship, and not due to normal wear and tear, misuse, abuse, negligence, accidents, unauthorizedrepair or alteration, or lack of maintenance, then Next Wave Automation will, at its expense and uponproof of purchase, send replacement parts to the original retail purchaser necessary to remedy theissue. Next Wave Automation will repair the CNC Shark HD5 machine or CNC Shark HD5 accessoryprovided the necessary CNC Shark HD5 machine component is returned to Next Wave Automation,shipping prepaid, with proof of purchase and within the warranty period.Next Wave Automation disclaims any and all other express or implied warranties, including fitness for aparticular purpose. Next Wave Automation shall not be liable for death, injuries to persons or property,or incidental, consequential, contingent or special damages arising from the use of the CNC Shark HD5machine.SafetyThe CNC Shark HD5, along with a router or other power tool, is a computer-numerically controlled (CNC)routing system. As such, it is a powerful system that can reduce your woodworking risks by providing amethod of cutting wood and other materials without having to interact with the cutting tool(s) ormaterial during the fabrication process. As with all power tools, your care and attention are required toensure that you use your CNC Shark HD5 safely. Next Wave Automation assumes you will use your CNCShark HD5 safely and follow accepted safety precautions and practices for woodworking and machining.July 2019CNC Shark HD5 4
Emergency StopThere are three ways you can immediately stop your CNC Shark HD5. CNC Shark HD5 users shouldemploy a surge suppress power strip with an on/off switch.The first is the STOP button on the CNC Shark HD5 Pendant when the unit is running.Pause and Stop on the Shark HD5The second is either the on/off switch or the red Emergency Stop button on the CNC Shark HD5.Hitting either will immediately stop the CNC Shark HD5 movement. This will also stop the router if it isplugged into the Controller Interface.Third is turning off the power strip. The power strip’s on/off switch serves the same purpose as the EStop button on the Shark HD5 Controller Interface. For this reason, it is recommended that you usepower strips with an on/off switch.July 2019CNC Shark HD5 5
Power Strip On/Off SwitchCNC Shark HD5 Operations Safety Instructions1. Read and follow all safety and operating instructions before using the CNC Shark HD5. This includesreading the manual for the router that will be mounted on your CNC Shark HD5. Take the time toorient yourself to the Shark HD5 and the workflow steps.2. Take small steps early in use – this will enable you to use the Shark HD5 safely and effectively.Practice each step a few times early on without running the router for example. Again, thisorientation process will help you to use the Shark HD5 safely and effectively.3. Let the machine and spindle come to a complete stop before touching parts, CNC Shark HD5, orrouter. Ensure that you have a positive system in place to make sure that power is not applied to therouter or the CNC Shark HD5 while positioning a work piece, adjusting the position of the tool,changing a bit, or setting up clamps, hold downs, or jigs.4. Ensure that the material or work piece is firmly secured to the table. This includes accounting for theattachment and hold down of any pieces that will become cutouts or cutoffs during the machiningprocess. Also, be sure that all clamps, hold downs, and jigs are not in the path of the cutter and donot interfere with the movement of the gantry.5. Always wear eye and ear protection while operating your CNC Shark HD5.6. Keep miscellaneous equipment off the CNC Shark HD5 table and gantry. This includes areasalongside the table where the gantry travels.7. Never leave the CNC Shark HD5 unattended while it is running. A work piece slippage, unexpectedcutting error or other unexpected event might occur. This could result in injury as well as damage tothe CNC Shark HD5.July 2019CNC Shark HD5 6
8. Never attempt to remove chips, dust or debris from the machine while it is running with your handsor fingers, or by placing a vacuum device into the field of operation.9. Position LCD Pendant and/or control box (with E-Stop button) in a place that is easy for you toquickly reach, and out of the path and travel direction of the tool. Chips and debris can travel a gooddistance, and cutters can break during use.10. Never attempt to manually adjust the work piece while the CNC Shark HD5 and router are running.Do not attempt to manually feed a work piece ‘into’ a running cutter – this is not a router table.11. Keep the CNC Shark HD5 lubricated and clean. Clean the CNC Shark HD5 and area after each use.The best lubrication for the CNC Shark HD5 is a dry Teflon, silicone spray applied to the bearings andlead screws of each axis.CNC Shark HD5 Hardware and Project Safety InstructionsThe Shark HD5 has 3 stepper motors, a Controller Interface Box, and a LCD Color Pendant. These are allprecision electronic devices and are susceptible to damage from power surges, static discharges,inappropriate power supply, and other unexpected electrical events. It is recommended that theController Interface be plugged into a surge protector to minimize the opportunity for damage to occuras a result of a power surge. You may also want to use a dedicated electrical circuit for the CNC SharkHD5. Turning on a shop vac or other power tool on the same leg may cause a momentary change in thepower supplied to the CNC Shark HD5. If you know that the power you receive fluctuates significantly,you may also want to use a power conditioner and battery backup device. This will ensure the longestlife of your CNC Shark HD5 electronic components. A minimal battery backup will enable you togracefully stop the job in progress at the time of the power loss, thus minimizing the possibility ofdamage to the CNC Shark HD5, electronics and router.CNC Shark HD5 users are strongly encouraged to use a power strip with an on/off switch to providepower to the Controller Interface and power supply. This provides a second means of an emergencystop if needed.The CNC Shark HD5 machine is not designed to work with fluids. The router is a ‘dry’ router. Do not cutwith any misting, cutter lubrication, or wet material as it may cause a fire.Keep the LCD Color Pendant and the controller vents clear of dust, dirt, shavings and other material.July 2019CNC Shark HD5 7
Keep your CNC Shark HD5 away from any moisture and in a temperature range of 50o to 80o F.With the power off, lightly vacuum the LCD Color Pendant and controller interface occasionally toremove any particulate from the electronics. This will help to prevent additional heating inside the boxthat could result in damage.Do not expose the system to high humidity – this may cause condensation on the electronics and resultin abnormal behavior or even a short in the electronics.You should not operate your CNC Shark HD5 machine during a thunderstorm unless you have anappropriate surge protector in place to prevent circuits from being damaged by excessive line voltage.Keep static charges from discharging into the motors. If you think this may become an issue, agrounding wire can be added to one bolt head of each of the motors.It is also strongly recommended that you keep backup copies of all important computer data, files andprograms. These should be separate copies – stored on a different device than the computer you areusing to create the projects and run them on the CNC Shark HD5.OverviewGeneral – The CNC Shark HD5Bringing the speed and precision of computer-numerically-controlled machinery to your shop, the CNCShark HD5 is designed for routing all types of wood, engraving plastics, etching metal, and even etchingor cutting tile. The CNC Shark HD5 has impressive power, speed, accuracy and ease of use. The CNCShark HD5 has a quality design and its parts have been manufactured using CNC machines to ensure thehighest accuracy. The CNC Shark HD5 is constructed of steel, aluminum, and high-density polyethylenefor a robust, long lasting and close tolerance machine.The CNC Shark HD5 comes with Vectric’s VCarve Desktop, (VCarve Pro on Extended Models) which willallow you to bring in designs from a multitude of art or drawing programs. You can find tutorials anddesign help at their website www.vectric.comJuly 2019CNC Shark HD5 8
The core components of the CNC Shark HD5 are shown in the figure below.Z - axismotorX - axismotorGantryRouterCarriageY - axis motorInterlockingT -trackClamping baseCNC Shark HD5 Core ComponentsCNC Shark Controller and LCD PendantThe CNC Shark LCD Pendant controls the movement of the X, Y, and Z axis as well as runs the project’stap file saved from the Vectric design software when input via a flash drive. The LCD Pendant is designedto be a standalone unit so that it is no longer necessary to expose your computer to a dusty shopenvironment. However, in the event you want to run it from your computer the Controller Interface mayalso be connected using a USB cable plugged into a USB 2.0 capable plug. This function will require youto download and use the CNC Shark Control Panel software (check online for the latest version) used tocommunicate to the controller. Then, just like the LCD Pendant you can use this interface to jog(position) the gantry and router, load a project (tap) file, and run the project.July 2019CNC Shark HD5 9
The CNC Shark HD5 has a Controller Interface with the power supply integrated into a single unit.LCD Touch Screen PendantJuly 2019CNC Shark HD5 10
CNC Shark HD5 Assembly InstructionsUnpack the CNC Shark HD5 machine and verify that all items are present. CNC Shark HD5 CNC Controller 15 pin Pendant Cable LCD Touch Screen Pendant Power Supply Power Cord 2 Hold Down ClampsNOTE: Make sure when removing the CNC Shark HD5 base from its box that you lift it from thesupporting rods underneath or the HDPE bottom. Do not lift from aluminum table top as this can causemisalignment.Attaching the Gantry to the Base1. For standard operation, use the bottom three sets of holes to mount the Gantry Assembly to the BaseAssembly. The upper sets of holes can be used if extra vertical clearance is needed.2. The Gantry Assembly attaches to the Base Assembly with the 12 mounting bolts and nylon- insert locknuts (six on each side). The fit of the mounting bolts is intentionally snug, so you’ll need to use the T27Torx bit or screwdriver to start and advance the bolts. Once the bolts are through the gantry and baseassemblies, thread on the nylon-insert lock nuts and tighten with a 7/16” wrench. Do not overtighten.CNC Shark HD5 Router MountingWith the 4 bolts removed, place the cradle mount onto your gantry and replace the 4 bolts using theappropriate hex driverInstall Router into Router Base by loosening the two horizontal bolts on the left and sliding router inuntil the motor protrudes at least 1 ½” below the clamp. On some router brands you may need tospread the clamp by gently inserting a flat blade screwdriver in the slot while sliding the router into themount.Tighten all clamping bolts securely.July 2019CNC Shark HD5 11
Attaching the PendantPlace the Controller Interface in a comfortable easy to access location and connect it to the CNC SharkHD5 using the serial cable provided. The LCD Pendant gets its power from the controller interface, so noother power cords are needed. See image below.Applying power to the Controller Interface. Re-verify that all three axis drive cables are connected to their respective Controller Interfaceleads. You should arrange the drive motor cables, power cables, and USB cable in a manner thatminimizes overlap, even amongst cables of the same purpose. This will reduce any opportunityfor signal interference because of cables ‘laying on top of each other’. Plug the Shark HD5 Controller into a 120V AC wall outlet, power strip, or surge protector. Onceagain, it is recommended that a power strip with an on/off switch is used. You will also hear a slight bumping or clicking noise coming from each of the motors whenpower is initially supplied. This noise is momentary, and will occur every time power is appliedto the Controller Interface.July 2019CNC Shark HD5 12
WARNING: The axis cable connectors should never be disconnected or re-connected while there ispower to the Controller Interface. Doing so can damage the stepper driver board inside the ControllerInterface.The CNC Shark HD5 machine’s hardware is now completely setup and is ready for basic operationtesting. You must setup the CNC Shark HD5 software before you can completely test your CNC SharkHD5 machine.Registering your Shark HD5Once you power up your CNC Shark HD5, you will see a screen like below. Hit continue.CNC Shark HD5 Welcome ScreenNext you will see your CNC Shark HD5’s serial number, and firmware information. Record this serialnumber into your manual on Page 2 then press OK.CNC Shark HD5 Serial NumberJuly 2019CNC Shark HD5 13
Please visit www.NextWaveAutomation.com to register your HD5. Once at the home page, choose“Registration,” listed at the top of the page. Fill in the items that are marked in red and then chooseSave at the bottom. This will email an access code to the email address provided in the registration formas well as display on your computer screen. (be sure to check your spam box if you fail to see the code)ATTN SCHOOLS: You will typically need to have administrator rights to register because of schoolsecurity restraints.If you received a registration error message there are a couple things to try: assuming you have aninternet connection.1.) Use a different browser and register again2.) Use a different computer to register.3.) Send tech support ALL the information from the form or a screen capture of the form and we cangenerate a working access code for you.If you received the success message and did not get a key code back in your email please try thefollowing:1.) Check your trash and spam email folders.2.) Register again but send to another email addressAlways Visit http://help.nextwaveautomation.com/ for help with the latest issues.July 2019CNC Shark HD5 14
Workflow OverviewIt is important to recognize that unlike other wood working and machining tools, you just don’t walk upto the CNC Shark HD5 with your material, hit the power button, and start carving or engraving yourproject. It is easiest to think of the workflow in two distinct components:1. Create the design and toolpath (also called TAP file) - using VCarve.2. Machining the part - using the CNC Shark HD5 LCD Control Panel, you will set your “HomeLocation” then load the toolpath file and run the project (create your carving).Create the Design and Toolpath(s)VCarve is used to create the design of the part you want. It is a powerful user friendly program, if youhaven’t yet gone to www.vectric.com and watched their instructional tutorials on designing you mustdo this first.The VCarve projects are saved with the file extension ‘.crv’. This is not however the file you will loadonto the CNC Shark HD5 LCD Control Panel to carve your design as VCarve does not directly control oroperate the CNC Shark HD5. This is commonly referred to as your ‘project file’ and can be opened andedited at any time by using the VCarve software.Once your design is ready, you will use VCarve to generate one or multiple toolpaths depending on whatyou are trying to do to your project, profiles, drilling, carving etc. They all require separate toolpaths.(Complete directions on this are available at www.vectric.com) You select the design component, thecutting tool you want to use and then generate the toolpath. A great feature is that you can preview theoutcome of that toolpath in VCarve and make changes before ever cutting or wasting your material.Then using VCarve to save that toolpath and selecting the correct post processor (CNC Shark postprocessor in post processor area of VCarve) it automatically creates the g-code needed by convertinginto a .TAP file. Next save it onto a USB thumb drive and directly load this into the CNC Shark HD5 via theUSB slot on the right side of the pendant. The tap file contains the G-code instructions that will tell theCNC Shark HD5 where to move in X, Y, Z to make the appropriate cuts using the cutter tool selected. (Gcode is the common name for the computer numerical control (CNC) language used by the CNC SharkHD5.It is important to also note that you can do all tasks associated with VCarve on a separate computer –i.e. you may choose to use a computer in your office or home to create your designs and generate thetoolpath files and then download them to a thumb drive and plug this into the Shark HD5.July 2019CNC Shark HD5 15
Machining the PartThe material to be machined is placed on the Shark HD5 work table and properly secured – typically byusing clamps. The proper cutter tool is placed in the router. Using the Shark HD5 Touch Screen, the toolis moved (jogged) to X0, Y0, Z0 – this is typically on the very top of the material, and the lower leftcorner. Once you have it in position you press the Zero xyz button, answer yes to reset zero and thisbecomes the starting and stopping place for this project. (You can place your material anywhere on thetable and reset home in this manner)Control Speed ofToggle MovementToggle any of the 3 AxisSet new Zero HomehereThe tap file is loaded onto the Thumb Drive in the Controller Interface using the Touch Screen interface.Select the ‘Load G-Code’ button and select the appropriate tap file. At this point, all the steps necessaryto run the toolpath have been taken. The ‘Run’ button is selected, and the Shark HD5 starts to machinethe part.You can also type a measurement directly into the current location screen. Pressing the location areawill display the screen below.July 2019CNC Shark HD5 16
Enter the desiredlocation using thenumeric keypadThen press theMove ButtonNext, plug the thumb drive containing the .tap file into the LCD Pendant using the USB port on the righthand side of the Pendant.The USB button will now become accessible, press it now.July 2019CNC Shark HD5 17
Next select the appropriate tap file. (Tap files only allow 8 characters so be sure you have uniqueidentifying names )Verify you have the correct file you are preparing to run, you can see file name, material size, etc. Ifeverything is correct press NextAt this point, all the steps necessary to run the toolpath have been taken. Next select the ‘Start’ buttonand the CNC Shark HD5 will start to machine the part. You’ll notice you have complete control to pauseand resume should you need to check something (remember to turn router off if your adjusting thework piece) The slide bar for speed override allows you to compensate for things like denser materialthan what you had originally designed the program for. And of course, the E-Stop in case you need tostop everything in a panic. (we don’t recommend using the small x to stop the cutting as it can confusethe machine, it is only used to back out to the previous page)July 2019CNC Shark HD5 18
Using the Touch Plate AccessoryThe Touch Plate is an optional accessory that can be used to obtain faster, more accurate setups. Justplug it into the CNC Shark HD5. This same Touch Plate is used with the CNC Shark offered by Next WaveAutomation through a network of authorized distributors and web store.Next Wave Touch Plate AccessoryPress the App button and go to the Touch Plate setup App.July 2019CNC Shark HD5 19
Attach the magnet to the router bit collar and place the plate on top of the material you’re workingwith. Then Tap Press to Run and the CNC Shark HD5 will ask to perform a test as below.Raise the touch plate to enough to make momentary contact with the bit, the screen will turn red andyou may proceed. If the screen does not turn red, try repositioning the magnet and repeat procedure.Once you make the proper connect press ok to begin movement.The CNC Shark HD5 will establish the zero/home position the instant the bit makes contact with thetouch plate. You can ABORT the process at any time by pressing the Abort Key.July 2019CNC Shark HD5 20
Press OK to accept the results.Virtual ZeroEven material that seems flat can sometimes have a slight bend to it. Virtual Zero is a function that usesthe Touch Plate to account for this different bend in each piece of material. Virtual Zero is for G-Codefiles only, not raster graphics laser files. To clarify, Virtual Zero does not work in accompaniment withlaser-burning images. When using Virtual Zero with a file, ensure that the file uses the CENTER as thereference, as opposed to a corner of the material. When running a file, a green “V” indicates that VirtualZero is armed.SELECTING VIRTUAL ZERO FROM THE APPS MENUJuly 2019CNC Shark HD5 21
Even seemingly flat material can be slightly warped. Virtual Zero touches down at five points on thematerial to compensate for any warps or bends.SLIGHTLY WARPED MATERIALPoints at which the routerwill touch down on theTouch PlateVirtual Zero reference pointsJuly 2019CNC Shark HD5 22
Once Virtual Zero has been selected, the program needs input to use the touch plate. Select the firstoption from Virtual Zero sub-menu and input the number 1 to confirm that the touch plate will be used.From this menu, select Scan Width X and enter the width of the area you are machining, in inches. Thisarea should account for potential obstructions, such as clamps holding the material in place. In ourexample, we input 2 inches. Your value will vary depending on the size of the individual area you aremachining. Then, select Scan Length Y and enter the length of the machining area.July 2019CNC Shark HD5 23
Once you have input your desired settings for Speed, Scan Width X, and Scan Length Y, select EnableVirtual Zero. Inputting the number 1 tells the machine to run Virtual Zero the next time you run a file,and the next time a file is run, the machine will display a prompt asking if the file should run with VirtualZero. Inputting the number 0 tells the machine to ignore Virtua
The CNC Shark HD5, along with a router or other power tool, is a computer-numerically controlled (CNC) routing system. As such, it is a powerful system that can reduce your woodworking risks by providing a method of cutting wood and other materials without having to interact with the cu