Transcription
Intuit Field Service ManagementCorrigo Integration ClientFor QuickBooksInstallation & Setup Guidepg. 1
This documentation and related computer software program (hereinafter referred to as the “Documentation”) is for the end user'sinformational purposes only and is subject to change or withdrawal by Corrigo Incorporated at any time.THIS DOCUMENTATION MAY NOT BE COPIED, TRANSFERRED, REPRODUCED, DISCLOSED OR DUPLICATED,IN WHOLE OR IN PART, WITHOUT THE PRIOR WRITTEN CONSENT OF CORRIGO. THIS DOCUMENTATION ISPROPRIETARY INFORMATION OF CORRIGO AND PROTECTED BY THE COPYRIGHT LAWS OF THE UNITED STATES ANDINTERNATIONAL TREATIES.TO THE EXTENT PERMITTED BY APPLICABLE LAW, CORRIGO PROVIDES THIS DOCUMENTATION “AS IS”WITHOUT WARRANTY OF ANY KIND, INCLUDING WITHOUT LIMITATION, ANY IMPLIED WARRANTIES OFMERCHANTABILITY, FITNESS FOR A PARTICULAR PURPOSE OR NONINFRINGEMENT. IN NO EVENTWILLCORRIGO BE LIABLE TO THE END USER OR ANY THIRD PARTY FOR ANY LOSS OR DAMAGE, DIRECT ORINDIRECT, FROM THE USE OF THIS DOCUMENTATION, INCLUDING WITHOUT LIMITATION, LOST PROFITS, BUSINESSINTERRUPTION, GOODWILL OR LOST DATA, EVEN IF CORRIGO IS EXPRESSLY ADVISED OF SUCH LOSS OR DAMAGE.THE USE OF ANY PRODUCT REFERENCED IN THIS DOCUMENTATION AND THIS DOCUMENTATION IS GOVERNED BYTHE APPLICABLE END USER'S LICENSE AGREEMENT.The manufacturer of this documentation is Corrigo Incorporated.Provided with “Restricted Rights” as set forth in 48 C.F.R. Section 12.212, 48 C.F.R. Sections 52.227-19(c)(1) and (2) or DFARS Section252.227.7013(c)(1)(ii) or applicable successor provisions. 2007 - 2014 Corrigo Incorporated, 8245 SW Tualatin Sherwood Rd. Tualatin, OR 97062. All rights reserved.All product names referenced herein belong to their respective companies.Version 6.10 JRP 07/30/2010 1:15 PMUpdated August 20 2014 by MHS and JTpg. 2
Table of ContentsOverview .5Using This Guide .5System Requirements .6Technical Support: .6Before You Connect QB to FSM .6QuickBooks Company File Considerations and Potential Clean-Up Areas .6Installing the Corrigo Integration Client .7Overview .7To Install the Corrigo Integration Client: .8Initial Synchronization Setup .13Overview .13QuickBooks Settings for Inventory Tracking .13QuickBooks Settings for Time Card users .14Using the Setup Wizard .18Field Service Management Authentication Settings .20Customer Synchronization Settings .22Item Synchronization Settings .25Inventory Item Synchronization.26Invoice Settings .26Time Card Settings .29Completing Initial Synchronization Wizard .31Synchronizing the Systems .31Overview .31Starting the Synchronization Wizard .32Customer Synchronization .40Item Synchronization .43pg. 3
Group Item Synchronization .44Retrieval of Employees with Approved Invoices.46Associate Field Service Management employees with QuickBooks employees and Sales Reps .47Invoice Export .47Payment Method Mapping .51Time Card Synchronization (for Time Card users) .55Running Corrigo Integration in network share setup .60Automatic Update of the Corrigo Integration Client .62Troubleshooting .63Frequently Asked Questions .63Technical Support: .64pg. 4
Corrigo Integration Client for QuickBooks –Installation & Setup GuideOverviewThis guide explains how to implement the Corrigo Integration Client for QuickBooks. The following assumptions apply to theuse of this guide: You utilize QuickBooks as your business accounting software (see System Requirements in this guide for additionalinformation)Your QuickBooks application runs on a computer that has Internet access.You have a valid URL, user ID, and password for your Intuit Field Service Management product.You have a basic understanding of how to access, navigate, and use both QuickBooks and your Intuit Field ServiceManagement product.Using This GuideAppearance:Since your company can customize Service Management by changingscreen appearance, words, and phrases used in the application, someimages used in this guide may not exactly match those that appear onyour screens.Conventions:The Intuit Field Service Management product you use will be referred to asField Service Management, the web application, or just application withinthis guide. All supported versions of QuickBooks will be referred to merelyas QuickBooks, unless otherwise noted. The Corrigo Integration Client forQuickBooks will be referred to as the integration client.pg. 5Path Reference:Path references will be used in this guide to direct you to the appropriatescreen within your software products. For example, to reach the clientdownload screen in Field Service Management, the path is Settings Company Integration. This means that, within your Field ServiceManagement web application, you select the Settings page, choose theCompany tab on that page, then select the Integration option from theCompany menu.System Administrator:This is the person at your company who manages your Field Service Managementand QuickBooks programs. The term System Administrator is used in this guide.
System RequirementsMinimum system requirements for the machine running the sync between FSM and QB: High speed Internet connection 1024 by 768 screen resolution QuickBooks Pro/Premier/Enterprise Desktop Software version 2012 or later running on MicrosoftWindows Vista Business 32 or 64 bit, Vista Ultimate 32 or 64 bit, Windows 7 Business 32 or 64 bit,Windows 7 Ultimate 32 or 64 bit, Windows 8 Business 32 or 64 bit, Windows 8 Ultimate 32 or 64 bit.Windows Vista “Home Edition ”, Windows 7 “Home Edition”, and Windows 8 “Home Edition” notsupported (they will not sync). At least 1 GB RAM At least 1.6 GHz processor 1 GB available hard-disk spaceQuickBooks versions supported: The Corrigo Integration Client can be used with the following QuickBooksversions: Pro, Premier, and Enterprise versions from 2012 and newer, running on Microsoft Vista or Windows 7/8Business or Ultimate operating systems (32 bit and 64 bit).Technical Support: Helpful videos during the Installation and Setup process: http://vimeo.com/intuitfieldsvc/albums to watchthe “Phase 1” video series.Field Service Management technical support: 1-800-517-2871 (toll-free)Email: support@corrigo.comLocal Experts for personalized setup assistance, QB file cleanup, and FSM /local-expertsBefore You Connect QB to FSMQuickBooks Company File Considerations and Potential Clean-Up AreasPlease review this list of potential clean-up areas prior to your initial synchronization between QuickBooks and Intuit FieldService Management (FSM).1.pg. 6Look in QB and determine if you are using more than one type of customer in QB.FSM supports two types of customers: Residential or Commercial. Commercial customers in FSM have a field for“Company”, while Residential customers do not. If this is important to you for reporting purposes or customerrecord appearance you will want to go through your customers in QB to ensure the customer type is set tosomething you can map to either residential or commercial. In most cases this is not something that FSMcustomers have needed to do, but you cannot correct the customer type after they have been created/importedinto FSM.
2.3.4.5.6.Sync errors: QB customers will not sync to FSM if there is an invalid entry in the billing/ship to addresses or theemail field. If you are using these fields in QB for something other than the appropriate information the customerwill not sync until you fix the customer record. Usually this is corrected after the initial sync since FSM will give youa list of exact records that were not able to sync and why. However, if you are planning to review your customerlist prior to sync it would be a good idea to correct any errors on these records first.Customers and Jobs in QB: Jobs in QuickBooks Sites/Locations in Field Service Management. If prior topurchasing FSM your business has been using Jobs in QB as “work orders”, you probably have many Jobs in QB forthe same “Customer Site”. If this is the case, please call FSM Support prior to running the First-time sync betweenFSM and QB to discuss ways to manage your existing QB customers and jobs when synced into FSM.Service/site address: FSM pulls the billing information from the QB “Bill To” field and the service/site address fromthe “Ship To” field. Even if the billing and service addresses are the same for your customer, there must be entriesin both the “Bill To” and the “Ship To” in QB. If the “Ship To” in QB is left empty, then there will not be an addresson the work orders in FSM for those customers. There are several ways this can be corrected:a. One at a time in QB by clicking the “copy” button between the addresses in the customers’ records.b. In FSM by editing the site address when customers call in for service.c. All at once by exporting your customer list from QB to Excel and copy the “Bill To” columns to the “ShipTo” columns and importing the list back into QB.i. If this is what you would like to do then any questions should be directed to Intuit QuickBooksSupport.Work zones: If you need to setup multiple office locations in two or more service areas (usually different cities,states, etc.) then you should contact support@corrigo.com, call 800-517-2871, or one of our Local Experts to assistyou. This must be setup correctly before your initial sync to bring customers into FSM or you will not have anotheropportunity.Estimating the time for Initial Sync between QB and FSM: It takes about an hour per chunk of 1,000 records. Tosave time any customer records or job levels that can be made “inactive” should be made inactive prior to theinitial sync with FSM. FSM will not attempt to sync inactive items, customers, or jobs from QB. If you have morethan 6,000 customers/jobs in QB, we recommend inactivating records so you are bringing them into FSM inincrements of 5,000.Installing the Corrigo Integration ClientOverviewIn order to integrate Field Service Management with your QuickBooks accounting system, you will first need to install theCorrigo Integration Client for QuickBooks. The “FSM” Integration Client is typically installed on only one computer in theoffice. If the QuickBooks company file is installed on a server, the FSM Integration Client is, nevertheless, installed typicallyon a desktop PC or laptop (not onto the server itself) and accesses the QB Company file that is located on the server. Also,the “FSM sync” is NOT the same as the “QuickBooks Web Connector”. If necessary, you may also want to refer to “Runningthe Corrigo Integration Client in a network share setup” later in this guide.Once installed, the FSM integration client will enable you to synchronize customers and items, export/update webapplication invoices and payments to QuickBooks, and map payment methods between the two systems. Time Card userscan export time card information.If you desire to be able to perform the FSM Sync from more than one PC in the office, or if you want to move the FSM Syncto a different computer, or if you wish change the “file path” referenced by the FSM Sync, please contact FSM TechnicalSupport prior to making these changes.pg. 7
Prior to installing the FSM Integration Client on your PC it is recommended that you first check to make sure you havealready installed all necessary QuickBooks updates. This may require closing QuickBooks several times and/or rebootingyour computer, but will ensure the FSM Integration Client is making use of the newest file paths and database structures.To update QuickBooks:1.2.3.4.5.6.7.8.9.Launch QuickBooks and log in as the AdministratorSelect Help Update QuickBooksSelect Update NowClick Get UpdatesOnce QuickBooks is updated, close the Update QuickBooks window.Close QuickBooks itself.Launch QuickBooks as the Administrator by right-clicking on the QB icon and choosing “Run As Administrator”You will be asked if you want to install recently downloaded updates. Choose Yes. You may be asked if you want tocontinue with the program or for permission to restart your computer, and your security software may ask forpermission to install the QuickBooks update. Choose Yes.Once the updates are installed, Close QuickBooks. You may now proceed to Install the Corrigo (FSM) IntegrationClient.To Install the Corrigo Integration Client:1.On the computer where you wish to install the FSM Integration Client, Close QuickBooks itself. Then openyour Task Manager (CTRL ALT DEL) and end the “QBW32.EXE” process for Vista/Windows 7 users, or the“QuickBooks 32 bit” for Windows 8 users (these steps ensure QB itself is completely closed).2.Log into Field Service Management from either www.Apps.com or www.workordernetwork.com.3.Within the web application, go to Settings Company Integration.pg. 8
4.Click Edit on “Do you want to integrate with QuickBooks?”7.Click Install Corrigo QuickBooks Integration Client (this button becomes active once Step 6 is completed).Note: write down the Authentication Code you created—QuickBooks will ask this for this code the firsttime you sync between FSM and QB.pg. 9
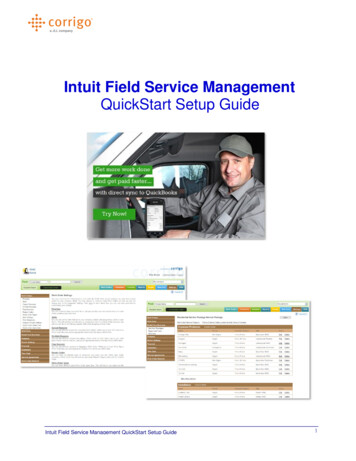
8.You will be presented with the option to Run or Save the file setup.exe. Choose Run.Figure 2: Sample File Download screen from Microsoft Windows XP Media Center Edition, version 2002Note: Depending upon your operating system and security software, you may receive additional messages. Ingeneral, choose options that allow you to accept and run this file from Corrigo9.pg. 10You will be greeted by the setup program. Close your QuickBooks application and click Next.
Figure 3:Close QuickBooks and click Next when this screen appears10. Click through the setup program as prompted.Note: You will be given the option to choose your own folder where the client files will be installed. Corrigorecommends that you choose the default option unless otherwise directed.pg. 11
Figure 4a:Corrigo recommends choosing the default installation folder11. Click Close when you receive a message stating that installation is complete.12. Your Corrigo Integration Client for QuickBooks is now installed and available for use within QuickBooks.Locate the QuickBooks icon on your Desktop or menu, Right-click the icon, and choose “Run asadministrator” and log into QuickBooks as the QB Admin.Figure 4b:pg. 12Run the QuickBooks as administrator at this point
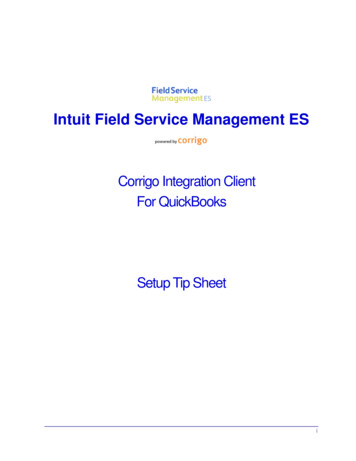
Initial Synchronization SetupOverviewOnce the client is installed, you will need to configure settings for integration between Field Service Management andQuickBooks. This consists of deciding how various fields and functions will associate between the two systems. Setup iscompleted through the Initial Synchronization Setup Wizard, which will walk you through each step.oIf you want to synchronize inventory tracking between QuickBooks and Field ServiceManagement: Prior to running the setup wizard, you must activate inventory tracking inQuickBooks. See QuickBooks Settings for Inventory Tracking below for additional information.o Time Card Module users: Prior to running the setup wizard, you must make adjustments to yourQuickBooks configuration. See Time Card Synchronization in the Table Of Contents.Note: If your company is running QuickBooks in multi-user mode, make sure the user running the synchronization is loggedin as an administrator and has rights to access external applications. See your QuickBooks documentation for information onhow to set user rights.QuickBooks Settings for Inventory TrackingField Service Management allows you to synchronize QuickBooks inventory items for inventory tracking. Inventory Items areitems for which you track quantities purchased, on-hand, and sold. You can create inventory items in QuickBooks and exportthem into Field Service Management. Any inventory item sold in Field Service Management will be decremented from theinventory tracking count in QuickBooks.If you want to set up the Corrigo Integration Client to synchronize inventory items, you must activateInventory and Purchase Orders within QuickBooks. To do this, go to Edit Preferences Items & Inventory CompanyPreferences, then check Inventory and purchase orders are active (this is the location in most versions of QuickBooks.Consult your QuickBooks documentation if Company Preferences is not found on this path for your version).After activating inventory tracking, set up inventory items within QuickBooks so that they can export to Field ServiceManagement (see QuickBooks documentation to learn how to set up inventory items).pg. 13
Figure 7: In QuickBooks, go to Edit Preferences Items & Inventory Company Preferences and check Inventory andpurchase orders are active in order to synchronize inventory items with FieldService ManagementQuickBooks Settings for Time Card usersPrior to running the Initial Synchronization Setup Wizard, Time Card users must configure QuickBooks for synchronization.First, you must set up QuickBooks payroll items to associate with Field Service Management hourly rates. This can beaccomplished through the Change New Employee Default Settings feature within QuickBooks. Refer to your QuickBooksdocumentation for additional information. Note: To proceed through the initial synchronization you must have thefollowing Item Names in QuickBooks: Regular, Overtime, and Double-time.pg. 14
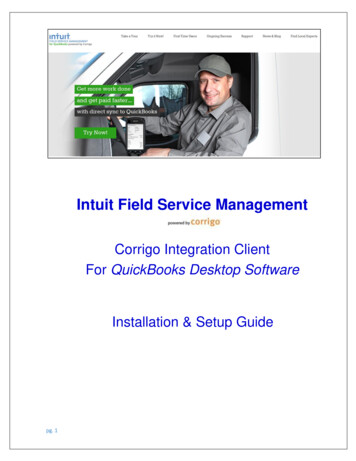
Figure 8:Sample of Employee Default Settings Screen from QuickBooks Enterprise v14Next, you need to configure QuickBooks to allow the Corrigo Integration Client access to personal data. To change thissetting:1.Go to Edit Preferences Integrated Applications Company Preferences (this is the location in mostversions of QuickBooks. Consult your QuickBooks documentation if Company Preferences is not found onthis path for your version).2.Click on Corrigo Integration (under Application Name).3.Click the Properties button.4.Click the Access Rights tab atop the Properties edit screen.5.Check each of the following settings:a.Allow this application to read and modify this company fileb.Allow this application to access Social Security Numbers, customer credit card information, andother personal dataNote: It is necessary to allow the Corrigo client access to personal data in order for the integration tooccur. However, the integration client does not access or modify Social Security Numbers or customercredit card information.6.Click OK when done.Modifying these settings will allow the Corrigo Integration client access to the necessary data files in QuickBooks.Note: While running the integration client, if you receive the message: “Application doesn’t have access to QuickBookspersonal data. Please correct this and click Next to continue” then you have not correctly set the QuickBooks settingsdescribed in this section. Re-check the settings. You do not need to cancel the integration process to change the settings.pg. 15
Figure 9: Select Properties for the Intuit Field Svc. Integration client (upper left), then check the access settings (lower right),under the Access Rights tab (sample above from QuickBooks Enterprise v14).pg. 16
Launching the Setup WizardIf you just completed installation of the Corrigo Integration Client, the setup wizard will launch automatically the next timeyou start QuickBooks. If the wizard doesn’t start or you cancel it for any reason, you can start it manually by selecting File Corrigo Integration Sychronize from the QuickBooks menu bar.Figure 10a, 10b: Select File Intuit Field Svc. Integration Settings within QuickBooks to manually launch the settings area.Note: if the Intuit Field Svc. Integration option is missing from the File menu, please do the following:1.2.3.4.5.6.7.pg. 17Exit QuickBooks.Open Task Manager (CTRL ALT DEL)Access the Processes tab and End the following processes if they appear the listing: QBW32.EXE (on WindowsVista/Windows 7), QuickBooks 32 bit (on Windows 8), and QBEventsShim/CorrigoEventsShimLocate the QuickBooks icon on your Desktop or menuRight-click on the QuickBooks icon and select “Run as administrator”as shown in Figure 10bWhen QuickBooks opens, log in with the QB Admin usernameLocate the Intuit Field Service Integration option on the menu. If it is still not there, please contact FSM TechnicalSupport @ 800-517-2871.
Using the Setup WizardThe wizard will walk you through each step of setting up your integration client. The first screen that appears willbe General Synchronization Settings.General Synchronization SettingsBasic SettingsFigure 11:Basic General Settings screen of the Initial Synchronization Setup WizardGeneral Settings: You will be asked how the integration client should decide conflicts if updates have been made tothe same item in both systems prior to synchronization.If updates are made to the same information in both systems, decide which information will remain unchanged: QuickBooks Wins: QuickBooks updates remain unchanged; Field Service Management updates will bechanged by synchronization to match QuickBooks. (If a change has been made on both sides is when thiscomes into effect.)Field Service Management Wins: Field Service Management updates remain unchanged; QuickBooksupdates will be changed by synchronization to match Field Service Management.Manual: You will be given the chance to decide which updates will change if conflicts exist.Next, choose how often you should be prompted to synchronize the two systems. One day is the minimum as wellas default time that the system will remind you to synchronize.Note: You can manually synchronize at any time by selecting File Corrigo Integration Synchronize from theQuickBooks menu when logged in as an administrator.pg. 18
Backup Settings: The repository is a file on your computer that contains a record of information you havesynchronized. If this file is deleted or corrupted, you will need to restore it from a backup in order to recovermappings and associations that you’ve made in past synchronizations. Choose where and how often to create abackup of your repository.Once the Initial Setup Wizard is run, you can also manually backup the repository file at any time by accessing File Corrigo Integration Settings General Settings Create Backup from within QuickBooks.Advanced SettingsFigure 12:Advanced General Settings screen of the Initial Synchronization Setup WizardWho should turn off On Demand sync?Any business running QuickBooks in multi-user mode in QuickBooks should turn off On-Demand sync. If you havemultiple work zones created in Field Service Management and would like to put customers you create inQuickBooks into specific work zones please turn off On Demand sync. Otherwise On-Demand sync will use thedefault work zone that is defined in synchronization settings for all the new customers you create in QuickBooks.On Demand Sync Settings: On-Demand sync settings help you enable or disable real-time sync. That is ifOn Demand sync is turned on any edits or additions you make to your customer and items inQuickBooks will be automatically reflected in Field Service Management without you having to run the syncexplicitly. But for any changes that have been made to customer or items in Field Service Management to getacross to QuickBooks you will have to run the sync explicitly.Automatic Sites/Jobs Update: If you want QuickBooks to get automatically updated whenever a Site/Job is createdor edited in Field Service Management, you need to select ‘Yes’ for this setting. If you select ‘No’, updates will besynced up only when you explicitly run the synchronization.pg. 19
This functionality is mainly introduced to cover the scenario where you might create a new site/job for a customerin Field Service Management while creating a work order and you need to add a PO for that site/job immediately inQuickBooks. Hence this automatic process will run only if the customer:sites/jobs to be updated is less than orequal to 50 records.Automatic Sites/Jobs process will run only on one computer at any point of time when you are working in anetwork share environment.For example if computer A and B have integration client installed and are accessing the same QuickBooks companyfile on a server and if automatic customer:sites/jobs sync process started on computer A, a warning message willbe displayed in computer B that automatic process is running in the background on computer A and that explicitsync or settings change cannot be done at that point. You will be able to perform any settings change or run syncafter the “lock down” period of 20 minutes.Note: Once you make any change to this setting, please close QuickBooks and open it again for the change inconfiguration to take effect.Click Next when done.Field Service Management Authentication SettingsOn the next screen, enter the Authentication code and Field Service Management company name you createdinside Field Service Management web application (just prior to downloading the Setup program).Figure 13:Enter the authentication informationYou can get the authentication code and company name by logging into your Field Service Managementapplication and navigating to Settings Company Integration Settings.pg. 20
Figure 14: Integration settings in Field Service Management applicationClick on ‘Edit’ link for Integration Client Authentication Code, enter the code and re-enter to confirm and click onSave. Note the company name dis
1. Launch QuickBooks and log in as the Administrator 2. Select Help Update QuickBooks 3. Select Update Now 4. Click Get Updates 5. Once QuickBooks is updated, close the Update QuickBooks window. 6. Close QuickBooks itself. 7. Launch QuickBooks as the Administrator by right-clic