Transcription
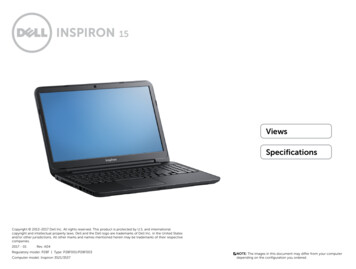
Inspiron 15 3000Service ManualRegulatory Model: P63FRegulatory Type: P63F002February 2021Rev. A03
Notes, cautions, and warningsNOTE: A NOTE indicates important information that helps you make better use of your product.CAUTION: A CAUTION indicates either potential damage to hardware or loss of data and tells you how to avoidthe problem.WARNING: A WARNING indicates a potential for property damage, personal injury, or death. 2016-2021 Dell Inc. or its subsidiaries. All rights reserved. Dell, EMC, and other trademarks are trademarks of Dell Inc. or its subsidiaries.Other trademarks may be trademarks of their respective owners.
ContentsChapter 1: Before working inside your computer. 8Before you begin .8Safety instructions. 8Recommended tools. 9Screw list. 9Chapter 2: After working inside your computer. 11Chapter 3: Removing the battery. 12Lithium-ion battery precautions. 12Procedure.12Chapter 4: Replacing the battery. 14Lithium-ion battery precautions. 14Procedure.14Chapter 5: Removing the optical drive. 15Prerequisites. 15Procedure. 15Chapter 6: Replacing the optical drive. 17Procedure.17Post-requisites.17Chapter 7: Removing the keyboard. 18Prerequisites.18Procedure.18Chapter 8: Replacing the keyboard.20Procedure.20Post-requisites.20Chapter 9: Removing the base cover. 21Prerequisites.21Procedure.21Chapter 10: Replacing the base cover. 24Procedure.24Post-requisites.25Chapter 11: Removing the optical-drive interposer. 26Prerequisites.26Procedure.26Contents3
Chapter 12: Replacing the optical-drive interposer. 27Procedure. 27Post-requisites. 27Chapter 13: Removing the hard drive. 28Prerequisites.28Procedure.28Chapter 14: Replacing the hard drive. 30Procedure.30Post-requisites.30Chapter 15: Removing the solid-state drive.31Prerequisites.31Procedure.31Chapter 16: Replacing the solid-state drive. 32Procedure.32Post-requisites. 32Chapter 17: Removing the memory modules.33Prerequisites.33Procedure.33Chapter 18: Replacing the memory modules. 34Procedure.34Post-requisites. 34Chapter 19: Removing the wireless card. 35Prerequisites.35Procedure.35Chapter 20: Replacing the wireless card.36Procedure.36Post-requisites.36Chapter 21: Removing the power-button board. 38Prerequisites.38Procedure.38Chapter 22: Replacing the power-button board. 40Procedure.40Post-requisites.40Chapter 23: Removing the speakers. 41Prerequisites.41Procedure.414Contents
Chapter 24: Replacing the speakers. 42Procedure.42Post-requisites. 42Chapter 25: Removing the I/O board. 43Prerequisites.43Procedure.43Chapter 26: Replacing the I/O board. 44Procedure.44Post-requisites. 44Chapter 27: Removing the coin-cell battery.45Prerequisites.45Procedure.45Chapter 28: Replacing the coin-cell battery. 46Procedure.46Post-requisites.46Chapter 29: Removing the heat sink. 47Prerequisites. 47Procedure. 47Chapter 30: Replacing the heat sink. 49Procedure.49Post-requisites.49Chapter 31: Removing the fan. 50Prerequisites.50Procedure.50Chapter 32: Replacing the fan.51Procedure. 51Post-requisites.51Chapter 33: Removing the status-light lens.52Prerequisites.52Procedure.52Chapter 34: Replacing the status-light lens.53Post-requisites.53Procedure.53Chapter 35: Removing the system board. 54Prerequisites.54Procedure.54Contents5
Chapter 36: Replacing the system board. 57Procedure.57Post-requisites. 57Chapter 37: Removing the touchpad.58Prerequisites.58Procedure.58Chapter 38: Replacing the touchpad. 60Procedure.60Post-requisites.60Chapter 39: Removing the power-adapter port. 61Prerequisites. 61Procedure. 61Chapter 40: Replacing the power-adapter port.62Procedure.62Post-requisites.62Chapter 41: Removing the display assembly.63Prerequisites.63Procedure.63Chapter 42: Replacing the display assembly. 66Procedure.66Post-requisites.66Chapter 43: Removing the display bezel. 67Prerequisites. 67Procedure. 67Chapter 44: Replacing the display bezel. 68Procedure.68Post-requisites.68Chapter 45: Removing the display panel. 69Prerequisites.69Procedure.69Chapter 46: Replacing the display panel.71Post-requisites.71Procedure.71Chapter 47: Removing the camera. 72Prerequisites. 72Procedure. 726Contents
Chapter 48: Replacing the camera. 73Procedure. 73Post-requisites. 73Chapter 49: Removing the display hinges. 74Prerequisites. 74Procedure. 74Chapter 50: Replacing the display hinges. 75Post-requisites. 75Procedure.75Chapter 51: Removing the display back-cover and antenna assembly.76Prerequisites. 76Procedure. 76Chapter 52: Replacing the display back-cover and antenna assembly.77Procedure. 77Post-requisites. 77Chapter 53: Removing the palm rest.78Prerequisites. 78Procedure. 78Chapter 54: Replacing the palm rest. 80Post-requisites.80Procedure.80Chapter 55: Troubleshooting. 81Dell Enhanced Pre-Boot System Assessment (ePSA) diagnostic 3.0. 81Diagnostics. 81Drain residual flea power (perform hard reset). 82WiFi power cycle. 82Updating the BIOS in Windows.83Handling swollen Lithium-ion batteries. 83Chapter 56: Getting help and contacting Dell. 85Contents7
1Before working inside your computerNOTE: The images in this document may differ from your computer depending on the configuration you ordered.Before you begin1. Save and close all open files and exit all open applications.2. Shut down your computer. Click Start Power Shut down.NOTE: If you are using a different operating system, see the documentation of your operating system for shut-downinstructions.3. Disconnect your computer and all attached devices from their electrical outlets.4. Disconnect all attached network devices and peripherals, such as keyboard, mouse, and monitor from your computer.5. Remove any media card and optical disc from your computer, if applicable.Safety instructionsUse the following safety guidelines to protect your computer from potential damage and to ensure your personal safety. Unlessotherwise noted, each procedure included in this document assumes that you have read the safety information that shippedwith your computer.WARNING: Before working inside your computer, read the safety information that is shipped with yourcomputer. For more safety best practices, see the Regulatory Compliance home page at www.dell.com/regulatory compliance.WARNING: Disconnect your computer from all power sources before opening the computer cover or panels.After you finish working inside the computer, replace all covers, panels, and screws before connecting yourcomputer to an electrical outlet.CAUTION: To avoid damaging the computer, ensure that the work surface is flat, dry, and clean.CAUTION: To avoid damaging the componen
WARNING: Disconnect your computer from all power sources before opening the computer cover or panels. After you finish working inside the computer, replace all covers, panels, and screws before connecting your computer to an electrical outlet. CAUTION: To avoid damaging the computer

