Transcription
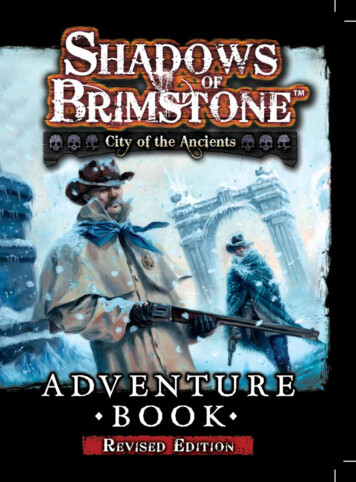
“Hunched and lumbering, this towering behemothdwarfed all other creatures my expedition hasencountered! Its large head covered in soulless blackeyes with a wide, round mouth surrounded by anarray of sharp teeth. A dozen long tongues eruptedfrom its face and writhed in a hypnotic dance.”- Excerpt from the journals ofDr. Tobias Hedgebrook2
City of the Ancients - Adventure BookBy Jason C. HillTable4810121828293334363840ofThe Story of BrimstoneMap of BrimstoneMission ListBasic MissionsAdvanced MissionsTravelingFrontier TownsHero Classes andLeveling UpU.S. MarshalSaloon Miniature GalleryEnemy OverviewThe Targa PlateauComicPainting GuideTravel Hazard ChartMutation ChartGlossaryFAQ / ClarificationsBlank Character Sheets
THE STORY OF BRIMSTONEThere was a town, ifyou could call it that, namedBrimstone; a small railwaystop on the edge of the hottestdeserts in the SouthwestTerritory. Barely a speck, itdidn’t even show up on mostmaps. That is, until theyfound the Dark Stone.Digging in the hills, an old prospector cameacross a strange nugget he had never seen before,a black rock, part way between a crystal and ametal ore. But there was something special aboutthat rock, it had a glow you could only see out ofthe corner of yer eye and was warm to the touch.It had properties folks said were magik, and ofcourse, that caused a stir.Within days they found more of itburied in the earth, and stories startedto spread. Business men and scholarsstarted offering top dollar for even thesmallest shard of the stuff, and thatopened the floodgates.4
It was a gold rush, but not for gold; forthe black rock. The Dark Stone. People camefrom all over to try and make their fortune,and Brimstone boomed over night. They dugmines in every scrap of land they could getahold of.Round the clock they worked, digging deeper anddeeper into the earth, bringing up cartloads full of therock and sending it back to town to be stockpiled andsold to the highest bidder.What they didn’t know, what nobodyknew, was that as they collected more andmore of that black rock all in one place, itstarted to react, until.It exploded! In a flash, the townwas consumed and a shockwave rolledout across the desert, burning the treesand tainting the land.5
Reality itself was being ripped apart,and the people along with it. Dark portalsto other worlds started tearing open acrossthe countryside, pulling people in andunleashing all manner of demons andcreatures into our world.Wherever there was Dark Stone these gatewayswould appear; some only flickering open for aninstant, others opened and stayed that way.That was 6 months ago. Since then, demoniccreatures of all kinds have been pouring out of themines, and the scorched hell on earth that is.wasBrimstone.The government deniesits existence, and anyone sanesteers clear of the whole area,but plenty of folks find they can’thelp but be drawn in, whetherit’s to try and help somehowor just to find a fortune of theirown, it don’t matter.6
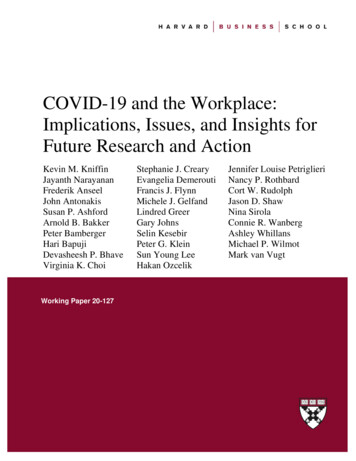
Everyone wants to be a hero. The damn fools! No one ever escapes.the Shadows of Brimstone.The Hangin’ JudgeQuick and the DeadWith a cruel and unforgiving fist, JudgeOctavian Bishop of Cantorsville is ruthless in hisswift justice on outlaws, thieves, and mutants. Heprides himself on the ‘speedy trial’, often arresting,convicting, and hanging folks in a single afternoon.He even likes to pull the lever on the gallows himself,just to watch ‘em swing! Rumor has it, though,that the Judge has more than a few secretsof his own to hide.In the Southwest, there’s only two types ofgunfighters, the quick and the dead. At least that WASthe case until infamous gunslinger and gambler Leo‘Dusty’ Marvin was shot dead in the street during aduel. The next morning, he stumbled back into thesaloon and sat down to play a hand of cards. Death,it seemed, had taken his life and his looks, butnot his love of poker, or his speed on thedraw.as his former rivals soon discovered.7
MISSIONSMissions are the backbone of the Shadows of Brimstone, describing a story set up, the goals, special rules, and reward forsuccessfully completing the Adventure. There are 12 different Missions included in this Core Set, and each can be played manytimes, as the map, cards, and story unfold differently every time you play.SELECTING A MISSIONWhen you are setting up for a game of Shadows ofBrimstone, one of the key factors is deciding what Missionyou will play. The For a Few Dark Stone More Mission is agreat entry point for all groups of new Heroes starting theircareer of adventure.Rolling Randomly vs ChoosingWhen you are ready for your next Adventure, you caneither select a Mission from the list to play, or, if you arefeeling adventurous, you can roll randomly to determine yournext Mission using the list below.If you are new to the game, it is recommended that youplay though several of the Basic Missions before moving on toany of the Advanced Missions.Mission ListBelow is a list of all of the Missions found in the City ofthe Ancients Core Set for Shadows of Brimstone. There are 6Basic Missions, and 6 Advanced Missions unique to this CoreSet.D6 Roll Mission TypeBasic Mission1-3City of the Ancients Mission4-6D6 Roll Basic MissionsFor a Few Dark Stone More1Exploration2Seal the Void Gate3Search Party4Escape5Blow the Mine6D6 Roll City of the Ancients MissionsTerror in the Night1Stop the Ritual2Last Stand3City of the Ancients4Overload5Frozen Expedition6Linking MissionsWhen playing as a campaign and keeping your Heroesfrom game to game, it is sometimes fun to link your Missionsthematically, one after another. Though none of the Missionsintroduced here directly affect one another, it is easy to imaginehow they might be chained together to form a narrative.For example, if you play Exploration and succeed, youmay determine that you need to Seal the Void Gate that youdiscovered along the way. While if you failed, you might needto form a Search Party to rescue someone carried off by theDarkness you let escape. Then if you failed to Seal the VoidGate, perhaps you should really just Blow the Mine, as it’s theonly way to be sure. While if you succeeded, maybe too manycreatures got through before the gate was sealed and now youhave to Escape to get away alive. The narrative possibilities areendless.10
MISSION FEATURESFIXED MAP MISSIONSElements of a MissionEvery Mission has a short story description as well asseveral features.Set Up describes the starting board arrangementand any special markers or cards the Heroesstart with.Mission Goal describes what the Heroes need todo to complete the Mission.Special Rules tell what extra rules are used that arespecific to the Mission.Objectives describes what Clue Icons are used forduring the Mission (if relevant) as well aswhat the final Objective Room may hold.It also tells how the Mission is successfullycompleted by the Heroes.Reward details what bonuses the Heroes get if theysuccessfully complete the Mission.Failure tells what happens if the Heroes lose theMission - by all being KO’d, letting theDarkness Escape the Mines, etc.Mission Special RulesMost Missions have one or more Special Rules. Often,the same Special Rule can be found in multiple differentMissions.Special Rules marked with ‘(Objective)’ specifically relateto the Objectives of the Mission (usually only taking effectwhile in the final Objective Room).Some Missions use a fixed map rather than a randomlygenerated board. For these Missions, the board is created atthe start of the game, as shown in the Mission’s Set Up sectionand map diagram.The Map Decks are generally not used for these Missionsas the entire Map is constructed during Set Up.Exploration TokensExploration Tokens (if used) are placed on the board asshown in the map diagram. As normal, during the RoomExploration phase of the turn, if there are one or more Heroeson a Map Tile with an Exploration Token, that Token isrevealed.Once a Hero has entered a Map Tile withan Exploration Token on it, that Hero may notleave that Map Tile until the end of the turn.This prevents Heroes from moving through an unExplored Room without triggering the Exploration Token tobe revealed.A Hero may, however, move onto one of the puzzleconnection spaces in the Room, connected to another MapTile, as they will still be on both Map Tiles. If that Map Tilealso has an Exploration Token, both of them will be revealedduring the Room Exploration phase.During a Fight, models may not move ontoa Map Tile that has an unrevealed ExplorationToken.New Doors and GatesDoor and Gate Icons on Exploration Tokens are not usedin Fixed Map Missions, as the board is already pre-set. Anytime a Gate or new Door would appear (from an Encountercard, etc.), ignore that new Door or Gate, it simply does notcome into play.Placing EnemiesWith a Fixed Map, Rooms no longer always have anobvious ‘Entrance’. Because normal Enemy placement startsat the opposite side of the Room from the ‘Entrance’, simplytreat the side of the Room that the Heroes moved onto theMap Tile from as the ‘Entrance’ to that Room.If Heroes moved onto the Map Tile from two differentdirections in the same turn, roll off to see which of the twosides counts as the ‘Entrance’.11
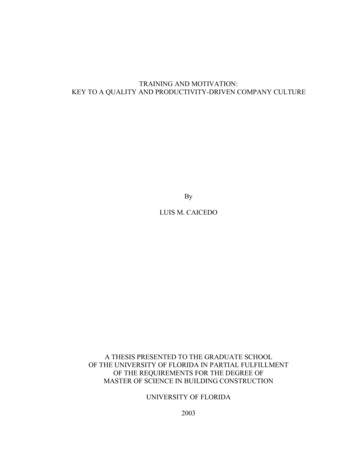
BasicMission1FOR A FEW DARK STONE MORESitting in a saloon one afternoon, you overhear talkof a local mine up in the hills that has a large deposit ofDark Stone, just waiting for someone to come and claimit. It sounds too good to be true.and it probably is, butthe old prospector swears up and down that he wouldgo claim it himself if he were twenty years younger.It’s not hard to figure out which mine systemhe’s talking about based on the landmarks hementions, and though the other patrons he tellsjust dismiss him, this could be the big scoreyou’ve been looking for.Set UpThis Mission uses the standard set up and allHeroes start on the Mine Entrance Map Tile as normal.Mission GoalThe Heroes are searching for a deposit of valuableDark Stone up in the hills. To reach the Dark Stone depositthat they are looking for, the Heroes must find enough ClueIcons on Exploration Tokens to lead them to the Objective.There are three variations for this Mission and the Heroesmust choose before the Mission begins which Mission Lengththey want to embark on.Mission LengthObjectiveSmall DepositFind 2 CluesMedium DepositLarge DepositFind 3 CluesFind 4 CluesSpecial RulesThere are no Special Rules for this Mission.ObjectivesWhen the final Clue is discovered, the Heroes have foundthe Dark Stone deposit they were looking for! Ignore anyAttacks or Encounters listed on the final Exploration Token.Also, ignore any Door/Gate Icons on the token, as theObjective Room has no exits.Reveal all Growing Dread cards in the stack as normaland then the Heroes must face an Epic Threat. Once allEnemies have been defeated, the Heroes have successfullycompleted the Mission!RewardThe XP gained and amount of Dark Stone that the Heroesfind in the deposit is based on the Mission Length they chosebefore the Mission began, as noted below. Each Hero receivesthe Reward for completing the Mission.Mission LengthRewardSmall Deposit25 XP and D3 Dark StoneMedium DepositLarge Deposit50 XP and D3 1 Dark Stone75 XP and D3 2 Dark StoneFailureIf the Heroes fail the Mission, the Darkness escapesthe Mines and wreaks havoc on the countryside and theneighboring Towns.When the Heroes Travel to a Frontier Town before thenext Adventure, D3 Random Buildings there will have beenDestroyed by the escaping Darkness.12
BasicMission2EXPLORATIONYou have been hired by a foreign investor toinvestigate and explore a claim that he has just purchasedin the area. He will pay you well if it pans out to be halfas a good a deal as he was lead to believe.All you have to do is see how big the mine really isand clean out any unsavory squatters that have moved in.Sounds simple, right? It always does.Set UpThis Mission starts with the Mine Entrance Map Tileleading directly to a T-Junction Map Tile. All Heroes start onthe Mine Entrance Map Tile as normal.Remove a T-Junction Map Card from the Mine MapDeck. Note that the Hero Posse marker is not moved forwarda step on the Depth Track for this T-Junction.Mission GoalThe Heroes must explore the entire Mine (not includingany Gates they might find along the way) and defeat all Enemiesthey come across to successfully complete this Mission.Special RulesLimited DoorsAll Exploration Tokens with a Clue Icon haveone less Door/Gate on them (Heroes’ Choice).Any time you reveal an Exploration Token, roll a D6for each Door/Gate Icon on that Token. On the roll of 4 ,ignore that Door/Gate Icon. While the Hero Posse marker isin the middle Stage of the Depth Track, ignore on a 3 instead.While the Hero Posse marker is in the last Stage of the DepthTrack, ignore all Door/Gate Icons automatically.Dead End ShowdownsWhenever a Dead End Room is found (a Room Map Tilethat has no Exits), roll a D6.1 - Add an Epic Threat to the Exploration Token.2-3 - Add a normal Threat to the Exploration Token.4-6 - There is no extra Threat here.Immediate DreadFor this Mission, Growing Dread cards are revealedimmediately when drawn rather than being placed on the stack.ObjectivesOnce the Heroes have explored the entire Mine (all pathslead to a Dead End Room - if a Room has only Gates as Exits,this counts as a Dead End), they must defeat any remainingEnemies on the board to complete the Mission.13RewardEach Hero receives 25 XP as well as 50 x the numberof steps on the Depth Track the Hero Posse marker is fromthe Mine Entrance space. For example - If the Hero Possemarker is on the 10 space of the Depth Track when the Minehas been fully explored, each Hero will earn 300 ( 50 x 6steps from the Mine Entrance).FailureIf the Heroes fail the Mission, the Darkness escapes theMine and lays waste to the roads and towns in the area.When the Heroes Travel to Town after this Adventure,they must each roll twice to see if they add a Travel Hazardto the journey. Also, 1 Random Building in Town will havebeen Destroyed by the escaping Darkness.
BasicMission3SEAL THE VOID GATEA stable Void Gate has opened deep in a nearbymine and all manner of horrific monstrosities are pouringout! Finding a way to seal the gate within an ancientoccult tome, the local Holy Man lead a group downinto the mine a few days ago to try to put a stop tothe rampage. They have not been heard from since,and the waves of creatures are getting stronger and morefrequent. Something must be done, or this entire areawill be overrun in a matter of days!Set UpThis Mission uses the standard set up and all Heroes starton the Mine Entrance Map Tile as normal.Mission GoalThe Heroes must discover the fate of the previousexpedition and retrieve the Occult Book. They must then findthe Void Gate and use the Book to collapse and seal it.Special RulesLeading DarknessDue to the extra Void energies surrounding the area, theDarkness moves D3 1 steps on the Depth Track at the startof the game (after set up but before the first turn). This maylead to an immediate Attack on the Heroes as they approachthe entrance.Creature Summoning (Objective)During the final Fight, anytime the Hold Back the Darknessroll is failed, roll a D6. On the roll of 1, 2, or 3, immediatelyadd a Low Threat card to the Fight. These Enemies areplaced normally (not in Ambush).Sealing the Gate (Objective)While on the same Map Tile as the Gate,the Hero with the Occult Book may attemptto read from it once per turn, during hisActivation. Make a Spirit 5 test. For every5 rolled, gain 10 XP and place a Sanitymarker on the Gate. When there are 5 ormore Sanity markers on the Gate, it is Sealedand the Gate End Cap is replaced with a normal End Cap.ObjectivesThe First ClueThe First Clue the Heroes find is the location of the illfated previous expedition as well as the location of the OccultBook they were carrying with them. Ignore any Attacks orEncounters listed on this Exploration Token. Instead theHeroes must draw a Threat card that is one Threat Levelhigher than normal to battle. These are the creatures thatkilled the first expedition. At the end of this Fight, the Heroesfind the Occult Book amongst the bodies of the fallen andmay choose which Hero will carry it.The Second ClueThe Second Clue the Heroes find is the location of theVoid Gate! Ignore any Attacks or Encounters listed on thisExploration Token. Also, ignore any Door/Gate Icons on thetoken, as the Objective Room has only one exit and that is theVoid Gate (a Gate End Cap). Heroes may not move throughthe Void Gate as it leads directly into the abyss of the Void.Reveal all Growing Dread cards in the stack as normaland then the Heroes must face an Epic Threat that is guardingthe Void Gate. As long as the Void Gate is open, the CreatureSummoning rule above is active in the final Room. Also, theHero with the Occult Book may use the Sealing the Gate ruleabove. If the Hero with the Occult Book is KO’d, the bookdrops in their space and may be picked up for free by anyother Hero moving into that space.Once the Void Gate has been Sealed and all remainingEnemies have been defeated, the Heroes have successfullycompleted the Mission.RewardEach Hero receives 25 XP as well as D6x 50 for theirefforts.FailureIf the Heroes fail the Mission, the surge of creatures fromthe Void Gate destroys all of the towns nearby. The Heroesmay not visit a Frontier Town, but instead must proceeddirectly on to the next Adventure.14
BasicMission4SEARCH PARTYDragged off in the night, one of the local frontierfolk has gone missing, and there are signs of a struggleleading into the hills. No one else around these parts iswilling to do anything about it, due to the sheer numberof vile creatures roaming those hills, but you can’t bringyourselves to simply walk away. Not this time.Set UpThis Mission uses the standard set up and all Heroes starton the Mine Entrance Map Tile as normal.Mission GoalOne of the local frontier folk has gone missing andeveryone fears the worst. Organizing your Posse for a search,you must find 3 Clue Icons before it’s too late to find themalive.Roll a D6 to determine who has gone missing. This willalso determine the Reward if you can bring them back alive.D6 Roll Person MissingA Farmer’s Son1-2The Preacher’s Daughter3-4The Local Doc5-6Special RulesThere are no Special Rules for this Mission.ObjectivesRewardThe Third ClueWhen the Third Clue is discovered, the Heroes havefound the location of the person they were looking for! Ignoreany Attacks or Encounters listed on the final ExplorationToken. Also, ignore any Door/Gate Icons on the token, as theObjective Room has no exits.Reveal all Growing Dread cards in the stack as normaland then the Heroes must face an Epic Threat that is guardingthe unconscious or dead body of the missing townsfolk. Placea KO’d Hero marker in any space of the final Objective Roomto represent the body (models may occupy this space and thebody may not be interacted with in any way. It is only forthematic purposes).Once all Enemies have been defeated, the Heroes havesuccessfully completed the Mission! If the Hero Posse markeron the Depth Track is in the first Stage, roll 1 die, if it’s in themiddle Stage, roll 2 dice, and if it’s in the last Stage roll 3 dice.If any of the dice roll a 1, it is too late, and the missing personis already dead. If none of the dice roll a 1, they are still alive,but just barely. This roll may not be Re-rolled.15If the Heroes successfully complete the Mission, eachHero gains 50 XP. If the missing person was brought backalive, they also gain the following Reward based on who wasrescued:Person RescuedRewardA Farmer’s SonD6x 50 and you mayremove D3 CorruptionThe Preacher’sDaughter 100 and Gain 1 SanityThe Local Doc 100 and Gain 1 HealthFailureIf the Heroes fail the Mission, each Hero takes D3Corruption Points, ignoring Willpower, as the loss weighsheavily on their souls.
BasicMission5ESCAPESomething went terribly wrong after that last missionand now you’re deep in the mines and surrounded! Youmust find a way out before you are overwhelmed anddevoured by the Darkness that is chasing you!Set UpThis Mission starts with the Heroes already down in theMines, with just a Cross Path Map Tile. All Heroes start onthe Cross Path, and may be placed in any spaces they like. Allfour exits of the Cross Path are considered Doors.Remove a Cross Path Map Card from the Mine MapDeck. Note that the Hero Posse marker is not moved forwarda step on the Depth Track for this Cross Path.Mission GoalChased by the Darkness, the Heroes must find a way outof this forsaken Mine before they are devoured in the deep.They must explore the Mine until they find the Mine EntranceMap Tile to escape through.Special RulesSurrounded by DarknessAs you frantically Search for a way to escape theDarkness, it closes in around you. Any time the Heroesfind an Exploration Token with a Clue Icon, it movesthe Hero Posse marker one extra step forward on the DepthTrack, but also adds an extra Threat card to the Token. If it isalready an Attack or Ambush Attack, this is an extra Threatcard for that Fight (the additional Enemies will Ambush aswell if it is already an Ambush Attack). If the ExplorationToken was an Encounter, this makes it an Attack as well witha single Threat card.Dangerous Escape (Objective)At the end of any turn in which one or more Heroesis standing on the Mine Entrance Map Tile as the ObjectiveRoom, roll a special Hold Back the Darkness test (ignoreDepth Events). If failed, the Darkness marker is not moved,but instead there is an Epic Threat there waiting for you thatmust be defeated to escape! If the test is successful, the coastis clear and the Heroes are able to hightail it, escaping withoutincident.Immediate DreadFor this Mission, Growing Dread cards are revealedimmediately when drawn rather than being placed on the stack.May Not FleeOnce the Adventure begins, the Heroes may not Flee;they are trapped, and must see the Mission through to the end.ObjectivesFind the Mine Entrance to EscapeAny time a new Map Tile is placed, move the Hero Possemarker as normal and then roll 2D6 (this roll may not beRe-rolled). If the roll is equal to or higher than the currentposition of the Hero Posse marker on the Depth Track, theHeroes have found the Mine Entrance!Ignore any Door/Gate Icons on the Exploration Tokenfor the Map Tile just placed (if there is an Exploration Token),as it has only one exit, leading to the Mine Entrance Map Tileas the final Objective Room (this uses the Dangerous EscapeSpecial Rule). Once the Heroes escape (after defeating anyEnemies on the last normal Map Tile placed and/or for theDangerous Escape Special Rule), the Mission is successfullycompleted.RewardEach Hero receives 100 XP.FailureIf the Heroes fail the Mission, each Hero must discardone Gear or Artifact card with a listed Gold value of at least 200 as it is lost in the frantic dash to escape the Darkness.Any Hero that cannot discard a Gear or Artifact like this mustinstead roll once on the Injury Chart using a D8 instead ofthe normal 2D6 (in addition to any Injury for being KO’d).16
BasicMission6BLOW THE MINEThat’s it! There are just too many Gates openingup and creatures coming out of the local mine tohandle. When one Gate closes, two more open uparound it! There’s only one thing for it, you’llhave to blow the mine! Collecting up all theheavy-duty explosives the local Frontier Townhas to offer, you set off into the depths to finda couple of good spots to plant the charges thatwill collapse the entrance tunnels for good.Of course, the only trick is that you also haveto get out before it blows. This one’s gonna be close!Set UpThis Mission starts with the MineEntrance Map Tile leading directly to aT-Junction Map Tile. All Heroes start onthe Mine Entrance Map Tile as normal. TheHeroes start with 2 Explosives markers toplant in the Mine.Remove a T-Junction Map Card from the Mine MapDeck. Note that the Hero Posse marker is not moved forwarda step on the Depth Track for this T-Junction.Mission GoalThe Heroes must explore the Mine far enough to findand place Explosives at a Dead End Room (a Room with noExits) on each side of the T-Junction (two total). They mustthen return to the Mine Entrance Map Tile to escape beforethe charges blow! This will successfully complete the Mission.Special RulesLimited DoorsDangerous Escape (Objective)At the end of any turn in which one or more Heroesis standing on the Mine Entrance Map Tile as the ObjectiveRoom, roll a special Hold Back the Darkness test (ignoreDepth Events). If failed, the Darkness marker is not moved,but instead there is an Epic Threat there waiting for you thatmust be defeated to escape! If the test is successful, the coastis clear and the Heroes are able to hightail it, escaping withoutincident.ObjectivesTwo Dead EndsWhen the Heroes find a Dead End Room (a Room withno Exits), after resolving any Encounters or Attacks there,they automatically place one of their Explosives markers onthat Map Tile.If a Room has only Gates as Exits, it also counts as a DeadEnd (as the Heroes can’t very well plant explosives in anotherworld if they want to collapse the mine here).The Heroes must place one Explosives marker at a DeadEnd on the path leading off to the right of the T-Junction andone at a Dead End on the path leading off to the left of theT-Junction. This will ensure that the mine collapses properly.All Exploration Tokens with a Clue Icon haveone less Door/Gate on them (Heroes’ Choice).Any time you reveal an Exploration Token, roll a D6 foreach Door/Gate Icon on that Token. On the roll of 4 , ignorethat Door/Gate Icon. While the Hero Posse marker is in themiddle Stage of the Depth Track, ignore on a 3 instead.While the Hero Posse marker is in the last Stage of the DepthTrack, ignore all Door/Gate Icons automatically.Get Back to the Mine EntranceDead End ShowdownsFailureWhenever a Dead End Room is found (a Room Map Tilethat has no Exits), roll a D6.1 - Add an Epic Threat to the Exploration Token.2-3 - Add a normal Threat to the Exploration Token.4-6 - There is no extra Threat here.Immediate DreadFor this Mission, Growing Dread cards are revealedimmediately when drawn rather than being placed on the stack.17Once both Explosives markers are placed, the Heroesmust return to the Mine Entrance Map Tile (as the finalObjective Room) to escape the blast. This uses the DangerousEscape Special Rule. Once the Heroes escape (after defeatingany Enemies), the Mission is successfully completed.RewardEach Hero receives 25 XP as well as 250 for their efforts.If the Heroes fail the Mission before placing BOTHExplosives, the Darkness escapes the Mine and devoursthe Heroes Horses before ravaging the countryside. AnyTransport Item a Hero has must be discarded (Horse, StageCoach, etc.).If the Heroes fail after placing BOTH Explosives, theyare caught in the blast and must each roll once on the InjuryChart to see how bad it is (in addition to any Injury for beingKO’d).
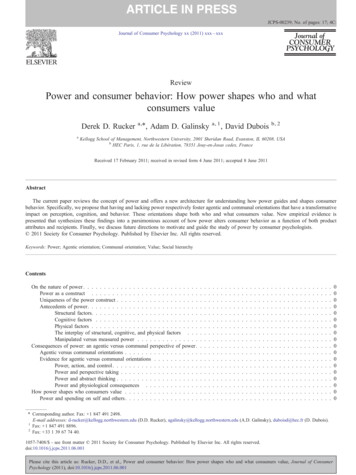
Cityof theAncientsMission1TERROR IN THE NIGHTLast night a massive, lumbering demon emergedfrom the mines and carried off one of the townsfolk intothe hills, leaving a trail of broken and twisted bodies in itswake, as the local lawmen tried to stop it. Now everyoneis too afraid to go down into the mines after it.andthey should be. The one survivor from the attack gave adescription of a massive and brutal creature, unlike anyseen before in these parts.Set UpThis Mission uses the standard set up and all Heroes starton the Mine Entrance Map Tile as normal.Mission GoalThe Heroes must hunt down and kill the nightmarishcreature, and if possible, rescue the poor victim it carried offinto the night. Organizing your Posse for the hunt, you mustfollow its trail of Clues to find the creature’s lair.ObjectivesThe Creature’s LairWhen the Heroes find the Objective Room using the Trailof Clues special rule, they have discovered the Creature’s Lair!Ignore any Attacks or Encounters listed on this ExplorationToken. Also, ignore any Door/Gate Icons on the token, as theObjective Room has no exits.Reveal all Growing Dread cards in the stack as normaland then the Heroes must face the Brutal Night Terror Enemythat they have been hunting for. There is only a single Enemyfor this Fight and it is a Night Terror as described in theUltimate Terror special rule above.Place a KO’d Hero marker in any space of the finalObjective Room to represent the body of the kidnapped victim(models may occupy this space and the body may not beinteracted with in any way. It is only for thematic purposes).Once the Night Terror is defeated, you must discover if thekidnapped victim is still alive. Roll 3D6. If the total is equalto or less than the current position of the Darkness marker onthe Depth Track, the victim has been killed; devoured by theNight Terror. Otherwise, they are still alive!Special RulesTrail of CluesAny time the Heroes find a Clue Iconon an Exploration Token, they must roll aD6, adding 2 for each Clue they have found.If the total is 8 or higher, this Room is thefinal Objective Room.RewardIf the Heroes successfully completethe Mission, each Hero gains 50XP. If the kidnapped person wasbrought back alive, they also gainD6x 50 each and may draw anadditional Loot card.Ultimate TerrorThe lumbering creature that theHeroes are hunting is a Brutal NightTerror (use the red Brutal side of theEnemy Record Sheet). In additionto being Brutal, the creature also hasthe Tough ability (Immune to CriticalHits) and gets an extra 6 Health xThe Hero Posse Level of the group (soif the Hero Posse Level is 4, the NightTerror gets an extra 24 Health, 6 x 4 24).If the Hero Posse Level is 5 or higher, thecreature is not just Brutal (as it would be anyway),but it also gains all six of its Elite Chart abilities.FailureIf the Heroes fail theMission, each Hero takesD3 Corruption Points,ignoring Willpower, as theloss weighs heavily on theirso
the Shadows of Brimstone. With a cruel and unforgiving fist, Judge Octavian Bishop of Cantorsville is ruthless in his swift justice on outlaws, thieves, and mutants. He prides himself on the ‘speedy trial’, often arresting, convicting, and hanging folks in a single afternoon