Transcription
iPhone 6 Product Installation Best PracticesiPhone 6 PlusScreen Assembly Replacement Guide
iPhone 6 2014 iCracked, Inc. All rights reserved.iOS, all Apple product names, and Apple logos are trademark property of Apple, Inc.The content of this document is for iCracked Inc. suggested best practices for productuse and installation. Users of this document are not permitted to copy, sell, reproduce,distribute, or otherwise share this content, either in part or as a whole, with others.Misuse of the content will be viewed as a violation of any license, employmentagreement, or independent affiliate relationship with iCracked.
iPhone 6 ESD SAFETY!iCracked likes to stay on the safe side of repairs, and byusing ESD (Electrostatic Discharge) safe tools andequipment, you can be sure to avoid static damage toyour mobile device.ESD damage is difficult to diagnose as its effect isn’tusually immediately apparent, but sensitive sections of thelogic board can, nevertheless, get weakened by static, andin turn become non-functional over time. While installing aniCracked touch screen digitizer or an LCD screen, doing arepair with ESD safety in mind can save the long-termcircuitry and functionality of the device.
iPhone 6 RECOMMENDED TOOLS AND PARTSTools Required:Parts Needed:ESD safe nylon spudgerESD safe #00 Phillips screwdriveriPhone Pentalobe screwdriveriSesamo opening toolSuction cupESD safe tweezersHair dryer or heat gunReplacement display assemblyOptional:iSclack opening tool
iPhone 6 WARNING!TAKE every possible care to NOT damage the homebutton/biometric scanner cable. The Biometric scanneris locked to its original iPhone, meaning this CANNOTbe replaced.Changing the Home button flex cable WILL result in anError-53 which rendered the phone irreparable. Shouldyou damage the Home button you will be required toreplace the customers device.If the Home Button extension cable is damaged youCAN replace that without affecting the home button/biometric scanner.
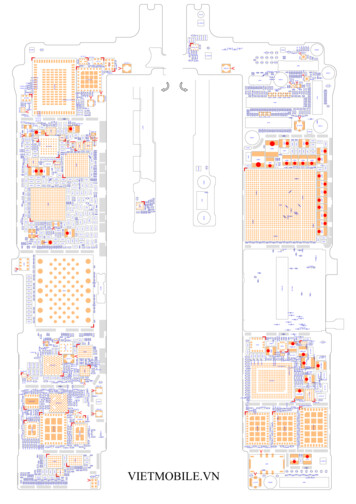
iPhone 6 MODEL NUMBERSGRAYGOLDSILVERA1522 / EMC2817CAPACITYAT&T (GSM)16 GBMGAL2LL/AMGAN2LL/AMGAM2LL/AAT&T (GSM)64 GBMGAU2LL/AMGAW2LL/AMGAV2LL/AAT&T (GSM)128 GBMGAP2LL/AMGAR2LL/AMGAQ2LL/AA1522 / EMC2817CARRIERT-Mobile/Unlocked (GSM)16 GBMGAX2LL/AMGC12LL/AMGC02LL/AT-Mobile/Unlocked (GSM)64 GBMGC52LL/AMGC72LL/AMGC62LL/AT-Mobile/Unlocked (GSM)128 GBMGC22LL/AMGC42LL/AMC382LL/A
iPhone 6 MODEL NUMBERSGRAYGOLDSILVERA1522 / EMC2817CAPACITYVerizon (CDMA)16 GBMG5W2LL/AMG5Y2LL/AMG5X2LL/AVerizon (CDMA)64 GBMGCR2LL/AMGCU2LL/AMGCT2LL/AVerizon (CDMA)128 GBMGCN2LL/AMGCQ2LL/AMGCP2LL/AA1586 / EMC2816CARRIERSprint (CDMA)16 GBMGCV2LL/AMGCC2L/AMGCW2LL/ASprint (CDMA)64 GBMGD22LL/AMGD32LL/AMGD42LL/ASprint (CDMA)128 GBMGCY2LL/AMGD12LL/AM6D02LL/A
iPhone 6 IMPORTANT! Before working on any iOS device, we recommend testing all ofthe functions that are described in the iTech app. Power off the device before performing any repairs! If you have any questions regarding the use of the productbefore starting a repair, reference the iTech Help Center, or usethe Product Support Hotline button in the iTech app for support.
iPhone 6 REPAIR PREPPlace the iPhone 6 face up near the edge of a smooth surface,with the rear camera off the edge, not resting on the surface.Using a piece of paper (preferably a Post-it note) slid undereach corner and down the left and right sides. If the paperslides under the corner, that area is damaged. This cannot bechecked on the corner with the camera because it protrudesfrom the phone past the frame.It is highly recommended you decline this repair. If you proceedwith this repair, the customer must understand we will offerno warranty on the part used as it will become an issue in thefuture.Note: The most common area to be bent is at the Volume down button and theSIM card tray.GoodBad CornerCheck all frame edges,not just the corners.GoodGood*iPhone 5s shown in photo
iPhone 6 PARTS DIAGRAMiSight CameraRear MicrophoneSleep/Wake ButtonTrue Tone FlashSIM Card TrayAmbient Light SensorReceiver/Front MicrophoneFace Time CameraRing/Silent SwitchVolume ButtonsHome Button/Touch IDSpeakerLightning ConnectorHeadphone Jack
iPhone 6 POWER DOWN TO BEGINHold the power/sleep button down until “slideto power off” shows up on the screen. Slidethe arrow from left to right.If the digitizer is not functioning:Power off the iPhone by holding down boththe power/sleep button and the home button.Continue holding down as the Apple logoappears until the screen goes black.If the power button does not function:Using assistive touch, tap the white bubble Device press and hold “Lock Screen” untilthe “slide to power off” drops down, and thenslide the arrow from left to right.
iPhone 6 step1Display RemovalRemove the two 3.75 mmPentalobe screws next to thelightning port connector usinga Pentalobe screwdriver.QTY2MATERIAL3.75 mm Pentalobe screw
iPhone 6 step2Opening ToolPlace the iPhone into theiSclack opening tool or use asuction cup on the screen justabove the home button.NOTE: If the screen is shattered, place2 to 3 pieces of packing tape over theshattered glass to form a flat suctionsurface.
iPhone 6 step3Lift ScreenSqueeze the handles of theiSclack tool to open.If using the suction cup, firmlylift up on the metal ring untila gap is created at the bottomedge of the device. You mayneed to use a spudger togently increase the gap.Remove the iSclack or suctioncup from the device.
iPhone 6 IMPORTANT!Do not try to completely remove thedisplay assembly from the frame!There are four flex cables still attachedto the top of the iPhone, and removingthe display assembly at this stage candestroy them.Lift the bottom of the displayassembly away from the rear case untilit forms a 90-degree angle.
iPhone 6 step4Remove Battery PlateContinue holding the displayassembly upward with onehand.Locate the battery retainingplate and remove the twoPhillips screws that hold thelower plate in place using a#00 Phillips screwdriver.Remove the battery connectorplate and set aside.QTY11MATERIAL3.1 mm Phillips screw2.3 mm Phillips screw
iPhone 6 step5Disconnect BatteryUsing the flat end of the nylonspudger to lift and disconnectthe battery flex cable from theconnector.CAUTION: Be careful to only pry upthe battery connector and not to pryup the socket on the logic board. If youpry up on the logic board socket, youmay break the connector entirely.
iPhone 6 step6Remove EMI ScrewsRemove the five Phillipsscrews securing the EMI shieldto the logic board using a #00Phillips screwdriver.QTY113MATERIAL1.6 mm Phillips screw3.0 mm Phillips screw1.26 mm Phillips screws
iPhone 6 step7Remove EMI ShieldRemove the EMI shield usingtweezers.
iPhone 6 step8Disconnect Flex CablesUsing the pointed end of thenylon spudger, disconnect:1. Home button extensionflex cable2. Front-facing camera cable1.2.
iPhone 6 step9Disconnect LCD Flex CableUsing the pointed end of thenylon spudger, disconnect theLCD flex cable.
iPhone 6 step10Disconnect Digitizer Flex CableUsing the pointed end of thenylon spudger, disconnect thedigitizer flex cable.
iPhone 6 step11Remove Display AssemblyRemove the display assemblyfrom the iPhone and lay facedown. Do not discard.There are several items thatwill be transferred from theold display assembly to thenew display assembly.
iPhone 6 step12Remove Bracket ScrewsRemove the three Phillipsscrews securing the earspeaker retaining bracket tothe display assembly using a#00 Phillips screwdriver.QTY111MATERIAL2.28 mm Phillips screw2.32 mm Phillips screw1.46 mm Phillips screws
iPhone 6 step13Remove Speaker BracketRemove the ear speakerbracket and set aside.
iPhone 6 step14Fold Camera Cable LeftGently lift the front-facingcamera up and fold over tothe left to expose the earspeaker.
iPhone 6 step15Remove Ear SpeakerRemove the ear speaker andset aside.
iPhone 6 step16Home Button Bracket ScrewsRemove the two Phillipsscrews holding the homebutton bracket in place.QTY11MATERIAL1.8 mm Phillips screw1.85 mm Phillips screw
iPhone 6 step17Remove Home Button BracketRemove the home buttonretaining bracket and setaside.
iPhone 6 step18Disconnect Home ButtonUsing the flat end of thenylon spudger, disconnect thehome button flex cable fromthe home button extensioncable located to the left of thehome button.
iPhone 6 step19Remove Thermal Plate ScrewsRemove the seven Phillipsscrews holding the thermalplate in place.QTY161MATERIAL1.73 mm Phillips screw1.28 mm Phillips screw1.75 mm Phillips screws
iPhone 6 step20Heat GlassTurn the display face-up, andgently heat the glass to theright of the home button witha hair dryer or heat gun.
iPhone 6 step21Peel Home Button Flex CableUsing the iSesamo, carefullypeel the home button flexcable away from the bezel onthe underside of the display.
iPhone 6 step22Dislodge Home ButtonUsing the flat end of thenylon spudger push the homebutton upward through it’sopening to separate thegasket from the bezel.
iPhone 6 step23Remove Home Button AssemblyRemove the home button withflex cable and set aside to beinstalled in the new displayassembly.
iPhone 6 step24Reheat Front of DisplayAgain turn the displayassembly over and heat theindicated area with a hairdryer or heat gun to loosenthe adhesive for the homebutton flex extension cable.
iPhone 6 step25Peel Extension CableUsing the iSesamo tool,very carefully lift the homebutton extension flex cablefrom the bezel.
iPhone 6 step26Remove Thermal PlateLift and remove the thermalplate.
iPhone 6 step27Heat Top of DisplayTurn the display assemblyover face up and heat theglass surrounding the frontfacing camera lens with a hairdryer or heat gun.
iPhone 6 step28Peel Camera Cable AssemblyCarefully peel up the frontfacing camera/accessory cablefrom the right side toward theleft using the pointed end ofthe nylon spudger to unseatthe proximity and ambientlight sensor.
iPhone 6 IMPORTANT!Do not lose the rubber gasket for theambient light sensor, shown here stillattached to the sensor.ONLY the black display assembly hasan ambient light filter which mustbe transferred to the replacementdisplay assembly. It rests underneaththe ambient light sensor.
iPhone 6 step29Reheat Top of ScreenTurn the display assemblyover again face up andapply more heat to the glasssurrounding the front-facingcamera with a hair dryer orheat gun.The upper microphonebeneath this area is attachedthe to the bezel with a strongadhesive. Make sure youheat this area well beforeattempting to peel themicrophone from the bezel.
iPhone 6 step30Disconnect MicrophoneTurn the display over facedown. Very carefully peelup the upper microphoneusing the iSesamo along thebottom edge.
iPhone 6 step31Remove Camera AssemblySet the front-facing cameraflex cable aside to install ontonew display assembly.
iPhone 6 step32Remove Sensor FilterRemove the ambient lightsensor filter (white sticker)located in the sensor bracketbuilt into the bezel andtransfer it to the new displayassembly.Note: This applies to black assemblies,not white.
iPhone 6 step33Remove Rubber SpacersRemove the rubber spacersfrom the bottom of theoriginal display assembly bylifting upward. Transfer to thenew display assembly.
iPhone 6 REASSEMBLY PREPIf your new assembly hasan anti-static protective filmcovering the back side of theLCD, remove it before youbegin reassembly.Not all display units will havethis film.
iPhone 6 step34Check Gasket PlacementMake sure the rubber ambientlight sensor gasket is in placeover the ambient light sensoras shown.
iPhone 6 step35Peel AdhesivePeel the adhesive from the earspeaker rubber gasket for theupper microphone.
iPhone 6 step36Align MicrophoneAlign the microphone ontothe bezel, make sure theflex cable is placed over thealignment pin.Note: The orientation of the cableshown is intentionally improper inorder to illustrate the microphoneclearly. It will need to be turnedaround.
iPhone 6 step37Align Thermal PlateAlign the thermal plate. Makesure the home button flexextension cable sits in front ofthe ledge of the bezel.
iPhone 6 step38Install Thermal PlateLay the thermal plate on thenew assembly and screw in theeight Phillips screws holdingthe thermal plate in place.QTY161MATERIAL1.73 mm Phillips screw1.28 mm Phillips screw1.75 mm Phillips screwsNote: Make sure the LCD flap is on topof the thermal plate.
iPhone 6 step39Align Home ButtonAlign the home button ontothe new display assembly andpress into place.Rest the flex button onto thetwo alignment pins indicatedin red.
iPhone 6 step40Connect Home ButtonConnect the home buttonflex cable onto the homebutton extension flex cable.Note the before (top) andafter (bottom) images forreference.
iPhone 6 step41Install Home Button BracketAlign the home buttonretaining bracket over thealignment pin, shown ingreen.Insert and tighten the twoPhillips screws.QTY11MATERIAL1.8 mm Phillips screw1.85 mm Phillips screw
iPhone 6 step42Set Proximity and Light SensorLay the proximity andambient light sensor into theirbrackets within the displayassembly.
iPhone 6 step43Install Ear SpeakerInsert the ear speaker into itsrubber boot housing to theleft of the front facing camerahousing. Make sure that theoval opening on the back ofthe speaker drops into the earspeaker grill on the assembly.See before (top) andafter (bottom) images forreference.
iPhone 6 step44Install Front Facing CameraLay the front-facing camerainto the centering bracket.Double check that the earspeaker contacts, indicatedin green, on the end of thefront-facing camera/accessoryflex cable are not damaged,torn or folded underneath thecable.
iPhone 6 step45Align Speaker BracketPlace the ear speakerretaining bracket over theear speaker. Make sure theflex cable and bracket alignover the two pins. The twoalignment pins should havepassed through the earspeaker retaining bracket.
iPhone 6 step46Install Ear Speaker Scre
iPhone 6 Place the iPhone 6 face up near the edge of a smooth surface, with the rear camera off the edge, not resting on the surface. Using a piece of paper (preferably a Post-it note) slid under each corner and down the left and right sides. If the paper slides under the