Transcription
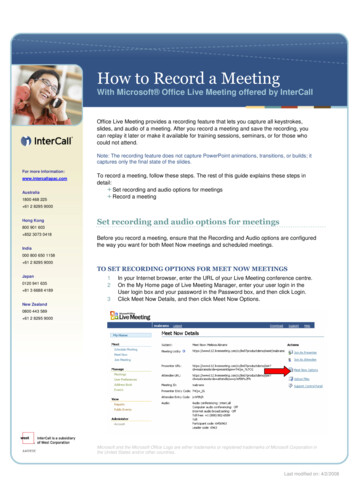
How to Record a MeetingWith Microsoft Office Live Meeting offered by InterCallOffice Live Meeting provides a recording feature that lets you capture all keystrokes,slides, and audio of a meeting. After you record a meeting and save the recording, youcan replay it later or make it available for training sessions, seminars, or for those whocould not attend.Note: The recording feature does not capture PowerPoint animations, transitions, or builds; itcaptures only the final state of the slides.For more information:www.intercallapac.comAustralia1800 468 225To record a meeting, follow these steps. The rest of this guide explains these steps indetail:Set recording and audio options for meetingsRecord a meeting 61 2 8295 9000Hong Kong800 901 603 852 3073 0418IndiaSet recording and audio options for meetingsBefore you record a meeting, ensure that the Recording and Audio options are configuredthe way you want for both Meet Now meetings and scheduled meetings.000 800 650 1158 61 2 8295 9000TO SET RECORDING OPTIONS FOR MEET NOW MEETINGSJapan0120 941 63512 81 3 6688 41893In your Internet browser, enter the URL of your Live Meeting conference centre.On the My Home page of Live Meeting Manager, enter your user login in theUser login box and your password in the Password box, and then click Login.Click Meet Now Details, and then click Meet Now Options.New Zealand0800 443 589 61 2 8295 9000Microsoft and the Microsoft Office Logo are either trademarks or registered trademarks of Microsoft Corporation inthe United States and/or other countries.Last modified on: 4/2/2008
45At the top of the Meet Now Options page, click Recording.By default, only the meeting organiser can record a meeting. If you want to allowpresenters to record your meeting, select Presenters can record the meeting.6Under Recording Access, select how you want to control access to viewingrecordings. By default, only the administrator and organiser can view recordings.TO SET AUDIO OPTIONS FOR MEET NOW MEETINGSWhen using InterCall’s Reservationless-Plus audio and the Live Meeting recordingfeature, you must specify additional dialing keys in addition to the participant code and theleader code. The Live Meeting recorder dials into the conference call as a silent attendee.You use additional dialing keys to input the character string needed to allow the LiveMeeting to input your participant code for you. You can instruct Live Meeting to pausebefore dialing the participant code. By adding commas or the letter “p” to indicate pauses,you can give the phone conferencing service prompt time to complete before LiveMeeting dials the participant code. After Live Meeting enters the participant code, it entersany other character strings that you have specified.In the first Additional dialing keys box, type commas or “p” to indicate how long LiveMeeting should wait before proceeding with the participant code. In the box to the right of participant code , enter any other characters that are required after the participant codeis entered.Note: If you are using InterCall Operator Assisted audio, please ensure that you notifyInterCall of your intent to record this Live Meeting session when scheduling your audiomeeting. Then, on the day of the call please be sure to notify your conference operatorbefore allowing Live Meeting to connect to the audio service.To set up Meet Now audio:1234Log into your Live Meeting account.On the My Home page, click Meet Now Details.On the Meet Now Details page, click Meet Now Options.On the Meet Now Options page, click Audio.* Computer Audio Conferencing (VoIP functionality) is only currently available in Japan and India
5In the Audio for this meeting list, select Telephone conferencing. Note theoptions available in this section: LiveMeeting without Audio ( The “Display Toll and Toll Free” options will beavailable) Telephone Conferencing Service (The “Display Toll and Toll Free” optionsand “Join Conference” feature will be available) Computer Audio Conferencing* (The “Display Toll and Toll Free” options and“Enable one-way Internet Audio Broadcasting”* will be available ) Telephone and Computer Audio Conferencing* (All the options will beavailable)67In the Conferencing provider list, select InterCall .Select the phone conferencing options you want to enable:- Allow meeting participants to use the Join Conference option (for InterCallReservationless-Plus audio only). When this option is enabled, meetingparticipants can click Join Conference in the Live Meeting console to have theconferencing service dial out to them rather than dialing into the conference call.- Display the Toll-free phone number. Select this option to display the toll-free DialIn Number you are using in the Audio dialog box or in the Meeting Informationdialog box for all attendees to see.- Display the Toll phone number. Select this option to display the toll Dial-InNumber you are using in the Audio dialog box or Meeting Information dialog boxfor all attendees to see.8Enter your Reservationless-Plus toll and toll-free Dial-In Numbers in theappropriate boxes.9 Enter your Reservationless-Plus Conference Code in the Participant Code box.10 Enter your Reservationless-Plus Leader PIN in the Leader Code box.11 Type additional dialing keys into the text boxes provided in the Actual dialingkeys section. For use with your InterCall Reservationless-Plus account, thefollowing configuration is recommended:* Computer Audio Conferencing (VoIP functionality) is only currently available in Japan and India
Note: Keys entered in the first box will be dialed before the participant code; keys entered inthe second box will be dialed following the participant code.12 Click OK.TO SET RECORDING OPTIONS FOR SCHEDULED MEETINGS123In your Internet browser, enter the URL of your Live Meeting conference centre.On the My Home page of Live Meeting Manager, enter your user login in theUser login box and your password in the Password box, and then click Login.Under Meet, click Schedule Meeting.4On the Schedule Meeting page, click Meeting Options.* Computer Audio Conferencing (VoIP functionality) is only currently available in Japan and India
56At the top of the Meeting Options page, click Recording.By default, only meeting organisers can record a meeting. If you want to allowpresenters to record the meeting, select Presenters can record the meeting.7Under Recording Access, select how you want to control access to viewingrecordings. By default, only the administrator and organiser can view recordings.TO SET AUDIO OPTIONS FOR SCHEDULED MEETINGSWhen using InterCall’s Reservationless-Plus audio and the Live Meeting recordingfeature, you must specify additional dialing keys in addition to the participant code and theleader code. The Live Meeting recorder dials into the conference call as a silent attendee.You use additional dialing keys to input the character string needed to allow the LiveMeeting to input your participant code for you. You can instruct Live Meeting to pause* Computer Audio Conferencing (VoIP functionality) is only currently available in Japan and India
before dialing the participant code. By adding commas or the letter “p” to indicate pauses,you can give the phone conferencing service prompt time to complete before LiveMeeting dials the participant code. After Live Meeting enters the participant code, it entersany other character strings that you have specified.In the first Additional dialing keys box, type commas or “p” to indicate how long LiveMeeting should wait before proceeding with the participant code. In the box to the right of participant code , enter any other characters that are required after the participant codeis entered.Note: If you are using InterCall Operator Assisted audio, please ensure that you notifyInterCall of your intent to record this Live Meeting session when scheduling your audiomeeting. Then, on the day of the call please be sure to notify your conference operatorbefore allowing Live Meeting to connect to the audio service.To set up audio for Scheduled Meetings:123On the My Home page, under Meet, click Schedule Meeting.Click Meeting Options.On the Meeting Options page, click Audio.4In the Audio for this meeting list, select Telephone conferencing. Note theoptions available in this section: LiveMeeting without Audio ( The “Display Toll and Toll Free” options will beavailable) Telephone Conferencing Service (The “Display Toll and Toll Free” optionsand “Join Conference” feature will be available) Computer Audio Conferencing* (The “Display Toll and Toll Free” options and“Enable one-way Internet Audio Broadcasting”* will be available ) Telephone and Computer Audio Conferencing* (All the options will beavailable)5In the Conferencing provider list, select InterCall .* Computer Audio Conferencing (VoIP functionality) is only currently available in Japan and India
6Select the phone conferencing options you want to enable:- Allow meeting participants to use the Join Conference option (for InterCallReservationless-Plus audio only). When this option is enabled, meetingparticipants can click Join Conference in the Live Meeting console to have theconferencing service dial out to them rather than dialing into the conference call.- Display the Toll-free phone number. Select this option to display the toll-free DialIn Number you are using in the Audio dialog box or in the Meeting Informationdialog box for all attendees to see.- Display the Toll phone number. Select this option to display the toll Dial-InNumber you are using in the Audio dialog box or Meeting Information dialog boxfor all attendees to see.7Enter your Reservationless-Plus toll and toll-free Dial-In Numbers in theappropriate boxes.8 Enter your Reservationless-Plus Conference Code in the Participant Code box.9 Enter your Reservationless-Plus Leader PIN in the Leader Code box.10 Type additional dialing keys into the text boxes provided in the Actual dialingkeys section. For use with your InterCall Reservationless-Plus account, thefollowing configuration is recommended:Note: Keys entered in the first box will be dialed before the participant code; keys entered inthe second box will be dialed following the participant code.11 Click OK.12 Select Set as Default if desired.Record a meetingBy default, only the meeting organiser can record a meeting, but the organiser can givepermission to presenters to record the meeting as described earlier in this article.Note: These instructions assume that you have joined the meeting as either the presenter withpermission to record, that you have set audio and recording options as described earlier in thisarticle, and that you have imported the resources you need for the meeting.TO RECORD A MEETING* Computer Audio Conferencing (VoIP functionality) is only currently available in Japan and India
12Choose where you would like recording saved. Click To My Computer or ToService.Connect the audio.If you are recording To Service:- In the Recording menu, click Options Configure Phone.- Verify the phone number and dialing keys are correct.- Click Configure if this is the first time using the service.- Click Edit if you need to make changesNote: It is recommended that you click “Record” as soon as you log into your meeting and thenimmediately click “Pause” to allow the recorder time to dial into your conference. When youare ready to begin the recording, simply click “Resume.” This will eliminate silence andenunciator being heard at the beginning of your recorded session.If you are recording To My Computer, you must use Telephone and Computeraudio*, or Computer audio*. When using Telephone and Computer audio*:- In the Voice and Video panel, click Options Connect Telephone and Computeraudio.- In the Computer and Telephone Audio Connections, verify the phone numberand dialing keys are correct.- Click Connect.- Once your console is connected, you will be able to hear the conference call andenable your microphone.3Choose what features you would like to record.- Under the tab chosen in step 3, click Options - In the Options window, place a check mark next to what you would like includedin the recording. Data is selected by default.Your choices are Voice, Video or Panoramic Video.- Click OK to save the options or Record to start the recording.4When you are ready to start recording, click Record or Resume in the tab to startrecording your meeting.5To pause a recording, click the Pause button. To resume recording after a pause,click the Resume button.6When you are finished recording:- Click Record in the menu.- Click the Stop button.- To save the recording, click Save Recording. The recording is saved to yourcomputer or server depending on the choice you made in step 3.* Computer Audio Conferencing (VoIP functionality) is only currently available in Japan and India
7 Enter your Reservationless-Plus toll and toll-free Dial-In Numbers in the appropriate boxes. 8 Enter your Reservationless-Plus Conference Code in the Participant Code box. 9 Enter your Reservationless-Plus Leader PIN in the Leader Code box. 10 Type additional dialing keys into th
