Transcription
Cleo Tile Install Guide800-728-4010bestbuymetals.com
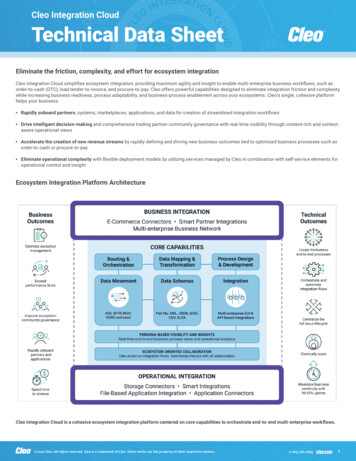
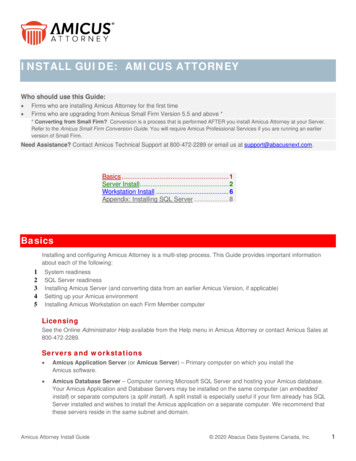
TOOLS REQUIREDRulerCLEO51.89”16.77”14.37”Safety ShoesHammer and Screw GunSnipsSealantCrayon MarkerNails and Srews
MORE TOOLS REQUIREDCutterBenderDo not use electric cutter!Installers are reminded to wear the propergear when handling objects with sharp edges
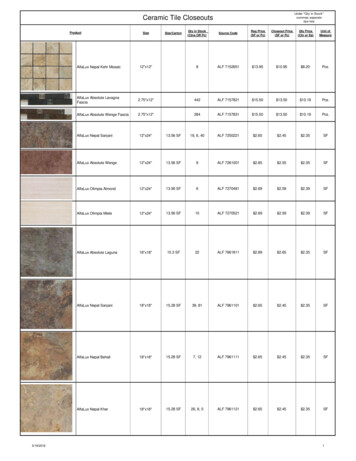
CLEO ACCESSORIESBird Stop RidgeBird Stop 2.28”0.79”Fascia / Eave FlashingHip & Ridge with End �78.74”5.91”5.79”Side FlashingFlat 0.51”0.51”Valley Type 11.25”0.39”Valley Type 6.38”0.59”0.59”58”
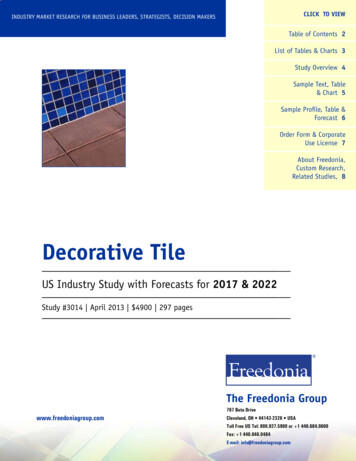
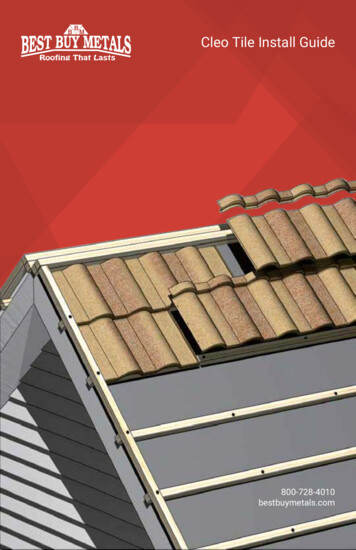
BATTEN INSTALLATIONBatten Spacing is measured fromfront (lower end) of the Batten tofront (lower end) of next Battenas you go up the roof.VariableLocal Code Approved( Underlayment )14.25”2”X2” BattensPlace the top front edge of thefirst batten flush at the edge ofthe fascia board parallel withthe ridge. Install local codeapproved battens in standardgrade lumber using a 16d minimum common nail or codeapproved equivalent at a maximum of 24” on center intorafters.14.25”VariableEave Flashing
Local Code Approved( Underlayment )Bird Stop EaveBird Stop EaveCutting LocationBird Stop Eave
CLEO TILE PLACEMENTCutting for a Ridge Course
CLEO TILE PLACEMENT CONTINUEDPoint of overlapping
LAY CLEO TILE FROM TOP TO BOTTOMWHEN INSTALLING ON BATTENS
RAKE GABLE INSTALLATIONRake Gable BattenBend the edge oftile upward toabout 1”Point of overlapping
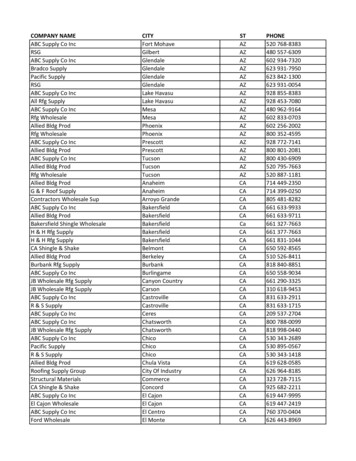
CLEO TILE FASTENING POINTSFastening points are asshown in the drawing.Follow local buildingcodes.Length of cover : 49.61”Overall length : 51.89”
BIRD STOP RIDGE INSTALLATION
CLEO TILE HIP & RIDGEINSTALLATION RAKE GABLE EDGE
CLEO TILE HIP & RIDGEINSTALLATION RIDGE COURSEHip& RidgeColor ScrewsBird Stop RidgeCLEO Panel2”X2” Battens
CLEO TILE HIP & RIDGEINSTALLATION HIPSHip& RidgeColor ScrewsCLEO Panel2”X2” Battens
VALLEY TYPE 2 INSTALLATIONCLOSED VALLEYOPEN VALLEYCLEO PannelColor ScrewsCLEO PannelValleyColor ScrewsCut CLEO tile to suitand bend downward to covver battens.CuttingValley
CLEO TILE RAKE GABLE DETAILLocal Code Approved(Underlayment)1'' X 3''Eave Flashing
INSTALLING ROOFING PANELSLocal Code Approved(Underlayment)Position the panels against the roof andfasten at the back flange of the panel atleast every other pan and every pan atthe nose of the panel.CuttingColor Screws
VALLEY TYPE 1 INSTALLATIONCLEO PanelColor ScrewsValley Type1ClipValley Type1
Metal Roofing, Nationwide800-728-4010bestbuymetals.com
as you go up the roof. Place the top front edge of the rst batten ush at the edge of the fascia board parallel with the ridge. Install local code approved battens in standard grade lumber using a 16d mini- mum common nail or code approved equivalent at a