Transcription
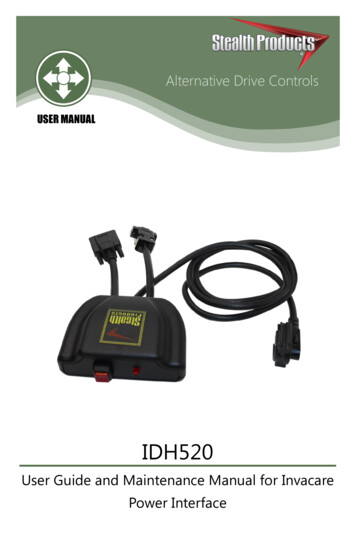
Alternative Drive ControlsUSER MANUALIDH520User Guide and Maintenance Manual for InvacarePower Interface
Customer Satisfaction1.0Stealth Products strives for 100% customer satisfaction. Your completesatisfaction is important. Please contact us with feedback or suggested changesthat will help improve the quality and usability of our products.You may reach us at:Stealth Products, LLC104 John Kelly Drive, Burnet, TX 78611Phone: (512) 715-9995Toll Free: 1(800) 965-9229Fax: (512) 715-9954Toll Free: 1(800) s.comMDSS GmbHSchiffgraben 4130175 Hannover, GermanyGeneralRead and understand all instructions prior to the use of the i-Connect. Failure toadhere to instructions and warnings in this document may result in propertydamage, injury, or death. Product misuse due to failure of the followinginstructions will void the warranty.Immediately discontinue use if any function is compromised, parts are missing,loose, or shows signs of excessive wear. Consult with your supplier for repair,adjustment, or replacement.If this document contains information you do not understand, or there areconcerns about safety or operation, contact your supplier.i
Important Information2.0Important Information!All persons responsible for fitting, adjustment, and daily use of the devicesdiscussed in these instructions must be familiar with and understand all safetyaspects of the devices mentioned. In order for our products to be usedsuccessfully, you must: Read and understand all instructions and warnings. Maintain our products according to our instructions on care and maintenance. Devices should be installed and adjusted by a trained technician.Supplier ReferenceSupplier:Telephone:Address:Purchase Date:Model: i-Drive is a trademark of Stealth Products, LLCStealth Products is a registered trademark of Stealth Products, LLCii
Introduction3.0Before you install or begin using this product, it is important that you read andunderstand the content of these installation and operating instructions. Theinstallation instructions will guide you through the options and possibilities withthe product.Instructions are written with the expressed intent of use with standardconfigurations. They also contain important safety and maintenanceinformation, as well as describe possible problems that canaries during use. Forfurther assistance, or more advanced applications, please contact your supplieror Stealth Products at (512) 715-9995 or toll free at 1-800-965-9229.Always keep the operating instructions in a safe place so they may bereferenced as necessary.All information, pictures, illustrations, and specifications are based on theproduct information that was available at the time of printing. Pictures andillustrations shown in these instructions are representative examples and are notintended to be exact depictions of the various parts of the product.Ordering DocumentationYou can download additional copies of this user manual on the Stealth website:https://stlpro.site/stealth-docsand search: IDH520 User Manual in the search bar at the top of the page.iii
Warranty4.0Our products are designed, manufactured, and produced to the highest ofstandards. If any defect in material or workmanship is found, Stealth Productswill repair or replace the product at our discretion. Any implied warranty,including the implied warranties of merchantability and fitness for a particularpurpose, shall not extend beyond the duration of this warranty. StealthProducts, LLC does not warrant damage due to, but not limited to: Misuse, abuse, or misapplication of products. Modification or product without written approval from Stealth Products, LLC. Any alteration or lack of serial number, where applicable, will automaticallyvoid this warranty. Stealth Products, LLC is liable for replacement parts only. Stealth Products, LLC is not liable for any incurred labor costs.No person is authorized to alter, extend, or waive the warranties of StealthProducts, LLC.Stealth Products warrants against failure due to defective materialsor workmanship:Covers: 2 yearsHardware: 5 yearsElectronics: 3 yearsIn Case of Product FailureIn the event of product failure covered by our warranty, please follow theprocedures outlined below:1.Call Stealth at 1 (512) 715-9995 or toll free 1-800-965-9229.2.Request the Returns Department or obtain an RA from the Returns Department andfollow department or documentation instructions.iv
Table of Contents1.0 Customer Satisfaction . i2.0 Important Information . ii3.0 Introduction . iii4.0 Warranty. iv5.0 Table of Contents . v6.0 Warning Labels . vii6.1 Warning Labels. vii6.2 Limited Liability . vii6.3 Testing . vii7.0 Invacare Power Interface . 17.1 Invacare Power Interface . 17.2 Installation . 17.3 Invacare’s Universal Connector . 27.4 Operation . 2v5.0
Table of Contents5.08.0 MK6i Installation . 38.1 Invacare MK6i Electronics . 3Menu Navigation 3Installation .3Powered Seating Control . 49.0 Testing . 59.1 Check That the Interface . 59.2 Operational Test . 59.3 Test Drive. 59.4 Stop Test . 510.0 First Time Use . 610.1 Dealer Assistance . 610.2 User Testing . 610.3 Conditions of Use . 611.0 Maintenance . 711.1 Cleaning . 711.2 Safety . 7vi
Warning Labels6.0Warning Labels6.1Warnings are included for the safety of the user, client, operator and property.Please read and understand what the signal words SAFETY, NOTICE, CAUTION,WARNING and DANGER mean, how they could affect the user, those aroundthe user, and property.DANGERWARNINGCAUTIONNOTICEIdentifies an imminent situation which (if not avoided) willresult in severe injury, death, and property damage.Identifies a potential situation which (if not avoided) willresult in severe injury, death, and property damage.Identifies a potential situation which (if not avoided) willresult in minor to moderate injury, and property damage.Identifies important information not related to injury, butpossible property damage.Indicates steps or instructions for safe practices, reminders ofSAFETYsafe procedures, or important safety equipment that may benecessary.Limited Liability6.2Stealth Products, LLC accepts no liability for personal injury or damage toproperty that may arise from the failure of the user or other persons to followthe recommendations, warnings, and instructions in this manual.Testing6.3Initial setup and driving should be done in an open area free of obstacles untilthe user is fully capable of driving safely.The IDH520 Power Interface should always be tested without any person sittingin the wheelchair until every alteration of the physical installation or adjustmentis complete.vii
Invacare Power Interface7.0Invacare Power Interface7.1The digital input on Invacare’s Sip ‘N Puff with Digital Interface (seen below), isunpowered. To provide the i-Drive with the required 12 volts, Stealth Product’sInvacare Power Interface is used to convert 24 volts from Invacare’s UniversalConnectors to 12 volts for Stealth Product’s i-Drive Alternative Control.Installation7.2To install the Invacare Power Interface, the Male 9 pin plug (B) connects to thei-Drive Head Array. The Female 9 pin plug (C) connects to the Digital Input onInvacare’s Sip ’N puff with Digital Interface (F). Invacare’s Universal Connector(D) connects to the Invacare electronics.1
Invacare Power Interface7.0Invacare’s Universal Connector7.3Please follow all safety procedures and instructions from the manufacturer whenconnecting Invacare’s Universal Connector and Locking Securement Tab.Operation7.4After installation, the i-Drive Head Array will be ready for normal operation.Please refer to the i-Drive User Manual for information on r-Drive operationsand setup. The Invacare Power Interface comes with a Power button to togglepower to the Head Array and a signal light that displays when the power isturned on.CAUTIONInvacare’s Universal Connector provides power for the i-Drive Electronics. Forextra precaution, it is advised to connect the Universal Connector last in orderto avoid any possibility of product damage, shock, or personal injury.NOTICEInvacare’s Sip ‘N Puff with Digital Interface (SNPM6/1139973) is required toinstall the Invacare Power Interface and Stealth Products i-Drive onto anInvacare powered wheelchair.2
MK6i Installation8.0Invacare MK6i Electronics8.1After having your i-Drive and Invacare Power Interface connected to the seatingsystem, programming the MK6i Electronics is required. Install and set-up withthe following instructions.NOTICEInvacare MK6i Programmer required.Menu Navigation Navigate with the Up & Down Return to the previous menu or exit with the Left Select a menu item for more options with the Right Toggle highlighted menu items with the Selectbutton. Save the programmer’s changes with the Savebutton.navigation buttons.navigation button.navigation button.Installation1.Power off the chair with the power button on the joystick or display.2.Disengage the motors.3.Power on the chair from the display’s power button.4.Plug the Programmer into the back of the Invacare MK6i joystick.5.Power on the MK6i Programmer.6.On the MK6i Programmer, navigate with the Up & Down buttonsand select with the Rightnavigation button.7.In the Performance Adjust menu, navigate with the Up & Down buttons to Input Typeand either press the Select button to select all drive profiles (D1-D4), or navigate with theLeft or Rightnavigation buttons to the Drive Profile you want to change and use theSelect button.8.After selecting the drive profile (s), navigate with the Up & Down buttonsSelect button to select Digital from the list for the i-Drive.9.If you would like to enable Reverse Mode with the reset switch, in the Performance Adjustmenu, navigate with the Up & Down buttons to RIM Control and set your desired driveprofile(s) RIM Control to On or Off.to Performance Adjustand use the10. Now that you have programmed for digital input and RIM Control, save your settings withthe Save button. A save prompt should appear. Press Save again to save, or select cancelwith the Select button.3
MK6i Installation8.011. After saving, the screen should show that you have saved this information successful. Aftersaving, either the Power Off the MK6i Programmer, or continue with further adjustments.12. Unplug the MK6i Programmer.13. Power off the chair to cycle the power.14. The chair may prompt a Press Reset after the programmer is disconnected of when turningon. Press the reset switch on the i-Drive to clear the prompt.15. The chair is now programmed to recognize the i-Drive.NOTICEReengage motors before operation.Powered Seating Control1.Reconnect the MK6i Programmer (follow Steps 1-3 from Installation).2.On the MK6i Programmer, navigate with the Up & Downand select with the Right button.3.In the Powered Seating menu, navigate with the Up & Down buttons to Actuator Controland set your desired drive profile (s) Actuator Control to an actuator control type.4.After you are finished configuring the chair, save your settings with the Save button. A saveprompt should appear. Press Save again to save, or press the Select button to cancel.5.Disconnect the MK6i Programmer (follow Steps 11-15 from the Installation section).4buttons to Powered Seating
Testing9.0After installation of the Invacare Power Interface, execute the following testsbefore the wheelchair is delivered or put into service: Check the interface for intactness Operational Test Test Drive Stop TestCheck that the Interface9.1 Is not bent or damaged. Housing, cabling, and all connectors are not damaged.Operational Test9.2WARNINGExecute this test only on a level surface, in an open area free of obstacles.1.Activate the wheelchair operating system.2.Check for any error messages.3.Activate the chair to move forward until you hear the parking breaks switch off.CAUTION4.The wheelchair may start moving.Immediately release pressure from the drive control. You should hear the parking breakreact within a few seconds. Repeat this step 3 to 4 times to ensure all connections arecorrect.Test Drive9.3 Perform a test drive with the wheelchair. Check whether the wheelchair and all of its operations are fully functioning. Check that no cabling or parts may become damages or hindered in any position of thechair.Stop Test Drive full speed ahead and shut down the wheelchair with your drive control. The wheelchair may not suddenly stop, but must slow down to a gradual stop.9.45
First Time UseDealer Assistance10.010.1During first time use by the client, it is advised that the dealer or servicetechnician assists and explains the product to the customer (the user and/or theattendant). If needed, the dealer can make final adjustments.User Testing10.2It is important that the customer is fully aware of the installation, how to use it,and what can be adjusted in order to gain as much mobility as possible. As adealer, proceed as follows: Explain and show the customer how you have executed the installation, and explain everyfunction. Can the user safely operate the wheelchair with minimal effort? Is the placement of the interface in an optimal position on the chair?If needed, adjust the interface to the best position on the chair.Explain to the customer possible problems and how to address them.Conditions of Use10.3The interface is intended for use as installed by the dealer, in accordance to theinstallation instructions in this manual. The foreseen conditions of use are communicated by the dealer or service technician to theuser and/or attendant during the first time use. If the conditions of use change significantly, please contact your dealer or a qualifiedservice technician to avoid excessive wear and tear or unintended damage.6
Maintenance11.0Cleaning11.1Ensure the hardware you are using stays in working order by keeping it caredfor and maintained. Keep electronics dry and out of the water.WARNINGGetting electronics wet will cause irreversible damage to the circuitry. Periodically check the hardware for loose screws or worn parts. Replace or repair the partsas needed. To clean, use a mile, nonabrasive household cleaner.WARNINGDo not get electronics wet.Safety11.2Avoid getting electronics wet and working on electronics with wet or damphands. This could cause minor to sever electrocution, resulting in personal injuryand/or product damage.7
NOTESa12.0
NOTES12.0b
NOTESc12.0
NOTES12.0d
Stealth Products, LLC. info@stealthproducts.com www.stealthproducts.com 1(800) 965-9229 1(512) 715-9995 104 John Kelly Drive, Burnet TX 78611P91D11Revision Date 2019-12-17
and search: IDH520 User Manual in the search bar at the top of the page. iv . Warranty 4.0 . Our products are designed, manufactured, and produced to the highest of standards. If any defect in material o
