Transcription
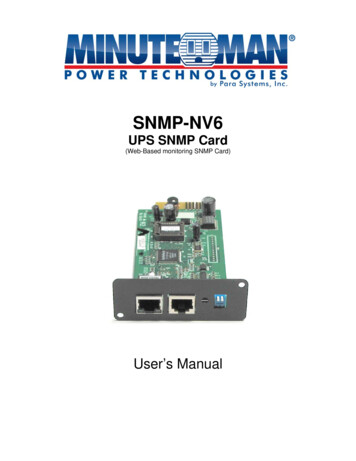
SNMP-NV6UPS SNMP Card(Web-Based monitoring SNMP Card)User’s Manual
SNMP-NV6About this manualThis manual contains information about the installation and the operation of the SNMP-NV6SNMP card.Save this ManualThis manual contains instructions and warnings that should be followed during theinstallation, operation and storage of this product. Failure to heed these instructionsand warnings will void the product warranty.Electromagnetic InterferenceThis is a Class A product. In a domestic environment, this product might cause radiointerference in which case the user is required to take adequate measures. These limits aredesigned to provide reasonable protection against harmful interference when the equipmentis operated in a commercial environment.DOS, Windows: NT, 2000, XP, 2003, Vista, and 7 are registered trademarks of MicrosoftCorporation. All other trademarks belong to their respective proprietors.Safety Information Qualified service personnel must perform the servicing of this equipment. Removerings, watches and other jewelry before servicing the unit.Before plugging in or pulling out the SNMP-NV6 card to and/or from the UPS, werecommend turning the UPS off. Copyright 2012Page 2
SNMP-NV6Table of Contents1. Overview . 61.1 Features . 61.2 Package Contents . 72. Description . 72.1 Ports . 72.1.1 LED Indicators. 82.1.2 Dipswitch Settings . 83. Installation . 84. Configuration Methods . 94.1 Configure the SNMP-NV6 card by EzSetting . 94.2 Configure the SNMP-NV6 card through COM Port . 104.3 Configure the SNMP-NV6 card through Telnet . 114.4 Configure the SNMP-NV6 card via Text Mode . 114.4.1 SNMP-NV6 card’s Main Menu . 114.4.1.1 User Manager . 124.4.1.2 TCP/IP Setting . 134.4.1.3 Network Parameter . 144.4.1.4 Time Server. 154.4.1.5 Soft Restart . 154.4.1.6 Reset All To Default . 154.4.1.7 Exit Without Save . 154.4.1.8 Save And Exit. 155. Web Interface . 165.1 Run a Web Browser . 165.2 Monitor Information . 165.2.1 UPS Properties . 175.2.2 Battery Parameters . 175.2.3 In/Out Parameters . 185.2.4 Identification . 185.2.5 Status Indication. 195.2.6 ShutdownAgent . 195.3 Monitor History . 205.3.1 Event Log . 205.3.2 Data Log. 205.3.3 Configure. 215.4 Monitor About . 215.4.1 Information . 215.5 Device (UPS) Management. 215.5.1 Configure. 225.5.1.1 Auto Restart . 225.5.1.2 UPS Buzzer. 225.5.1.3 Low Battery . 225.5.1.4 UPS Shutdown Action . 225.5.1.5 Smart Shutdown. 22Page 3
SNMP-NV65.5.1.6 Battery Replacement Date . 235.5.1.7 External Battery Pack. 235.5.1.8 Outlet Banks. 235.5.1.9 Economy Mode . 235.5.2 Control. 235.5.2.1 Battery Test . 235.5.2.2 Shutdown & Restart UPS Only . 235.5.2.3 Smart Shutdown. 245.5.2.4 Outlet Control . 245.5.2.5 Power Fail/Restore Simulation . 245.5.3 Weekly Schedule . 245.5.4 Specific Schedule . 255.5.5 Event Level . 255.6 System Administration. 265.6.1 User Manager . 265.6.2 TCP/IP. 265.6.2.1 TCP/IP Settings for IPv4 . 275.6.2.2 TCP/IP Settings for IPv6 . 275.6.2.3 System . 275.6.2.4 Link. 275.6.3 Web . 275.6.3.1 Web . 285.6.3.2 SSL Certificate . 285.6.4 Console . 285.6.4.1 Console . 285.6.4.2 Host Key. 285.6.4.3 Authentication Public Key . 295.6.5 FTP . 295.6.5.1 FTP . 295.6.6 Time Server. 295.6.6.1 Simple Network Time Server . 305.6.6.2 Manual . 305.6.7 Syslog . 305.6.8 Batch Configuration. 305.6.9 Upgrade . 315.7 System Notification . 325.7.1 SNMP Access . 325.7.2 SNMPv3 USM (User Based Management) . 325.7.3 SNMP Trap . 335.7.4 Mail Server . 345.7.5 Wake On LAN . 355.8 Environment . 355.8.1 Information . 355.8.2 Configuration . 366. Upgrade . 37Page 4
SNMP-NV67. Specifications . 397.1 Technical Specifications . 397.2 DIP Switch Settings . 397.3 LED Indicators . 398. Troubleshooting . 409. Limited Product Warranty . 43Page 5
SNMP-NV61. OverviewSNMP-NV6 card is an interface between the UPS and the network. It can obtain theinformation from a UPS and issue commands to it. SNMP-NV6 card supports two kinds ofprotocols – SNMP and HTTP for user access. Through the SNMP NMS and Web Browser,the user can setup the SNMP-NV6 card obtain information from the UPS and issuecommands to UPS.SNMP-NV6 card also provides shutdown software that operates with various OperatingSystems that can link to the SNMP-NV6 card automatically through the network andcommunicate with it via SNMP protocol. The shutdown software retrieves the UPSinformation from SNMP-NV6 card and based on this information can start the shutdownprocess in order to prevent the abnormal shutdown of the host or server due to power events.1.1 Features UPS network management:Allows remote management of a UPS from any workstation through the Internet orIntranet UPS remote monitor via SNMP & HTTP:Allows remote monitoring of a UPS via SNMP NMS together with the UPS MIB(Management Information Base) files or via a Web Browser UPS and system configuration from any client (password protected):Set UPS and system parameters from a Web BrowserSupports Load Shedding on a Power Event Records event logs & monitored data:Provides history data and event log for the UPS User notified via SNMP Trap and e-mail Supports gmail accounts Configurable SMTP server port Supports Network Time Protocol Supports Telnet configuration Supports BOOTP/DHCP Supports security protocols - HTTPS, SSH, SFTP, and SNMPv3 Login via RADIUS and local authentication Supports Syslog Supports IPv4 and IPv6 Supports Environmental MonitoringPage 6
SNMP-NV61.2 Package ContentsThe SNMP-NV6 card package contains the following items.QuantityItem1SNMP-NV6 SNMP Card1CD1RJ45 to DB9 serial cable1Quick Install1Product Warranty Card2. DescriptionThe SNMP-NV6 card’s components are described as below.Network PortLED IndicatorsConsole PortReset ButtonDipswitch2.1 PortsItemDescriptionNetwork PortConnect to the Network.LED IndicatorsIndicate operational status.Console PortConnect to a VT100 terminal to configure the system orconnect to a Temperature/Humidity Probe to monitorthe environmental parameters.Reset ButtonReset the SNMP-NV6 card only. This does not affectthe UPS.DipswitchSetup the operational modes.Page 7
SNMP-NV62.1.1 LED IndicatorsNo.Yellow LEDGreen LEDDescription1---OFFHardware or network error2Flashing (1sec)---UPS is disconnectedONNormal operationWithout Temp/Humidity probeFlashing (50 ms)3With Temp/Humidity probe45Flashing (50 ms)Flashing (50 ms) Normal operationFlashing (50 ms)ONTemp/Humidity probe isdisconnected2.1.2 Dipswitch SettingsNo.1Dip1OFFDip2OFFDescriptionNormal operation2OFFONPass Through Mode3ONOFFSensor Mode (with Temp/Humidity probe)4ONONConsole Mode3. InstallationNote: The SNMP-NV6 cards are designed to be Hot Swappable, but there is a remotechance that when Hot-Swapping the SNMP-NV6 card that the UPS will shutdown.Minuteman recommends following steps 1 through 13 when installing the SNMP-NV6 card,but to hot-swap skip to step number 3 and omit steps 6, 7.1.2.3.4.5.6.7.8.Turn off all of the equipment that is plugged into the UPS.Turn off the UPS and unplug the UPS’s power cord from the AC wall outlet.Remove the Option Slot cover plate from the rear panel of the UPS.Insert the SNMP-NV6 card into the option slot and secure with the retaining screws.Connect the Network cable to the Network Port on the SNMP-NV6 card.Plug the UPS’s power cord into the AC wall outlet and turn the UPS on.Turn on all the equipment that is plugged into the UPS.Open a web browser and type in the default host name SNMP-NV6 or the default IPaddress 192.168.1.100 in the address box.9. Login as administrator with admin for the default Account and password for thedefault Password.10. Open the TCP/IP page and configure the IP address, Subnet Mask, Gateway IP andthe host name for the SNMP-NV6 card.11. Open the User Manager page to change your accounts and passwords.12. We recommended disabling the BOOTP/DHCP option and assigning a valid static IPaddress.13. Open the Time Server page to set the time and the date.Note: The BOOTP/DHCP default setting is Enabled.Page 8
SNMP-NV64. Configuration MethodsThe easiest way to configure the SNMP-NV6 card is to run the EzSetting program, whichyou can find on the provided CD. Once you have configured the essential networkparameters successfully, you can launch a Web Browser or telnet to the SNMP-NV6 card toexecute more detailed configuration.4.1 Configure the SNMP-NV6 card by EzSetting1. Prepare a workstation (Microsoft Windows 2000, 2003, 2008, XP, Vista, Win7 orlater).2. Make sure both of the dipswitches of the SNMP-NV6 card are set to the OFFposition (normal mode) to enable the network transmission.3. Make sure the workstation and the SNMP-NV6 card are in the same LAN.4. Connect the Network cable to the Network Port on the SNMP-NV6 card.5. Put the CD in and open the EzSetting program.Note: The Windows Firewall may need to be turned off while using the EzSettingprogram.6. Press the Discover button to search for all of the SNMP-NV6 cards in the LAN. Allof the SNMP-NV6 cards will be listed in the Device List as shown below.7. If you want to search all of the SNMP-NV6 cards in a different domain network, justchange the Subnet and Subnet Mask and then press the Discover button to listthem.8. If the SNMP-NV6 card cannot be found, check the networking port UDP 3456 in theOS. Open it if it is blocked.Page 9
SNMP-NV69. Select the SNMP-NV6 card in the Device List and then click on the Modify button.Enter the account and password. The default account and password are adminand password respectively.10. Click on the Configuration button and then configure the essential networkparameters.4.2 Configure the SNMP-NV6 card through COM Port1. Prepare a workstation (Microsoft Windows 2000, 2003, 2008, XP, Vista, Win7 orlater).2. Use the RJ45 to DB9 serial cable (provided) to connect the SNMP-NV6 card’s COMport with the workstation’s COM port.3. Set both of the dipswitches of the SNMP-NV6 card to OFF position (normal mode)to enable the network transmission.4. From the workstation running Windows 2000, 2003, 2008, or XP, openHyperTerminal in the Accessories Program Group. From the workstation runningWindows Vista or 7, download the Putty software from the Internet to execute theconfiguration.5. Configure the COM port’s parameters: 2400 bps, 8 data bits, no parity, 1 stop bitand no flow control.Page 10
SNMP-NV66. Set both of the dipswitches of the SNMP-NV6 card to ON position (configurationmode). After the message appears on the screen, key in the account (defaultaccount is admin’) and password (default password is password). Then theSNMP-NV6 card’s Main Menu will appear on the screen. Refer to section 4.4Configure the SNMP-NV6 card via Text Mode for more information.4.3 Configure the SNMP-NV6 card through Telnet1. Connect the SNMP-NV6 card to the network.2. Prepare a workstation (Microsoft Windows, Mac OS X or Linux) that is in the sameLAN.3. Set both of the dipswitches of the SNMP-NV6 card to the OFF position (normalmode).4. From the Windows workstation open a DOS Prompt, type in the telnet HostNameor the IP address. For other operating systems, please run the OS shell and typethe same command.5. After the message appears on the screen, enter the account (default account isadmin) and the password (the default password is password) and then the SNMPcard’s Main Menu will appear on the screen. Please refer to 4.4 Configure theSNMP-NV6 card via Text Mode for more information.Note: The SNMP-NV6 card will terminate the telnet connection if there is no activitywithin 1 minute.4.4 Configure the SNMP-NV6 card via Text ModeYou can configure the SNMP-NV6 card via text mode by using a Telnet utility or through theCOM port.4.4.1 SNMP-NV6 card’s Main Menu Web Card Main Menu Web Card Version 01.00.00MAC Address 00-30-ab-25-e9-1e[1]. User Manager[2]. TCP/IP Setting[3]. Network Parameter[4]. Time Server[5]. Soft Restart[6]. Reset All To Default[z]. Exit Without Save[0]. Save And ExitPlease Enter Your Choice Page 11
SNMP-NV64.4.1.1 User Manager User Manager RADIUS[1]. RADIUS Auth: Disable[2]. Server:[3]. Secret:[4]. Port: 1812---------------Local AuthAdministrator[5]. Account: admin[6]. Password: ********[7]. Limitation: Only in This LANDevice Manager[8]. Account: device[9]. Password: ********[a]. Limitation: Only in This LANRead Only User[b]. Account: user[c]. Password: ********[d]. Limitation: Allow Any[0]. Back To Previous MenuPlease Enter Your Choice ItemFunctionDescriptionDefault[1].RADIUS Auth:[2].Server:Obtain the login authentication from aRADIUS serverThe RADIUS server name[3].Secret:The RADIUS secret[4].Port:The RADIUS port number[5].Administrator Account[6].Administrator PasswordAdministrator has sole right to modify the adminSNMP-NV6 settings.password[7].Administrator LimitationRestrict login area for the administratorOnly in this LAN[8].Device Accountdevice[9].Device PasswordDevice Manager is not permitted tochange the network settings but has theability to configure the UPS settings.[a].Device LimitationRestrict login area for the device manager Only in this LAN[b].User Account[c].User PasswordRead Only. User can observe the UPSinformation only.password[d].User Limit
Prepare a workstation (Microsoft Windows 2000, 2003, 2008, XP, Vista, Win7 or later). 2. Make sure both of the dipswitches of the SNMP-NV6 card are set to the OFF position (normal mode) to enable the network transmission. 3. Make sure the workstation and t