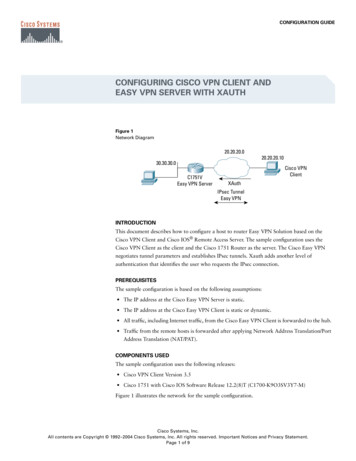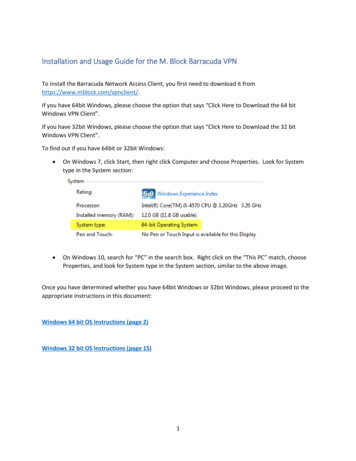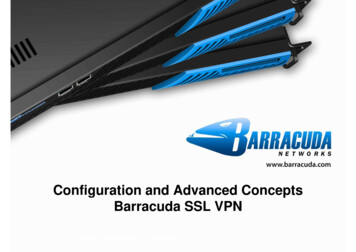
Transcription
Copyright NoticeCopyright (c) 2004-2011, Barracuda Networks, Inc., 3175 S. Winchester Blvd, Campbell, CA 95008 USAwww.barracuda.comv30-111222-1-1222All rights reserved. Use of this product and this manual is subject to license. Information in this document is subject to change without notice.TrademarksBarracuda NG Firewall is a trademark of Barracuda Networks. All other brand and product names mentioned in this document are registered trademarks ortrademarks of their respective holders.
ContentsChapter 1: Installation. . . . . . . . . . . . . . . . . . . . . . . . . . . . . . . . . . . . . . . 51.1 General . . . . . . . . . . . . . . . . . . . . . . . . . . . . . . . . . . . . . . . . . . . . . . . . . . . . . . . . 51.2 Installation Process . . . . . . . . . . . . . . . . . . . . . . . . . . . . . . . . . . . . . . . . . . . . . . . 6Chapter 2: Configuring the Client . . . . . . . . . . . . . . . . . . . . . . . . . . . . 112.1 Creating a New VPN Profile . . . . . . . . . . . . . . . . . . . . . . . . . . . . . . . . . . . . . . . 112.2 Configuring a VPN Profile . . . . . . . . . . . . . . . . . . . . . . . . . . . . . . . . . . . . . . . . . 132.2.1 Authentication Settings Section. . . . . . . . . . . . . . . . . . . . . . . . . . . . . . . . . . . . . . .2.2.2 Proxy Settings Section . . . . . . . . . . . . . . . . . . . . . . . . . . . . . . . . . . . . . . . . . . . . .2.2.3 License Settings Section . . . . . . . . . . . . . . . . . . . . . . . . . . . . . . . . . . . . . . . . . . . .2.2.4 Advanced Settings Section . . . . . . . . . . . . . . . . . . . . . . . . . . . . . . . . . . . . . . . . . .14141516Chapter 3: Establishing and Terminating a VPN Connection . . . . . . 173.1 Connecting and Disconnecting Using the Client . . . . . . . . . . . . . . . . . . . . . . . . 173.1.1 Initiating a VPN Connection. . . . . . . . . . . . . . . . . . . . . . . . . . . . . . . . . . . . . . . . . .3.1.2 Closing the Client . . . . . . . . . . . . . . . . . . . . . . . . . . . . . . . . . . . . . . . . . . . . . . . . .3.1.3 Terminating a VPN Connection . . . . . . . . . . . . . . . . . . . . . . . . . . . . . . . . . . . . . . .1720203.2 Connecting and Disconnecting Using the Tray Menu . . . . . . . . . . . . . . . . . . . . 21Chapter 4: Command Line Client . . . . . . . . . . . . . . . . . . . . . . . . . . . . . 234.1 Using the Command Line . . . . . . . . . . . . . . . . . . . . . . . . . . . . . . . . . . . . . . . . . 23Chapter 5: Uninstallation . . . . . . . . . . . . . . . . . . . . . . . . . . . . . . . . . . . 255.1 General . . . . . . . . . . . . . . . . . . . . . . . . . . . . . . . . . . . . . . . . . . . . . . . . . . . . . . . 255.2 Uninstallation Process . . . . . . . . . . . . . . . . . . . . . . . . . . . . . . . . . . . . . . . . . . . 25Warranty and Software License Agreement . . . . . . . . . . . . . . . . . . . 27Barracuda Networks Limited Hardware Warranty . . . . . . . . . . . . . . . . . . . . . . . . . 27Barracuda Networks Software License Agreement . . . . . . . . . . . . . . . . . . . . . . . . 27Barracuda Networks Software License Agreement Appendix . . . . . . . . . . . . . . . . 303
4
Chapter 1:Installation1.1GeneralThe following explains how to install and configure the Barracuda VPN client on your client computerrunning under Mac OS X 10.5 Leopard.For the VPN client installation, your workstation must meet the following minimum technicalrequirements: Mac OS X 10.5 (Leopard), 32 bit10 MB of free HDD space512 MB RAMFurthermore, the tuntap driver (minimum tuntap2011-11-01) is required. This driver is contained ml.5
1.2Installation ProcessExecute the installation file that is named BarracudaNGVPNClientInstaller.pkg or similar.A Welcome screen will appear as shown in figure 1–1.Fig. 1–1 Installer main windowClick Continue to start the installation process. The Barracuda NG VPN Client must be installed for allusers, so select the respective option as displayed in figure 1–2, then click Continue again.Fig. 1–2 Installer main windowThe operating system will prompt you now to enter your system user credentials as shown infigure 1–3 in order to allow the installation of the software. Therefore, your system account needsadmin privileges.6 Barracuda NG VPN Client 3.0 for Mac - Administrator’s Guide: Installation
After typing user name and password click Install Software to continue.Fig. 1–3 Installer main windowYou will now be presented with a screen as seen in figure 1–4 wherein you can optionally choose toChange Install Location. or simply accept the default install location by clicking Install.Fig. 1–4 Installer main window7
By doing the latter, the actual installation process will begin (figure 1–5).Fig. 1–5 Installer main window8 Barracuda NG VPN Client 3.0 for Mac - Administrator’s Guide: Installation
As soon as the installation process is finished (figure 1–6), you can click Close and head on toconfiguring the client.Fig. 1–6 Installer main window9
10 Barracuda NG VPN Client 3.0 for Mac - Administrator’s Guide: Installation
Chapter 2:Configuring the Client2.1Creating a New VPN ProfileYou can access the Barracuda NG VPN Client 3.0 through the Finder and the Launchpad. It resideswithin the Applications folder.When starting for the first time, you will need to define the configuration parameters for a VPNconnectionIf a client prior to version 3.0 is already installed, your old configuration will be automatically migrated and willappear as the default VPN profile in Barracuda NG VPN Client 3.0.The screenshot in figure 2–1 shows the client’s default start screen.Fig. 2–1 Default start window11
To configure a new VPN profile, choose New. from the Profile Name dropdown (see figure 3–2):Fig. 2–2 Choose New.Type a name for your new profile as shown in, followed by clicking OK.Fig. 2–3 Type a name for the profileSubsequently, you will be forwarded to the configuration screen as shown in figure 2–4.12 Barracuda NG VPN Client 3.0 for Mac: Configuring the Client
2.2Configuring a VPN ProfileConfigure an existing profile by selecting it in the client’s main window the same way you would createa new profile (see figure 2–2), followed by clicking Configure.In the Configuration screen (figure 2–4) you can define all settings for a VPN profile. The examplebelow is already filled in with configuration data.Fig. 2–4 Configuration screenYou can decide whether to rename the selected profile or retroactively select a different one or evencreate a new one by either clicking New, Delete or Rename in the Profile section.13
2.2.1Authentication Settings SectionThe Authentication Settings section allows you to choose one of the Authentication Types listed belowthat will be used for the VPN connection. Contact your administrator for details on the requiredauthentication method. Public Key (license file)X509 Cert (certificate)X509 Cert User/PassUser Pass onlyIf the authentication method was actually certificate-based and the selection is changed to Public Key or User Pass only, certificate configured in the License Settings will be removed from the configuration, although thelicense file will remain in the file system.If the authentication method was actually license-based and the selection is changed to X509 Cert or X509 Cert User/Pass or User Pass only, a license configured in the License Settings will be removed from theconfiguration, although the certificate file will remain in the file system.Enter the VPN server’s IP address or host name into the Server Address field and the appropriate portinto the Server Port field.You may also specify a list of VPN servers using the comma character (’,’) as separator.2.2.2Proxy Settings SectionThe Proxy Settings section defines whether a proxy should be used and if so, which type. You maychoose between one of the following options: No ProxyHTTP (disables all Tunnel Modes except TCP)Socks4 (disables all Tunnel Modes except TCP)Socks5The Proxy Server field takes either IP address or host name of the proxy server, while the Proxy Portfield takes the port number.The Proxy User field is for defining the user name to authenticate at the proxy server.Actually it is necessary to provide IP address, port number and, in some cases, a user name. If the serverrequires a password, you will be prompted for it during the connecting process.Common port numbers are e.g. 3128 or 8080. Your network administrator will provide you with these values ifin doubt.The proxy server’s password cannot be set in the profile configuration. It must be set in the main window andwill not be stored when the client is closed.14 Barracuda NG VPN Client 3.0 for Mac: Configuring the Client
2.2.3License Settings SectionThe License Settings section is used to configure licenses and certificates. To import a license, clickChoose. besides the License Path field and pick an apropriate license file in the appearing dialog asshown in example figure 2–5 below.Fig. 2–5 Importing a license fileUse the same method to import a certificate file into the Certificate Path field.If either Public Key or User Pass only is selected in the Authentication Settings, it is not possible to import acertificate file.If either X509 Cert or X509 Cert User/Pass or User Pass only is selected in the Authentication Settings, it isnot possible to import a license file.15
2.2.4Advanced Settings SectionThis section contains options for fine tuning the Barracuda NG VPN client. Not all entries aremandatory. Some entries depend on the used proxy type.Certain settings in this section can have unwanted impacts on theoverall functionaliy of the client.Modify them knowingly and carefully and please consult your administrator if in doubt.You may configure the following options: Special ModeDeactivate tunnel probing by setting this to Silent. Normal operation is chosen by selectingNone. This functionality depends on the VPN server. Source IPThis is the IP address to be assigned to the client for the TAP device. It is also VPN serverdependant. Tunnel ModeThe protocol for the VPN tunnel. Possible options are TCP, UDP and Hybrid. Only TCP isallowed if Socks4 or HTTP was configured in the Proxy Settings. Tunnel Encryption HashThe hash algorhithm to be used. Options are MD5 and SHA1. The selected option must besupported by the VPN server. Tunnel EncryptionSupported are AES128, AES256, CAST, BlowFish, 3DES and DES. The selected option mustbe supported by the VPN server. TAP DeviceTAP device to be used for the VPN tunnel. In most cases this is /dev/tun0. Keep AliveThe interval in seconds to send keepalive signals.When done, click Save to save and close the profile configuration dialog.The configuration is saved to this plain text ASCII f.16 Barracuda NG VPN Client 3.0 for Mac: Configuring the Client
Chapter 3:Establishing and Terminatinga VPN Connection3.1Connecting and Disconnecting Using the ClientExecute the configured Barracuda NG VPN Client.If no connection is active, the traffic light graphic heading the client window will show a red light.3.1.1Initiating a VPN ConnectionNow, choose a Profile Name. The profile defines all parameters needed for a successful VPNconnection.Depending on the connection type, you may be prompted to enter various authentication credentialsfor server, license or proxy.If the profile is configured for public key authentication, you will be asked to type a Server Password anda License Password as seen in figure 4–1 below. Type these passwords followed by clicking Connect.Fig. 4–1 Establishing a connection17
Alternatively, if the profile uses simple username and password authentication, you will be promptedfor Username and Password as shown in figure 4–2. Type these, then click Connect.Fig. 4–2 Establishing a connectionOr, it might be that only a Server Password is needed, as shown in figure 4–3. Type it, then clickConnect.Fig. 4–3 Establishing a connection18 Barracuda NG VPN Client 3.0 for Mac: Establishing and Terminating a VPN Connection
After authenticating successfully, the traffic light graphic changes to yellow and the Connect buttondisplays Connecting (see figure 4–4).Now, please wait a few moments until the VPN tunnel is established.Fig. 4–4 Establishing a connectionAs soon as the VPN tunnel is up, the traffic light graphic changes to green and the former Connectbutton becomes the Disconnect button, as shown in figure 4–5 below:Fig. 4–5 Connection establishedThe connection is now successfully established.19
You can watch certain important connection parameters in the Connection Status section: ClientIPThe IP address used by the client’s TAP device. GatewayThe gateway to the VPN server. DNSThe DNS assigned by the VPN server. RoutesThe routes in use. Bits/sThe traffic throughput in bits per second.3.1.2Closing the ClientClick the Close button in the main window to terminate the client’s user interface. An established VPNconnection will be kept open in the background.This leaves an already established connection open.The Barracuda NG VPN Client forks a background process that keeps running even if you exit the main client.As soon as you terminate the connection with Disconnect or Quit., this second process will be terminated aswell.3.1.3Terminating a VPN ConnectionClick the Disconnect button in the main window to terminate the VPN connection.20 Barracuda NG VPN Client 3.0 for Mac: Establishing and Terminating a VPN Connection
3.2Connecting and Disconnecting Using the Tray MenuIt is also possible to perform some basic operations by using the Barracuda NG VPN Client’s statusicon in the system tray.Clicking the icon will open a small window wherein a variety of basic operations can be performed.If there is no active VPN connection, the names of all available VPN profiles are displayed andclickable (see figure 4–6). Click the desired profile to initiate a VPN connection or choose one of theremaining active options Show Status Window., Show Configuration., About. or Quit Barracuda NG VPNClient.Fig. 4–6 Tray menu disconnectedAs soon as a VPN connection is established, the status icon turns green and the profile names becomeunclickable (see figure 4–7). You need to Disconnect before you can connect using a different profile.Clicking Quit Barracuda NG VPN Client with an active connection will terminate not only the user interfacebut also the connection.Fig. 4–7 Tray menu connected21
22 Barracuda NG VPN Client 3.0 for Mac: Establishing and Terminating a VPN Connection
Chapter 4:Command Line Client4.1Using the Command LineIt is possible to invoke the Barracuda NG VPN client from the command line with our without thegraphical user interface.The graphical client must have been executed at least for one time to migrate the default VPN profile fromprevious versions for version 3.0 of the command line client.Ensure that your local user account has the necessary rights to perform these operations.Open a command line window and type:barracudavpn.engine [options]followed by Enter, wherein the possible [options] are as listed below:-s--startStart VPN tunnel-p--stopStop VPN tunnel-t--statusShow tunnel status-k--keypwdPassword for local key-r--serverpwdServer password-c--configPath name to configuration-V--versionShow VPN client version-v--verboseShow debug output-h--helpShow this help outputIt is possible to start the graphical client by typing:barracudavpn followed by pressing Enter.23
24 Barracuda NG VPN Client 3.0 for Mac: Command Line
Chapter 5:Uninstallation5.1GeneralClose all open VPN connections prior to uninstalling the Barracuda NG VPN Client.5.2Uninstallation ProcessEnsure that your local user account has the necessary rights to perform these operations.1.) Removing Barracuda VPN BinaryFirst, remove the client’s shortcut in the Dock if such a shortcut had been created, then opena command line window and type these commands, followed by pressing Enter.rm -rf /Applications/BarracudaNGVPNClient.apprm /usr/sbin/barracudavpnrm /usr/sbin/barracudavpn.engineThe executables may also be deleted using the Finder.2.) Removing Certificates and Licenses (Optional)Removing the certificates is possible by opening a command line window and typing thefollowing commands, each line followed by pressing Enter:rm -rf /System/Library/barracudavpn25
26 Barracuda NG VPN Client 3.0 for Mac: Uninstallation
Barracuda NetworksWarranty and Software License AgreementBarracuda Networks Limited Hardware Warranty1. Barracuda Networks, Inc., or the Barracuda Networks, Inc. subsidiary or authorized Distributor selling the BarracudaNetworks product, if sale is not directly by Barracuda Networks, Inc., ("Barracuda Networks") warrants that commencingfrom the date of delivery to Customer (but in case of resale by a Barracuda Networks reseller, commencing not more thansixty (60) days after original shipment by Barracuda Networks, Inc.), and continuing for a period of one (1) year: (a) itsproducts (excluding any software) will be free from material defects in materials and workmanship under normal use; and (b)the software provided in connection with its products, including any software contained or embedded in such products willsubstantially conform to Barracuda Networks published specifications in effect as of the date of manufacture. Except for theforegoing, the software is provided as is. In no event does Barracuda Networks warrant that the software is error free or thatCustomer will be able to operate the software without problems or interruptions. In addition, due to the continualdevelopment of new techniques for intruding upon and attacking networks, Barracuda Networks does not warrant that thesoftware or any equipment, system or network on which the software is used will be free of vulnerability to intrusion orattack. The limited warranty extends only to you the original buyer of the Barracuda Networks product and isnon-transferable.2. Exclusive Remedy. Your sole and exclusive remedy and the entire liability of Barracuda Networks under this limitedwarranty shall be, at Barracuda Networks or its service centers option and expense, the repair, replacement or refund of thepurchase price of any products sold which do not comply with this warranty. Hardware replaced under the terms of thislimited warranty may be refurbished or new equipment substituted at Barracuda Networks’ option. Barracuda Networksobligations hereunder are conditioned upon the return of affected articles in accordance with Barracuda Networksthen-current Return Material Authorization ("RMA") procedures. All parts will be new or refurbished, at Barracuda Networks’discretion, and shall be furnished on an exchange basis. All parts removed for replacement will become the property ofBarracuda Networks. In connection with warranty services hereunder, Barracuda Networks may at its discretion modify thehardware of the product at no cost to you to improve its reliability or performance. The warranty period is not extended ifBarracuda Networks repairs or replaces a warranted product or any parts. Barracuda Networks may change the availabilityof limited warranties, at its discretion, but any changes will not be retroactive. IN NO EVENT SHALL BARRACUDA NETWORKSLIABILITY EXCEED THE PRICE PAID FOR THE PRODUCT FROM DIRECT, INDIRECT, SPECIAL, INCIDENTAL, ORCONSEQUENTIAL DAMAGES RESULTING FROM THE USE OF THE PRODUCT, ITS ACCOMPANYING SOFTWARE, OR ITSDOCUMENTATION.3. Exclusions and Restrictions. This limited warranty does not apply to Barracuda Networks products that are or have been(a) marked or identified as "sample" or "beta," (b) loaned or provided to you at no cost, (c) sold "as is," (d) repaired, alteredor modified except by Barracuda Networks, (e) not installed, operated or maintained in accordance with instru
The following explains how to install and configure the Barracuda VPN client on your client computer running under Mac OS X 10.5 Leopard. For the VPN client installation, your workstation must meet the following minimum tech
