Transcription
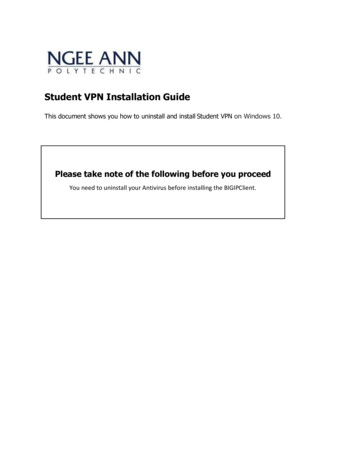
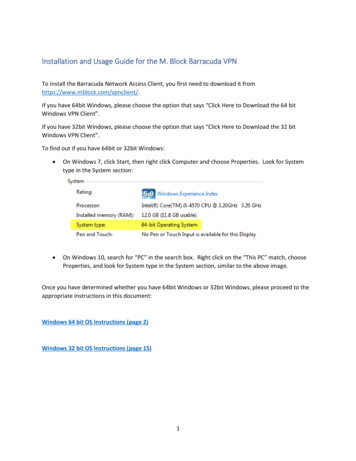
Installation and Usage Guide for the M. Block Barracuda VPNTo install the Barracuda Network Access Client, you first need to download it fromhttps://www.mblock.com/vpnclient/.If you have 64bit Windows, please choose the option that says “Click Here to Download the 64 bitWindows VPN Client”.If you have 32bit Windows, please choose the option that says “Click Here to Download the 32 bitWindows VPN Client”.To find out if you have 64bit or 32bit Windows: On Windows 7, click Start, then right click Computer and choose Properties. Look for Systemtype in the System section: On Windows 10, search for “PC” in the search box. Right click on the “This PC” match, chooseProperties, and look for System type in the System section, similar to the above image.Once you have determined whether you have 64bit Windows or 32bit Windows, please proceed to theappropriate instructions in this document:Windows 64 bit OS Instructions (page 2)Windows 32 bit OS Instructions (page 15)1
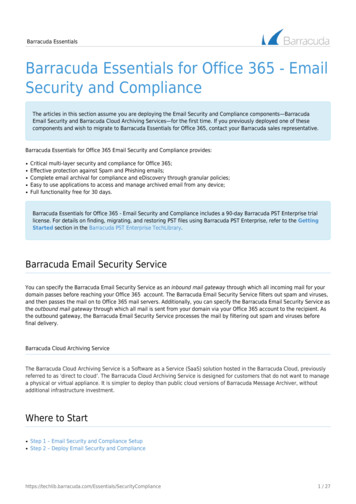
Windows 64 bit OS InstructionsAfter you have downloaded the Zip file, you will need to extract the contents. Once you have done so,double click the icon to run the installation.The setup program will launch. Click Next on the first screen to begin:Choose “I accept the terms in the license agreement” and click Next:2
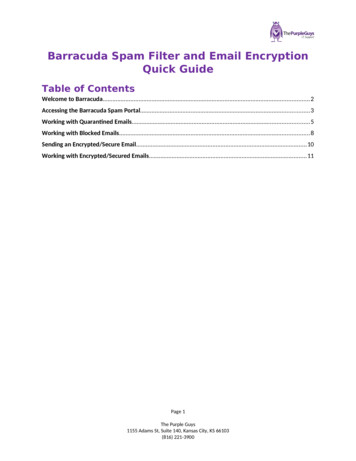
For Setup Type, choose “VPN Client” and click Next:3
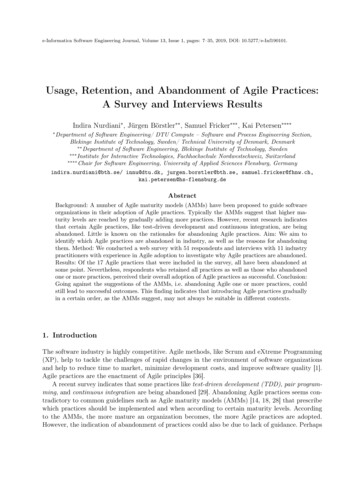
For Application Settings, you do not need to choose a Master Password. This is used for passwordprotecting access to the Barracuda Network Access Client only. It is recommended to leave that blankand not make any other changes on this page.Click Next.4
Click Install to begin the installation:5
When the installation is complete, click Finish.Important – if the installer asks you to reboot your computer to complete the installation, do so now.Once the installation is complete, you will have a new icon in your system tray, a circle with a key insideof it:6
Double click that key icon to open the Client:You will now need to set up your profile. Click “Get started” to begin.7
You may see a message at the top of the Client application that says “Some settings are managed byyour administrator. Click here to restart with elevated privileges.” Please do so.8
Once you’ve restarted the Client, click New Profile in the upper left-hand corner, then choose Machine:In the Create new Machine VPN Profile box, enter the following:Description – M. BlockServer Address – mbcon2.mblock.comAuthentication Method – Username/PasswordRemember credentials – Username onlyTunnel Mode – Optimized (Hybrid)Encryption Algorithm – AES256Authentication Algorithm – SHA5129
Keep all other settings as defaults and click Save.10
Your new profile will be added. Click on it to highlight it and then click Connect in the upper right-handcorner:11
A connection box will appear above your system tray. Enter your M. Block user name and yourpassword and then click Connect:You may see a certificate warning. Click Yes to proceed:12
When the connection is established you will see this above your system tray:You may click the x in the upper right-hand corner to close that message.You are now connected to the VPN. If you look for the icon in the system tray you will see it haschanged to a green circle and if you hover over it, it will show you are connected.13
To disconnect from the VPN, you can right click on that icon and choose Disconnect:You may also double click that icon to bring up the status window, then click Disconnect there:The Client will run in the background and will start when you start Windows.14
Windows 32 bit OS Instructions After you have downloaded the Zip file, you will need to extract the contents. Once you havedone so, right-click and select Extract All.Select ExtractDouble-Click Setup15
Select RunThe setup program will launch. Click Next on the first screen to begin:16
Choose “I accept the terms in the license agreement” and click Next:Click Next17
Click NextFor Setup Type, choose “Barracuda VPN Client” and click Next:18
Click NextFor Application Settings, you do not need to choose a Master Password. This is used for passwordprotecting access to the Barracuda Network Access Client only. It is recommended to leave that blankand not make any other changes on this page.19
Click Install to begin the installation:20
When the installation is complete, click Finish.The Welcome to the VPN Profile Wizard Window will open:Remote Server: mbcon2.mblock.comDescription: M.BlockSelect: Remember by user nameClick Next21
Click FinishSelect M.Block profile and Modify ProfileDescription – M. BlockHost names or IP addresses of remote server – mbcon2.mblock.comCertificate – Username/PasswordRemember credentials – Username only22
Select Advanced tab23
In the Properties for M. Block Profile box, enter the following:Tunnel Mode – Optimized (Hybrid)Encryption Algorithm – AES256Authentication Algorithm – SHA512Keep all other settings as defaults and click OK.24
Your new profile will be added. Click on it to highlight it and then click Connect in the upper left-handcorner. Enter your M. Block user name and your password and then click Connect:25
You are now connected to the VPN.If you look for the double computer icon in the system tray you will see it has changed to blue and ifyou hover over it, it will show you are connected. Verify that you can access http://blocknet.To disconnect from the VPN, you can right click on the icon in your System Tray and choose Disconnect:You may also double click that icon to bring up the status window, then click Disconnect there:The Client will run in the background and will start when you start Windows.You can access the Barracuda client from the System Tray or Or you can go to Start All Programs andright-click on the Barracuda Network Access Client VPN Connector and Send to: Desktop to access theprogram.26
The Client will run in the background and will start when you start Windows. You can access the Barracuda client from the System Tray or Or you can go to Start All Programs and right-click on the Barracuda Network Access Client