Transcription
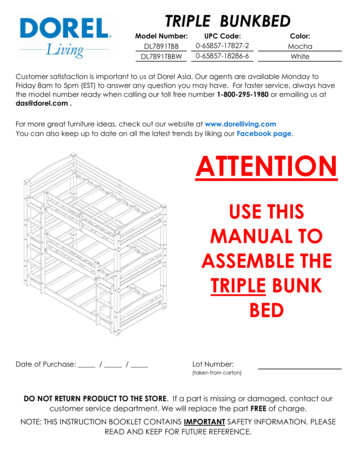
TRIPLE BUNKBEDModel Number:DL7891TBBDL7891TBBWUPC eCustomer satisfaction is important to us at Dorel Asia. Our agents are available Monday toFriday 8am to 5pm (EST) to answer any question you may have. For faster service, always havethe model number ready when calling our toll free number 1-800-295-1980 or emailing us atdas@dorel.com .For more great furniture ideas, check out our website at www.dorelliving.comYou can also keep up to date on all the latest trends by liking our Facebook page.ATTENTIONUSE THISMANUAL TOASSEMBLE THETRIPLE BUNKBEDDate of Purchase: / /Lot Number:(taken from carton)DO NOT RETURN PRODUCT TO THE STORE. If a part is missing or damaged, contact ourcustomer service department. We will replace the part FREE of charge.NOTE: THIS INSTRUCTION BOOKLET CONTAINS IMPORTANT SAFETY INFORMATION. PLEASEREAD AND KEEP FOR FUTURE REFERENCE.
CUSTOMER SERVICEIf you are missing parts or have any questions about this product, contact our customer servicerepresentative first!CALL 1-800-295-1980You can also order parts by writing to the address listed below. Please include theproduct model number, color and a detailed description of the part.Customer Service Department No. 41312345 Albert-Hudon Boulevard, Suite 100Montreal, QuebecCanada, H1G 3L1E-MAIL: das@dorel.comWARNING* STRANGULATION HAZARD - NEVER ATTACH OR HANG ITEMS TO ANY PART BUNK BED THAT ARENOT DESIGNED FOR USE WITH THE BED; FOR EXAMPLE, BUT NOT LIMITED TO HOOKS, BELTS ANDJUMP ROPES.* FOLLOW THE INFORMATION ON THE WARNINGS APPEARING ON THE UPPER BUNK ENDSTRUCTURE AND ON THE CARTON. DO NOT REMOVE WARNING LABEL FROM BED.* THE MATTRESS PLATFORM IS DESIGNED TO SUPPORT A MATTRESS WITHOUT THE NEED FOR APOSTURE BOARD OR BOX SPRING.* ALWAYS USE THE RECOMMENDED SIZE MATTRESS OR MATTRESS SUPPORT, OR BOTH, TO HELPPREVENT THE LIKELIHOOD OF ENTRAPMENT OR FALLS.* USE ONLY COIL SPRING MATTRESSES ON BOTH THE UPPER AND LOWER BUNKS. FAILURE TO DO SOCAN RESULT IN INJURY.* USE ONLY MATTRESSES WHICH ARE 74"-75" LONG AND 37 1/2" - 38 1/2" WIDE ON UPPER AND ONLOWER BUNKS. ENSURE THICKNESS OF MATTRESS DOES NOT EXCEED 6". SURFACE OF MATTRESSMUST BE AT LEAST 5" (127MM) BELOW THE UPPER EDGE OF GUARDRAILS.* DO NOT ALLOW CHILDREN UNDER 6 YEARS OF AGE TO USE THE UPPER BUNK.* ALWAYS USE GUARDRAILS ON BOTH LONG SIDES OF THE UPPER BUNK. IF THE BUNK BEDWILL BEPLACED NEXT TO THE WALL, THE GUARDRAIL THAT RUNS THE FULL LENGTH OF THE BED SHOULD BEPLACED AGAINST THE WALL TO PREVENT ENTRAPMENT BETWEEN THE BED AND WALL (APPLICABLEFOR BUNK BEDS WITH FULL LENGTH GUARDRAILS ON ONE SIDE).* PERIODICALLY CHECK AND ENSURE THAT THE GUARDRAIL, LADDER AND OTHER COMPONENTSARE IN THEIR PROPER POSITION, FREE FROM DAMAGE, AND THAT ALL CONNECTORS ARE TIGHT.* DO NOT ALLOW HORSEPLAY ON OR UNDER THE BED AND PROHIBIT JUMPING ON THE BED.* DO NOT USE SUBSTITUTE PARTS. CONTACT CUSTOMER SERVICE FOR REPLACEMENT PARTS.* USE OF A NIGHT LIGHT MAY PROVIDE ADDED SAFETY PRECAUTION FOR A CHILD USING THEUPPER BUNK.* THE USE OF WATER OR SLEEP FLOTATION MATTRESSES IS PROHIBITED.* ALWAYS USE THE LADDER FOR ENTERING AND LEAVING THE UPPER BUNK.* PROHIBIT MORE THAN ONE PERSON ON UPPER BUNK.* KEEP THESE INSTRUCTIONS FOR FUTURE USE.
NOTES* READ EACH STEP CAREFULLY BEFORE STARTING. IT IS VERY IMPORTANT THAT EACH STEP OFINSTRUCTION IS PERFORMED IN THE CORRECT ORDER. IF THESE STEPS ARE NOT FOLLOWED INSEQUENCE, ASSEMBLY DIFFICULTIES WILL OCCUR AND CAN RESULT IN INJURY.* CAUTION: ADULT ASSEMBLY REQUIRED* MAKE SURE ALL PARTS ARE INCLUDED. WORK IN SPACIOUS AREA, PREFERABLY ON A SMOOTHSOFT SURFACE.* ASSEMBLY WILL REQUIRE TWO PEOPLE.* MOST BOARD PARTS ARE LABELED OR STAMPED ON THE RAW EDGE.* PHILLIPS SCREWDRIVER (NOT INCLUDED) IS REQUIRED.* A RUBBER MALLET (NOT INCLUDED) IS RECOMMENDED TO FACILITATE ASSEMBLY.* BED IS DESIGNED FOR CHILDREN RANGING FROM 6 YEARS OF AGE TO YOUNG TEENAGERS.* CAUTION: ADULT ASSEMBLY REQUIRED. ASSEMBLY WILL REQUIRE 2 PEOPLE. ESTIMATEDASSEMBLY TIME 45 MINUTES.CARE AND CLEANINGDust regularly with a soft, dry cloth. We do not recommend the use of chemicalcleaners or wax on our lacquered furniture as it may damage the finish. Keepsolvents, alcohol, nail polish and polish removers away from your hardwoodfurniture surfaces.MAINTENANCECheck bolts/screws periodically and tighten them if necessary.LIMITED WARRANTYDOREL warrants its product to be free from defects in material and workmanship andagrees to remedy any such defect. This warranty covers 1 year from the date oforiginal purchase. This warranty is valid only upon presentation of proof of purchase.This is solely limited to the repair or replacement of defective furniture componentsand no assembly labor is included. This warranty does not apply to any product whichhas been improperly assembled, subjected to misuse or abuse or which has beenaltered or repaired in any way. This warranty gives you specific legal rights and youmay also have other rights which vary from State to StateWARNING: Should this product become damaged,and/or components are broken or missing, DO NOT USE.
TRIPLE BUNK BEDDL7891TBB / DL7891TBBWHARDWARE LIST12Φ 1/4" x 100mmΦ 6.5mm x 48mmJOINT CONNECTOR (4mm HEX HEAD)24 PCSWOOD JOINT CONNECTOR (4mm HEX HEAD)28 PCS34Φ 6.5mm x 100mmΦ 4mm x 35mmWOOD JOINT CONNECTOR (4mm HEX HEAD)40 PCSFLAT HEAD SCREW36 PCS56Φ 10mm x 100mmΦ 4mm x 30mmMETAL DOWEL8 PCSFLAT HEAD SCREW9 PCS78Φ 10mm x 50mmWOOD DOWEL106 PCS9ALLEN KEY1 PC1011Φ 11.8mm x 15mmΦ 1/4" x 32mmΦ 9mm x 17mmBARREL NUT24 PCSJOINT CONNECTOR (4mm HEX HEAD)6 PCSHEX CAP6 PCS
TRIPLE BUNK BEDDL7891TBB / DL7891TBBWPARTS LISTABTOP POST1 PCDCTOP POST2 PCSEBOTTOM POST2 PCSTOP POST1 PCFBOTTOM POST2 PCSHEADBOARD TOP CROSS6 PCSNOTE- the components needed toassemble the triple bunk bed are packedin 2 boxes. Make sure that all parts areaccounted for before beginningassembly.
TRIPLE BUNK BEDDL7891TBB / DL7891TBBWPARTS LISTGHHEADBOARD BOTTOM CROSS6 PCSJITOP FRONT SIDE RAIL1 PCKBACK SIDE RAIL2 PCSMLBOTTOM BACK SIDE RAIL1 PCNLONG GUARDRAIL4 PCSPSHORT GUARDRAIL2 PCSRIGHT LADDER END1 PCHEADBOARD CENTER CROSS6 PCSSLAT WITHOUT WOOD DOWEL18 PCSOQSBOTTOM FRONT SIDE RAIL1 PCLEFT LADDER END1 PCRLADDER STEP9 PCSTGUARDRAIL LEG3 PCSUSLAT WITH WOOD DOWEL6 PCSGUARDRAIL POST2 PCS
TRIPLE BUNK BEDDL7891TBB / DL7891TBBWPARTS LISTVWRIGHT GUARDRAIL POST1 PCYXCENTER POST1 PCZCENTER POST1 PCB1A1CENTER POST1 PCC1SHORT GUARDRAIL2 PCSCENTER POST1 PCFRONT SIDE RAIL1 PCD1LONG LADDER LEFT END1 PCLONG LADDER RIGHT END1 PC
TRIPLE BUNK BEDDL7891TBB / DL7891TBBW77777777777777A77CSTEP 13Insert wood dowels (7) into the ends of headboard top cross (F), headboard bottom cross(G) and headboard center cross (S). Attach them to top posts (A & B) using wood jointconnectors (3) as shown. Tighten the wood joint connectors (3) with the Allen key (8).NOTES: Headboard top crosses (F, G& S) may require that they be pulled closer together orfurther apart in order to allow wood dowels (7) to align with holes in top posts (A & B).Repeat this previous step to assemble the other headboard using posts (B & C).NOTE: Be sure to use headboard top cross (F) with warning label attached to it is betweentop posts (A) and (B). See the above illustration for label orientation.
TRIPLE BUNK BEDDL7891TBB / DL7891TBBW7E7777E777D777777D77STEP 23Insert wood dowels (7) into the ends of headboard top cross (F), headboard bottomcross (G) and headboard center cross (S) and attach them to bottom posts (D) & (E)using wood joint connectors (3) as shown. Tighten the wood joint connectors (3) withthe Allen key (8).
TRIPLE BUNK BEDDL7891TBB / DL7891TBBWKISTEP 3Attach the two headboards with bottom posts (D & E) to bottom front side rail (I) andbottom back side rail (K) using joint connectors (1) and barrel nuts (9) as shown.Tighten the joint connectors (1) with the Allen key (8).Note: This is the lower bunk.
TRIPLE BUNK BEDDL7891TBB / DL7891TBBWJHSTEP 4Insert wood dowels (7) into each end of the long guardrails (M).Attach two long guardrails (M) and two top side rails (H & J) to top posts (A & B) and (C & B)as shown.Fasten top side rails (H & J) with joint connectors (1) and barrel nuts (9). Fasten longguardrails (M) with wood joint connectors (3).Tighten the joint connectors (1) and wood joint connectors (3) with the Allen key (8).Note: This is the top bunk.
TRIPLE BUNK BEDDL7891TBB / DL7891TBBWU83U771110ANHB10STEP 5Insert wood dowels (7) into short guardrails (N). Attach short guardrails (N) toguardrail post (U) with wood joint connectors (3) as shown.Fasten the short guardrails (N) to top post (B) with wood joint connectors (3). Fastenthe guardrail post (U) to top front side rail (H) with joint connectors (10) and hex cap(11) as shown.
TRIPLE BUNK BEDDL7891TBB / DL7891TBBWM6N66H6STEP 6Attach the guardrail leg (R) to the short guardrails (N) and top front side rail (H) withflat head screws (6). Attach the other guardrail leg (R) (on the other side of the bed)to long guardrails (M) and top back side rail (J) with flat head screws (6) as shown.Use a Phillips head screwdriver (not included) to tighten the flat head screws.
TRIPLE BUNK BEDDL7891TBB / DL7891TBBWOPSTEP 7Insert wood dowels (7) into the end of the ladder steps (Q). Attach left ladder end(O) and right ladder end (P) to ladder steps (Q) with wood joint connectors (2).Tighten the wood joint connectors (2) with the Allen key (8).
TRIPLE BUNK BEDDL7891TBB / DL7891TBBW77777777777777W77Z3STEP 8Insert wood dowels (7) into the ends of headboard top cross (F), headboard bottomcross (G) and headboard center cross (S). Attach the center posts (W & X) usingwood joint connectors (3) and Allen key (8).NOTES: Headboard top crosses (F, G and S) may require that they be pulled closertogether or further apart in order to allow wood dowels (7) to align with holes incenter posts (W & X).Repeat this step to assemble the other headboard using center posts (Y & Z).
TRIPLE BUNK BEDDL7891TBB / DL7891TBBWJSTEP 9Insert wood dowels (7) into each end of the long guardrails (M).Attach two long guardrails (M) and side rails (A1 and J) to center posts (W & X) and (Y & Z)as shown.Fasten side rails (A1 and J) with joint connectors (1) and barrel nuts (9). Fasten longguardrails (M) with wood joint connectors (3).Tighten the joint connectors (1) and wood joint connectors (3) with the Allen key (8).Note: this is the middle bunk.
TRIPLE BUNK BEDDL7891TBB / DL7891TBBW1110V111010STEP 10Insert wood dowel (7) into short guardrails (B1). Attach short guardrails (B1) toguardrail post(U) and right guardrail post (V) with wood joint connectors (3) as shown.Fasten the guardrail post (U) and right guardrail post (V) to center front side rail (A1)with joint connectors (10) and hex cap (11) as shown.
TRIPLE BUNK BEDDL7891TBB / DL7891TBBW6666STEP 11Attach the guardrail leg (R) to long guardrails (M) and side rail (J) with flat headscrews (6) as shown. Use a Phillips head screwdriver (not included) to tighten the flathead screws.
TRIPLE BUNK BEDDL7891TBB / DL7891TBBWSTEP 12To assemble the ladder, insert wood dowels (7) into the end of the ladder steps (Q).Attach the long ladder ends (C1 & D1) to ladder steps (Q) with wood jointconnectors (2) and Allen key (8).
TRIPLE BUNK BEDDL7891TBB / DL7891TBBW55D5DI5ESTEP 13Place four metal dowels (5) into the holes in the bottom posts (D and E). Stack themiddle bunk on the bottom bunk with the help of another person.
TRIPLE BUNK BEDDL7891TBB / DL7891TBBWB5A5HC5B5ISTEP 14Place four metal dowels (5) into the holes in the center posts (W, X, Y, Z). Stack thetop bunk on the middle bunk with the help of another person.
TRIPLE BUNK BEDDL7891TBB / DL7891TBBWAU2AUH2H2222II228back viewSTEP 15Attach the long ladder to front side rails (H & A1 & I) with wood joint connectors (2)as shown. Use Allen key (8) to tighten the joint connectors.
TRIPLE BUNK BEDDL7891TBB / DL7891TBBWV2IV22OPPOI28STEP 162back viewAttach the short ladder to the front side rail (A1 & I) with wood joint connectors (2)as shown. Use Allen key (8) to tighten the joint connectors.
TRIPLE BUNK BEDDL7891TBB / DL7891TBBWJLLHLTJTLLLLLKTTI4STEP 17Insert two slats with wood dowel (T) into the center slots of the top side rails (H &J)of the upper bunk as shown.Attach slats without wood dowel (L) onto top side rails (H &J) of the upper bunkwith flat head screws (4) as shown. Use Phillips screwdriver (not included) to tightenflat head screws (4).Repeat this process for the middle and bottom bunk.
TRIPLE BUNK BEDDL7891TBB / DL7891TBBWTo convert the bunk bed into three different twin bed, remove both ladders andall the guardrails. With the help of another person, unstack the top bunk andcenter bunk from the lower bunk.
TRIPLE BUNK BEDDL7891TBB / DL7891TBBWCAUTION: This unit is intended for use only with theproducts and/or maximum weights indicated. Use with otherproducts and/or products heavier than the maximum weightsindicated may result in instability or cause possible injury.DO NOT ALLOW HORSEPLAYON OR UNDER THE BED ANDPROHIBIT JUMPING ON THEBED.DO NOT ALLOW CHILDREN UNDER 6 YEARSOF AGE TO USE THE UPPER BUNK. BED ISDESIGNED FOR CHILDREN RANGING FROM 6YEARS OF AGE TO YOUNG TEENAGERS.USE ONLY COIL SPRINGMATTRESSES ON BOTH THE UPPERAND LOWER BUNKS. FAILURE TODO SO CAN RESULT IN INJURY.USE ONLY MATTRESSES WHICH ARE 74"75" LONG AND 37 1/2" - 38 1/2" WIDEON UPPER AND ON LOWER BUNKS.ENSURE THICKNESS OF MATTRESS DOESNOT EXCEED 6".That's it! You've finished assembling your triple bunk bed.DO NOT RETURN PRODUCT TO THE STORE.If a part is missing or damaged, contact our customer servicedepartment. We will replace the part FREE of charge.Tel #: 1-800-295-1980NEEDHELP!E-Mail: das@dorel.comCALLFOR ASSISTFax #:US514-353-78191-800-295-1980DO NOT RETURN PRO
MODEL # DL7891TBB / DL7891TBBWCustomer ServicePLEASE DO NOT RETURN THIS PRODUCT TO THE STOREPLEASE CONTACT CUSTOMER SERVICE REPRESENTATIVES AT THE FOLLOWINGNUMBERS SHOULD THERE BE ANY MISSING OR DEFECTIVE PART(S).Customer Service Phone Number 1-800-295-1980Customer Service Fax Number 514-353-7819Email: das@dorel.comRequest Date:Name:Shipping Address:Street & Number:City & State:Zip Code:Day Time Phone Number:(including area code)Date & Place of Purchase:Part(s) description and quantity: (Please be sure to list model number or SKN number)Customer Service Representative Mailing Address:Customer Service Department No. 413, 12345 Albert-Hudon Boulevard, Suite 100, Montreal, QC, Canada, H1G 3L1
CAMAS CUCHETAS TRIPLEModelo No:DL7891TBBDL7891TBBWCODIGO ¡Le damos mucha importancia a la satisfacción de nuestros clientes. Nuestros representantesestán disponibles de lunes a viernes de 8 h a 17 h (hora del este) para responder a todas suspreguntas. Con el fin de acelerar el servicio, por favor tenga a mano el número de modelocuando llame a nuestro número sin coste 1-800-295-1980 o por correo electrónico adas@dorel.com.Para obtener más ideas de muebles inspirantes, visite nuestro sitio web en www.dorelliving.comTambién puede mantenerse informado de todas las últimas tendencias suscribiéndose a nuestrapágina en Facebook.ADVERTENCIAUTILICE ESTEMANUAL PARAENSAMBLAR LACAMASCUCHETASTRIPLEFecha de compra: / /Número de lote:(en la caja)NO DEVUELVA EL PRODUCTO A LA TIENDA. Si falta una pieza o está dañada, contacte nuestrodepartamento de servicio a la clientela. Reemplazaremos la pieza SIN cargo.NOTA: ESTE MANUAL DE INSTRUCCIONES CONTIENE INFORMACIÓN DE SEGURIDAD IMPORTANTE.POR FAVOR, LÉALO Y CONSÉRVELO PARA CONSULTARLO EN EL FUTURO.
SERVICIO AL CLIENTESi faltan piezas o si tiene alguna pregunta sobre este producto, ¡comuníquese con nuestro representante deservicio!LLAME AL 1-800-295-1980También puede pedir piezas escribiendo a la siguiente dirección. Por favor incluya el número demodelo, color y una descripción detallada de la pieza.Departamento de Servicio al Cliente No. 41312345 Albert-Hudon Boulevard, Suite 100Montreal, QuebecCanada, H1G 3L1CORREO ELECTRÓNICO: das@dorel.comADVERTENCIAS****PELIGRO DE ESTRANGULAMIENTO - NUNCA CUELGUE O ATE EN LA CAMA ARTÍCULOS QUE NO ESTÉNDISEÑADOS PARA USARLOS CON LA CAMA; POR EJEMPLO, PERO NO LIMITADO A ESTO, GANCHOS,CINTURONES Y CUERDAS DE SALTAR.SIGA LA INFORMACIÓN DE LAS ADVERTENCIAS INSCRITAS EN LA ESTRUCTURA DE LA CUCHETASUPERIOR Y EN EL CARTÓN. NO RETIRE LA ETIQUETA DE ADVERTENCIAS DE LA CAMA.LA BASE DEL COLCHÓN ESTÁ DISEÑADA PARA SOPORTAR UN COLCHÓN SIN NECESIDAD DE USARUNA TABLA PARA MANTENER LA POSICIÓN O UN SOPORTE CON RESORTES.SIEMPRE UTILICE EL TAMAÑO DE COLCHÓN O DE SOPORTE DE COLCHÓN RECOMENDADO, O LOSDOS, PARA EVITAR LA POSIBILIDAD DE CAÍDAS O QUE EL NIÑO QUEDE ATRAPADO.*UTILICE SOLAMENTE COLCHONES CON RESORTES EN ESPIRAL EN LAS DOS CUCHETAS. EL NO RESPETARESTO PUEDE CAUSAR LESIONES.*UTILIZAR ÚNICAMENTE COLCHONES DE 74"-75" DE LARGO Y DE 37 1/2" - 38 1/2" DE ANCHO EN LALITERA SUPERIOR Y EN LA LITERA INFERIOR. ASEGÚRESE DE QUE EL ESPESOR DE LOS COLCHONES NOSUPERE 6". LA SUPERFICIE DEL COLCHÓN DEBE QUEDAR POR LO MENOS 5" (127MM) POR DEBAJODEL BORDE SUPERIOR DEL MARCO DE LAS CUCHETAS.*NO PERMITA QUE NIÑOS MENORES DE 6 AÑOS DUERMAN EN LA CUCHETA SUPERIOR.**PESO MÁXIMO: 165 LBS (75 KGS) POR NIVEL.SIEMPRE UTILICE LAS BARANDAS EN LOS DOS LADOS DE LA CUCHETA SUPERIOR. SI LA CUCHETAESTÁ COLOCADA CERCA DE UNA PARED, LA BARANDA QUE CUBRE EL LADO LARGO DE LACUCHETA DEBE SER COLOCADA CONTRA LA PARED PARA EVITAR QUE EL NIÑO QUEDE ATRAPADOENTRE LA CAMA Y LA PARED (ESTO SE APLICA A LAS CUCHETAS CON BARANDA LARGA DE UNSOLO LADO).*VERIFIQUE LA CAMA PERIÓDICAMENTE Y ASEGÚRESE DE QUE EL CUADRO, LA ESCALERILLA Y OTROSCOMPONENTES ESTÉN EN LA POSICIÓN CORRECTA, NO ESTÉN DAÑADOS Y TODAS LAS UNIONESESTÉN BIEN AJUSTADAS.*NO PERMITA QUE LOS NIÑOS HAGAN PAYASADAS SOBRE O DEBAJO DE LA CAMA Y PROHIBA QUESALTEN SOBRE ELLA.NO UTILICE PIEZAS DE SUSTITUCIÓN. CONTACTE EL SERVICIO AL CLIENTE PARA OBTENER PIEZASPARA REMPLAZAR.EL USO DE UNA VELADORA SIRVE COMO MEDIDA DE PRECAUCIÓN PARA EL NIÑO QUE UTILIZA LACUCHETA SUPERIOR.***SE PROHIBE EL USO DE COLCHONES DE AGUA O COLCHONETAS DE FLOTACIÓN.*SIEMPRE UTILICE LA ESCALERILLA PARA SUBIR A LA CUCHETA SUPERIOR O BAJAR DE ELLA.*PROHIBA QUE MÁS DE UN NIÑO SUBA A LA CUCHETA SUPERIOR.
*CONSERVE ESTAS INSTRUCCIONES PARA REFERENCIA FUTURA.NOTAS*LEA ATENTAMENTE CADA ETAPA ANTES DE COMENZAR. ES MUY IMPORTANTE QUE CADA ETAPA SELLEVE A CABO EN EL ORDEN CORRECTO. SI ESTAS ETAPAS NO SE SIGUEN EN ORDEN, PUEDENSURGIR DIFICULTADES PARA ARMAR LA CAMA Y CAUSAR LESIONES A LOS NIÑOS QUE LA USAN.*DEBE SER ARMADA POR UN ADULTO.*ASEGÚRESE DE TENER TODAS LAS PIEZAS. TRABAJE EN UN LUGAR ESPACIOSO, DE PREFERENCIASOBRE UN TAPIZ.*SE NECESITARÁN DOS PERSONAS PARA ARMARLA.*LA MAYORÍA DE LAS PIEZAS DE MADERA ESTÁN ETIQUETADAS O MARCADAS DEL LADO RÚSTICO.*SE NECESITA UN DESTORNILLADOR EN CRUZ (NO INCLUIDO).*SE RECOMIENDA EL USO DE UNA MAZA DE CAUCHO (NO INCLUIDA) PARA FACILITAR EL TRABAJO.*LA CAMA ESTÁ DISEÑADA PARA NIÑOS DESDE 6 AÑOS HASTA LA ADOLESCENCIA TEMPRANA.CUIDADO Y LIMPIEZALimpie el polvo regularmente con un paño suave y seco. Se recomienda no usar productosquímicos o cera en nuestros muebles laqueados, ya que se puede dañar el pulido. Mantengasolventes, alcohol, esmalte de uñas y quita-esmaltes lejos de toda superficie de madera de losmuebles.MANTENIMIENTOVerifique los pernos y tornillos periódicamente y ajústelos si es necesario.GARANTÍA LIMITADADorel garantiza que el producto está libre de defectos de material y mano de obra y secompromete a remediar cualquier defecto de este tipo. Esta garantía cubre 1 año a partir de lafecha de compra original. Esta garantía es válida solamente con presentación de una prueba decompra. Esto se limita a la reparación o reemplazo de componentes defectuosos del mueble yno se incluye ningún trabajo de ensamblaje. Esta garantía no se aplica a ningún producto quehaya sido mal armado, sujeto a mal uso o abuso, o que haya sido alterado o reparado decualquier
MANUAL TO ASSEMBLE THE TRIPLE BUNK BED DO NOT RETURN PRODUCT TO THE STORE. If a part is missing or damaged, contact our customer service department. We will replace the part FREE of charge. * * * * * * * * * * * * * * * * PERIODICALLY CHECK A