Transcription
Scheduling: User ManualThis guide describes all features available to normal users in the Scheduling system.
Copyright2014. All Rights Reserved. Reproduction without prior written permission is prohibited, except as allowed under thecopyright laws.Information in this document is subject to change without notice. The software described in this document is furnishedunder a license agreement or nondisclosure agreement. The software may be used or copied only in accordance withthe terms of those agreements. No part of this publication may be reproduced, stored in a retrieval system, or transmitted in any form or any means electronic or mechanical, including photocopying and recording for any purpose otherthan the purchaser's personal use without the written permission of ServiceU.TrademarksACTIVE Network, ServiceUPage 2
Table of ContentsSigning In4Menu and Navigation7Search Drop-down16User Dropdown: User Settings and Preferences21Internal Calendar32Creating an Event34Editing and Canceling Events48Copy Event56Event With a Date Pattern57How to Copy an Event without a Date Pattern60Event Workflow and Approval Process68Event Search and Search Drop-down73Available Resources Search81Resource Grid Report83Resource Form Reports85Support Service Reports89Page 3
Signing InThe My.ServiceU.com system can be accessed through your web-browser, i.e. Internet Explorer, Mozilla Firefox orGoogle Chrome.1. Begin by typing http://my.serviceu.com and press Enter.2. Type the e-mail address registered with my.ServiceU.com.3. Type the password you received in the email notification. If you do not have the password, select forgot password.4. Select Sign In.The system will verify the email address and password entered and the user will be given access to the organization’saccount. If logging in for the first time, users will be asked to change their password to a personal password.lKeep me signed in will bypass the login procedure the next time the user accesses the my.ServiceU.comlogin page and direct the user directly to their Home page.Note: Selecting the Log Out button inside the system or clearing the cookies in the internet browser will disable this feature.lForgot Password? If a user forgets his or her password, it may be retrieved by using this link. Enter theregistered email address in this field and select submit. A new, one-time use password will be sent to the emailaddress entered. This password may be used to access the system one time. The user will then be prompted tochange the password to a personal password that is easier to remember. The password email is sent immediately; however, if it does not appear in the email inbox, please check the spam filter or junk mail folder.Note: All users will be required to change their passwords at regular intervals. Currently, a password change isrequired after one year. This time frame may be adjusted as needed.Page 4
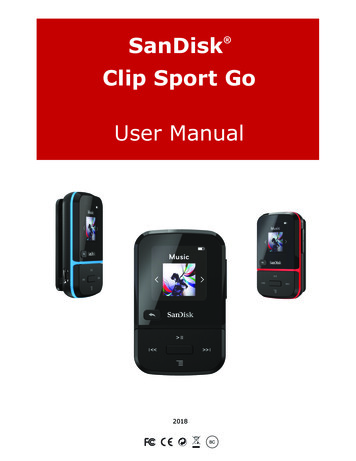
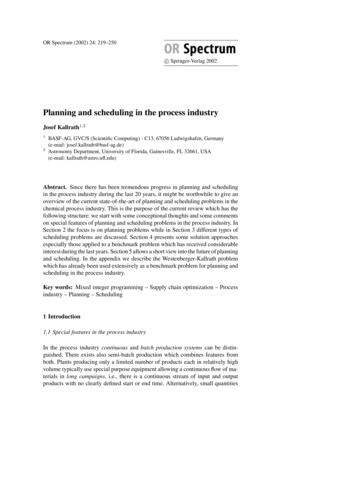
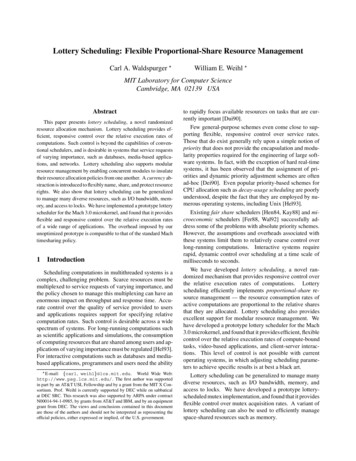
Home PageAfter logging in, the first page that appears is the home page. Each user has a personalized home page that displaysevents according to the user’s settings.The Home Page is divided into three sections for your convenience:lWaiting on Me – This section displays events that require the user to take an action. This can include eventspending the user’s approval or events the user submitted that were rejected by a coordinator.lItems Related to Me – This section displays events the user owns that have recently been modified. Thisincludes events recently created, submitted events pending approval from other users, and recently approvedevents. Users may customize the length of time approved events remain in this area by accessing the UserDropdown menu and selecting ‘Home Page Preferences’.lOther Items of Interest:View Upcoming Items - This page lists events that are somehow related to the specific user. Theseevents include upcoming events the user owns, events associated with the user’s assigned department,and events needing resources and support services that the user is in charge of coordinating. The timeframe of events listed can be specified in the User Dropdown menu under ‘Home Page Preferences’.Page 5
Page 6
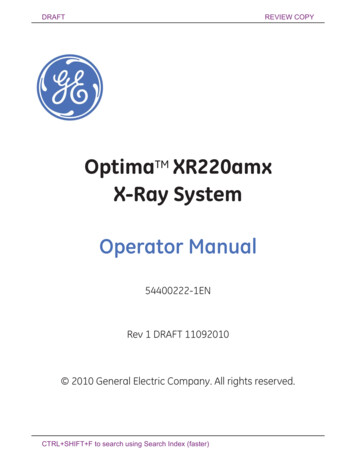
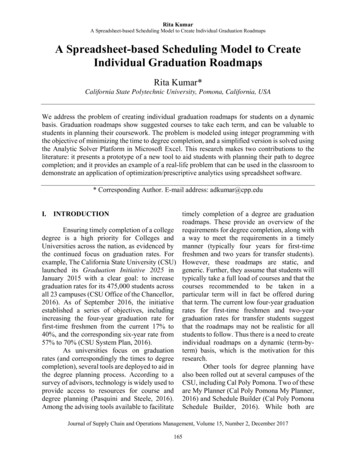
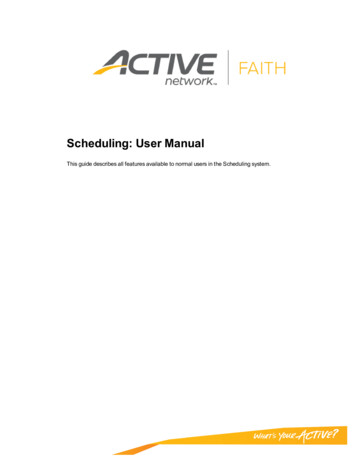
Menu and NavigationNavigation in ServiceU is accomplished using the tabs and action items located at the top of the screen.Tabs – Users will access specific features using the tab menus at the top of the page. Each tab represents a uniqueproduct or feature in the ServiceU system, including Scheduling, Ticketing, Giving, Registrations and Green. Only thefeatures related to the specific product will appear under each tab (i.e. Users will not see any Giving related featuresunder the Scheduling tab).Note: All product tabs will be visible for every organization. The tab will not be accessible if the organization isnot subscribed to a specific product (i.e. Ticketing or Green); the tab will appear grayed out and will not be highlighted when users hover over it.Sub-menu – Users may then access specific action items and reports related to the selected tab using the new Submenu. Each product will contain unique action items, reports, and if applicable, any overlapping features from otherproducts.Breadcrumbs – At the top and bottom of the content section, users will have navigational breadcrumbs. Theseoptions allow for quick access to previous pages or navigating within a single tab.Page 7
Dropdown MenusDropdown menus are also located in the upper right hand corner.If users resize their browser windows, these dropdowns collapse dynamically based on the browser width.Search DropdownThe search dropdown contains both Quick Links and Saved Searches.lQuick links allow users to quickly access specific pages in the system.lUsers are given the option when running an event search or report to save their criteria. Users can select a category (i.e. Reports, Events, Transactions, etc.) to see a list of all related saved searches and/or reports associated with that object.Users may also enter a keyword in the search box to locate an event or payment form by name or confirmation number.Organization DropdownPage 8
The Organization Dropdown gives system administrators access to the Organization level settings. Each option in thisdropdown will direct administrators to an overview page of any settings related to the selected menu.Note: All users will see the Organization Dropdown. However, only System Administrators will have access tothe organization-level settings.If an organization maintains multiple accounts within the system, users may also use the Organization dropdownmenu to switch to another organization account.Note: Users may only switch to an account if they have been created as a user in the account.Financial Administrators may also use the Organization Dropdown to locate and pay the organization’s accountinvoices to ACTIVE network.User DropdownThe User Dropdown allows users to customize their own specific preferences within the system. The User Menufocuses on the user level settings and options, including user password, email preferences, and home page preferences.While the Organization dropdown is used for adjusting organization wide settings, the User Menu focuses on the userlevel settings and options, including user password, email preferences, and home page preferences.Page 9
Users will also use this dropdown to sign out of the system when they are ready to exit. Users may also use the “SignOut” link at the bottom of the content section.TabsIMPORTANT REMINDER: The tabs, action items, and features each user will be able to access is determined by a combination of factors. These factors include the User Level and Role, if a feature is enabled on theaccount and what products the organization is currently using.Home - When users log into the system, they will first be directed to the Home Tab. This page will contain the WaitingOn Me and Items Related to me sections. Users may use this page to view items that may need their approval,review, or items the user has recently created or edited.The Submenu of the Home Tab will allow users to quickly access the options to create new events, new event registrations, and new payment forms.Page 10
Scheduling - The Scheduling tab allows users to access the features related to the Scheduling solution. When goingto the Scheduling tab, users will first be directed to the Internal Calendar view.The Scheduling sub-menu options allow users to create a New Event and if applicable a New Newsletter Messages.Scheduling Reports Dropdown – The reports dropdown will provide users access to all reports related to theScheduling tab including the Event Search, Available Resources, Resource Grid Report, Resource Conflict Report,Resource Setup Form Report, Support Service Form Report, Newsletter Messages and Newsletter Subscribers.Ticketing - The Ticketing tab allows users to manage all things related to Ticketing. Users accessing the Ticketing tabwill first be directed to the Ticketing Overview page from the previous menu.The Ticketing sub-menu provides users a quick way of accessing many of the most common features of the Ticketingsolution. This reduces the need for users to return to the Overview page when navigating to other pages.Page 11
Ticketing Reports Dropdown - The reports dropdown provides access to all ticketing reports, including the EventSearch, Sales Reports, Search Ticket Orders, Review New Orders, Transaction Report, and Batches Report.The Ticket Sales dropdown will provide Ticket Agents and Coordinators quick access to the features needed in managing ticket sales, including In Person Sales, Reserve Tickets, Copy Tickets Reservations, Manage Reserved Tickets,and Scan Ticket Barcodes.Advanced Users will also have access to the event setup tab which will provide ticketing event management relatedoptions, including Ticket Pricing, Ticket Design, Event Info, Venues, Access Codes, and Custom Text.The Advanced Settings dropdown will only be provided to advanced users and will provide access to control organization level ticketing settings, including Ticketing Users, Archive Events, and Ticketing Preferences.Page 12
The Ticketing sub-menu also includes the New Event option for quickly adding a new event and the Internal Box Officeoption. The Internal Box Office option replaces the previous menu for accessing the internal tickets sales page (Tickets Sell).Giving - The Giving tab allows users to access the features solely related to the Giving solution, specifically the features associated with Payment / Donation forms. When going to the Giving tab, users will first be directed to the Payment / Donation Forms list allowing them to more quickly access the forms as needed.The Payment form List will direct users to a view called “Recent and Future”. This view will display all current andfuture payment or donation forms as well as those passed or completed for one month beyond the completion/expiration date.The Giving sub-menu options allow users to create a New Payment / Donation Form from any page in the Giving section.Reports Dropdown – The Reports dropdown provides users access to all giving reports, including Payment/DonationForm reports, the Transactions report, and the Batches Report.Page 13
Registration - The Registration tab allows users to access the features specifically related to Event Registrations.When going to the Registration tab, users will first be directed to the Registration Forms list allowing them to morequickly access registration event details, registration reports, or manually add a registrant to an event.The Registration form List will direct users to a view called “Recent and Future”. This view will display all current andfuture registration forms as well as those passed or completed for one month beyond the completion/expiration date.The Registration sub-menu options allow users to create a New Event with a registration from any page in the Registration section.Reports Dropdown – The reports dropdown provides users access to all reports related to Event Registrations,including Registration Form Reports, the Transactions report, and the Batches report.Green - The Green tab allows system administrators to access the Green admin console which is used to configureresources, devices and schedules related to the Green solution.Note: The Green tab will only be available for administrators of organizations that are subscribed to the Greenproduct.Page 14
Page 15
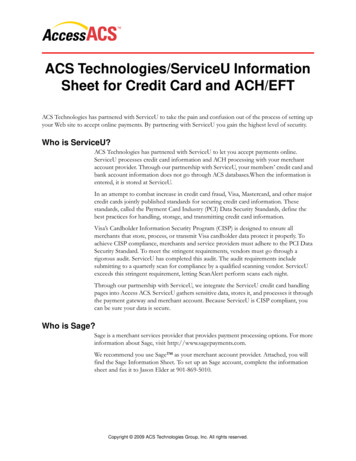
Search Drop-downThe Search drop-down contains the Quick Search feature, Quick Links, Saved Searches, and Saved Reports.Quick SearchThe Quick Search feature allows users to quickly locate an event or payment form.lSearching by Keyword - The search will display any events or payment form that contain the keyword in thename.lSearching by Confirmation Number - The search will return the specific event with the selected confirmation number.The search will display the Event or Payment Form Name, Dates, and event approval status. If there are no matchingresults, users will be given the option of accessing the "Advanced Search" option. This option will take the user to theEvent Search or Payment Forms List.Page 16
Quick Search vs. Event SearchMany users often wonder what the differences are in the Quick Search and Event Search options. The table belowlists the options of each feature in a side-by-side comparison.Quick SearchEvent SearchQuickEventSearchSearchSearch for an event by nameYesYesSearch for a payment formYesNoSearch for an event by confirmation numberYesYesSearch for an event by dateNoYesSearch for an event by Department, Category, or Event OwnerNoYesSearch for an event by Resource or Support ServicesNoYesSearch for an event by Approval Status or Web Display Setting (Public vs. Internal)NoYesCustomize search results into a specific format and include more detailsNoYesDesired SearchNote: To access the Event Search directly, users may go to the Scheduling Tab Reports Event Search.Page 17
Recent SearchesThe Quick Search also allows users to see a list of their most recent searches. This allows users to repeat a searchwithout having to re-enter their search criteria.Quick LinksQuick links allow users to quickly access specific pages in the system, similar to creating a bookmark to a website in anInternet browser.Quick Links are specific to each system user and may be customized using the "Edit Quick Links" link.Note: Because the Search drop-down is accessible from all pages in the my.ServiceU system, quick links cansave users time and effort when they need to access reports, public pages, or other administrative pages. If aPage 18
user accesses a specific report often, it is recommended they create a quick link to the report so that it may beaccessed without the need for navigating to the report each time.Saved Searches & ReportsWhen users run an event search or a report, they are given the option to save their report criteria. The saved information can be used to later run the search or report again without having to re-enter any data. Users can access theirsaved searches or reports from the Search drop-down.Saved Searches and Reports will be divided into categories. Users can select a category to see a list of all relatedsaved searches and/or reports.lEvents - Users can access previously saved searches using the Event Search tool (Scheduling Reports).lLast Search Results - This option allows users to quickly repeat the last Event Search they ran. Thiscan be useful when needing to access the same search information after leaving the results page.Please note: The Last Search Results will only be available while the user is logged into the system.Once the user logs out, the search results will be cleared and the search will have to be run again beforeit is available in the next session. If the search results need to be accessible after logging out and backin, it is recommended the search be saved for future use.lResources - Users can access previously saved Resource Setup Reports (Scheduling Reports).lSupport Services - Users can access previously saved Support Service Form Reports (Scheduling Reports).lRegistrations - Users can access previously saved Event Registration Form Reports.lPayment/Donation Forms - Users can access previously saved Payment / Donation Form Reports.Page 19
lTransactions - Users can access previously saved Transaction Reports (Registrations Reports or Giving Reports).For more information on creating a saved search or report, please see Saving a Report.Page 20
User Dropdown: User Settings and PreferencesThe User Dropdown allows system users to configure their personal settings and preferences. To access the User Dropdown, system users will click on their name in the upper right-hand corner of the system.Note: This dropdown will dynamically expand or collapse based on the internet browser size. If the browser window is narrow, the User Dropdown will collapse into a ‘user’ icon.The options included in the User dropdown allow system users to customize their preferences and access specificinformation related to their user account.AnnouncementsSystem administrators and ACTIVE Network may post organization announcements that will display on the user’shomepage.Announcements will appear in descending order from when they were created, with the most recent announcement atthe top. Important announcements will be denoted with red text.Page 21
Once a user has viewed all current announcements, the New Announcement(s) link will disappear from thehomepage.Users may use the Announcements option in the User Dropdown to review recent organization announcements.Announcements will only remain available for viewing until the message expiration date.Getting StartedThe Getting Started option will direct users to the initial welcome page users see when they sign into the system thefirst time. This page contains several URLs to direct users depending on the task they wish to accomplish.Page 22
My User InformationThe User Information page allows each user to maintain personal information, which will be displayed in the user directory and contact fields for events and forms.Users may edit their Name, Address, and Phone Number.Amount of Time to Stay Logged In - Users may also edit their preferred session duration. This is the amount oftime that the system will keep the user logged in from the last page view.When this limit is exceeded, the user must log in again. If the user closes the Internet browser, the session is immediately terminated. The default setting is 1 hour, but can be extended up to 24 hours.Note: Normal users must contact a system administrator in order to update their email address.Page 23
Home Page PreferencesBy default, any events or forms a system user creates will appear in the Items Related to Me section of theHomepage. These items will remain on the homepage during the approval process and for a short time after itreceives the final approval.Users can adjust the length of time it remains after receiving the final approval using the Home Page Preferences.Forms and events can remain on the homepage for up to 25 days.Note: Not Yet Submitted and Rejected items will remain on a user’s homepage indefinitely until the item isedited or canceled.Page 24
Change PasswordUsers can update their login password at any time using the Change Password option in the User Dropdown.Note: All users will be required to change their passwords at regular intervals. Currently, a password changeis required after one year. This time frame may be adjusted as needed.Page 25
Default “Viewed By” for EventsThe “Viewed By” setting controls if an event is considered an internal event (only displays on the internal calendar) or apublic event (displays on the internal and public website calendar). Users are required to mark each event as internal orpublic.lIf users are scheduling the same type of event, the Default “Viewed By” option allows the user to have the
TableofContents SigningIn 4 MenuandNavigation 7 SearchDrop-down 16 UserDropdown:UserSetting