Transcription
Nikon Back Button AF Guide Steve Perry1
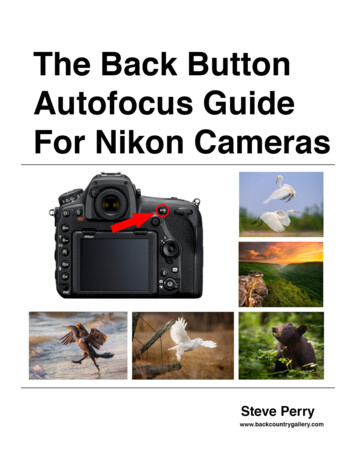
The Back Button Autofocus Guide For Nikon CamerasCopyright 2018 Steve Perry, Backcountry Gallery, LLC.All rights reservedAll photos and illustrations by the author unless otherwise notedhttp://www.backcountrygallery.comBook Version 1.0.1Note: This book is an independent work and not sponsored by orauthorized by the Nikon Corporation in any way. All information ispresented to the best of the author’s / publisher’s knowledge and any andall other liability is expressly disclaimed. Nikon is a registered trademark ofthe Nikon corporation, as are the Nikon referenced names of the camerabodies, accessories, and lenses contained herein. All other trade namesare copyrighted to their respective manufactures. The author / publishershall not be held responsible for any errors, omissions, or damages –however unlikely – caused by following the advice found in this book.Cameras covered:Nikon D5, D4, D4sNikon D850, D800, D810,Nikon D750Nikon D600, D610Nikon D500Nikon D7500, D7200, D7100Nikon D5xxx series, D3xxx seriesNikon Back Button AF Guide Steve Perry1
ForwardBefore we begin, I wanted to thank you for downloading this little guide.This book is designed to not only show you how to set up Back ButtonAutofocus (BBAF), but also, and more importantly, to explain why so manyphotographers find the technique beneficial. We’ll look at why it’s needed,how to set it up, how to use it, and answer tons of questions along the way.In the end, you’ll know everything you ever wanted to know about BBAFand how to get the most from it.Also, note that this publication is only a (very) small adaptation from mySecrets To The Nikon Autofocus System book. The bulk of this guideactually comes from a single chapter that includes not only Back Button AF,but also several other alternative focusing methods.Of course, the full Nikon AF book is 494 pages long so this is only the veryslightest taste of what’s in that publication (about 6% of the information, tobe exact). So, if you like what’s included here, you’ll really enjoy the fullbook. Head to the site and give it a peek - I promise, you’ll like what yousee. And don’t just take it from me, check out the testimonials page too.At any rate, I truly hope you find this little publication useful - and feel freeto share it with anyone you like.Thanks so much and happy shooting!StevePS - If you find this publication useful, all I ask in return is that you share itwith your friends. Thanks!Please share this with your friends!Nikon Back Button AF Guide Steve Perry2
Back Button AutofocusNikon Back Button AF Guide Steve Perry3
Nikon Back Button AF Guide Steve Perry4
So, what is Back Button AF (BBAF) anyway and why does my wife keepreferring to it as “my mistress”?Back Button AF uncouples autofocus from your shutter release and movesit exclusively to a button on the back of your camera. I know, this sounds allstrange and new-fangled, but when you think about it, this is how focusinghas worked for most of our photographic history.After all, before the advent of autofocus, it was up to the photographer toskillfully twist that ring on the end of the lens to make everything in theviewfinder sharp and crispy. Back then, to handle a stationary subject (likemodern AF-S), we’d simply focus the lens, compose, and shoot.If we were photographing action, we’d attempt to focus as the subject wasmoving through the frame, popping off shots when we thought the subjectlooked sharp. Although I must admit, my hit rate for manually focusingmoving targets was about the same as Charlie Brown's for kickingfootballs.At any rate, back in the day, your shutter release had about as much to dowith focus as the government does with spending your tax dollars wisely.And you know what? It worked just fine (focus, not the government).Well, they say everything old is new again. And while I’m still not holdingout any hope for my wardrobe, it certainly does apply to autofocus. BBAFonce again separates AF from the shutter release - the way the cameragods intended.At first, BBAF seems like it sits somewhere between a lateral move and astep backwards. As such you’d be forgiven for thinking the advantages ofthis seem a bit obscure - at first. After all, what difference does it makeanyway? Focus is focus, right?As it turns out, it makes all the difference in the world, and it has everythingto do with AF-S and AF-C. Each mode has a very specific job when usedwith shutter release AF. Once you understand those jobs, you’ll see whyBBAF is so handy.Nikon Back Button AF Guide Steve Perry5
(Note that AF-S and AF-C are discussed in detail in the Secrets To TheNikon Autofocus System Book prior to this chapter. Included below is abrief description to cover what you need to know for BBAF.)Here’s how AF-S and AF-C are typically used with shutter release AF:AF-C - This mode is used for subjects in motion and allows the camera totrack your subject as it moves through the frame. It will always try to focuson anything under the AF point. While it’s great for action, it’s ill-suited for afocus and recompose scenario.The problem is, when you focus and recompose in AF-C mode, youfrequently have something under the AF point that’s not on the same planeof focus as the subject upon recomposition. AF-C will change focus to thisnew spot when you press the shutter release to take the photo.So, you need another mode, AF-S.AF-S - This mode allows you to focus on your subject, and as long as youkeep a half-press on the shutter release, it will keep that focus distancelocked in.This makes it ideal for when you need to focus and recompose since, aslong as you maintain a half press on the shutter release, it won’t refocus onthe background or foreground the way AF-C does.However, the downside is that AF-S will never allow you to track a subjectas it moves through the frame. The second it gets an AF lock, it stopsfocusing and locks in the distance.Also, with AF-S, each time your finger comes off the shutter release youmust re-focus and probably recompose as well. And frankly, life’s too shortfor that sort of nonsense.In short, with shutter release autofocus, AF-C is for moving subjects, andAF-S is best for stationary subjects. When a stationary subject launchesinto motion, you need to switch to AF-C; when a moving subject becomesstationary, it’s best to switch back to AF-S.Nikon Back Button AF Guide Steve Perry6
Remember AF-C for action and AF-S for stills – until BBAF!Of course, switching between AF-S and AF-C and then back to AF-S takesa moment, and it’s easy to miss a once-in-a-lifetime shot while you’refumbling with the camera. That, and what about those times when youforget which mode you've dialed in - you know, like you think you're in AF-Cwhen you're really in AF-S? Talk about frustrating!In fact, let’s look at one of my favorite examples.So, let’s say you’re hiking through the woods one day and happen upon amagnificent owl sitting low in a tree. Well, you’d love yourself a beautifulowl portrait for the wall, so you focus on his eye, recompose, and DRAT!When you move the camera to recompose you notice that it refocused onsome leaves right in front of him. Oops, that’s right, your camera was set toAF-C mode, and the AF point always focuses on whatever is directly underit (pesky leaves this time). Hmm So locking focus on his eye is a no-go.Hey, no worries, you know what to do. So, you switch to AF-S mode,refocus on his eye and recompose. The camera dutifully keeps the focusdistance locked in as your finger sustains a half-press on the shutterrelease. He’s now framed perfectly and you’re just about to nail the shotwhen the owl shifts around and takes off, tired of all your tomfooleries.You try to get a burst of him flying, but guess what? That’s right, you werein AF-S mode and the camera didn’t track him. He’s gone, and your wall isNikon Back Button AF Guide Steve Perry7
stuck with that terrible painting your in-laws saddled you with last Christmasinstead of that awesome owl.Ouch. Here’s a picture of that owl you didn’t get.Of course, if your camera features AF-A mode you may be able to use that,but as I mentioned in the previous chapter, there’s no telling if it would pickthe right AF mode when things start to happen quickly.So, you’re stuck monkeying around with AF modes.Or are you?What if I told you it didn’t have to be that way?What if there was a way to have the best of both worlds, no switchingmodes required?THAT’S where BBAF comes in. With Back Button AF, you have the best ofboth worlds (Continuous Servo/AF-C and Single Servo/AF-S), right at yourfingertips.Nikon Back Button AF Guide Steve Perry8
Here’s how it works.As mentioned, we’ll assign all AF function to a button on the back of yourcamera and totally disable shutter release AF. Once this is done, the onlyway to focus is shoving in the button on the back of the camera.Note # 1 – Some Nikon bodies will have a dedicated AF-On button on theback, for others, you’ll have to assign a button. On Nikon cameras, youusually reassign the AF/ AE Lock button, but I also know people who assignone of the function buttons on the front of the camera (more on that later).The good news is that most Nikons are capable of this.Note # 2 – To keep it simple, from this point forward I’m going to refer towhatever button you use for Back Button focus as the “AF-On button”, evenif you assign the AE/AF Lock button to do your focus bidding.Nikon Back Button AF Guide Steve Perry9
BBAF Setup GuidelinesSetup for BBAF will vary from camera to camera, so I've listed the relevantbodies for each set of instructions. If a section of instructions doesn’tinclude your camera, you can skip over to the next step.Set To AF-C (All bodies)First, make sure your AF Mode is in AF-C. If you don’t, it’ll cripple thebiggest advantage of using this setup.To switch to AF-C, press your Focus Mode Button and spin the maincommand dial (the one on the back of the camera by your thumb). You’llsee the mode change on your LCD and in your viewfinder.Press and hold the Focus Mode Button as you turn the Main Command Dial on the back of thecamera to switch AF Modes.Nikon Back Button AF Guide Steve Perry10
D5xxx & D3xxx users – you’ll need to set AF-C via the main LCD menu onthe back of your camera. Press the “i“ button and head to the Focus Modeoption. Click OK and select AF-C from the resulting menu.AF Priority Selection (All but D3xxx series)Next, set your AF-C priority selection (Custom Settings Menu Autofocus AF-C priority selection) to one of the “Release” modes andNOT to “Focus”. If it’s set to “Focus," you won’t be able to use this methodin a focus-and-recompose situation, and it kind of defeats the wholepurpose of using BBAF.Select AF-C priority selection and then press your Multi selector center button to get to the submenu. From there, choose one of the release modes, never Focus.Nikon Back Button AF Guide Steve Perry11
Next, I’m going to break the instructions down a bit, one set for those with adedicated AF-on button, the next set for those who will need to reassign abutton.Cameras With A Dedicated AF-On Button (D4/s, D5, D810, D850, D500)If you happen to have a dedicated AF-On button, this couldn’t be easier.Head to the Custom Settings Menu Autofocus AF Activation. Onceyou arrive, select AF-On Only and you’re all set. Really, that’s all there is toit.Select AF activation and then choose AF-ON only from the sub-menu. (the main menu item “AFActivation” will read “OFF” when properly setup).Nikon Back Button AF Guide Steve Perry12
No Dedicated AF-On ButtonDon’t have an AF-On button? No worries. We’ll just reassign another buttonto the task. My recommendation is to use the AE-L/AF-L button since it’sconveniently located near your right thumb. However, the otherprogrammable buttons (Fn & Pv) can perform AF-On duty as well.This is a handy option if you’d rather use a button to keep AF on the front ofthe camera, but just not on the shutter release (works the same as usingthe Back Button – more on this soon, including setup).Note that setup varies from camera to camera, so we’ll take them on amore or less individual basis on starting on the next page.Nikon Back Button AF Guide Steve Perry13
D7200 SetupTo program your AE-L/AF-L button for AF-On duty, just head to yourCustom Settings Menu Controls Assign AE-L / AF-L button.Once there hit the Press option and select AF-On from the resulting menu.When you press the option to Assign AE-L/AF-L button, you’ll have an option for just Press –that’s the one you want. On the next menu, select AF-ON and hit the OK button on the back ofthe camera.Next, head to your Custom Settings Menu Autofocus AF Activation.Under this option, select AF-On Only.Nikon Back Button AF Guide Steve Perry14
Select AF activation and then choose AF-ON only from the sub-menu.D7500 SetupThe D7500 uses the new-style Custom Control Assignment menu, so setupis different than any other body at the time of this writing.To assign your AE/AF Lock button for AF-On, head to the Custom SettingsMenu Controls Custom Control Assignment.Getting to the new Custom Controls Assignment menu in the D7500.Nikon Back Button AF Guide Steve Perry15
When you jump into that menu, you’ll see two columns, you want the oneon the left. You’ll scroll down to the option for AE/AF Lock and press that.Note that you can also assign both the Fn1 button and Fn2 button for AFOn duty from this menu as well (we’ll discuss that method in just a bit).Once you’re in the sub-menu, simply select AF-On from the list and pressOK.Select the AE/AF Lock button and then AF-On from the resulting menu.Now, just one last step. Head to the Autofocus section of the CustomSettings menu and select AF Activation AF-ON Only and press OK.That’s it, your D7500 is set to go.Select AF-ON only and you’re finished with the setup.Nikon Back Button AF Guide Steve Perry16
D600, D610, D7000 D5xxx SeriesSetup for your camera is slightly different than what’s been described thusfar. You’ll want to go to your Custom Settings Menu Controls AssignAE-L/AF-L button, and then select AF-On from the resulting menu.That’s it – the camera will automatically switch AF function to the AE/AF-Lbutton and away from the shutter release. Easy!Switching the AE/AF Lock button to AF-On duty on the D6xx and D5xxx series.Nikon Back Button AF Guide Steve Perry17
D750, D7100This is just like the D6xx, D5xxx, and D7000 but there’s an extra menuoption in the middle that allows you to choose from Press or Press command dials (you want “press”).So, you’ll want to go to your Custom Settings Menu Controls AssignAE-L/AF-L Press , and then select AF-On from the resulting menu.Switching the AE/AF Lock button to AF-On duty on the D750 / D7100.That’s it - super easy and you’re all set for Back Button AF!Nikon Back Button AF Guide Steve Perry18
D3xxx SeriesFor the D3xxx series, it’s even easier. Head to your Setup Menu Buttons Assign AE/AF-Lock AF-On. That’s it, you’re ready to go!The D3xxx series doesn’t have a Custom Settings menu, but you can turn on BBAF using theinstructions above.What About AE/AF Lock?I’ve had many people ask, “If I reassign the AE/AF Lock button toautofocus, what do I use for exposure and AF Lock?”The first part is simple, with BBAF, you won’t need AF Lock anymore. As forexposure lock, there are three easy possibilities.1. Simply don’t use it. This option is actually how I roll. I’ve never usedexposure lock (AE-L), so I never miss it. Instead, I either use exposurecompensation in an auto mode (like Aperture Priority) or switch over toNikon Back Button AF Guide Steve Perry19
manual mode. However, everyone has their own style and mine certainlyisn’t the only way to do things.2. Reassign another button. On some cameras, you’ll be able to reprogramanother button to take over the AE-Lock responsibilities. For instance, withmost bodies, you can go to the Custom Settings Menu Controls Assign Fn Button (or Assign Preview Button) Press and choose tohave AE-L activate when you press and hold them. (More on ControlCustomizations in an upcoming chapter.)In the example above, we’re assigning the Pv button, but it works the same for the Fn button.D5/D500/D850 users – I know you don’t have an AE/AF Lock button on theback of your camera, but you can still assign AE-Lock to one of theprogrammable buttons too. Complete info in the upcoming SpecialCustomizations chapter.Nikon Back Button AF Guide Steve Perry20
Note – you may find two or three options for AE-L. The first is AE-lock(hold). The “hold” option allows you to press and release the assignedbutton and the camera will lock in the exposure until the meterdeactivates - or you press the assigned AE-L button again. The exposurestays locked as you shoot. With “AE-L Only,” the exposure is only lockedin for as long as you maintain a press on the button. If you have a D5/D500/D850/D7500, you’ll also have an option called “AE lock (reset onrelease)”. This will hold the exposure only until you take the photo (or themeter shuts off) and then it will reset.3. The other option is simply to assign AE-L to a half-press of your shutterrelease. This option is under the Custom Settings Menu Timers / AELock Shutter-release button AE-L. (On the D3xxx series, you can find itunder the same Buttons menu we used to reassign the AE/AF Lockbutton.) From there, you can turn it on or off.However, note that you're locking exposure every time you’re half-pressingthe shutter, so be careful.Shutter release AE-L is simple to set up via the Custom Setting menu.That’s it, you’re all set.Nikon Back Button AF Guide Steve Perry21
Battery Grips Without AF-On ButtonsSo, what if you have a battery grip on your camera with an AE/AF lockbutton? The first thing you’ll discover after setting up BBAF is that whenyou try to use the button on the grip to initiate focus it doesn’t work.Extremely frustrating if you discover this when you’re on a the cusp ofsnapping a once-in-a-lifetimer.Fortunately, the solution is easy. The grip’s AE/AF Lock button is set upseparately from the one by your thumb.Head to the Custom Settings Menu Controls. Now, look for a settingcalled Assign MB-Dxx AE/AF Lock Button. Note, where you see theorange “xx” above, you’ll see a number on the camera that corresponds toyour battery grip, like MB-D12 or MB-D15 or whatever MB-Dxx grip yourcamera happens to use.Note - these screen caps are from the D7200, but the procedure is the same for any Nikoncamera with a grip featuring an AE/AF-L button. Just note that the number will vary. Forinstance, on a D7200, it’s MB-D15, for a D810, it’s MB-D12.Anyhow, click that option and, on the next page, find the AF-On option.Select that, click OK, and your grip’s AE/AF-Lock button will now autofocusjust like it’s counterpart by the viewfinder.Nikon Back Button AF Guide Steve Perry22
How’s it work?For action, BBAF is just like you’d expect since the camera is already inAF-C mode. Simply get your AF area over your subject and hold in yourAF-On button for as long as you’d like to track. The camera will continue tofocus using your selected AF area as you fill your card with futuremagazine covers!NOTE – People ask all the time if you need to keep pressing the AFbutton as you shoot and track or if you just press it once and thecamera takes over. The answer is that you MUST keep pressing theAF-On button until you’re done with the burst. As soon as you letoff the AF will disengage and tracking will cease.But here’s the real trick.When you need to shoot a static image, you just focus – AND THENRELEASE THE AF-ON BUTTON. Now you can recompose and shoot.As long as you keep your finger OFF of the AF-On button, the lens won’trefocus, effectively keeping it “locked in” at whatever distance it was thelast time you pressed AF-On.This is like using Single Servo (AF-S) with shutter release AF - only youdon’t maintain a half-press on the button once you achieve focus. (Note –this isn’t to say the lens will automatically refocus if the subject moves. Youmust push the AF-On button again to reacquire focus as needed).The only downside for some people is that they like the confirmation beepthey get in Single Servo AF and since we’re in Continuous Servo, thecamera will remain silent even when you lock on. (The reason for this isthat the camera beeps every time it gets confirmed focus. Well, thishappens and re-happens constantly while tracking a subject, so the camerawould constantly squeal if the beep function were allowed in AF-C.)Nikon Back Button AF Guide Steve Perry23
BBAF made it easy to keep up with this active cub. I had AF-C when he was on the move andcould quickly shoot and recompose when he decided it was time to be adorable again.Let's look at the advantages:1. You have more control. With the standard setup of autofocus on theshutter release, every time you take your finger off that button and then putit back on again, the camera must refocus. If you do a lot of focus,compose, and shoot, then every time your finger comes off the release, youmust go through that process again, since the camera is going to want tofocus again. Arrgh – that’s no way to live!With Back Button AF, you focus once, and when you take your finger off theAF-ON button, the focus distance is “locked” in. Now you can take a seriesof shots without worrying that your camera is constantly refocusing in theNikon Back Button AF Guide Steve Perry24
wrong place just because your finger had the audacity to wander off therelease between shots.2. It's great for action - Back Button AF gives you a LOT of flexibility in anaction situation. See, with Back Button AF, as long as you're pressing theAF-On button, the camera is attempting to focus.If the subject stops and you want to take a second to get critical focus onthe eye, just focus on that spot and then release your AF-On button. Thefocus is set at that distance until you press the AF-On button again. If theaction starts again, or the subject moves, just press the AF button toreacquire focus or start tracking.It’s like a combo of single and continuous AF that allows you to reactinstantly to any situation.Many photographers, myself included, believe that there’s simply no better way to captureaction than BBAF!Nikon Back Button AF Guide Steve Perry25
3. It’s great for stills - I know, people generally associate BBAF with action,but it can help with landscapes, cityscapes, or any type of photographywhere your subject is motionless. Let me give you an example of how I didlandscapes with shutter release AF vs. how I do it with BBAF:The bad old way for me to focus a landscape was to use AF-S, as Nikonintended. So, I would focus, recompose, and then turn off autofocus.Why?Simple – when I recomposed the shot, it moved my AF point to a newlocation – a location that I didn’t want the camera to focus on. Sure,sometimes I could just move the AF point to where I wanted it, but in mostcases I needed to recompose.With AF-S, I would need to hold my finger at a half-press while I took myphotos to lock in the focus. If you’re bracketing or even taking multipleimages over a period of time, this gets old really fast! So, by turningautofocus off, I could prevent the lens from refocusing - effectively “lockingin” the focus - so I didn’t have to keep that half-press on the shutter releasefor the duration. (I could also press the AE/AF Lock button prior to pressingthe shutter release, but that’s easy to forget.)With BBAF, it’s far simpler. I decide where I want the focal point located inthe scene, hover my AF point over it, and press the Back Button to focus.Now, I can recompose and not worry if the AF point is in the wrong place. Idon't have to agonize about the camera refocusing because I was in AF-Smode. This way, I focus, take my finger off the button, and my focusdistance stays right where I want it.Nikon Back Button AF Guide Steve Perry26
In this image, my focus point was on the foreground trees. However, none of my AF points wereover that location, so I had to focus and recompose. Using BBAF made this easier since I didn’thave to hold a half-press of the shutter release as I photographed the changing clouds over thecourse of ten minutes or so (although the light in this photo only lasted a few moments).Now, what do you say we try that owl example again, this time using ourAF-On technique?So, we have our owl on a branch and we’re working on a nice portrait toreplace that horrible painting we mentioned earlier. We put the AF sensoron his eye, focus, and release our AF-On button. Now, we recompose andnotice that, once again, the AF point is over some foreground leaves.However, that doesn’t bother us one little bit. As long as we keep our fingerOFF the AF-On button, the focus distance we set when we focused on hiseye stays locked in. If he moves, we simply focus on his eye again. Nailedthe shot.Once again, he decides to take flight, only this time you don’t have to worryabout switching AF modes. Simply mash down on the AF-On button andyou’re instantly tracking his flight. Now you have two wall-hangers.Congrats!Nikon Back Button AF Guide Steve Perry27
Not an exact match for our hypothetical scenario, but BBAF constantly helps me get shots likethis. Just prior to capturing this image, I was taking portraits of the owl as she sat on the fencepost. When she took flight, I instantly started tracking her and grabbed the action as she took offand flew away.I’ll admit, on paper, the difference may seem subtle, but I can’t tell you thenumber of action shots this method has enabled me to put on my cards. Ino longer think about whether I’m shooting action or stills or if I need AF-Sor AF-C. With Back Button AF at my disposal, I can do both – instantly. Oneless thing to worry about is always a plus if you ask me!Also, I've received thousands of comments and e-mails over the years frompeople who switched and just couldn’t believe the impact it had on theirphotography. So, if you’re hesitant to try it, remember there are thousandsof people out there who took the plunge and discovered it’s a far better wayto shoot than shutter release AF – at least for them.By the way, the first time you use this you may find that it seems moreawkward than a middle school dance. Don’t worry, that’s normal. It IS goingto feel odd for a few weeks and you will initially miss some shots.Nikon Back Button AF Guide Steve Perry28
My advice is to go somewhere and photograph something that doesn’tmatter much to you. Just pick a place that gives you the chance to shootsomething easy that varies from moving and stationary. My suggestion?Find a beach or waterfront area covered with seagulls. You’ll have a blastas they fly around and you'll be comfortable with BBAF in no time.(NOTE – I also have a free video about this on YouTube which may helpexplain if you’re still not sure. You can find it here.)Of course, BBAF isn’t for everyone and there are some downsides.The first is if you’re left-eye dominant. In that scenario, your left eye is atthe viewfinder while the knuckle of your right thumb attempts to dislodgeyour right eyeball.The second disadvantage is that you can’t switch AF points as quickly.Since your thumb needs to find either the Multi selector pad or the littleJoystick (if equipped), you’ll need to temporarily give up focusing to makean AF point switch. In practice, I don’t think I’ve missed many shotsbecause of this, but there are times I have considered having anotherthumb added to my right hand, creepy or not!Back Button AF - Frequently Asked QuestionsWhich Is Faster – Shutter Release AF or Back Button AF?I get this question quite frequently, and I wanted to make sure I address ithere. Many people notice an “increase” in AF performance when theyswitch to BBAF (either with the Back Button or the Pv/Fn button).However, I want to make this perfectly clear – there is NO increase inthe performance of your AF system just because you switched focus to adifferent button.The camera’s AF system remains the same as it was. Now, there may be adifference in YOUR performance – you may be faster with one method overanother, but the speed of the AF system is the same. So, even if you’reNikon Back Button AF Guide Steve Perry29
using the traditional shutter release AF system and switching back andforth between AF-S and AF-C as needed, you’re not losing any AF speedbecause of it – at least not from the camera.How is VR Activated With BBAF?The answer to this is going to depend on your camera. If you have a newerNikon body (like the ones covered in this book), pressing your AF-Onbutton (dedicated or assigned) will activate VR when pressed. For oldercameras, it’s only activated with a half-press of the shutter release.However, don’t let that stop you if you're using an older body!I was using VR and BBAF long before the AF-On button activated VR. It'sreally not that tough since when you're about to take a photo, you'reprobably half-pressing the shutter release anyway. Again though, not aproblem for newer bodies.What about using AF Areas? Like d9, d21, Group, or 3D tracking?No worries – it works exactly the same as if you were using your shutterrelease for AF. (We’ll discuss these AF Area modes in the next chapter.)For now, just keep in mind that the camera doesn’t care where the AFcommand input comes from (AF button or shutter release), everything willwork the same as it did before.What about using a cable release with BBAF?This one is tricky. Most Nikon cable releases will allow for both a half-pressto focus and a full-press to release the shutter. However, the cable releasewill mimic how you have your shutter release set up.So, if you have Shutter Release AF enabled, the cable release will focuswith a half-press. If you have BBAF setup, then the half-press will activatethe meter and such, b
Secrets To The Nikon Autofocus System book. The bulk of this guide actually comes from a single chapter that includes not only Back Button AF, . biggest advantage of using this setup. To switch to AF-C, press your Focus Mode Button and spin the main command dial (the one on the back of the camera by your thumb). .