Transcription
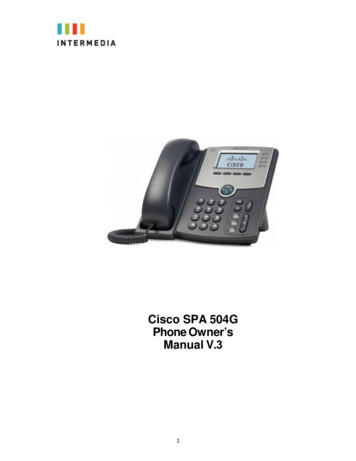
Cisco SPA 303Phone Owner’sManual V.31
1Introduction . 7Using this Document . 7Typographical conventions . 7Special messages . 7Definition . 7Basic Requirements . 82Using Your Hosted PBX phonesystem . 7System Description . 7Getting Started . 7Introduction to your Cisco Desk Phone . 7Before You Use Your Phone. 7Soft key Buttons your Cisco Phone. 8Information Screen . 10Main Menu Screen: . 11Adjusting the Volume . 113Desk Phone– Basic CallFeatures . 12Placing Calls . 12To place a call using the handset: . 12To place a call using Hands-Free Speakerphone mode: . 12To place a call using the headset: . 12Placing a second call . 13Method 2 . 13Answering Calls . 14To answer a call using the handset: . 14To answer a call using Hands-Free Speakerphone mode: . 14To answer a call using the headset: . 14Inbound Caller ID . 14Ending Calls . 15Forwarding Calls . 15Static Forwarding . 15Call Management Features . 17Conferencing Calls . 17Splitting Conference Calls . 18Ending Conference Calls . 18Transferring Calls . 19Performing a Consultative (Warm) Transfer. 19Performing a Blind Transfer . 19Call Transfer to Voicemail . 20Using Network-based Call Transfer. 20Call Park . 20Paging (Intercom) . 21Redial . 21Mute . 22Directed Call Pickup . 22Directed Pickup . 22Any Call Pickup . 22Group Pickup. 22Call Recording . 224Managing IncomingCalls . 23Rejecting Calls . 235Using Voicemail . 24Setting up the voicemail box for the first time . 242
Retrieving messages from your Desk Phone . 24Retrieving messages when you are away from the office. 25Returning a Call . 25Change your Voicemail PIN . 25Record a Personal Greeting via the Phone . 25Forward Voicemail Messages via the Phone . 26Logging into your Voicemail Box via the Web . 26Retrieving messages via the Web . 26Forward Voicemail Messages via the Web . 27Voicemail Notification via Email. 29To Create a Voicemail Group . 30Change the Number of Rings Before Voicemail Picks Up . 316Call Lists and Directories . 32Managing Call Lists . 32Managing Contacts . 33Adding Contacts . 33Adding Contacts Manually . 33Adding Contacts From Call Lists . 34Editing Contacts . 34Deleting Contacts . 35Placing Calls to Contacts . 36Searching for Contacts . 367Customizing yourPhone . 37Configuring Basic Settings . 37To configure the time and date formats: . 37To Adjust the Display contrast: . 38Selecting the Ring Type . 38To change the incoming ring type: . 38Changing the Language . 398InstallationOverview . 40Before you Begin Your Installation. 40Assigning Extension Numbers and Phone Numbers to Phones . 42Understanding Extensions and Lines . 429Installing your Hosted PBXPhone . 43Installing Desk Phones . 43Option 1: Connect Desk Phones using your existing data network. 43Option 2: Connect Desk phones using your existing data network then connect the phones to yourcomputer . 44Connecting Wired and Wireless Headsets . 45Installing the Desk Phone Wirelessly . 46Step 1) Installing the Wireless Transmitter . 46Step 2) Connect phones wirelessly (within 40’) using the Wireless Adapter . 46Note . 46Activating the Service . 46Conformance . 48Important Safety instructions . 48FCC Information . 50Customer Owned Coin/Credit Card Phones . 50Data Equipment . 50Systems . 50Automatic Dialers . 51Toll Restriction and Least Cost Routing Equipment . 51Equal Access Requirements . 51Electrical Safety Advisory . 513
Radio Interference . 51RF Radiation Exposure . 52Modifications. 524
1IntroductionCongratulations on purchasing the Intermedia Hosted PBX phonesystem and service. You will now be able to share your phoneconnection between fixed & wireless handsets and across multiplelocations using the latest in ‘Voice over IP’ services.This User Guide will show you how to setup and use your newPBX phone system and service.Using this DocumentNotational conventionsAcronyms are defined the first time they appear in the text. Theterm LAN refers to a group of Ethernet-connected computers atone site.Typographical conventionsItalic text is used for items you select from menus and drop-downlists and the names of displayed web pages.Bold text is used for text strings that you type when prompted bythe program, and to emphasize important points.Special messagesThis document uses the following icons to draw your attention tospecific instructions or explanations.NoteDefinitionWARNINGProvides clarifying or non-essential information on the currenttopic.Explains terms or acronyms that may be unfamiliar to manyreaders.Provides messages of high importance, including messagesrelating to personal safety or system integrity.5
Basic RequirementsThe Hosted PBX phone system is designed to use your existingbroadband data connection as well as the existing data wiring inyour office. Where you don’t have data wiring, you may use theoptional Wireless Transmitter and Wireless Adapters to connectDesk Phones wirelessly.In order to use all the features of the Hosted PBX phone systemand service, you must have the following: Broadband Internet access At least one free port on your router or modem/router Your router must be set to DHCPInstallation Instructions are located on page 43 of this guide.Note6
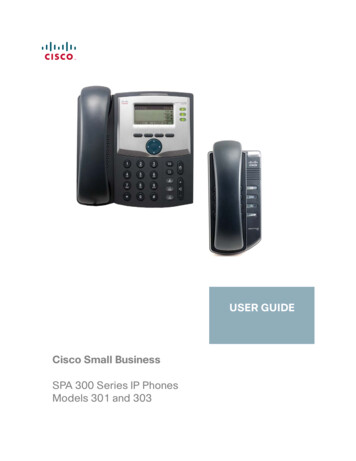
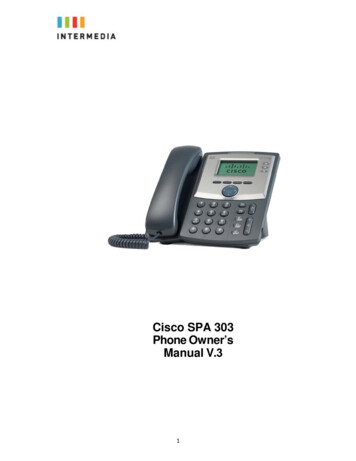
2Using Your Hosted PBX phone systemSystem DescriptionThe Hosted phone system supports up to 100 phones You can have as few as one phone at an addressCordless phones can be used in conjunction with Desk Phonesor can be installed stand aloneThrough your Admin Portal, you can view information and makechanges to phone systemGetting StartedThis section of your Owner’s Manual is your guide to using the PBX phonesystem and its features. It also explains how to program system settingsfor your Desk Phones.Introduction to your Cisco Desk PhoneThe Cisco SPA 303 Desk Phone provides a powerful, yet flexible IPcommunications solution, delivering excellent voice quality. The highresolution graphic display supplies content for call information, directoryaccess, and system status. The phones support advanced functionality,including multiple call appearances, HTTPS security and a suite ofbusiness phone features.Some system settings are programmed through your Admin Portal websitewhile others are programmed through the phone.Before You Use Your PhoneThe image below and table describe the various feature buttons of yourphone.7
Button1234HandsetDescriptionPick up to place or answer a callMessage Waiting Displays solid red when you have anew voicemail message. Blinks redIndicatorduring an incoming callIP PhonescreenLine keysDisplays date and time. Phone stationname, line extensions, and soft keyoptionsIndicates phone line status.Green: Line is idle.Red (steady): Line is active or in use.Red (flashing): Line is on hold or there isan inbound call.Orange: Line is unregistered (cannotbe used).5Soft keyButtons8Press a soft key button to perform theaction shown on the label of the IP phonescreen.Note: The Cisco SPA 303 has thefollowing four buttons:Redial - Dials the last number called.Dir - Accesses the Directory.Cfwd – Forwards all calls.Dnd – Do Not Disturb
6Navigation button Press an arrow key to scroll left, right,up, or down through items shown on theIP phone screen7Messages button Press to access voice mail.8Hold Button9Setup butto
Congratulations on purchasing the Intermedia Hosted PBX phone system and service. You will now be able to share your phone connection between fixed & wireless handsets and across multipl