Transcription
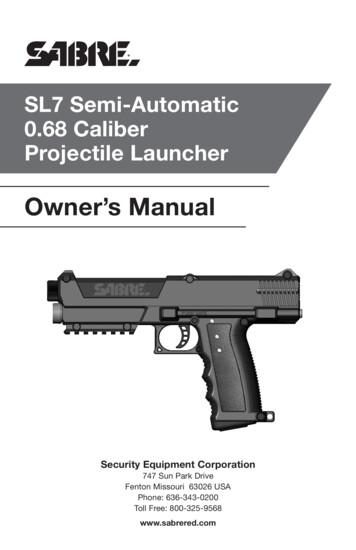
SL7 Semi-Automatic0.68 CaliberProjectile LauncherOwner’s ManualSecurity Equipment Corporation747 Sun Park DriveFenton Missouri 63026 USAPhone: 636-343-0200Toll Free: 800-325-9568www.sabrered.com
SL7 Projectile LauncherSecurity Equipment Corporation747 Sun Park DriveFenton Missouri 63026 USAPhone: 636-343-0200Toll Free: 800-325-9568www.sabrered.comCONGRATULATIONS on your purchase of a SABRE SL7 Launcher. Your SL7 willprovide many years of dependable service if cared for properly. Please take timeto read this manual thoroughly and become familiar with your SABRE SL7 parts,operation, and safety precautions before you attempt to load or deploy this SL7.This manual should be used as a reference when performing routine maintenance.If you need assistance, please contact SABRE Customer Service at 636-343-0200 ortoll free at 800-325-9568 for fast, friendly service.TABLE OF CONTENTSLimitations and Usage.4Warning/Liability Statement.4SAFETY IS YOUR RESPONSIBILITY.5Getting Started.61. CO2 Cartridge Installation.72. Removing the Magazine and Loading.73. Deploying/Shooting the SL7.84. Unloading the Magazine.8Velocity Adjustment.9CO2 Cartridge Removal.9Removing an Unused CO2 Cartridge (Non-Punctured).9Removing a Used CO2 Cartridge (Punctured).10Release Pressure from a SL7 that Will Not Deploy.10Troubleshooting.11Cleaning & Maintenance.11Storage .12Specifications.12Warranty and Repair Information .13Limited Warranty.13Warranty and Non-Warranty Repairs.14
WARNINGTHIS SL7 PROJECTILE LAUNCHER IS NOT A TOY, AND ISINTENDED FOR PERSONAL AND HOME DEFENSE (WHERE LEGALLYPERMITTED), MILITARY, LAW ENFORCEMENT, CORRECTIONALOFFICERS, PRIVATE SECURITY GUARDS, BAIL ENFORCEMENTAGENTS, AND OTHER AUTHORIZED PERSONNEL. MISUSE MAYCAUSE SERIOUS INJURY OR DEATH. READ THIS OWNER’S MANUALBEFORE USING THIS PRODUCT. THIS LAUNCHER DISCHARGESPROJECTILES FROM THE BARREL.SAFETY IS YOUR RESPONSIBILITY!READ AND FAMILIARIZE YOURSELF AND ANYOTHER USER OF THIS LAUNCHER WITH THESAFETY INSTRUCTIONS IN THIS MANUAL.FOLLOW THESE INSTRUCTIONS WHEN USING,MAINTAINING, TRANSPORTING, OR STORINGTHIS LAUNCHER. EXCEPT WHEN USING THESL7, ALWAYS MAKE SURE THAT THE TRIGGER SAFETY (ARROW)IS IN THE SAFE POSITION.NEVER USE INDOORS UNLESS PROTECTING YOURSELF OR YOURFAMILY AGAINST AN INTRUDER. ALL TRAINING AND PRACTICEMUST TAKE PLACE OUTDOORS AND AGAINST A STRUCTURESUCH AS A CONCRETE OR BRICK WALL. PROJECTILES CANTRAVEL OVER 200 FEET (61 METERS). TO PREVENT INJURIES ORPROPERTY DAMAGE, NEVER DEPLOY AT PEOPLE OR OBJECTSDURING TRAINING. ONLY DEPLOY AT THE PRACTICE TARGET THATHAS BEEN SECURED TO A CONCRETE OR BRICK WALL. NEVERDEPLOY A LIVE ROUND DURING TRAINING.SAFETY INSTRUCTIONS ARE ON PAGE 5.3
Limitations and UsageThere are some state and local limitations on purchase, possession and use of theSL7. Verify local legal requirements in your state and city to ensure possession anduse are proper. The user assumes the liability from unsafe or improper use or anyaction which constitutes a violation of any applicable law or regulation.The SL7 Launcher may be prohibited from certain premises, including governmentbuildings, airports, courthouses, schools, or other public spaces. Possessing a SL7in a prohibited area may subject user to criminal liability.Warning/Liability StatementIf misused, this SL7 Launcher can cause serious injury or death. The Launcher issurrendered by Security Equipment Corporation (“SABRE”) with the understandingthat the purchaser assumes all liability resulting from unsafe handling or any actionthat constitutes a violation of any applicable laws or regulations. SABRE shall notbe liable for personal injury, loss of property or loss of life resulting from the use ofthis weapon under any circumstances, including intentional, reckless, negligent oraccidental discharges.All information contained in this manual is subject to change without notice. SABREreserves the right to make changes and improvements to products without incurringany obligation to incorporate such improvements into products previously sold.If you as a user do not accept liability, SABRE requests you do not use a SABRELauncher. By using this projectile Launcher, you release SABRE of any and all liabilityassociated with its use.4
SAFETY IS YOUR RESPONSIBILITY!WARNINGExcept when your Launcher is in use,always make sure that the trigger safetyis in Safe mode.To turn ON the Trigger Safety (Safemode), push in the safety (see arrow)as shown.To turn OFF the Trigger Safety (Fire mode), push in the safety fromthe opposite side of the receiver.By purchasing this Launcher, you assume total responsibility for its safe and lawfuluse. You must observe the same precautions as you would with any firearm toassure the safety of yourself and everyone around you. The operator should usecaution at all times when using, maintaining, or otherwise handling the Launcher.This Launcher cannot be sold to minors, convicted felons, those convicted of amisdemeanor crime of domestic abuse or chemically dependent. MUST be 18 andhave no legal disabilities to order. D o not load or deploy this Launcher until you have completely read thismanual and are familiar with its safety features, mechanical operation, andhandling characteristics. Handle the Launcher as if it were loaded at all times. Keep your finger off the trigger until ready to shoot. Do not look down the barrel of the Launcher. Accidental discharge into theeyes may cause permanent injury or death. K eep the Launcher in Safe mode until ready to use (see Warning message above). Never point or discharge the Launcher at anything you do not intend to shoot. Always keep the muzzle pointed down or in a safe direction, even if youstumble or fall. Never launch at the head, face, eyes, ears, throat, or spine. We recommending loading the Launcher only when it will be immediately used. Do not disassemble this Launcher while it is pressurized with air supply. Do not pressurize this Launcher while it is disassembled. Keep exposed skin away from escaping gas when installing or removing theair cylinder, or if the Launcher or air supply is leaking. Use only SABRE projectiles in this Launcher - never load or shoot foreignobjects. The use of any other projectile in the Launcher may result inproduct malfunction or failure, and voids all warranties. SABRE accepts noresponsibility for product performance or results should the Launcher be usedwith any projectile(s) other than SABRE projectiles.5
Getting Started o not pressurize a partially assembled Launcher.D Read each step completely before performing the step. Review the image below to familiarize yourself with the location of SL7 features. For more information and instructional videos on how to use and maintainyour SABRE SL7 Launcher, visit www.sabrered.com/launcher-warranty.Picatinny RailMagazineWindowsTrigger eep exposed skin away from gas escapepoints (arrows) when installing or removinga CO2 cartridge, or if the Launcher isleaking. CO2 gas is very cold, and cancause frostbite under certain conditions.WARNING: 12 Gram CO2 CartridgeContents under pressure. The 12 gram CO2 cartridge is not a toy.Once punctured, shoot until all cartridge gas is used. Once punctured,the cartridge will leak air until it is completely empty within a 24-hourperiod. Do not transport pressurized CO2 cartridges by air. Do not refillthis cartridge. Do not alter or modify this cartridge in any way. Do notmanipulate or incinerate. Do not expose to heat or store above 120 F(49 C). Improper use, storage, or disposal of this CO2 cartridge may resultin personal injury, property damage, and/or death. Keep CO2 cartridgesaway from children. Not for human consumption. One time use only.6
1. CO2 Cartridge InstallationDo not pressurize a partially assembled Launcher.a. Put the Trigger Safety in Safe mode (see page 5).b. R emove the CO2 Cap. This CO2 Cap has asafety feature. You must push in while turningthe CO2 Cap counterclockwise until it stops.Next, pull the CO2 Cap outward and turncounterclockwise again until it stops. The CO2Cap can now be removed from the Launcher.c. Insert the small end of the cartridge into the Launcher.d. R eplace the CO2 Cap. Align the CO2 Cap’s tabs withthe slots, push in on the CO2 Cap and turn clockwiseuntil it stops. Push in on the CO2 Cap a second timewhile turning the CO2 Cap clockwise.NOTE: The CO2 cartridge is not punctured during installation. Once you move theTrigger Safety to Fire mode, the first pull of the Trigger punctures the CO2 cartridge.You can hear the CO2 cartridge pressurize the Launcher. Your Launcher is now ready todeploy on the next Trigger pull. Each 12 g cartridge will deploy at least 14 shots beforelosing full power. Do not store your Launcher with a punctured CO2 cartridge. Oncepunctured, a CO2 cartridge will leak air until it is completely empty within a 24-hourperiod. If you wish to store your Launcher ready to deploy, you can keep an unpuncturedcartridge in the Launcher. When you need to use the Launcher, remember that thefirst trigger pull punctures the cartridge and the next trigger pull deploys a round.IMPORTANT: If your Launcher begins to leak gas, keep exposed skin away from theescaping gas (the arrows in the WARNING illustration on page 6 show gas escapepoints) and follow CO2 Cartridge Removal instructions on page 9 and then go toTroubleshooting on page 11.NOTE: If your Launcher does not shoot after you have loaded and punctured yourCO2 cartridge, put the Trigger Safety back into Safe mode (see page 5) and go toTroubleshooting on page 11.2. Removing the Magazine and LoadingThe Trigger Safety must be in Safe mode (see whitearrow at right and also see page 5).a. To remove the Magazine, push in the MagazineRelease button and the Magazine ejects outMagazine Releasethe bottom of the grip.b. T he Ball Carrier inside the Magazine has two tabs,one on each side of the Magazine. To load the Magazine,push down on the Ball Carrier tabs until the Ball Carrier locksin place near the bottom of the Magazine. (It automaticallyreleases when inserted into the Launcher.)c. Keep the Magazine vertical as shown and insert one roundat a time into the top of the Magazine. The Magazine holdsseven rounds. Rounds in the Magazine are not under springpressure until the Magazine is inserted into the Launcher.7BallCarrierTab
d. To insert a loaded Magazine into theLauncher, slide the Magazine into thegrip until you hear it lock into place.Change the Trigger Safety to Firemode only when you are ready toshoot. The Magazine Windows allowyou to see when you are lowon rounds in the Magazine.MagazineWindows3. Deploying/Shooting the SL7Point the Launcher in a safe direction. Move the Trigger Safety from Safe mode toFire mode. If the CO2 cartridge has not been punctured, the first trigger pull willpuncture the cartridge. Pull the Trigger to deploy the Launcher. Each pull of theTrigger fires one round.4. Unloading the MagazineBreech Windowa. Push the Magazine Release button torelease the Magazine from the SL7 grip.When removing the Magazine, two looseMagazine Releaserounds might drop from inside the grip.b. I nspect the breech chamber for a round.NEVER look down the barrel of theLauncher. The Breech Window (black arrowat right) on top of the receiver providesa way to check for a round in the breechchamber. Point the Launcher in a safedirection and pull the trigger (dry fire) toclear the Launcher of any remaining rounds. Put the Trigger Safety in Safemode (see page 5).WARNINGNot seeing a round in the Breech Window does not indicate that theLauncher is unloaded or safe.c. Push the Magazine’s Ball Carrier down until it locksinto place (see step 2.b.) to take pressure off anyremaining rounds in the Magazine. You can thenreload any loose rounds back into the Magazine.d. T o remove all rounds from the Magazine, pressdown on the top of the Carrier Release Armaturewith a flat object, and any remaining rounds arepushed out the top of the Magazine.8Pressdownhere on theCarrierReleaseArmature
Velocity AdjustmentSABRE does not recommend making any changes to the velocity, and the useraccepts all liability for any adjustments made to the SL7.NOTE: This Launcher has a self-adjusting Regulator Pressure Relief Valve that ventsexcessive CO2 pressure that could damage your Launcher and is factory set at350 psi. It vents excessive gas pressure out the access point.CO2 Cartridge RemovalWARNINGKeep exposed skin away from gas escapepoints (arrows) when installing or removinga CO2 cartridge, or if the Launcher isleaking. CO2 gas is very cold, and cancause frostbite under certain conditions.Eye protection must be worn by the user.Do not store the SL7 with a punctured CO2 cartridge installed. You may store theSL7 with an unpunctured CO2 cartridge installed.Do not disassemble the Launcher with the CO2 cartridge (punctured or unpunctured)installed. We never recommend disassembling the Launcher.Read each step completely before performing the step.Removing an Unused CO2 Cartridge (Non-Punctured)1. Put the Trigger Safety in the Safe mode (see page 5).2. Press the Magazine Release button and the Magazine ejects out of the grip.NOTE: When removing a loaded Magazine from the Launcher, two loose roundsmight drop from the grip. Pull the Magazine’s Ball Carrier down until it locks to takespring pressure off the rounds, and reload any loose rounds back into the Magazine.3. Keep the Launcher pointed in a safe direction, and remove the CO2 Cap.a. Push in and turn the CO2 Cap counterclockwise until it stops. Then pull outuntil it stops to partially unscrew the cap. NOTE: The cap should be easyto turn; if you are unable to turn it, or if it is difficult to turn, the cartridgehas been punctured and you must follow the instructions Removing a UsedCO2 Cartridge (Punctured).b. T urn the CO2 Cap a second turn counterclockwise until it stops and pull itout. The CO2 cartridge will then slide out.4. Replace the CO2 Cap. Align the cap pins with the pin guides. Push the cap inand turn clockwise. Push the cap in a second time and turn clockwise.9
Removing a Used CO2 Cartridge (Punctured)NOTE: A punctured CO2 cartridge must be emptied before it is removed.1. Put the Trigger Safety in Safe mode (see page 5).2. Press the Magazine release button and the Magazine ejects out of the grip.NOTE: When removing a loaded Magazine from the Launcher, two loose roundsmight drop from the grip. Push the Magazine’s Ball Carrier down until it locks to takespring pressure off the rounds, and reload any loose rounds into the Magazine.3. Go to a safe firing area.4. Point the Launcher in a safe direction, move the Trigger Safety to Fire mode,and fire until there is no CO2 left in the cartridge. NOTE: If you have apunctured cartridge in your Launcher and the Launcher will not deploy, followthe instructions below, Release Pressure From a SL7 That Will Not Deploy.5. Put the Trigger Safety in Safe mode (see page 5).6. Visually inspect the chamber for rounds through the Magazine opening at thebottom of the grip.7. Keep the Launcher pointed in a safe direction during CO2 Cap removal.a. Keep exposed skin away from escaping CO2 - the arrows in the WARNINGillustration on page 9 show CO2 escape points. Push in and turn the CO2Cap slowly counterclockwise until it stops, and pull until it stops to partiallyunscrew the cap, then wait as any remaining CO2 in the cartridge escapesbefore performing step (b).b. T urn the CO2 Cap a second turn counterclockwise until it stops and pull itout. The empty cartridge then slides out.8. Replace the CO2 Cap by aligning the CO2 Cap pins with the pin guides andpushing the Cap in while turning clockwise. Push the Cap in a second time,turn clockwise, and release.Release Pressure from a SL7 that Will Not DeployOnly use this procedure if Launcher will not deploy and the CO2 cartridge has beenpunctured. Put the Trigger Safety in Safe mode (page 5). Remove the Magazine asoutlined in Removing a Used CO2 Cartridge (Punctured) (see above).Keep Launcher pointed in a safe direction during CO2 Cap removal. Keep exposedskin away from escaping gas as it rushes out at the gas release points (see arrowsin Warning on previous page).Use a 3/16” Hex key (see right) to removethe Locking Set Screw, and then slowlyloosen the Adjusting Set Screw to emptyCO2 from the cartridge. Remove anddispose of the CO2 cartridge.103/16” HexKey
TroubleshootingPROBLEM: You have successfully loaded and punctured a new CO2 cartridge andput the Trigger Safety in Fire mode. Your Launcher will not fire and you can’t get theCO2 cartridge out of the Launcher.SOLUTION: Put the Trigger Safety in Safe mode (see page 5). Remove theMagazine as outlined in Unloading the Magazine (see page 8). Follow theinstructions Release Pressure from a SL7 that Will Not Deploy on page 10.PROBLEM: Magazine will not feed rounds correctly.SOLUTION: Clean the Magazine with a damp towel to wipe off grease anddebris. Dry springs immediately, if necessary, to help prevent formation of rust.NOTE: If a problem still exists, contact SABRE Customer Service at 636-343-0200 ortoll free at 800-325-9568.Cleaning & MaintenanceAlways wear eye protection (like safety glasses) when cleaning or performingmaintenance on your SL7. To reduce the chance of an accidental discharge,follow CO2 Cartridge Removal instructions on page 9. SABRE never recommendsdisassembling your Launcher and never disassemble a Launcher that is underpressure. Clean and lubricate your Launcher with marker grease after approximately5,000 shots. F amiliarize yourself with instructions and follow warnings on CO2 cartridgepackaging for use, handling, storage and disposal. Contact the CO2 cartridgemanufacturer with any questions. Petroleum based products and aerosol products can damage O-Rings. Donot use any petroleum based cleaning solvents. Do not use any cleaningsolvents that come in aerosol cans. Clean your Launcher using a damp towel to wipe off paint, grease, and debris.To clean inside the barrel, turn the barrel counterclockwise and remove. Pushthe cable of the squeegee through the barrel, then pull the squeegee throughto remove debris. To clean the breech and barrel with the Magazine removed, push the cableof the
to read this manual thoroughly and become familiar with your SABRE SL7 parts, operation, and safety precautions before you attempt to load or deploy this SL7. This manual should be used as a reference when performing routine maintenance. If you need assistance, please contact