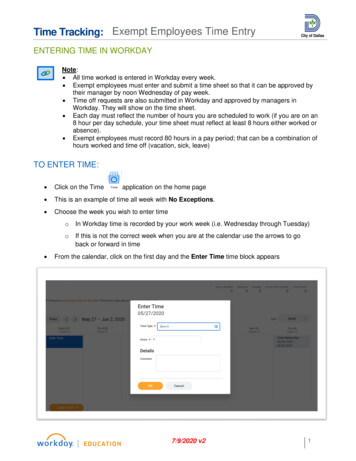
Transcription
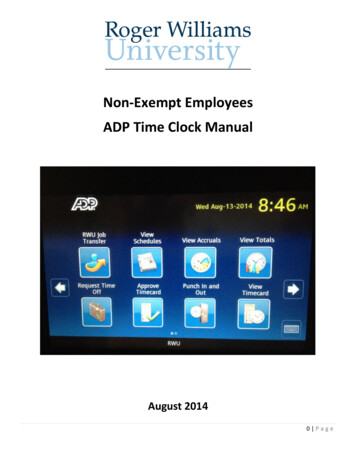
Non-Exempt EmployeesADP Time Clock ManualAugust 20140 Page
Table of ContentsPunching In and Out (Single positon) . .2-3Punching In and Out (Multiple positions/Job Slice) . . 4-6View Schedules. . 7-10View Accruals . 11-14View Totals . .15-19Requesting Time Off – Full Days/Half Days .20-26Requesting Time Off – In Hours. . 27-35View Timecard 36-41Missed Punches . .41Approve A Timecard 42-45How to Read Messages. .46-50Time Clock Basics . 511 Page
Punching In and OutAll employees should record accurate time worked each day; therefore, it is important tostamp your time when clocking into work and clock out when you leave. Once you haverecorded your time, the application will refresh and no further action is needed. Your time willbe posted immediately for your supervisor to view. You do not need to indicate if your punchis an in-punch or out-punch. The system determines this for you. If you need to makecorrections to your time punch, contact your supervisor.Punching In and Out (Single positon)1. To Punch in or Punch out without a job transfer just swipe your badge, or2. Press the punch In and Out button.Press Punch In and Out2 Page
3. Then use the keypad to type in your ID Number4.Then Press Enter01234560123456A green light will flash on letting you know the punch has been accepted.3 Page
RWU Job Transfer - (Multiple Positions)If you have multiple positions and need to select a job that is not your primary position pleasefollow the instructions below.Also, if you need to change jobs during the workday, (for example, you clock into position 1 at9:00 a.m. and then transfer to position 2 at 11:00 a.m.) you will need to select position 2 fromthe dropdown menu. This will automatically log you out of position 1 and into position 2.1. Press the RWU Job Transfer button.You must press on RWU Job Transfer BEFORE swiping your card.4 Page
2. Then swipe your badgeOr Use the Keypad to manually enter your ID number and press Enter when finished.5 Page
3. Select the position you wish to punch into by pressing on it. A green light will then flashon letting you know it is accepted.6 Page
View SchedulesUse the View Schedules transaction to display your scheduled shifts for the next 14 days,including the current day.1. Tap View Schedules to View your schedule.Tap ViewScheduleto see yourschedule2. Swipe Badge7 Page
3. Or enter your Badge ID using the keypad4. Your schedule will appear8 Page
Note: If you don’t see the day in the period that you are looking for you can scroll up ordown using the keys on the right of the screen.Press the keys to navigate up ordownYou will be able to then view more days.9 Page
Tap on any day to view the details of your schedule.Tap on any day to view the detailof your schedule.The details of each day will appear. When finished press closed.Press the keys tonavigate up ordownPress Close whenfinished10 P a g e
View AccrualsUse the View Accruals button to view current totals of accrued time, such as vacation and sick time. The totalsare accurate as of the time that you perform the transaction. You may also view projected accrual totals as ofa specific future date.1. Tap View AccrualsTo view current or projected accrualbalances tap View Accruals.2. Swipe your badge11 P a g e
3. Or Enter your Badge ID Number manually using the keypad, then press Enter.4. Press on the day you wish to view your accruals.12 P a g e
5. The accrual balances as of the day you selected will appear.6. Use the arrow keys to scroll up or down.Use these keys to scroll up and down toview your accrual balances13 P a g e
Note, if you wish to view a different date, press the back arrow to go back to the calendar.Use this key to navigate between thecalendar and detailYou can also change the month by using the arrow keys at the top of the screenUse these keys to scroll to the time frameyou wish to view (by month)14 P a g e
View TotalsUse the View Totals transaction to view the total hours for various time frames, including the previous payperiod as well as week-to-date. The totals are accurate as of the time that you perform the transaction.1. Press the View Totals buttonTo view your totals for various timeframes press View Totals2. Swipe your badge15 P a g e
3. Or Enter your Badge ID using the keypad and press EnterNote, once you have entered your ID number you will be able to view the totals for various time frames suchas: Previous Pay PeriodCurrent Pay PeriodNext Pay PeriodTodayYesterdayWeek to DateLast Week16 P a g e
4. Tap on the period you wish to view.To view the total hours for the period you wish toview, tap next to your selection.5. Use the Scroll keys to navigate up or downUse the arrow buttons to view more options17 P a g e
6. Select the time period.7. The total hours for your selection will display.18 P a g e
8. To navigate back to the period selection page press the back arrow.19 P a g e
Requesting Time Off – Full/Half DaysFrom the time clock you are able to put in a request for time off such as a vacation or sick day. You have theoption of requesting your time off in days, half days or in hours.New Request1. Tap Request Time OffPress the Request Time off button to put in arequest for time off.2. Swipe your badge20 P a g e
3. Or enter your Badge ID number using the keypad then press Enter4. To begin your request press Scheduled Time Off.Press Scheduled Time Off.21 P a g e
5. Press Submit Request6. Press the day you wish your request to start22 P a g e
Note, if the day you wish to request is in a different month you can use the arrow keys to scroll to the correctmonth.7. Select the End Date23 P a g e
8. Tap on the proper pay code.9. If you do not see the proper pay code use the arrow to scroll down for my choices.Use the arrow buttons to view more options24 P a g e
10. Select the pay code.11. Requests can be made in full days, half days or hours. Select your choice by pressing on it.Tap on whether you wouldlike the request to be filled inFull days, Half days, or Hours.25 P a g e
12. The next screen shows you a snap shot of your current request. The 0 is not the number of days butthe Full Day selection code. 1 is Half Day and 2 is Hours.13. Review your request and hit Add Another if you wish to request more time off or press Submit.If you needto makeanotherrequestpress hereIf you arefinishedpresshere26 P a g e
Requesting Time Off - In HoursIf you do not need a full day off you may make a request in hours. You must make your requests in half hourincrements. Example: You have a doctor’s appointment and you will be late for work. You can request a halfan hour, an hour or an hour and a half but you cannot request an hour and 45 minutes. To put in a half houryou must put in 30 not 50. Example: An hour and a half would be put in as 1:30 not 1:50.1. Press Request Time Off27 P a g e
28 P a g e
29 P a g e
Press the end date.Tap the proper pay code to continue the request.30 P a g e
Select HoursReview and click ContinuePressContinue31 P a g e
The Start Time defaults to the time you are putting the request in. Use the key pad to enter the start time ofyour time off request.Enter the time you wish your request to start, making sure to enter AM or PMUse the keypad to enter the correct time,be sure to include AM/PM32 P a g e
Once you have entered the correct time of your request, press Enter.PressEnterThe Length screen will appear. It defaults to 1:00 (1 hour).33 P a g e
To request more than an hour use the key pad to enter the appropriate length of time.IMPORTANT NOTEWHEN ENTERING HALF-HOUR INCREMENTS YOUMUST USE :30 NOT :50. EXAMPLE AN HOURAND A HALF WOULD BE ENTERED 1:30 NOT 1:5034 P a g e
When you have finished push Enter.PressEnterReview your request and push Add Another or Submit.Press AddAnother ifyou wish toenter anotherrequestPress Submitif you arefinishedRequestingTime Off35 P a g e
View TimecardThe View Timecard transaction displays a timecard in an hourly view (start time, end time, and shift totals) foreach day in the selected pay period. Only employees whose assigned time entry method is hourly canperform this transaction.1. Tap View Timecard2. Swipe your badge36 P a g e
3. Or enter your ID Number manually by using the key pad4. Select the time period.Tap on which period you wishto view.37 P a g e
5. Each day in the period selected will appear with the total for each day.6. Use the scroll buttons to view more daysUse the scroll buttonsto view more days38 P a g e
7. An explanation point means that there is an exception for that day.Any day with an Exclamation pointmeans there is an exception for thatday (missed punch, late punch, early punch etc.)8. Tap on the day to view the details.39 P a g e
You will be able to view the details of each day.You can use the scroll keys to view other dates within the period.Use the scroll keys to viewmore days in the period40 P a g e
Press Close when doneMissed PunchesWhat is a missed punch?A missed punch is when an employee enters the time they started working but does not enter timewhen they leave or vice versa. On the “Timecard” the employee will see an exclamation pointindicating that there is a missed punch for that day. If the employee misses the punch in, theemployee should still record a normal punch out. It is important to note that in either of thesesituations, the system does not know the amount of time worked and therefore will not pay theemployee for the entire pay period.How can I fix a missed punch?For both Time Clock and Time Stamp employees only a supervisor has the ability to fix missed punches.An e-mail notification alert will be sent to both the supervisor and the employee informing them of themissed punch and that further action is required.41 P a g e
SelceApprove a TimecardTo ensure that your timecard accurately reflects the hours you worked as well as any exception time (i.e.vacation, sick, etc.) please review and approve your timecard on the last day worked in the bi-weekly payperiod. Note, submitting a fraudulent timesheet is subject to disciplinary action including termination ofemployment.At the time clocks you can only perform this function if you are an hourly employee and punch in and out. Youcan also remove the approval from a time card prior to the pay period being closed by payroll for processing.1. Tap approve Timecard42 P a g e
2. Swipe your badge3. Or enter you badge ID manually using the key pad.43 P a g e
4. Select the appropriate time period by tapping on it.Tap on which period you wishto view.5. The hours worked in the period will show on the calandar.44 P a g e
6. Use the scroll keys to view more days.Use the scroll keysto view more days7. Once you have reviewed your timecard for accuracy and are satisfied with it press Approve.Once you have reviewedyou timecard foraccuracy press Approve45 P a g e
How to Read MessagesYou do not need access to a computer to read your e-Time messages. Messages sent by your manager orsystem generated notices, including notifications for meeting announcements, missed punches and time offrequests can be read at the clock.1. To access your messages hit the arrow key to scroll to the next page.Touch the Arrow to goto the next screen2. Tap the Read Messages icon.Tap the ReadMessages Icon.46 P a g e
3. Your messages will appear. Note the messages are displayed newest to oldest.4. If you wish to view more scroll downPush the arrow to scrolldown47 P a g e
5. To Read a message tap on it.Tap the messageto read it6. The message in its entirety will appear.48 P a g e
7. Use the Scroll keys to view more of the message.Push the arrow to scrolldown8. Once you have finished reading the message you can close out of your messages, read the previousmessage, delete the current message or move to the next message by pressing your option at the bottom.To Exitthe mailboxMovesyou tothepreviousmessagein theinboxDeletethecurrentmessageMovesyou tothe nextmessagein theinbox49 P a g e
8. A button that appears in Gray is not available. The Next button is grayed out here because this is thelast one in the mailbox.A Gray buttonmeans theoption is notavailable.There are nomore messagesin the inbox toview.9. Once a message has been read it will appear in Gray.Messages in Gray havealready been read50 P a g e
Time Clock BasicsSwipeBadgeHereTouch ScreenFrom anyscreen youcan returnto themainscreen bypressingthis button51 P a g e
From the time clock you are able to put in a request for time off such as a vacation or sick day. You have the option of requesting your time off in days, half days or in hours. New Request 1. Tap Request Time Off 2. Swipe your badge Press the Request Time off bu
