Transcription
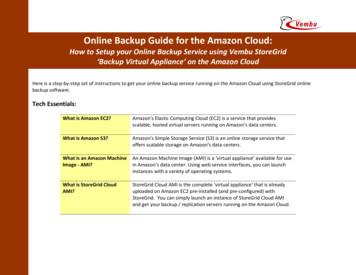
Online Backup Guide for the Amazon Cloud:How to Setup your Online Backup Service using Vembu StoreGrid‘Backup Virtual Appliance’ on the Amazon CloudHere is a step-by-step set of instructions to get your online backup service running on the Amazon Cloud using StoreGrid onlinebackup software.Tech Essentials:What is Amazon EC2?Amazon’s Elastic Computing Cloud (EC2) is a service that providesscalable, hosted virtual servers running on Amazon’s data centers.What is Amazon S3?Amazon’s Simple Storage Service (S3) is an online storage service thatoffers scalable storage on Amazon’s data centers.What is an Amazon MachineImage - AMI?An Amazon Machine Image (AMI) is a ‘virtual appliance’ available for usein Amazon’s data center. Using web service interfaces, you can launchinstances with a variety of operating systems.What is StoreGrid CloudAMI?StoreGrid Cloud AMI is the complete ‘virtual appliance’ that is alreadyuploaded on Amazon EC2 pre-installed (and pre-configured) withStoreGrid. You can simply launch an instance of StoreGrid Cloud AMIand get your backup / replication servers running on the Amazon Cloud.
How does StoreGrid ServiceProvider Edition work withAmazon?StoreGrid Service Provider Edition clients are installed in your clientmachines that require to be backed up and you can power up yourStoreGrid Servers on the Amazon EC2 to receive the client’s backups.The backup data will be stored on Amazon’s S3 storage service (pleasenote that the StoreGrid backup server will use an Amazon EBS volumeduring the backup process).How much will this entiresetup cost?Amazon charges fees for the ‘server’ usage time, data transfer andstorage charges on S3 etc. For more information please cing.phpStoreGrid licenses cost 30 per desktops and 60 per servers – For moreinformation on volume discounts, please hpHow will I manage mybackups?Simply login to your StoreGrid server web console running on Amazonusing your public DNS address and login. You will be able to manage thebackups from all your clients using StoreGrid’s powerful managementfeatures.I need more information.Where can I find it?This guide provides you with the steps required to setup an onlinebackup appliance on the Amazon Cloud using StoreGrid Cloud AMI. Ifyou require further information, please ackup.phpFor more information on Amazon EC2 / S3, please visithttp://aws.amazon.com. Our Cloud Technical Support team is availableat storegrid-cloud@vembu.com
Installation Steps in a Nutshell1Get your AmazonAWS account2Launch the StoreGrid‘Virtual Appliance’ onAmazon Using AWSManagementConsole (Or) Using ElasticFox (Or) Using AmazonCommand Line tools3Configure yourStoreGrid ‘VirtualAppliance’ serversettings4Get your clientsmachines to backupto your AmazonServer!
1Getting your Amazon AWS account1) Point your browser to http://aws.amazon.com and click on the button ‘Sign Up Now’2) Enter your Amazon account details, if you have one (or select ‘I am a new user’)
3) Enter your name and email address to register for an Amazon Web Services Account and click ‘Continue’
4) Please enter your contact information and accept the AWS Customer Agreement
5) You will see this screen below if you have successfully created your AWS account.6) Login into Amazon Web Services and select Your Account Access Identifiers from the top menu. Note down your AmazonAWS account number from the top-right corner.
7) You will see the ‘Access Key ID’ and your ‘Secret Access Key’ listed below. Please note them down for future use.
To proceed with the next steps, you can use AWS Management Console, ElasticFox or Amazon Command Line tools; in this guide,we will proceed with the ElasticFox tool to manage your Amazon Cloud instances.What isElasticFox?Where do I get it?How do I use it?ElasticFox is a Mozilla Firefox extension for managing your AmazonEC2 account. You can launch new instances, mount volumes andmore.You can download it from here entry.jspa?externalID 609You need Firefox browser to be able to ElasticFox extensionYou can get the latest version of Firefox from here –http://www.mozilla.com/firefox
2Launching the StoreGrid Virtual Appliance on Amazon EC21) Once you install ElasticFox, you will see this screen when you select Tools ElasticFox in your Mozilla Firefox browser.
2) In ElasticFox, Click on the ‘Account IDs’ button. And enter your ‘Account Id’ and give it a ‘Display Name’ and click ‘Add’.3) Once you have created your Account Id, Click on ‘Credentials’ and enter the ‘Display Name’ from the previous step for thefield ‘Account Name’ and enter your ‘AWS Access Key’ and ‘AWS Secret Access Key’ from step (7) above.
4) Select the region in which you want the Amazon Instances on EC2 to be located. Here we have chosen ‘us-east-1’
5) Click on the ‘KeyPairs’ tab in ElasticFox and click on the green button to create a new Key Pair for your ‘virtual appliance’.Give it a name to identify it. E.g. ABC BackupServer
6) Once you click ‘OK’, you will get the following screen to save the private key for your ‘virtual appliance’. Choose a locationand click ‘Save’
7) You will get the KeyPair for your ‘virtual appliance’ ABC BackupServer listed in the KeyPairs tab in ElasticFox8) Now to get your own StoreGrid ‘Virtual Appliance’ started, Click on the ‘Images’ Tab and select the StoreGrid Cloud AMI idthat you wish to startup. Simply select ‘AMIs’ in the drop down menu and enter the StoreGrid Cloud AMI ID (listed below) inthe text box in the ‘Images’ tab.You can choose from the following StoreGrid Cloud AMIs for the US RegionVembu StoreGrid Cloud AMI ID for Windows [32 bit]: ami-f232d59bVembu StoreGrid Cloud AMI ID for Windows [64 bit]: ami-f93fd890Vembu StoreGrid Cloud AMI ID for Cent OS [32 bit]: ami-01b75668StoreGrid Cloud AMIs for the EU RegionVembu StoreGrid Cloud AMI ID for Windows [32 bit]: ami-2ee3cb5aVembu StoreGrid Cloud AMI ID for Windows [64 bit]: ami-36e3cb42Vembu StoreGrid Cloud AMI ID for Cent OS [32 bit]: ami-afb29adb
(Note: The steps detailed below are applicable for a Windows instance of the StoreGrid Cloud AMI; for instructions on setting upa Linux instance, please refer -online-backup.php. You can get in touchwith us at storegrid-cloud@vembu.com in case of queries.)
9) Select the StoreGrid Cloud AMI listed in the screen and right click and say ‘Launch instance of this AMI’
10) In the following screen, select the type of instance (e.g. m1.small), number of instance (e.g. 1), select the Key Pair that youhave created in the previous step (e.g. ABC BackupServer). Then select the availability zone for the instance e.g. (US-East1a). Then Click ‘Launch’. (Note: It will take a few minutes for AWS to launch an instance. Please wait till the ‘State’ status inthe ‘Instances’ tab in ElasticFox comes to ‘running’)
Congratulations! now you have your own ‘backup virtual appliance’ running on the Amazon Cloud. You will see a screen like thisbelow.11) You will require an EBS volume along with your backup virtual appliance to run StoreGrid backups. For this, go to ElasticFoxand click on the ‘Volumes and Snapshots’ Tab. Click on the ‘ ’ button to create a new volumeWhat is an EBSvolume?EBS is short for Elastic Block Store.Amazon EBS volumes are storage that persists independently ofyour backup virtual appliance. Amazon Elastic Block Storeprovides storage volumes that can be attached to a runningAmazon EC2 instance (like your ABC BackupServer backupappliance) and be viewed as a device within the instance.
12) Enter the size of the EBS Volume and the Availability Zone in which you require it. Enter the ‘Instance ID’ (available in the‘Instances’ Tab in ElasticFox) of your backup virtual appliance for the ‘Tag’(Note: The availability zone of the EBS volume should be the same as the availability zone of your EC2 instance that youstarted up in Step #10 above)
3Configure your StoreGrid ‘Virtual Appliance’ server settings1) To login to your EC2 instance, you will have to grant permission to Remote Desktop (RDP) connections to your backup server.To do this, click on ‘Security Groups’ tab in ElasticFox and click on the ‘Grant New Permission’ button (marked with green).Select ‘RDP’ under Protocol Details and click ‘Add’.2) Right click on the instance of your ‘backup virtual appliance’ under the ‘Instances’ tab and select ‘Get AdministratorPassword’
3) You will get a message like the one below.
4) Now, to login into your ‘backup virtual appliance’, right click the instance again and select ‘View Details’. You will see ascreen like the one below. Copy the ‘Public DNS Name’ field from the window that appears. You can login to your backupvirtual appliance using remote desktop using this Public DNS Name.
5) If you are performing these steps from a Windows installation, use Remote Desktop Connection, (Start - Programs - Accessories - Communications - Remote Desktop Connection) to login to your EC2 instance (or) In case you are on a Linuxmachine, use rdesktop to login using the public-DNS name of the EC2 instance and the administrator password.
6) Once you are connected to your EC2 instance, convert the EBS volume attached to the EC2 instance into a new partitionusing the New Partition Wizard on WindowsOnce you complete the wizard, you will find the EBS volume listed in the EC2 instance like the figure below.
7) In the EBS volume (E:\ drive in our example), create a new folder called ‘SGCloudConf’. Within this folder, create a file called‘SGConf.xml’ with the following text. This xml file stores the values of StoreGrid Configuration and EBS Volume snapshotschedule. StoreGrid Configuration ID "test@email.com" StartModule "601" / EBSSnapShots Enabled "1" Schedule Type " Daily " Day "0" Hour "2" Mins "0" / Volume ID "VOLUME ID" / /EBSSnapShots /StoreGrid
AttributeIDStartModuleEnabledScheduleVolume IDDescriptionThe ID attribute under Configuration tag represents the uniqueStoreGrid ID of the StoreGrid installation.The StartModule attribute specifies that the StoreGrid instance to bestarted as 601 - Backup Server or 609 - Replication ServerTo know more about StoreGrid Backup and Replication servers, pleasevisithttps://support.vembu.com/index.php? m knowledgebase& a viewarticle&kbarticleid 54The Enabled attribute under EBSSnapShots tag represents the enable 1 and disable - 0 of scheduled snapshots of the attached EBS Volume.It is recommended to have this value enabled, as this would makesure that there is a backup of the attached EBS Volume.The Schedule tag fills in the details for when to schedule the EBSVolume snapshot. For example, if you wish to do snapshot of the EBSvolume daily on 2:10 AM, then you can configure as follows : Schedule Type "Daily" Day "0" Hour "2" Mins "10" / The Volume tag's ID attribute provides the EBS Volume's id value fortaking the snapshot.
8) Next, to store the backup data, we will require a ‘bucket’ of storage in the Amazon S3 service. We will use the S3Fox tool tocreate the storage bucket on Amazon S3.What is S3Fox?Where do Idownload thistool?S3Fox Organizer is a simple tool that lets youorganize/manage/store your files on Amazon S3. It is integratedinto the Firefox browser.You can download this as a Firefox Add-on 247You can get the latest version of Firefox from here –http://www.mozilla.com/firefox
After installing S3Fox Organizer, click on ‘Manage Accounts’ and add your AWS access credentials as below.
Click on the ‘Create Directory’ button to create a new S3 folder (or ‘bucket’).(Note: Folder (i.e. bucket) names can only contain lowercase letters, numbers, periods (.) and dashes (-). )Then close the S3Fox tool and come back to the ElasticFox screen.9) Under the same folder in the Amazon EC2 instance, ‘SGCloudConf’, create another file called ‘S3Conf.xml’ with the followingtext. This xml file stores the AWS access credentials needed for StoreGrid to store the primary storage data in Amazon S3.
StoreGrid S3Configuration AccessKey " AWS access key " SecretKey " AWS secret key " BucketName " Bucket Name "/ /StoreGrid cessKey attribute stores the AWS access key.SecretKey attribute stores the AWS secret key.Enter the name of the folder (or ‘bucket’) we created using theS3Fox tool in the previous step.10) To allow StoreGrid clients to connect to the StoreGrid Backup Server, you need to grant permission to the security group(e.g'default' security group) which determines the ports opened up for communication in your EC2 instance.The TCP ports for which the permission should be granted are 32004, 32007. For accessing StoreGrid web console remotely,you should open up 6060 and 6061 TCP Ports.
To do this, click on the ‘Security Groups’ tab in ElasticFox and click on the ‘Grant Permission’ button under GroupPermissions.
11) In the ‘Grant New Permission’ pop-up, select ‘Other’ under Protocol Details and enter the Port Range as 32004 to 32004.Repeat this process for the ports 32007, 6060 and 6061.Port Number320043200760606061DescriptionFor default Backup PortFor default SSL Backup PortFor default HTTP Port of StoreGrid WebConsoleFor default HTTPS Port of StoreGrid WebConsole
Congratulations, Your StoreGrid Backup Server (or Replication Server, as set in StartModule attribute in Step# 7) is nowconfigured! After StoreGrid is started, login to StoreGrid web console by entering http://Public DNS name of the instance:6060 with the username of "admin" and password "storevembu"4Get your clients machines to backup to your Amazon Server1) Download and install the StoreGrid client builds from this link online-backup.php#4.0For client installation instructions and help in configuring backups, please refer to the help documentation –Client OperatingSystemWindowsInstallation dfIn case you require any further assistance during installation, please write to us at storegrid-cloud@vembu.comVembu Technologies powers the online backup and storage business of over 1300 Managed ServiceProviders, VARs and ISPs worldwide with its flagship brand StoreGrid Vembu Technologies, 2009. All rights reserved.www.vembu.com
StoreGrid. You can simply launch an instance of StoreGrid Cloud AMI and get your backup / replication servers running on the Amazon Cloud. Online Backup Guide for the Amazon Cloud: How to Setup your Online Backup Service using Vembu