Transcription
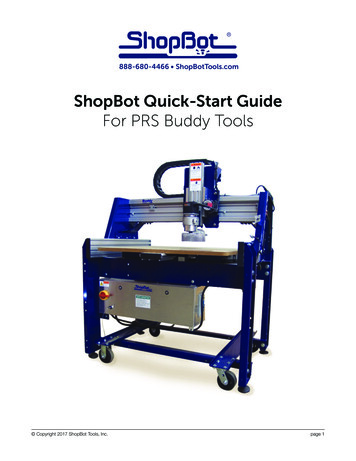
888-680-4466 ShopBotTools.comShopBot Quick-Start GuideFor PRS Buddy Tools Copyright 2017 ShopBot Tools, Inc.page 1
Quickstart Guide for PRS Buddy June 19, 2017 Copyright 2017 ShopBot Tools, Inc.page 2
Quickstart Guide for PRS Buddy June 19, 2017Table of ContentsGeneral Safety and Precautions.5Main Parts of the ShopBot Buddy.6Axes Orientation.6Introduction.7Removing the ShopBot Buddy from Crate.7Moving the ShopBot Buddy Tool.8With Optional Caster Kit.8Without Casters.8Adjusting the PowerStick.9Leveling Machine Frame.9Electrical Connections.10Install Dust Foot.10Decks for the PowerStick.10Sizing the Deck.11Suggested Materials.11Spoilboard.11Working with Longer PowerSticks.12Outfeed Support System.12Connect ShopBot to Computer.13Load Settings File.13ShopBot Control Software.14Test Each Axis with the Keypad.15Test the Spindle/Router.16Running a Part File.17Zeroing the Z-Axis.17Z-Axis Zeroing Process.17Zeroing the X- and Y-axes.18Changing Bits.18Setting up the RPM Control.18Holding Down Material.19Warming Up the Spindle.19Previewing a File with an Offset.19Running the Cut.20Pausing or Stopping a Cut.20Software Controlled Stop.20Emergency Stop.20Basic Information.21Bits.21Machine Maintenance.21Resources.21 Copyright 2017 ShopBot Tools, Inc.page 3
Quickstart Guide for PRS Buddy June 19, 2017 Copyright 2017 ShopBot Tools, Inc.page 4
Quickstart Guide for PRS Buddy June 19, 2017General Safety and PrecautionsThis safety summary contains general safety warnings that should be understood during operation ofthis machine. Failure to observe these precautions could result in injury.Learn and understand safe use of the machine. Do not allow untrained individualsto operate the machine without supervision. Be aware of the location of the Emergency Stop switches at all times.Eye and ear protection MUST be worn by the machine operator as well as anybystanders or observers. Flying sawdust, material chips, and other debris cancause serious eye injury.Wear closed-toe shoes at all times.Make sure that your material is properly secured before cutting, and be aware ofany small parts that may come loose after being cut. If a small part catches theedge of a spinning bit, it can be thrown forcefully in any direction, causing injuryor damage.Never place your hands on the rails of the ShopBot. Be aware that the machinemay move unexpectedly in any direction, which can cause serious injury if yourhands are in the path of movement.Never wear gloves while operating the machine. As with any power tool, a glovecan get caught in moving or spinning parts and pull your hand into the machinery.Never leave a machine running and unattended. Understand that a spinning toolgenerates friction and heat, creating a risk of fire. This risk is minimized by usingcorrect chip load, using sharp bits, and by always double-checking your filesbefore cutting. Be prepared to pause or stop the cut if something seems incorrector unsafe.Keep a working fire extinguisher within reach of the machine, for the reasonslisted above. Copyright 2017 ShopBot Tools, Inc.page 5
Quickstart Guide for PRS Buddy June 19, 2017Main Parts of the ShopBot BuddyAxes Orientation Copyright 2017 ShopBot Tools, Inc.page 6
Quickstart Guide for PRS Buddy June 19, 2017IntroductionThe ShopBot Buddy Quick Start Guide provides instructions for unpacking and setting up the ShopBot PRS Buddy Tool. It does not include instruction on software, troubleshooting, or maintenance.This and additional documentation are available at www.shopbotdocs.com.Removing the ShopBot Buddy from CrateRemove corner brackets from side of crate marked“RAMP END.” Lay ramp on the ground and align predrilled holes where ramp meets the pallet.Insert carriage bolts (located in one of the machinelegs near the ramp) into these holes to secure rampbefore continuing.Remove screws from top edge of crate and lift/slideoff top. Carefully remove crate sides by unscrewingedge brackets and freight gussets.Remove any boxes, accessories, packaging or support material from around machine, including the Lbrackets that secure legs to the pallet. Copyright 2017 ShopBot Tools, Inc.page 7
Quickstart Guide for PRS Buddy June 19, 2017Moving the ShopBot Buddy ToolWARNING! The ShopBot Buddy weighs 600 pounds (270 kg) or heavier, depending onconfiguration. Use caution when moving the machine.With Optional Caster Kit:Use a 1/2” wrench to raise the leveling feet until the machine is resting on all four casters. With at least two people on each side, slowlyroll the machine down the ramp and position it where it will be used.Without Casters:If the machine does not have casters, it should be moved with aforklift. Place the forks under the two cross-support bars as shownhere.If possible, spread the forks so they are as close to the legs as possible. This will help prevent any deflection or damage of the machineframe when lifting. Copyright 2017 ShopBot Tools, Inc.page 8
Quickstart Guide for PRS Buddy June 19, 2017Adjusting the PowerStickThe standard PowerStick is already fitted with an initial deck. Adjust or remove the PowerStick bypulling out the release knob on the right side of the Buddy. Move the knob to the right to lock it in thereleased position. This disengages the X motor pinion and rack so that the PowerStick can be movedfreely.Leveling Machine FrameMachines with casters: Once the machine is in position, lower the levelingfeet until the casters are raised off the ground again.Note: Do not operate the machine with the feet raised with the weightplaced on the casters.Use a 48” level to check for level along the PowerStick (the X axis) and along the underside of thegantry beam (the Y axis).Adjust the leveling feet until the machine is level in both X and Y axes.When finished leveling, tighten jam nut on each leveling foot to lock it into position. Copyright 2017 ShopBot Tools, Inc.page 9
Quickstart Guide for PRS Buddy June 19, 2017Electrical ConnectionsWARNING: RISK OF ELECTRIC SHOCK - The ShopBot Buddy needs to be connected to electrical service by a licensed electrician who has experience with industrial equipment. Do not riskpersonal injury or damage to the machine by having an unlicensed individual perform this job.Note: A PRS Standard Buddy Tool with a Porter-Cable Router is the only model that does not require an electrician to connect it. However, it will require a dedicated 20A circuit.Wiring diagrams, electrical specs, and spindle manufacturer’s documentation are located inside thecontrol box and at shopbottools.com/ShopBotDocs/wiring. Refer to the control box part number listedon the order and on the control box to determine the appropriate power and wiring diagrams.The ShopBot Buddy is either a PRSalpha or PRSstandard model.PRSalpha: Power to the control box should be wired into a fused disconnect by a licensed electricianfamiliar with industrial equipment.PRSstandard: For a PRSstandard with a Porter-Cable router, plug the included cable into a 110V 20A(230V 15A for select international tools) circuit. For PRSstandard tools with spindles, power to thecontrol box should be wired into a fused disconnect by a licensed electrician familiar with industrialequipment.General Precautions for All Models:Motor connections: DO NOT connect or disconnect the motor cables while the control box is powered on. This can damage or destroy the motors or drivers.Induced currents: Avoid moving any axis by hand when the control box is powered off. If it is necessary to push or pull an axis by hand, do so very slowly. Spinning the motors can generate an electriccharge and damage the drivers or other electronic components.Please contact tech support with any questions about wiring before turning on the power:1-888-680-4466.Install Dust FootRefer to Installing PRS Dust Foot document , which should have been sent with this tool. However, ifnot, please access the document via www.shopbottools.com/ShopBotDocs.Decks for the PowerStickThe deck is the first level of support for the work surface. All ShopBot Buddy tools ship with a standard PowerStick (24” nominal work area; 48” stick) and Extira deck already installed. The Extira works well for a general purpose deck, but can be swapped out for a different design if desired. Copyright 2017 ShopBot Tools, Inc.page 10
Quickstart Guide for PRS Buddy June 19, 2017Often, it is beneficial to attach a sacrificial sheet of material (also called a spoil board) to the deck. Aplenum for a vacuum hold-down system can also be attached. The 80/20 t-track slots in the PowerStick provide a convenient system for securing the deck to the PowerStick.Sizing the DeckThe deck can be sized as narrow or wide as desired; however, if the deck was sized an inch or twowider than the PowerStick, it would aid in keeping debris from accumulating on the tracks. Keepingthe deck at least 3” (75 mm) wider than a projects’ work area will improve dust collection by providingan extended surface at the edges for the dust skirt to work.We recommend that the length of the deck be extended to within about 6” (150 mm) of the PowerStickat each end. Keeping the deck long is a SAFETY measure. It avoids creating a pinch point behindthe front and back rollers under the deck.Suggested MaterialsDeck Base Layer:½” or ¾” Plywood¾” MDF or LDFBest combination of stability, weight, and price.Two laminated pieces of ½” are particularly stable.Not as stable, but works well for applications whennot using a full size deck.½” or ¾” Phenolic½” Aluminum PlateSpoil Board:¾” MDF or LDF½” or ¾” PlywoodSpoilboardThe spoilboard is a sacrificial layer of 3/4” Medium-Density Fiberboard (MDF). As it gets damaged overtime, it can be re-surfaced to a perfectly flat work surface until the entire board has been used up, andthen simply replace it with a new sheet.Spread a thin, even coat of glue across the entire surface of thebase layer. A cheap paint roller works great.Have someone help set the MDF sheet(s) onto the base. Placethe spoil board on top of baseboard with 1/4” of overlap on allsides.Place clamps and heavy objects onto spoil board to help glue cure. Copyright 2017 ShopBot Tools, Inc.page 11
Quickstart Guide for PRS Buddy June 19, 2017Working with Longer PowerSticksPowerSticks of varied lengths add great versatility to the ShopBot Buddy . PowerSticks can be usedas multiple work fixtures that can be readily swapped in and out at any time.WARNING! The PowerStick can move very quickly, moving in and out over a much longer distance. Ensure that there is adequate clearance around the tool so that no one is likely to comeinto contact with the moving PowerStick.Do not program the PowerStick to move faster than 12 inches/sec.Outfeed Support SystemEven though the PowerStick seems quite rigid, weight or pressure on a long, unsupported stick cancause the work surface to bow and affect cutting. A PowerStick over about 6’ will typically needsome sort of out-feed support. ShopBot offers an outfeed system for use with long PowerSticks. Thesupport system uses UHMW polyethelyne sliders to support the Power Stick. There are many otherout-feed support solutions that should suffice for PowerStick work, including adjustable-stands, shoprollers, or fabricating special-purpose feed systems. Copyright 2017 ShopBot Tools, Inc.page 12
Quickstart Guide for PRS Buddy June 19, 2017Connect ShopBot to ComputerConnect USB cable from ShopBot control box to computer. Connect the RPM controller USB fromvariable frequency drive (VFD) unit into another USB port on the computer.Load Settings FileWhen prompted to load a default settings file for the first time, the following screen should appear:Double-click on “PRS ShopBots”, and choose the “Buddy” option. Choose the correct table size, andthis will return to the main screen.Note: Custom tools will not have a default setting preprogrammed in the software. Choose the correcttype (Alpha or Standard), and the size closest to the tool. Edit the table limits using “Values” and “Limits for table”. Save the new setting as a custom settings file in the “Utilities” menu. Copyright 2017 ShopBot Tools, Inc.page 13
Quickstart Guide for PRS Buddy June 19, 2017ShopBot Control SoftwareThe ShopBot control software works in two modes: “Easy mode” (by default) shows only the necessary functions to set up and run a cut file. “Full mode” shows all available functions and settings.Switch be-tween the two modes by clicking on the Help/options button in the red position window. Copyright 2017 ShopBot Tools, Inc.page 14
Quickstart Guide for PRS Buddy June 19, 2017Test Each Axis with the KeypadTurn ON the control box. Click on the yellow keypad window icon within the red position window. If theicon is not visible, click “move/cut” under “Mode” on the red position window.Use the buttons on the keyboard (see below) to move the spindle/router along each axis. Copyright 2017 ShopBot Tools, Inc.page 15
Quickstart Guide for PRS Buddy June 19, 2017Test the Spindle/RouterLocate the key attached to the collet wrench. Insert this key into the safety lockout next to the powerswitch and turn the key to “ENGAGE”.Note: Older Desktop tools do not have an interlock switch. Instead, they have an on/off switch on theunderside of the VFD unit. It is illuminated red when off and green when on.Routers: Make sure that the router’s power switch is in the ON position before proceeding.In the main console window, type “K” to bring up the keypad move command. Notice that output 4lights up in the red position window. Click output 1 to turn the output on. This will create a prompt tostart the router/spindle.For PRSstandard models, press “OK” to start the router/spindle.For PRSalpha models, after toggling output 1, press the green “START” button on the three buttonpendant.To turn the spindle off, click the output 1 switch again or close the keypad window.All models: turn on output 1 through keypad Copyright 2017 ShopBot Tools, Inc.Alpha models only: press the start buttonpage 16
Quickstart Guide for PRS Buddy June 19, 2017Running a Part FileThis section covers setup procedures performed prior to previewing or running the part file.Zeroing the Z-AxisThe Z-axis must be zeroed each time that the machine is turned on or bits are changed. Zeroing canbe done to either the top of the material or to the table surface.Zeroing to the top of the material is a better choicewhen a precise cut depth is needed (when cutting aninlay pocket, for example).Zeroing to the table surface is a better choice whenthrough-cutting parts in wood. Because wood productsnaturally vary in thickness, the top surface of any givenarea may be higher or lower than other areas. Zeroingto the table surface will provide the most consistentthrough-cutting results.Whichever location is chosen, the location must beidentified in the CAD/CAM program (as shown here forVCarve Pro). Failure to match what is specified in thesoftware with what is done at the table can result inruined material and/or broken bits!Z-Axis Zeroing ProcessEnsure that the software is set to Move/Cut mode.Place the grounding clip on the bit, if possible. Otherwise, place it on the collet nut or shaft of the spindle.
Remove corner brackets from side of crate marked “RAMP END.” Lay ramp on the ground and align pre-drilled holes where ramp meets the pallet. Insert carriage bolts (located in one of the machine legs near the r