Transcription
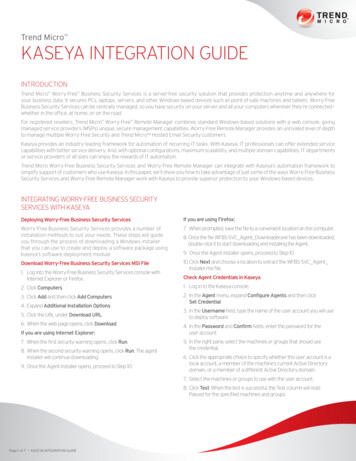
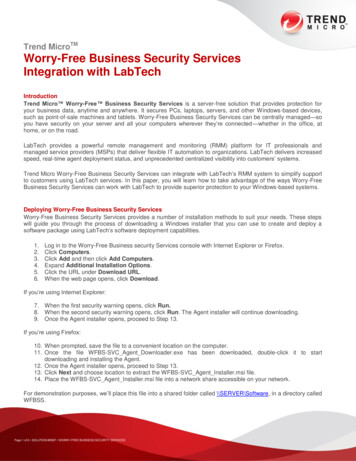
Trend MicroTMWorry-Free Business Security ServicesIntegration with LabTechIntroductionTrend Micro Worry-Free Business Security Services is a server-free solution that provides protection foryour business data, anytime and anywhere. It secures PCs, laptops, servers, and other Windows-based devices,such as point-of-sale machines and tablets. Worry-Free Business Security Services can be centrally managed—soyou have security on your server and all your computers wherever they’re connected—whether in the office, athome, or on the road.LabTech provides a powerful remote management and monitoring (RMM) platform for IT professionals andmanaged service providers (MSPs) that deliver flexible IT automation to organizations. LabTech delivers increasedspeed, real-time agent deployment status, and unprecedented centralized visibility into customers’ systems.Trend Micro Worry-Free Business Security Services can integrate with LabTech’s RMM system to simplify supportto customers using LabTech services. In this paper, you will learn how to take advantage of the ways Worry-FreeBusiness Security Services can work with LabTech to provide superior protection to your Windows-based systems.Deploying Worry-Free Business Security ServicesWorry-Free Business Security Services provides a number of installation methods to suit your needs. These stepswill guide you through the process of downloading a Windows installer that you can use to create and deploy asoftware package using LabTech’s software deployment capabilities.1.2.3.4.5.6.Log in to the Worry-Free Business security Services console with Internet Explorer or Firefox.Click Computers.Click Add and then click Add Computers.Expand Additional Installation Options.Click the URL under Download URL.When the web page opens, click Download.If you’re using Internet Explorer:7. When the first security warning opens, click Run.8. When the second security warning opens, click Run. The Agent installer will continue downloading.9. Once the Agent installer opens, proceed to Step 13.If you’re using Firefox:10. When prompted, save the file to a convenient location on the computer.11. Once the file WFBS-SVC Agent Downloader.exe has been downloaded, double-click it to startdownloading and installing the Agent.12. Once the Agent installer opens, proceed to Step 13.13. Click Next and choose location to extract the WFBS-SVC Agent Installer.msi file.14. Place the WFBS-SVC Agent Installer.msi file into a network share accessible on your network.For demonstration purposes, we’ll place this file into a shared folder called \\SERVER\Software, in a directory calledWFBSS.Page 1 of 6 SOLUTION BRIEF WORRY-FREE BUSINESS SECURITY SERVICES
Check Deployment Account in LabTech1.2.3.4.5.6.7.Log in to the LabTech Control Center.In the console, click Navigation Tree.In the Navigation Tree pane, expand Clients, and then expand the client you want to edit.Double-click the location you want to edit.The location window opens. Click the Passwords tab.Right-click the empty table and then click Add Entry.The Edit Entry window opens. Enter the description, username, and password of the user account you wantto use to deploy Worry-Free Business Security Services.Create a Deployment ScriptOnce the credentials have been set, you can now create a script to deploy Worry-Free Business Security Servicesto computers from the network share folder you created earlier. For demonstration purposes, we will assume theWorry-Free Business Security Services installer has been placed into a shared folder called \\SERVER\Software ina directory called WFBSS.1.2.In the console, click Navigation Tree.3.4.5.6.7.8.9.10.11.12.Right-click Antivirus and then click Add Folder.Right-click New Folder and then click Rename Folder. For the name of the folder, type Trend Micro.Right-click Trend Micro, point to Scripts, and then click Add New Script.The Script window opens. In the Name field, type Deploy WFBSS.Ensure that the Computer Script checkbox is selected.In the IF list, click Service is Running.In the Service name field, type tmlisten.In the Then section, right-click the empty table and then click Add.The Edit Script Step window opens. In the Function list, click Script Log Message.In the Message field, type Trend Micro WFBSS is already installed on %computername% at%clientname%.Click Save Step.In the Else section, right-click the empty table and then click Add.The Edit Script Step window opens. In the Function list, click Script Note.In the Remark field, type: Install and then click Save Step.Repeat steps 14-16, using the following Functions and parameters:13.14.15.16.17.In the Navigation Tree pane, expand Scripts.a. Shell as Admin – Command: msiexec /i \\server\software\wfbss\wfbs-svc agent installer.msi /qnb. Resend Softwarec. IF File Check – File Path: C:\Program Files\Trend Micro\Client Server Security Agent\tmlisten.exe– Compare: Exists – Steps To Skip: :Successd. IF File Check – File Path: C:\Program Files (x86)\Trend Micro\Client Server SecurityPage 2 of 6 SOLUTION BRIEF WORRY-FREE BUSINESS SECURITY SERVICES
Agent\tmlisten.exe – Compare: Exists – Steps To Skip: :Successe. Script Log Message – Message: Failed to install Trend Micro WFBSS on %computername% at%clientname%. The installer returned the message: %shellresult%.f. Ticket Create – Client ID: %ClientID% – Computer ID: %ComputerID% – Email: %ContactEmail% –Subject: Failed to install Trend Micro WFBSS on %computername% at %clientname%. – Body:Failed to install Trend Micro WFBSS on %computername% at %clientname%.g. Script Goto – Steps to Skip: 0h. Script Note – Remark: :Success.i. Script Log Message – Message: Installed Trend Micro WFBSS on %computername% at%clientname%j. Reboot forced18. Click Save and then click Close.Once the installer script has been created, you can deploy Worry-Free Business Security Services by schedulingthe script to run on a particular computer, a group, location, or client, automating the install process as much as youlike.Monitoring Worry-Free Business Security Services in LabTechYou can also monitor Worry-Free Business Security Services on individual computers by creating a service monitoron the computer. LabTech provides a number of alert templates that allow you to choose what actions to take whenan alarm is raised, including creating a helpdesk ticket.Create Service MonitorsWhen creating service monitors for Worry-Free Business Security Services, you can monitor the following servicenames for the Trend Micro Worry-Free Business Security Services components: SvcGenericHost - Trend Micro Client/Server Security AgentTmlisten - Trend Micro Client/Server Security Agent ListenerTmProxy - Trend Micro Client/Server Security Agent Proxy ServiceNtrtscan - Trend Micro Client Server Security Agent RealTime ScanTMBMServer - Trend Micro Unauthorized Change Prevention Service1.2.3.4.5.In the console, expand Clients.Expand the client and location where you want to create a service monitor.Right-click a computer in the location, point to Monitors, and then click Add New Monitor.The LT Client dialog box appears, asking if you would like to use the Wizard. Click Yes.Click Monitor Services and Processes and then click Next.Page 3 of 6 SOLUTION BRIEF WORRY-FREE BUSINESS SECURITY SERVICES
6.7.8.9.10.11.12.13.14.15.16.In the Type list, click Services.In the Service Name list, click svcGenericHost and then click Next.In the Client list, click the client you want to monitor.In the Location list, click the location you want to monitor.In the Computer list, click the computer you want to monitor.Click Next.In the Frequency field, click the interval you want you want the monitor to check that the service is running.In the Alert Style field, click the option for how you want to be alerted.In the Select an Alert Template list, click the alert template you want to use, and then click Next twice.In the Finish New Monitor page, type a name for the agent monitor and then click Finish.Repeat steps 3-15 for each of the five services that are part of Trend Micro Worry-Free Business SecurityServices.Once the monitors are created, LabTech will take the actions defined in the alert template you chose, givingyou flexibility in choosing how to handle a problem with Worry-Free Business Security Services on clients.Create a Script to Restart ServicesA service monitor will create an alert when one of the Worry-Free Business Security Services has stopped, but youcan also use a script to check the status of Worry-Free Business Security Services and attempt to restart any of theservices that have stopped.1.2.3.4.In the console, click Navigation Tree.In the Navigation Tree pane, expand Scripts and then expand Antivirus.Right-click Trend Micro, point to Scripts, and then click Add New Script.The Script window opens. In the Name field, type Restart svcGenericHost.Page 4 of 6 SOLUTION BRIEF WORRY-FREE BUSINESS SECURITY SERVICES
5.6.7.8.9.10.11.12.Ensure that the Computer Script checkbox is selected.In the IF list, click Service is Running.In the Service name field, type svcGenericHost.In the Else section, right-click the empty table and then click Add.The Edit Script Step window opens. In the Function list, click Service Start.In the Service Name field, type svcGenericHost and then click Save Step.Click Save and then click Close.Repeat steps 3-11 for each of the 5 the five services that are part of Trend Micro Worry-Free BusinessSecurity Services.Create a Search to find Worry-Free Business Security Services Clients1.2.3.4.5.6.7.8.9.10.On the menu bar, click Search.The Search window opens. Click the Advanced tab.In the Field list, click Related – Software Installed.In the Related list, click Name (Software).In the expression list, click Like.In the Values list, click the button.The Find window opens. In the Look For field, type Trend Micro and then click Find.In the results pane, click Trend Micro Client/Server Security Agent and then click .Click OK.Click Search to run the search and show a list of clients with Worry-Free Business Security Servicesinstalled.11. Above the Results pane, in the empty field, type Antivirus – Trend Micro WFBSS and then click Save.12. In the Searches pane, click and drag Antivirus – Trend Micro WFBSS to the Antivirus Software folder.Identify Registry KeysYou can use LabTech’s powerful scripting capabilities to collect product information from Worry-Free BusinessSecurity Services registry keys, allowing you to perform actions based on the status of Worry-Free BusinessSecurity Services component.There are several registry keys that contain product information that administrators may find useful. The paths tothe keys differ slightly, depending on whether a system is 32-bit or 64-bit, as shown below.For 32-bit WindowsHKEY LOCAL tVersionFor 64-bit WindowsHKEY LOCAL TCorp\CurrentVersion HostedAgent\Version – Product VersionSchedule Update\TimeStamp – Last Update Time, given in epoch timeMisc.\VsApiNT-Ver – Scan Engine VersionMisc.\LastInfectedDateTime – Last time a virus was foundMisc.\LastInfectedFileName – Name of file where last virus was foundMisc.\LastInfectedVirusName – Name of last virus foundMisc.\ProductName – Product NameHostedAgent\Rupdate\Version\NonCRCPtnVer – Pattern VersionPage 5 of 6 SOLUTION BRIEF WORRY-FREE BUSINESS SECURITY SERVICES
Create a Script to Check the Last Update TimeHere, we will create a script that will create a ticket if Worry-Free Business Security Services has not performed anupdate for more than 24 hours.1.2.3.4.5.6.7.8.9.10.11.12.13.14.In the left pane, expand Scripts and then expand Antivirus.Right-click Antivirus, point to Scripts and then click Add New Script.The Script window opens. In the Name field, type Check Trend Micro WFBSS Update Time.In the IF list, click Registry Check.In the Registry Key field, type sion\Schedule Update\TimeStamp.In the Compare field, click Exists.In the Then section, right-click and then click Add.The Edit Script step window opens.In the Function list, click Variable Set.In the Set Type list, click Registry.In the Parameter field, type HKEY LOCAL Version\Schedule Update\TimeStamp.In the Variable Name field, type LastUpdateEpoch.Click Save Step.Repeat steps 7 through 13, using the following information for each step:a)b)c)d)e)f)g)Function: Variable Set, Set Type: SQL Query, Parameter: SELECT UNIX TIMESTAMP(), VariableName: NowEpochFunction: Script Math, Value: @NowEpoch@, Operator: - , Value @LastUpdateEpoch@Function: Variable Set, Set Type: Constant, Parameter: %mathresult%, Variable Name:SecondsSinceUpdateFunction: Script Math, Value: @SecondsSinceUpdate@, Operator: \ , Value 3600Function: Variable Set, Set Type: Constant, Parameter: %mathresult%, Variable Name:HoursSinceUpdateFunction: Variable Check, Variable Name: HoursSinceUpdate, Compare: , To: 24Function: Ticket Create, Client ID: %clientid%, Computer ID: %computerid%, Email:%ContactEmail%, Subject: %computername% at %clientname% may have out-of-date virusdefinitions, Body: Trend Micro Worry-Free Business Security Services on %computername% at%clientname% has not updated for @HoursSinceUpdate@ hours. Check to make sure updateprocesses are working properly. 2013 by Trend Micro Incorporated. All rights reserved. Trend Micro, the Trend Micro t-balllogo, Worry-free Business Security Services are trademarks or registered trademarks ofTrend Micro Incorporated. All other company and/or product names may be trademarks orregistered trademarks of their owners. Information contained in this document is subject tochange without notice. [SB01 CC 130315US] www.trendmicro.comPage 6 of 6 SOLUTION BRIEF WORRY-FREE BUSINESS SECURITY SERVICES
Monitoring Worry-Free Business Security Services in LabTech You can also monitor Worry-Free Business Security Services on individual computers by creating a service monitor on the computer. LabTech provides a number of alert templates that allow you to choose what actions to take when an alarm is raised, including creating a helpdesk ticket.

