Transcription
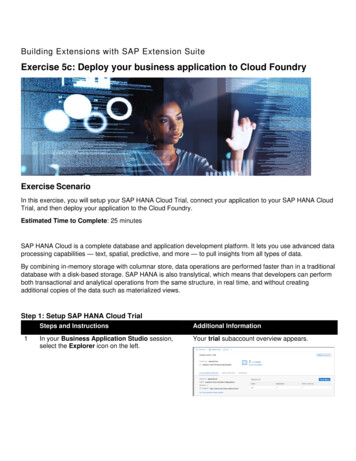
Building Extensions with SAP Extension SuiteExercise 5c: Deploy your business application to Cloud FoundryExercise ScenarioIn this exercise, you will setup your SAP HANA Cloud Trial, connect your application to your SAP HANA CloudTrial, and then deploy your application to the Cloud Foundry.Estimated Time to Complete: 25 minutesSAP HANA Cloud is a complete database and application development platform. It lets you use advanced dataprocessing capabilities — text, spatial, predictive, and more — to pull insights from all types of data.By combining in-memory storage with columnar store, data operations are performed faster than in a traditionaldatabase with a disk-based storage. SAP HANA is also translytical, which means that developers can performboth transactional and analytical operations from the same structure, in real time, and without creatingadditional copies of the data such as materialized views.Step 1: Setup SAP HANA Cloud Trial1Steps and InstructionsAdditional InformationIn your Business Application Studio session,select the Explorer icon on the left.Your trial subaccount overview appears.
Steps and InstructionsAdditional Information2In the subaccount overview, select the devspace.You enter your dev space.3Select SAP HANA Cloud.4Select Create and choose SAP HANAdatabase.You will be redirected into SAP HANA CloudCentral for instance creation. When being askedto authenticate, use your SAP Account user
Steps and InstructionsAdditional Informationcredentials that you used to create your BTP Trialaccount. You should see the following dialog:5The Location settings should point to your trialorg and dev space. Use the following settings forthe remaining fields and then select the Step 2button.Instance Name: hana-cloud-trialDescription: HANA Cloud Trial used forexercises.Administrator Password: create a passwordaccording to the password policy The default parameters for your trial SAP HANACloud database are displayed.6Select the Step 3 button.You will see the SAP HANA DatabaseAdvanced Settings dialog. Here you can allowor deny certain IP addresses for connection toyour database instance. In our case, we want anapplication running on the BTP to be able toconnect, so the default setting is fine.
Steps and InstructionsAdditional InformationYou also find a setting to connect the database toremote sources via the Cloud Connector. This isespecially useful in replication use cases, whereyou need to replicate data from on-premisesources to your SAP HANA Cloud instance. Inour use case, this setting is not required.7Select the Allow all IP addresses option, thenselect the Step 4 button.The Data Lake page appears.8Accept the default values and select the Step 5button.The Data Lake Advanced Settings pageappears.
9Steps and InstructionsAdditional InformationSelect the Create Instance button.The overview of your database instancesappears. There should be a new entry for yourhana-cloud-trial instance with StatusCREATING.The process will take several minutes tocomplete. Once done, the Status should switch toRUNNING. Use the Refresh button to update thestatus. Your SAP HANA Cloud Trial instance isnow ready to be used.10Return to your BTP trial account and select SAPHANA Cloud.Your hana-cloud-trial instance will appear in theSAP HANA Database instances overview.
11Steps and InstructionsAdditional InformationSelect Service Marketplace on the left.The Service Marketplace is displayed.
Steps and Instructions12Type schemas in the Search field and thenselect the SAP HANA Schemas & HDIContainers tile.13Select the Create button.Additional InformationThe New Instance or Subscription pageappears.
Steps and InstructionsAdditional Information14Set the Plan to hdi-shared, type bookshop-dbin the Instance Name field, and then selectCreate.The Information dialog appears.15Select Instances and Subscriptions.An instance for your bookshop appears in the list.This service instance is the database containerthat the CAP data schema will be deployed to.
Steps and InstructionsAdditional InformationStep 2: Configure the Dependency to SAP HANAIn this step, you will configure your service instance of the SAP HANA Schema & HDI Containers Trial serviceas a dependency of your CAP project.Follow the steps below to complete the exercise.1Steps and InstructionsAdditional InformationIn your Business Application Studio session,select the Explorer icon on the left.The project folder structure is displayed.
2Steps and InstructionsAdditional InformationSelect the package.json file on the left.The package.json file opens in a new tab on theright.
3Steps and InstructionsAdditional InformationSelect Terminal – New Terminal, then type cdsadd hana and press the Enter or Return Key onyour keyboard.An @sap/hana-client line appears as well asnew cds section is added to the package.jsonfile.
Steps and Instructions4Towards the bottom of the file, change “sql” to“hana”.Additional Information
Steps and Instructions5Between the cds line and the requires line, addthe following code:“hana”: {“deploy-format”: “hdbtable”},Additional Information" The finished file should look below.The full file can be found in the ## Exercise 5,package.json file section of the SAP ExtensionSuite - Exercise Code Snippets,txt file.This configures deployment for SAP HANA to usethe hdbtable and hdbview formats. The defaultformat of hdbcds is not available on SAP HANACloud.6Select Save from the File menu.7Type npm install in the terminal and press theEnter or Return key on your keyboard.The node modules folder will be updated withthe changed project dependencies.
Steps and InstructionsAdditional InformationStep 3: Run Your App with SAP HANAFollow the steps below to complete the exercise.Steps and InstructionsAdditional Information1Type cds deploy --to hana in the Terminal andthen press the Enter or Return key on yourkeyboard.The command will find your existing bookshopdb service instance of service hana and serviceplan hdi-shared on your HANA Cloud instance.This is the container that the data schema isbeing deployed to. A service key is being createdand the data schema is being deployed to yourdatabase container.2In your bookshop project structure, you shouldnow see a default-env.json file. Select that file.The file opens in the Code Editor. It containscredentials for the connection of your CAPapplication to the database.
Steps and InstructionsAdditional Information3Select the Run Configurations icon on the left.The previously created Run Configuration isdisplayed.4Expand the Run bookshop-X item.A db – hana item is displayed.
Steps and InstructionsAdditional Information5Position your mouse to the right of the db – hanaitem and select the Bind icon.A list of SAP HANA service instances isdisplayed. (You may be prompted to login first.)6Select the bookshop-db item.The Bind process begins. It will take a fewmoments to complete. You will know the processis complete when a dialog asking if you want todeploy appears.7Select Yes.The Deployment process begins. You will seeactivity in the terminal in the bottom of thescreen. You will know the process is completewhen the terminal indicates it will be reused bytasks.
Steps and InstructionsAdditional Information8Select the SQLTools icon on the left.The SQLTOOLS pane appears on the left.9Expand the Connections item.The bookshop-db item appears.10Expand the bookshop-db item.The Views and Tables folders are displayed.
Steps and InstructionsAdditional Information11Expand the Tables folder.The list of your tables is displayed.12Select the Show Table Records icon for theauthors table.The bookshop Results tab opens in the upperright, displaying the authors you added earlier.13Select the Run Configurations icon on the left.
Steps and InstructionsAdditional Information14Select the Run Module icon for the Runbookshop configuration.The run process begins, and activity will beshown in the terminal in the bottom right. Whenthe process has finished, you will see an opendialog.15Select the Open in New Tab button.Your application will open in a new browser tabor window.You can click the metadata and entities and theyshould show your data. The data is now beingpulled from the SAP HANA database in yourCloud Foundry.
Steps and Instructions16Additional InformationStop the application by clicking the Stop icon inthe Debug pane until al threads disappear.Step 4: Deploy your application to Cloud FoundryIn this step, you will transform your CAP project into a Multitarget Application (MTA) project in order to deploy itinto your BTP trial Cloud Foundry environment. A Multitarget application (MTA) is logically a single applicationcomprised of multiple parts created with different technologies, which share the same lifecycle. The developersof the MTA describe the desired result using the MTA model, which contains MTA modules, MTA resources,and interdependencies between them. The description is done in a mta.yaml file. Afterward, the SAP CloudDeployment service validates, orchestrates, and automates the deployment of the MTA, which results in CloudFoundry applications, services, and SAP specific contents.More information here on Multitarget Applications in the Cloud Foundry Environment.
Follow the steps below to complete the exercise.Steps and InstructionsAdditional Information1Select the Explorer icon on the left.The previously created Run Configuration isdisplayed.2Select New Terminal from the Terminal menu.A terminal window opens in the lower right.3Type cds add mta into the terminal and pressthe Enter or Return key on your keyboard.The mta.yaml file is created in your projectstructure.
4Steps and InstructionsAdditional InformationChoose the mta.yaml file.The mta.yaml file appears in the Code Editor. Itis the deployment descriptor for your MTAdeployment.
Steps and InstructionsAdditional InformationLet’s have a look at the most important elementsin an mta.yaml ionThe uniqueapplication IDThe applicationversionInforms the BTPwhich MTAspecification versionshould be usedContain the propertiesof module types,which represent CloudFoundry applicationsor content that form
Steps and InstructionsAdditional Informationthe MTA and aredeployed.resourcesAny resource, such asan external service,property, orenvironment variable,that is required by amodule at runtime butnot provided by themodule itself.parametersReserved variablesbelonging to a moduleor resource, whosevalue is used duringdeployment or atruntime.Your application consists of two modules. Thebookshop-srv module is of type nodejs andrepresents the service part of your CAPapplication. It will include the service endpoints.The bookshop-db-deployer module isresponsible for deploying your data schema tothe database. The database dependency isreflected in the requires sections of themodules. They both contain the requirement of aresource called bookshop-db.You can find the required resources in theresources section. Here you find thespecification for a resource bookshop-db oftype com.sap.xs.hdi-container. Theparameters specify service and service-planof the required resource.Further information on the MultitargetApplication 916a5b833fab40.html.5Right-click mta.yaml and select Build MTAProject from the pop-up menu.The MTA creation process begins and will takea few moments to complete. This processpackages all the project modules for deployment
Steps and InstructionsAdditional Informationinto a Multitarget archive file, with file extension.mtar.You will know the process is complete when theterminal indicates it will be reused by tasks anda mta archives folder appears on the left.6Expand the mta archives folder.7Right-click the bookshop 1.0.0.mtar file andselect Deploy MTA Archive.The deployment process begins, and you willsee activity in the terminal. The process will take
Steps and InstructionsAdditional Informationa few moments to complete. You will know theprocess is complete when the terminal indicatesit will be reused by tasks.Read through the terminal outputs. You will findall of the modules and resources from themta.yaml file mentioned, either becausemodules are being deployed or because serviceinstances are being created and bound to theapplication modules.You can now go back to your BTP and shouldbe able to see the application.8Close to the end of the deployment outputs in theterminal, you find a line with text like “Application"bookshop-srv" started and available at ”Copy the given URL and paste it into a newbrowser tab. Then press Return or Enter.9Switch back to your BTP Cockpit session andselect the Overview item on the left.Your application is now running on the BTPCloud Foundry environment, connected to yourSAP HANA Schema & HDI Containers Trialservice instance.
10Steps and InstructionsAdditional InformationSelect the number that appears in theApplications column in the Spaces area.The bookshop app will appear in the list of yourCloud Foundry applications. 2021 SAP SE or an SAP affiliate company. All rights reserved.No part of this publication may be reproduced or transmitted in any form or for any purpose without the expresspermission of SAP SE or an SAP affiliate company.SAP and other SAP products and services mentioned herein as well as their respective logos are trademarksor registered trademarks of SAP SE (or an SAP affiliate company) in Germany and other countries. Please right/index.epx for additional trademark information andnotices.Some software products marketed by SAP SE and its distributors contain proprietary software components ofother software vendors.National product specifications may vary.These materials may have been machine translated and may contain grammatical errors or inaccuracies.These materials are provided by SAP SE or an SAP affiliate company for informational purposes only, withoutrepresentation or warranty of any kind, and SAP SE or its affiliated companies shall not be liable for errors oromissions with respect to the materials. The only warranties for SAP SE or SAP affiliate company products and
services are those that are set forth in the express warranty statements accompanying such products andservices, if any. Nothing herein should be construed as constituting an additional warranty.In particular, SAP SE or its affiliated companies have no obligation to pursue any course of business outlinedin this document or any related presentation, or to develop or release any functionality mentioned therein. Thisdocument, or any related presentation, and SAP SE’s or its affiliated companies’ strategy and possible futuredevelopments, products, and/or platform directions and functionality are all subject to change and may bechanged by SAP SE or its affiliated companies at any time for any reason without notice. The information inthis document is not a commitment, promise, or legal obligation to deliver any material, code, or functionality.All forward-looking statements are subject to various risks and uncertainties that could cause actual results todiffer materially from expectations. Readers are cautioned not to place undue reliance on these forwardlooking statements, which speak only as of their dates, and they should not be relied upon in makingpurchasing decisions.
An @sap/hana-client line appears as well as new cds section is added to the package.json file. Steps and Instructions Additional Information 4 Towards the bottom of the file, change “sql” to “hana”. Steps and Instructions Additional Information