Transcription
GLOBAL CROSSING READY-ACCESS WEB MEETINGUser GuideGETTING STARTED SETTING UP A CONFERENCE2 LOGIN TO READY-ACCESS WEB MEETING2FEATURES CHAIRPERSON CONFERENCE CONTROL SCREEN3 WEB CONTROLS Start Web Conference3 Show Slide Presentations4 READY-ACCESS RECORD4 RECORDING ARCHIVES5 AUDIO CONTROL6 CONFERENCE COMMANDS7 PHONEBOOK7 ACCOUNT OPTIONS8 HELP9INSTALLING THE JAVA PLUG-IN9SYSTEM REQUIREMENTS9
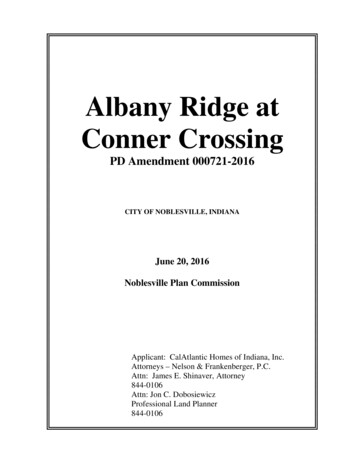
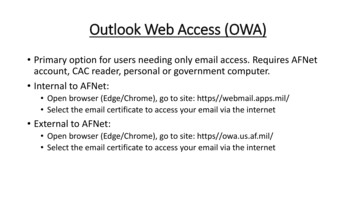
FEATURESREADY-ACCESS WEB MEETING ALLOWSYOU TO: Manage your Ready-Access meeting online usingeasy point and click conference commands Show slide presentations and graphics to meetingparticipants Record a conference (audio only or includesynchronized slides)SETTING UP A CONFERENCE CALL1. If this is your first Ready-Access conference, familiarize yourself with the controls and capabilities of thestandard Ready-Access conference commands.2. Inform all participants of the date and time of the conference.3. Give participants your Ready-Access phone numberand 7-digit access code.4. If you are using the Ready-Access Web Meetingslide presentation feature, provide participantswith this URL to join the Web ing– Please read any messages that may appearduring the installation process to insure acomplete installation. When prompted for a File Download, select “Runthis program from its current location.” When prompted to install and run the Java 2Runtime Environment click “Yes” Follow the instructions provided during installationof the Java plug-in. If prompted to restart your computer, do so beforeproceeding.2. A Java applet will launch the Ready-Access WebMeeting. You will be prompted with a security noticeindicating that the application is verified to havecome from Global Crossing Conferencing. Click “Start”to continue.3. When the Chairperson Login screen is presented,enter your Ready-Access phone number, 7-digitaccess code and Chairperson passcode. Click“Login”. (Figure 1)5. When it is time for your conference, dial in on theReady-Access phone number, enter your 7-digitaccess code, then listen to the prompts to enter yourChairperson passcode to begin the conference.6. Login to your Ready-Access Web Meeting (see below).If this is your first time using Web Meeting, allow extratime to download and install the Java plug-in.7. Conference participants dial the Ready-Accessnumber at the designated time, enter the 7-digitaccess code, and the conference is underway.8. If a slide presentation is used, the participants canview slides using a standard web browser. (There areno plug-ins required for the participant).LOGIN TO THE READY-ACCESS WEB MEETING1. Using a Web browser, go towww.globalcrossing.com/conferencing andselect “Start/Manage a Conference” from under“Ready-Access Web Meeting”. If you have not previously installed Java 2 RuntimeEnvironment 1.3 you will receive a message askingif you would like to begin installation of this plug-in.Click “OK” to start the installation.2Figure 1: ChairpersonLogin Screen4. Participants who will be viewing a slide presentationwill go to www.globalcrossing.com/conferencing, andselect “Join a Conference” from under “Ready-AccessWeb Meeting.” The participant does not need to installanything to view the presentation. They will be prompted to enter your Ready-Access phone number and7-digit access code. After joining the slide presentation, the participantwill be prompted to enter their name, email, phoneand company. Only the name is required. Uponcompletion of the conference, the Chairperson willreceive an email containing all of the participantregistration information.
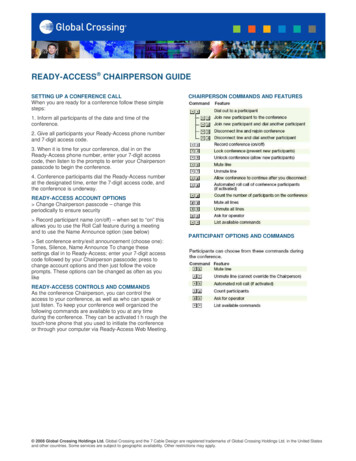
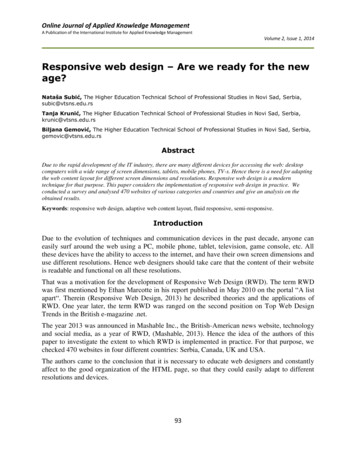
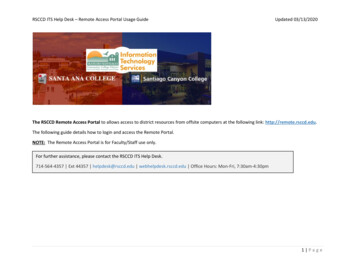
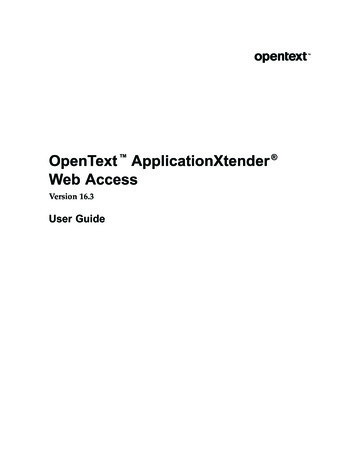
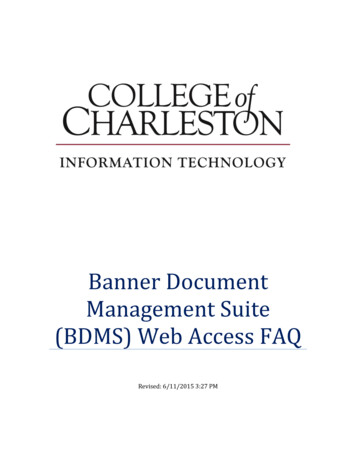
FEATURES5. After you login you will be presented with the ReadyAccess Web Meeting screens.6. Participants who login will initially see the ReadyAccess Participant Lobby screen if the WebConference has not started. (Figure 2) If theylogin after the Web Conference has started,participants will see the slide that the Chairpersonis showing to participants.On the left side of the screen, the chairperson canview either the Web Controls or the Audio Controls.Web Controls allows the chairperson to start a WebConference and enable Chat. When a Web Conferenceis enabled, a list of Web participants appears. AudioControls allows the chairperson to see a list showingthe number of lines in the audio conference as wellas control the audio conference by using point andclick commands.The thumbnails on the bottom of the screen representyour current slide set. Those slides are immediatelyavailable for you to present to participants. The slidewindow on the right displays the current slide beingshown to participants. There are three status indicatorson the bottom left side of the screen. The indicatordisplays whether the Web Conference is on or off,whether Record is on or off, and shows a total countof participants who have raised their hand to indicatethey have a question.Figure 2: Participant Lobby ScreenCHAIRPERSON CONFERENCECONTROL SCREENThe Conference Control screen is your main consolefor managing your conference. All the features of theReady-Access Web Meeting service are available throughthis console. (Figure 3)WEB CONTROLSSelect “Web Controls” at the top left area of the screento view the list of participants in your Web conference.This includes the participant's name, Status (showseither “In Lobby” or “In Conference”) and a Questionindicator box. If a participant selects the “Raise Hand”button on their screen then a check will appear in thebox next to that person’s name on your screen, indicating that they would like to ask a question. As you fieldquestions you can clear the check by clicking on it.Participants also have the ability to withdraw theirquestion and you will see the check mark disappearwhen this happens. You can use the Question featureas an easy way to do quick yes/no polling during aconference. For example, ask a question and theninstruct participants to select “Raise Hand” for yes. Thiswill give you a quick count of those with a yes answer.Instruct participants to select “Lower Hand” to clear theQuestion indicator boxes.The following commands are available from the WebControls screen:Start Web ConferenceFigure 3: Conference Control ScreenThe Start Web Conference button allows you to start aWeb Conference. When selected, you will be asked ifyou’d like to assign an optional Web Conference securitypasscode (4-9 digits). You may proceed without apasscode by selecting “Start.” (Figure 4) If you assigna Web Conference passcode, be sure to inform allparticipants of the security passcode before you beginthe conference.3
FEATURESChatFigure 4: Start Web Conferencing ScreenWhen a Web Conference is started, participants will seethe Ready-Access Web Meeting slide that appears bydefault in the slide window on the right side of theConference Control Screen. They will not see theparticipant list or any of the control buttons. Participantscan press “Full Screen” during the presentation to seean enlarged slide screen (if the participant’s screenresolution is 1024x768 then they will automatically seethe largest view available). Participants will see the Chatwindow unless you have this feature turned off. If theparticipant selects the “Full Screen” view, the Chatwindow may move behind the slide window. Anytimeyou send a new message, the Chat window will open ontop of the slide window so that participants do not missnew messages. The participant also has a “Raise Hand”button allows them to indicate they have a question.This button toggles to “Lower Hand” so the participanthas the option to withdraw their question. (Figure 5)The Web Controls screen displays a Chat box that allowsyou to communicate with all of the participants or aselected participant. Use the drop down menu next to“All Participants” to select a specific participant's nameif you want to send a private message to that person.Participants can send messages to the Chairperson;only the Chairperson views these. Chat is automaticallyenabled when you start a Web Conference. You can turnoff the Chat feature by un-checking the “Enable Chat”box at the bottom of the screen. You can pull the Chatbox out and view it or size it as a separate window onyour screen by double clicking on the arrow button inthe upper right corner of the Chat box. To return it to itsoriginal location on the left side of the control screen, justclose the window.SHOW SLIDE PRESENTATIONS DURING AREADY-ACCESS WEB CONFERENCEYou may show PowerPoint slide sets, GIF (GraphicsInterchange Format), JPG (Joint Photographic ExpertsGroup format), and PNG (Portable Network Graphicsformat) files. You can use the following buttons on theConference Control screen (Figure 3) to manageyour presentations: Slide Deck (Thumbnails) - You can store multiplepresentation files in Web Meeting. The files will remainthere until you delete or overwrite them. The slidedeck displays a thumbnail-sized version of yourslides. You may right mouse click on any of thethumbnails to open a full resolution preview of theslide. To present a slide to all participants viewing theweb portion of the conference, simply double-clickon the desired slide. That slide will then be sent to allparticipants and displayed, at its full resolution, in theconference control window.The slide deck can be scrolled horizontally to see all theslides contained in your presentations. New - Allows you to upload a new PowerPoint slideFigure 5: Participant View ScreenTo end a Web Conference, simply select the “End WebConference” button or you can exit the Web Meeting. Ineither case you will be asked to confirm, to preventaccidentally ending your Web Conference. If you do confirm, the Web Conference will end immediately. When aWeb Conference is ended, the system will automaticallyreturn participants to the Global Crossing Web page.4set that replaces the current slide set. The newpresentation will appear in the slide deck as thumbnailimages. You can also use the “New” button to simultaneously upload multiple presentations by using theShift or Ctrl keys to select multiple files on yourdesktop. Note: Anytime you use the “New” buttonto upload one or many files simultaneously, it willalways overwrite any existing slides you haveuploaded previously. Insert - Adds another presentation or image to the
FEATUREScurrent slides. The new presentation file is inserteddirectly following the slide that you select (click onceto select and it will be highlighted in red). If you wantto add the new presentation to the end of the currentslide set, select the last thumbnail in the slide set,then select "Insert." You can also use the “Insert”button to simultaneously upload multiple presentations by using the Shift or Ctrl keys to select multiplefiles on your desktop.(Figure 6) Delete - Removes the currently selected thumbnailfrom the slide set. You can use the Shift key to highlight several slides to delete. You may also check theoption in the “Delete” popup box that allows you todelete all of the presentation files currently stored inyour Web Meeting. If you do this after your meeting isfinished, none of your presentation content will bestored on the Global Crossing servers. Note: You willbe asked to confirm the deletion. Additionally, if youdelete the current slide being presented, the participants will still see that slide until you have selectedanother slide. Preview - To preview a slide without displaying it toall participants, click once on the slide to highlight itand then select the preview button. Alternatively, youmay move your cursor over the thumbnail and rightclick on it. When a slide is highlighted and the previewbutton is selected, the slide will be displayed in a newwindow, at the maximum slide size. Only theChairperson will see the preview. Arrow Keys - To present a slide to all participantsviewing the Web Conference, double click on thedesired slide. A Web Conference must be started topresent a slide to all participants. The slide will be displayed at its full resolution in the slide window on theright side of the Conference Control screen. The slidewindow always displays the content being presentedto participants. The arrow buttons on the bottom ofthe Conference Control screen allow you to displayslides in the presentation. You can use the scroll barnext to the thumbnail slide deck to locate a particularslide, and then double click on it to display it in theslide window.Figure 6: Upload Slides ScreenREADY-ACCESS RECORDThe Chairperson has the capability to record a meetingwith full synchronization between the audio and slidepresentation. You may also start an audio-only recordingwith Web Meeting (if you are not showing slides).Anytime you are showing PowerPoint slides or imagesduring a recording, they will automatically be synchronized with the audio.To start a recording in Web Meeting, check the box nextto “Record” on the Audio Control screen. (Figure 7) Youwill be asked to enter a name for the recording. Thisname will be used to identify the recording in the ArchiveManagement system. When the recording starts, amessage will play into the audio conference that notifiesparticipants the meeting is being recorded. The recorderwill show up in the Audio Control participant list. Feesapply and a new, recorded file is created each time youselect the Record button to initiate a recording. To avoidmultiple recording fees and files for a single meeting,do not start and stop the recording multiple times duringthe conference. Helpful Tip: Do not upload extremely large files. Thefile size limit is currently 27 MB. Large PowerPoint andimage files will take longer to upload.APPROXIMATE UPLOAD TIME FOR A 1MB FILE33.6kModem56kModem5 Min.3 Min.256KSL/Cable1.5MbT1/LAN30 Sec.5 Sec.Figure 7: Record Button in Audio Control Screen5
FEATURESIf a Web Conference is active, the current slide (in theslide window) will be synchronized with the audio recording. As you proceed through your series of slides eachslide will be synchronized with the Web Meeting audio.Any time you are not showing slides, or if you record aconference with no slide presentation, the Ready-Accessscreen will appear during playbackcontrol bar. The viewer may jump to a specific location inthe recording by selecting the thumbnail slide in therecording playback screen. Both slides and audio will beplayed from that location. The viewer may also use theslider bar to go to a specific location in the recordedconference.To end the recording, uncheck the ”Record” box on theAudio Control screen. You will be asked to confirm thatyou want to end the recording. Any time a recordingends, a message is played into conference informing allparticipants that the conference is no longer beingrecorded. If the Chairperson exits Web Meeting withoutending the recording, the recording will continue until theaudio conference ends. The Chairperson can also endthe recording by pressing * 2 on the telephone keypadat any time (see below).ACCESSING READY-ACCESS ARCHIVEMANAGEMENTRecording via the telephoneYou may also initiate a recording by pressing * 2 on thetelephone keypad. You will then be prompted to press 1to continue with the recording (or press * to canceland return to conference). A voice prompt will notify theChairperson and participants that the conference is beingrecorded. To end the recording, press * 2 on the telephone keypad. You will be prompted to press 1 to stopthe recording (or press * to cancel and return to conference). A voice prompt will notify that the conference isno longer being recorded. If a recording is in progressand the Ready-Access conference call is ended, therecording will automatically stop.You can access Ready-Access Archive Managementby selecting “Archives” from the Ready-Access WebMeeting Conference Control screen or you canlogin directly to Archive Management fromwww.globalcrossing.com/conferencing.To login directly to Archive Management:1. Go to the Global Crossing Conferencing Web site atwww.globalcrossing.com/conferencing.2. Select “Archive Management” under “WebConferencing.”3. At the Archive Management login screen (Figure 8),enter your Ready-Access phone number, 7-digitaccess code and Chairperson passcode.Notes on Recording: Use a handset whenever possible for bestvoice quality. If use of a handset is not possible, sit and speak as closely as possible to a speakerphone; headsetsmay cause static or poor audio quality. Mute participants that have a great deal ofbackground noise.Recording playbackRecordings are available immediately after the conference ends. Recordings can be accessed via the Internet(see Accessing Ready-Access Archive Managementbelow) and replayed using either RealNetworks audioor Microsoft Windows Media players. Recordings arestored in MP3 files for superior audio quality and easyplayback with no waiting or interruptions. If slides arepresented during a recording, both the audio and slidesare fully synchronized during playback. The audio controls for playback include: Start, Stop, Pause, Slider bar,Status on content (location and duration), and Volume6Figure 8: Archive Management Login ScreenARCHIVE MANAGEMENT TOOLSPreviously recorded conferences will be stored in theArchives List (figure 9) for future use. This list includesthe title of each archive, the date and time it was recorded and a file ID number. In addition there are some reportsettings that you can turn on or off. These include thefollowing columns:
FEATURES Registration - By default, this feature setting is ONfor a new recording. When Registration is ON, aviewer is asked to enter their name, company name,phone number and email address when they accessthe recording for online playback. The systemrequests this information but does not require it forplayback access. You can change this feature settingfor a specific recording as often as you like, just clickon the checkbox (checkmark ON; blank OFF). Notification - By default, this feature is OFF for anew recording. To be notified via email each time arecorded file is played back by a viewer, check the“Notification” box for that recording. (You will need tohave a current email address on file with GlobalCrossing.) You can change this feature setting for aspecific recording as often as you like, just click onthe checkbox (checkmark ON; blank OFF). Requirements: You must have either RealNetworksaudio or Windows Media Player installed to playan archived recording. You can choose the formatto play the recording in by selecting “WindowsMedia” or “Real Audio” from the menu on the rightside of the screen. Download Audio – Download the MP3 file to yourPC and store it yourself. You can then delete the filefrom the system to eliminate hosting and playbackcharges. If you download a recorded file that containsslides, only the audio portion of the recording will bedownloaded to your PC. The slides are not storedin the MP3 file – they are in another file that getsautomatically synchronized during playback. Rename – To change a name of the recorded fileselect “Rename” and enter a new name for therecording. Note: This button is only available if you log directlyinto Archive Management. To change a name of afile if you accessed Archive Management throughthe Audio Control screen, select the title in the“Name” column and enter the new title. Security - By default, there is no security codeFigure 9: Archives List Screen Once you have selected an archived conference (clickon the button in the first column on the left) you areable to Name/Rename, Email, Play, Download Audio,look at a real-time Report, Delete the file or assignadditional Security to the archive. Email – To sendrecipients an email message along with a link to theselected archive for playback, select “Email.” Oncethe message is received the recipient clicks on thelink and can play the recording in its entirety. Play – Select “Play” to playback the conference usingthe selected media player (see requirements below).Using play, pause, stop, a
come from Global Crossing Conferencing. Click “Start” . return participants to the Global Crossing Web page. Chat The Web Controls screen displays a Chat box that allows you to communicate with all of the participants or a selected participant. Use the drop down menu next to