Transcription
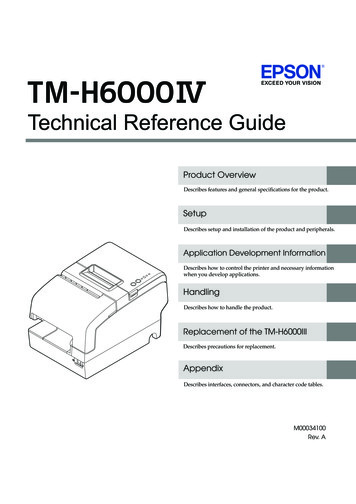
Technical Reference GuideProduct OverviewDescribes features and general specifications for the product.SetupDescribes setup and installation of the product and peripherals.Application Development InformationDescribes how to control the printer and necessary informationwhen you develop applications.HandlingDescribes how to handle the product.Replacement of the TM-H6000IIIDescribes precautions for replacement.AppendixDescribes interfaces, connectors, and character code tables.M00034100Rev. A
Cautions No part of this document may be reproduced, stored in a retrieval system, or transmitted in any formor by any means, electronic, mechanical, photocopying, recording, or otherwise, without the priorwritten permission of Seiko Epson Corporation. The contents of this document are subject to change without notice. Please contact us for the latestinformation. While every precaution has been taken in the preparation of this document, Seiko Epson Corporation assumes no responsibility for errors or omissions. Neither is any liability assumed for damages resulting from the use of the information containedherein. Neither Seiko Epson Corporation nor its affiliates shall be liable to the purchaser of this product or thirdparties for damages, losses, costs, or expenses incurred by the purchaser or third parties as a result of:accident, misuse, or abuse of this product or unauthorized modifications, repairs, or alterations to thisproduct, or (excluding the U.S.) failure to strictly comply with Seiko Epson Corporation’s operatingand maintenance instructions. Seiko Epson Corporation shall not be liable against any damages or problems arising from the use ofany options or any consumable products other than those designated as Original EPSON Products orEPSON Approved Products by Seiko Epson Corporation.TrademarksEPSON and ESC/POS are registered trademarks of Seiko Epson Corporation in Japan and othercountries/regions.Microsoft and Windows are registered trademarks of Microsoft Corporation.ESC/POS Command SystemEPSON ESC/POS is a proprietary POS printer command system that includes patented or patentpending commands. ESC/POS is compatible with all types of EPSON POS printers and displays(excluding the TM-C100 printer).ESC/POS is designed to reduce the processing load on the host computer in POS environments. Itcomprises a set of highly functional and efficient commands and also offers the flexibility to easily makefuture upgrades.2
For SafetyKey to SymbolsThe symbols in this manual are identified by their level of importance, as defined below. Readthe following carefully before handling the product.You must follow warnings carefully to avoid serious bodily injury.WARNINGCAUTIONProvides information that must be observed to prevent damage to the equipment or loss ofdata. Possibility of sustaining physical injuries. Possibility of causing physical damage. Possibility of causing information loss.Provides information that must be observed to avoid damage to your equipment or amalfunction.Provides important information and useful tips.3
WarningsWARNING4 To avoid risk of electric shock, do not set up this product or handle cables during athunderstorm Never insert or disconnect the power plug with wet hands.Doing so may result in severe shock. Handle the power cable with care.Improper handling may lead to fire or electric shock. Do not modify or attempt to repair the cable. Do not place any heavy object on top of the cable. Avoid excessive bending, twisting, and pulling. Do not place the cable near heating equipment. Check that the plug is clean before plugging it in. Be sure to push the plug all the way in. Be sure to use the specified power source.Connection to an improper power source may cause fire or shock. Do not place multiple loads on the power outlet.Overloading the outlet may lead to fire. Shut down your equipment immediately if it produces smoke, a strange odor, orunusual noise.Continued use may lead to fire. Immediately unplug the equipment and contact yourdealer or a Seiko Epson service center for advice. Never attempt to repair this product yourself.Improper repair work can be dangerous. Never disassemble or modify this product.Tampering with this product may result in injury or fire. Do not allow foreign matter to fall into the equipment.Penetration by foreign objects may lead to fire. If water or other liquid spills into this equipment, do not continue to use it.Continued use may lead to fire. Unplug the power cord immediately and contact yourdealer or a Seiko Epson service center for advice. If you open the DIP switch cover, be sure to close the cover and tighten the screwafter adjusting the DIP switch.Using this product with the cover open may cause fire or electric shock. Do not use aerosol sprayers containing flammable gas inside or around thisproduct.Doing so may cause fire.
CautionsCAUTION Do not connect cables in ways other than those mentioned in this manual.Different connections may cause equipment damage or fire. Be sure to set this equipment on a firm, stable, horizontal surface.The product may break or cause injury if it falls. Do not use this product in locations subject to high humidity or dust levels.Excessive humidity and dust may cause equipment damage or fire. Do not place heavy objects on top of this product. Never stand or lean on thisproduct.Equipment may fall or collapse, causing breakage and possible injury. Take care not to injure your fingers on the manual cutter: When you remove printed paper. When you perform other operations, such as loading/replacing roll paper. Do not open the roll paper cover without taking the necessary precautions, as thiscan result in injury from the autocutter fixed blade. To ensure safety, unplug this product before leaving it unused for an extendedperiod.Restriction of UseWhen this product is used for applications requiring high reliability/safety, such astransportation devices related to aviation, rail, marine, automotive; disaster prevention devices;various safety devices; or functional/precision devices, etc., you should use this product onlyafter giving consideration to including fail-safes and redundancies into your design to maintainsafety and total system reliability. Because this product was not intended for use in applicationsrequiring extremely high reliability/safety, such as aerospace equipment, main communicationequipment, nuclear power control equipment, or medical equipment related to direct medicalcare, etc., please make your own judgement on this product's suitability after a full evaluation.5
About this ManualAim of the ManualThis manual was created to provide information on the development, design, and installation ofPOS systems and the development and design of printer applications for developers.Manual ContentThe manual is made up of the following sections:Chapter 1Product OverviewChapter 2SetupChapter 3Application Development InformationChapter 4HandlingChapter 5Replacement of the TM-H6000IIIAppendixSpecifications of Interfaces and ConnectorsCharacter Code Tables6
Contents For Safety.3Key to Symbols . 3Warnings . 4Cautions. 5 Restriction of Use .5 About this Manual .6Aim of the Manual. 6Manual Content . 6Product Overview .11 Features .11 Product Configurations .13Interfaces . 13Colors . 13Accessories. 14 Part Names and Functions.15Power Switch . 15Power Switch Cover. 15Control Panel . 16Offline . 17Connectors. 18 Error Status .19Automatically Recoverable Errors . 19Recoverable Errors. 19Unrecoverable Errors . 20 NV Memory (Non-Volatile Memory) .22NV Graphics Memory. 22User NV Memory . 22Memory Switches. 23R/E (Receipt Enhancement) . 23User-defined Page . 23Maintenance Counter . 23 Product Specifications .24Printing Specifications . 25Character Specifications . 27Paper Specifications. 28Printable Area . 31Printing and Cutting Positions . 34Ribbon Cassette . 34MICR Reader (Factory-Installed Option) . 35Electrical Characteristics . 367
Reliability .37Environmental Conditions .38External Dimensions and Mass.39 Option Specifications . 40Power Supply Unit (PS-180) .40Setup .41 Flow of Setup. 41 Installing the Printer. 42Important Notes .42 Adjusting the Paper Roll Near-End (NE) Sensor. 43 Changing the Paper Width. 44 Setting the DIP Switches. 45Setting Procedure.45For Serial Interface.46For Parallel Interface .48For Built-in USB Interface .49For Ethernet/Wireless LAN Interface .50Selecting the Print Density (DIP Switches 2-3/2-4). 51Selecting the BUSY Status .52 Connecting the Printer to the Host Computer . 53For Serial Interface.53For Parallel Interface .56For USB Interface.57For Ethernet Interface .59For Wireless LAN Interface .61 Connecting the Power Supply Unit (PS-180) . 62Connecting the Power Supply Unit .62 Attaching the Connector Cover . 64 Setting the Memory Switches/Receipt Enhancement. 65Functions .66 Connecting the Cash Drawer . 71Connecting the Drawer Kick-out Cable.71Application Development Information.73 How to Control the Printer. 73Selecting a Driver .73ESC/POS Commands .748
Software and Manuals .83How to Get Drivers, Manuals, and the Utility . 83Printer Drivers. 83Utilities. 85 Setting/Checking Modes.86Self-test Mode . 86Hexadecimal Dumping Mode . 89NV Graphics Print Mode . 90Receipt Enhancement Information Print Mode. 92Memory Switch Setting Mode. 93Handling .95 Usage Precautions.95 Installing and Replacing the Ribbon Cartridge .95Installing and Replacing the Ribbon Cartridge for E/P . 97 Installing and Replacing Paper.99Inserting Slip Paper . 99Inserting Validation Paper (For Validation Models). 101Installing and Replacing Roll Paper. 102 Removing Jammed Paper.104Removing Jammed Slip Paper. 104Removing Jammed Roll Paper . 105 Cleaning the Printer.106Cleaning the Printer Case . 106Cleaning the Thermal Head. 106Cleaning the MICR Head (For Models with the MICR Reader). 107 Preparing for Transport .108Replacement of the TM-H6000III .109 Compatibility .109Printing . 109Number of Head Energizing Parts for Receipt Printing . 109Printable Area . 109Cutting Method . 109Receive Buffer . 110Memory Capacity . 110Electrical Characteristics . 110DIP Switches . 110Printer Status . 110Logo Registration . 110Driver Compatibility. 1119
Two-Color Printing.111Ink Ribbon Cartridge.111Overall Dimensions .112 Additional Functions and Functional Improvements. 113Print Speed .113Receipt Print Density .113Slip Paper.114Bar codes .114Tone.114Interface .114Connection of Customer Display .115Customized Value .115R/E Information Printing Mode .115Memory Switch Setting Mode .116Maintenance Counter.116Power Supply Unit Capacity .116USB Low Power Consumption Mode .116Appendix .117 Specifications of Interfaces and Connectors. 117RS-232 Serial Interface.117IEEE 1284 Parallel Interface.120USB (Universal Serial Bus) Interface .123 Character Code Tables . 124Common to All Pages.124Page 0 [PC437: USA, Standard Europe].125Page 1 (Katakana).126Page 2 (PC850: Multilingual) .127Page 3 (PC860: Portuguese) .128Page 4 (PC863: Canadian-French).129Page 5 (PC865: Nordic) .130Page 16 (WPC1252) .131Page 17 (PC866: Cyrillic #2) .132Page 18 (PC852: Latin2) .133Page 19 (PC858: Euro) .134Page 254 (User-Defined Page).135Page 255 (User-Defined Page).136International Character Sets.13710
Chapter 1 Product OverviewProduct OverviewThis chapter describes features and specifications of the product.FeaturesThe TM-H6000IV is a high-end POS printer that can print on both slip paper (checks) and rollpaper (receipts).The features are as follows:1Slip printing An optional Magnetic Ink Character Recognition (MICR) reader and an optional endorsementprinter (E/P) enable the printer to perform consecutive reading of MICR characters,endorsement printing, and front printing, in a single pass of a check. High throughput using bidirectional minimum distance printing. A mechanical form stopper gives stability to slip paper. Opening the front carriage unit makes removing jammed paper easy. The validation model printer can print an 8-line validation.Receipt printing High-speed printing enables issuing of batch receipts. Graphics are also printed with high-speed printing. Multi-tone graphics printing is possible. Bar code and two-dimensional symbol printing is possible. Easy drop-in paper loading. An autocutter is standard equipment. Paper-saving function is supported.Software Command protocol is based on the ESC/POS Proprietary Command System. OPOS ADK, JavaPOS ADK, and Windows printer drivers are available. Automatic Status Back (ASB) function that automatically transmits changes in the printerstatus is supported. A maintenance counter function is supported.11
Interfaces Various interface boards (EPSON UB series) can be used. A built-in USB interface is also available for serial/parallel interface models.EnvironmentENERGY STAR qualified. (Some configurations may be exempted, depending on theircomponents.)Others Small footprint and simple design. Direct connection of EPSON customer display series (DM-D) is possible.12
Chapter 1 Product OverviewProduct ConfigurationsThere are two models o
EPSON ESC/POS is a proprietary POS printer command system that includes patented or patent-pending commands. ESC/POS is compatible with all types of EPSON POS printers and displays (excluding the TM-C100 printer). ESC/POS is designed to reduce the pro