Transcription
Introduction to Deployment Solution 7.5DescriptionThis course is designed to provide an introductory look into DeploymentSolution 7.5.This lab assumes a basic and general understanding of the SymantecManagement Platform and operating system imaging. Basic MicrosoftWindows skills are recommended.At the end of this lab,you should be able toNotes Have a good understanding of the new features in DeploymentSolution 7.5 (DS 7.5) Understand the architectural changes in DS 7.5 and how theydiffer from DS 7.1 Understand what is needed to properly configure DS 7.5 forimage deployment using a distributed architecture Have a basic understanding of configuring the F8 Boot menu forcustomized scenarios Have a general knowledge on how to customize WinPE Understand the flow of data in DS 7.5 A brief presentation will introduce this lab session and discusskey concepts. The lab will be directed and provide you with step-by-stepwalkthroughs of key features. Feel free to follow the lab using the instructions on the followingpages. You can optionally perform this lab at your own pace. Be sure to ask your instructor any questions you may have. Thank you for coming to our lab session.
Table of ContentsIntroduction to Deployment Solution 7.5 . 1Cheat Sheet . 3Site Server Locations . 3SMP Locations . 3Important Notes/Things to Remember . 4Installing the Symantec NetBoot Service . 5Creating WinPE Images . 8Creating the Basic WinPE Image. 8Creating the Advanced WinPE Image . 11Creating Initial Deployment Jobs . 13Creating the Initial Deployment Job . 13Creating the Re-Deployment Image Job . 14Configuring Deployment Solution for Network Boot . 16Configuring Predefined Computers. 16Configuring the Initial Deployment Policy . 17Customizing Deployment Solution Network Boot Policies . 20Enabling the NBS Global Policy . 20Configuring the NBS General Policy . 21Testing the Boot Scenarios . 24Booting from an Unknown Computer (Initial Deployment) . 24Booting from Predefined Computer . 26Booting from a Managed Computer . 28Appendix A - Unboxing Deployment Solution 7.5/First Time Setup . 30Differences in PXE Services . 30Configuring DHCP Options . 30Sysprep Configuration . 32Adding OS License Keys . 32Creating the Personality Capture Template . 33Creating Jobs & Tasks . 34Creating the Windows 7 Migration Job . 34Creating the Basic Capture and Deploy Jobs . 36Create the Image Capture Job . 36Create the Image Deployment Job . 38Adding Preboot Drivers . 40Importing Existing Images . 422 of 42
Cheat SheetThis section is designed to provide you with a quick reference for navigating Deployment Solution7.5 and locating important Deployment Solution 7.5 resources.Site Server Locations Directory where WinPE images are processed (think temp folder)o C:\Program Directory for completed WinPE imagesoC:\Program Files\Altiris\Altiris Agent\Agents\Deployment\SBS\ImagesSMP Locations eXpress share locationo NSCAP share locationo C:\Program Files\Altiris\Deployment\PCT\TEMPLATE.EXECore WinPE files location (for customizing WinPE)o C:\Program ent\Packages\Images\PC Transplant locationo C:\Program Files\Altiris\Notification Server\NSCapImage store location (may also exist on package server)o Deprecated (No longer supported in DS 7.5)C:\Program x86\Base\Resource Import Utility (for importing images)oC:\Program Files\Altiris\Deployment\Tools\3 of 42
Important Notes/Things to Remember If you are sure you have correctly installed/configured the Symantec Netboot Service butyour clients will still not PXE boot, try restarting the “Symantec Network Boot Service”and also verifying DHCP settings You must have an image available in the system before you can create any task/job thatwould deploy an image Do not forget to enter in Windows Product keys in the “OS Licenses” screen – OurSysprep files are generated with SMP Tokens and having a blank or “null” license keymay result in a failed image deployment (fails on post image sysprep configuration) Make sure DNS is properly configured in your environment AND that your DHCP optionsreflect the correct DNS Name Server. The SMP processes are inconsistent when itcomes to using Fully Qualified Domain Names (NS75.Symplified.Org) and/or IPAddresses (192.168.128.131). You will likely have failed jobs/policies/deployments/etcwithout proper DNS configuration Remember that any WinPE changes you make (driver additions/customizations/etc) willresult in the need to recreate any or all WinPE images on each NBS Site Server. Thiscan be a time consuming process – be patient and use the methods in this lab to helpyou verify completion Regarding SSL – At the time of this writing there has been an issue identified that willprevent Deployment Solution 7.5 from properly functioning if SSL has been enabled afterthe installation of the SMP. The current supported method for SSL in DS is to enable SSLsupport during the installation of the platform. The section titled “Post SSL ConfigurationWorkaround” will detail a currently working method for resolving this issue.4 of 42
Installing the Symantec NetBoot ServiceAs previously mentioned, the Symantec Netboot Service is what facilitates the PXE and BDSP(Apple Netboot) management process.1) On the NS75 virtual machine double click on the Symantec Management Console 7.5 icon tolaunch the Symantec Management Console2) Navigate to Settings- Notification Server- Site Server Settings- 3) Expand “Site Management- Site Servers- 4) Click on “Site Servers”5) Add a new Site Server by pressing the “New” button6) Select the “MONITOR” machine from the list and press the button to move it to the“Selected Computers” list5 of 42
7) Press “OK”The Add/Remove Services window appears8) Select “Network Boot Service” from the listNote: Make sure to only select “Network Boot Service” from the list. While this is essentially asite server deployment, the purpose of the lab is to showcase the distributed architecture.9) Press “Next”*** DO NOT PRESS OK just yet ***10) Switch to the MONITOR virtual machine11) Double click the “Disk Pulse” icon on the desktop to open Disk PulseNote: Disk Pulse is freeware utility that monitors file system traffic. It is not affiliated withSymantec in anyway12) Press the “Monitor” button in upper left corner of the menu bar13) Select the C:\ from the directories list and press the “Del” button14) Press the “Add” button15) Navigate to C:\Program Files\Altiris\16) Press “OK”6 of 42
17) Press “OK” again to confirm the directory18) Press “Start” (the button in Disk Pulse, NOT the Windows Start Menu) to begin the filesystem monitoring processNote: Disk Pulse is currently “watching” the C:\Program Files\Altiris\ directory for any new,modified or deleted files or folders. This allows us to watch in “real time” as the SymantecManagement Agent consumes the Site Server Policy and deploys the Symantec NetbootService.19) Switch back to the NS75 virtual machine20) Press “OK” to confirm the installation of the Network Boot Service21) Switch back to the MONITOR virtual machine22) You may now either wait for the Symantec Management Agent to check in or force it bydouble clicking the agent icon in the system tray, pressing the settings button and then theupdate buttonWhen the agent receives the site server policy it will begin installing the site servercomponents and then install the Symantec Netboot Service. Disk Pulse will show you a flurryof files that are being modified and created. These are the actual files and respectivelocations of the Site Server Network Boot Service23) Verify the Symantec Netboot Service is up and running by clicking on the services icon in thetask bar (pair of gear icons) and looking for the following services:Symantec Network Boot Service (PXE and BSDP)Symantec Network Boot Service (TFTP)7 of 42
Creating WinPE ImagesCreating the Basic WinPE ImageWinPE is a preboot operating environment that is based on versions of Microsoft Windows.WinPE 3.1 is the version Deployment Solution 7.5 uses and is based on the Windows 7 SP1 OS.1) On the NS75 virtual machine double click on the Symantec Management Console 7.5 icon tolaunch the Symantec Management Console2) Navigate to Settings- Deployment- Create Preboot Configurations- 3) Check the box to “Apply Policy Immediately”This setting essentially forces any NBS Servers to check in right away to build the WinPEimage.Note: In the previous version of Deployment Solution a customer had to either wait for theagents to check in based on their policies OR manually force each server to check in for thebuild process to be initiated4) Press the “Add” buttonNote: You may be prompted for Java client authentication, if so enter the followingcredentials (make sure to check the box to remember password in your password list):Username: AdministratorPassword: symc4now!Domain: symplified5) Name the Preboot configuration “Default WinPE”6) Make sure only x86 architecture is selected7) Make sure “Inject imaging tools” is selected8 of 42
8) Choose to create “Both PXE and Automation folder”9) Press “OK”*** DO NOT PRESS Save Changes yet10) Switch to the MONITOR virtual machine and press the “Reset” button on the Disk PulseMenuNote: This will clear the Disk Pulse change log so we can view the WinPE build process andhas no direct effect on the WinPE build process itself, it is just for instructional purposes11) Switch back to the NS75 virtual machine and press “Save Changes” on the PrebootConfigurations page12) Switch back to the MONITOR virtual machine and note that Disk Pulse has already (if notshortly) begun picking up changes in the Altiris directory.Browse through the Disk Pulse change log as the WinPE build is being processed. Whatkinds of files are being created on the MONITOR virtual machine?Note: It is important to remember that a Site Server with the Symantec Netboot Service on itdoes not initially contain the required components to build a WinPE image. Upon the initialpreboot environment (WinPE) build request, the WinPE (or other) build components arecopied to the Site Server VIA package delivery. After the components have been copied, theSite Server can process the build request. This is by design to avoid large amounts of databeing deployed along with the Symantec Netboot Service. Your instructor can explain in moredetail as the process can initially be a bit confusingNote: The process of building the WinPE image(s) can take anywhere from 5 minutes to 30minutes per WinPE instance. The forthcoming exercises will explain how to verify the WinPEimage process has completed9 of 42
13) To verify that the WinPE build process completed navigate to the following directory:C:\Program Files\Altiris\Altiris Agent\Agents\Deployment\SBS\Images\14) Verify that the “Default WinPE” directory existsNote: This may take up to 20 minutesNote: The directory name gets its name directly from the Preboot Configuration form that wasused earlier in the lab. It is highly recommended that you use some type of standardizednaming convention in a production environment. While there are various use cases for usingmultiple WinPE instances, other than architecture (x86/x64) there is no delineation betweeninstances of WinPE. You will need to rely on the description field in the SymantecManagement Console’s Preboot Configuration Screen or on a naming convention (preferablyboth).15) Switch back to the NS75 virtual machine16) Close the “Preboot Configurations” window10 of 42
Creating the Advanced WinPE ImageSymantec does not officially support the customization of the core WinPE environment. With theexception of drivers, no mechanism exists to customize an instance of WinPE. Althoughunsupported in the traditional sense, making customizations to WinPE is very typical in acustomer environment. This exercise walks through a process whereby additional files are addedto the Symantec core WinPE directory that will be processed (mixed in with the WinPE image thenext time a build request is made.This Symantec KB article may help as well: http://www.symantec.com/docs/HOWTO559081) On the NS75 virtual machine locate the shortcut on the desktop labeled“Enable Advanced WinPE Tools” and run it.Note: This will copy the advanced tool kit from the lab resources folder into the WinPE folderon the SMP. (C:\Program x86\Base\)Note: Remember that even though you may copy files/folders into this directory, they will stillneed to “replicate” down to each site server that is building a new WinPE Image. Site Serverswill not receive these files until a task is generated to build a WinPE image. This helps reduceunnecessary network traffic.2) Double click on the Symantec Management Console 7.5 icon to launch the SymantecManagement Console3) Navigate to Settings- Deployment- Create Preboot Configurations- 4) Press the “Add” button5) Name the new Preboot Configuration WinPE Advanced”6) Select “x86” for the architecture”7) Make sure the bax labeled “Inject Imaging Tools” is checked8) Select the “PXE” radio button under “Select which preboot environments to build”9) Press “OK”11 of 42
10) Make sure the “Apply Policy Immediately” box is checked and press the “Save Changes”button11) Close the Preboot Configurations Window12) Switch to the MONITOR virtual machineDisk Pulse should already be picking up the changes in the Altiris directory13) Navigate to the following folder to verify WinPE Image creationC:\Program Files\Altiris\Altiris Agent\Agents\Deployment\SBS\Images\Note: Completed WinPE Images show up as folders with their respective namesNote: This will take approximately 5 to 10 minutes to complete12 of 42
Creating Initial Deployment JobsCreating the Initial Deployment JobThe Initial Deployment feature in Deployment Solution allows an administrator to pre-assign ajob(s) to an unknown resource (unknown in this case is a machine that the SMP has no priorinformation of)1) On the NS75 virtual machine double click on the Symantec Management Console 7.5 icon tolaunch the Symantec Management Console2) Navigate to Manage- Jobs and Tasks- 3) Expand “System Jobs and Tasks”4) Right click on “System Jobs and Tasks” and select New- Folder- 5) Name the folder “Initial Deployment”6) Right click the newly created folder and choose New- Client Job7) Name the job “Initial Deployment Job”8) Add a new task by pressing the “New” button9) Select “Deploy Image”10) From the “Image Name” drop down select “Windows7base.gho”11) Select the product key from the drop down12) Press “OK”13) Add a new task by pressing the “New” button14) Select “Boot To”15) Rename the task “Boot To Production”16) Select the “Production” radio button17) Press “OK”13 of 42
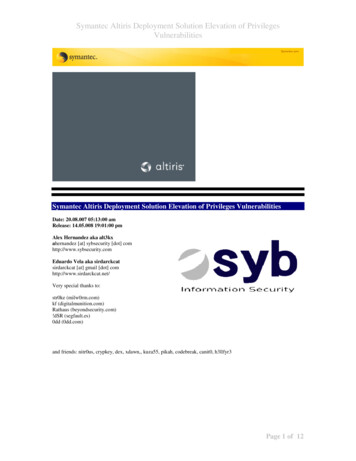
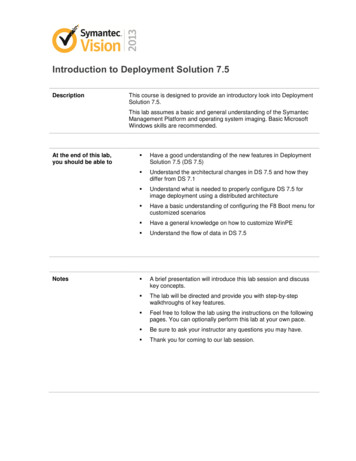
18) Press “Save Changes”Your job should now look like this:Creating the Re-Deployment Image Job1) Navigate to Manage- Jobs and Tasks- 2) Expand “System Jobs and Tasks”3) Right click on the “Redeploy Image” folder and select New- Client Job- 4) Name the job “Redeploy Image”5) Add a new task by pressing the “New” button6) Select “Deploy Image”7) Choose the “Windows7Base.gho” image from the drop down8) Select the product key from the drop down9) Press “OK”10) Add a new task by pressing the “New” button11) Select “Boot To”12) Rename the task “Boot To Production”13) Select the “Production” radio button14 of 42
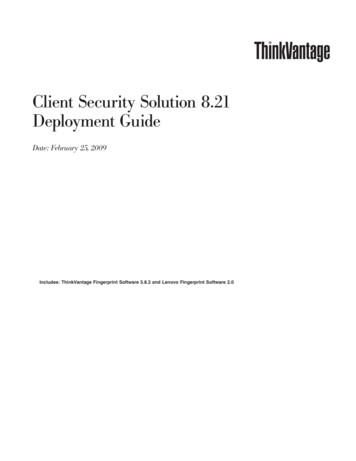
14) Press “OK”Your job should now look like this:15) Press “Save changes”15 of 42
Configuring Deployment Solution for Network BootNow that the foundational configuration process is complete, it is time to configure DeploymentSolution to accept network based boot clients. Although it is technically possible to completesome of this exercise much earlier on, waiting until the end prevents an administrator from havingto unnecessarily revisit these configuration steps.Configuring Predefined ComputersPredefined Computers allow an administrator to provide Deployment Solution with basicinformation about a computer before the computer has physically been communicated with on thenetwork. This allows for job and task pre-assignment as well as various other tasks such asinclusion in Organizational Views and Groups and Filter assignment.1) On the NS75 virtual machine double click on the Symantec Management Console 7.5 icon tolaunch the Symantec Management Console2) Navigate to Settings- Deployment- Predefined ComputersIf prompted for Java credentials, enter the following:User name: administratorPassword: symc4now!Domain:Symplified3) Press the “Add” buttonNote: If you receive a warning message about Predefined Boot Images, just ignore it16 of 42
4
7.5 and locating important Deployment Solution 7.5 resources. Site Server Locations Directory where WinPE images are processed (think temp folder) o C:\Program Files\Altiris\Altiris ootwiz\oem\DS\winpe\x8 6\Base\ Directory for completed WinPE images