Transcription
Getting Started with Your GT-400-
2020, Attendance on Demand , Inc. All rights reserved. Attendance on Demand is a registered trademark of Attendance onDemand, Inc. and Attendance Enterprise is a registered trademark of InfoTronics, Inc. All other company and product names areregistered trademarks or trademarks of their respective holders.Nothing in this document is intended to convey legal advice but is provided for general informational purposes only.Contact your own attorney for advice regarding any particular legal matter.Nothing contained in these materials modifies, enhances, replaces or supersedes any of your obligations under applicablefederal, state and local laws, rules, regulations and ordinances in using the Time and Attendance services. All content,including without limitation, any examples, should not be relied upon and are provided for illustration purposes only.Latest update: pdf 2020, Attendance on Demand , Inc. Information in this document is subject to change without notice.2
Meet the GT-400 . 4Maintenance of the GT-400. 5Quick Start Guide to GT-400 . 6Synchronize the Clock. 6Enroll an Employee . 7Special Enrollment of an Employee . 10Perform Employee Operations . 12Punch In or Out . 12Callback Transaction . 13Enter Tips . 13Employee Review. 14Simple Workgroup Entry . 16Multiple Level Workgroup Transfer . 17Quick Workgroup Transfer . 18A Single Day Leave Request . 19 2020, Attendance on Demand , Inc. Information in this document is subject to change without notice.3
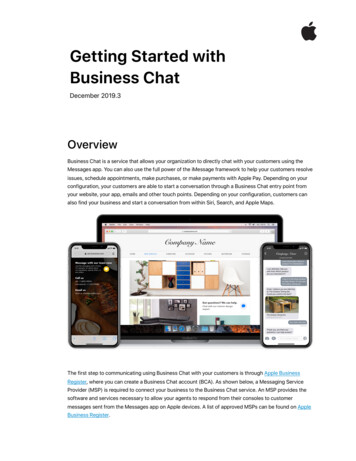
Meet the GT-400The GT-400 is an industry grade time clock with streamlined technology that is easy to use and easy toconfigure. Here are the basic parts of the time clock. Display. It displays time, information, and instructions for the user. F1 to F8 function keys. They are used to perform comprehensive employee functions or supervisorfunctions. Label abbreviations can be specified to appear on the GT-400 to support ATM-likefunction keys. 2020, Attendance on Demand , Inc. Information in this document is subject to change without notice.4
Navigation arrows. They are used to browse configuration menus in the time clock, switch betweenYes and No in the menus, scroll down to view the long messages on the screen, or erase numbersentered using the keypad. ENTER. It is used to indicate acceptance or move processes forward. Hand reader. Place the hand on the platen to punch. ESC. It is used to indicate lack of acceptance, halt a process, or go back a menu. SPACE. Press # to access configuration options. Synchronization. If the Push communication is used, press CAPS to perform full synchronizationoperation and other operations, such as navigate among options (OK, Cancel, and an edit field). (Optional) barcode reader.Please note: The FN and Alpha keys are not used.Maintenance of the GT-400The GT-400 works well in many kinds of industrial environments. Antimicrobial coating embedded inplaten, keypad and plastics in inhibits growth of bacteria. There is no special maintenance requirement. 2020, Attendance on Demand , Inc. Information in this document is subject to change without notice.5
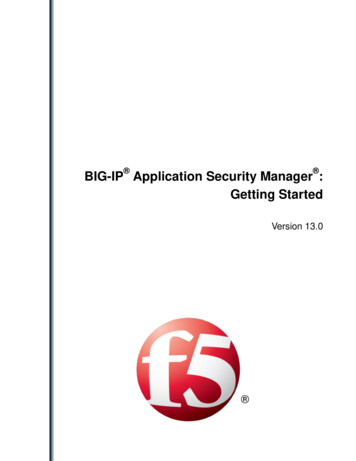
Quick Start Guide to GT-400This section gives an overview of the process on how to use GT-400.1. If the clock setup is complete, clock operations and employee information can be downloaded to theclock by performing the synchronization operation. See Synchronize the Clock on page 6.2. If the hand reader is used, enroll employee hand templates. See Enroll an Employee on page 7.3. Employees use their own function keys to perform transactions. For employee function keys, seePerform Employee Operations on page 12.Synchronize the ClockYour time and attendance partner configures the GT-400 for your needs. Once the setup has beencompleted, you can download the configuration and employees to your time clock as follows.1. Press CAPS or the dedicated function key to perform the synchronization operation.2. Enter PIN to access the synchronization function key. 2020, Attendance on Demand , Inc. Information in this document is subject to change without notice.6
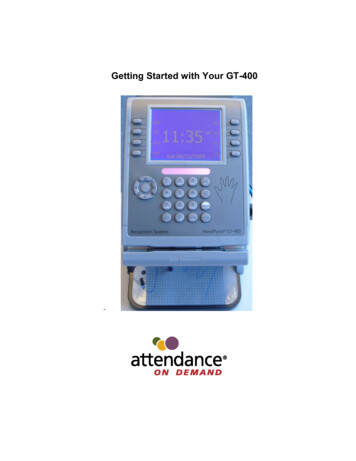
3. The messages “HTTP Sync Request Made”, “Loading Employees”, “Managing EmployeeTemplates”, “Loading System Settings”, “Sync Completed”, and “Completed. Thank You.” aredisplayed.If error messages are displayed on the screen, such as “General Communications Error”, or “SyncError”, contact your time and attendance partner.Enroll an EmployeeBefore employees can use the system, they must be enrolled at the GT-400 by a supervisor.1. Press the function key to enroll an employee.2. Enter PIN to access the enrollment function key. 2020, Attendance on Demand , Inc. Information in this document is subject to change without notice.7
3. The Enrollment menu is highlighted. Press ENTER.4. The Enroll menu is highlighted. Press ENTER.5. In the Enter Badge/ID number prompt, enter the employee badge number or slide the badge throughthe barcode swipe card reader (if the barcode reader is installed). Press the left arrow to erase thenumber and re-enter it if needed. Press the right arrow to navigate between OK, Cancel, and the editfield. Press ENTER to confirm the selection.6. If templates exist for this badge number, a message “This employee already has 1 templates(s). Doyou want to remove the existing template and reenroll?” Press the right arrow to navigate betweenOK, Cancel. Press ENTER to confirm the selection.7. An employee places his/her hand on the platen three times. It is important that the hand is placed onthe platen in the same manner every time.Follow the following instructions on the display to place or remove the hand on or from the platen forthe finger enrollment: First, a notification message, such as “Prepare to enroll” is displayed. 2020, Attendance on Demand , Inc. Information in this document is subject to change without notice.8
After the message “Place your hand firmly on the platen” is displayed, place the hand on theplaten. Remove the hand from the platen after the message “Please remove your hand from the platen” isdisplayed.The employee is asked to put his/her hand three times.8. The message “Completed. Thank you.” is displayed if the enrollment is successful.9. Enroll other employees or press ESC to exit the menu.10. Once the employee enrollment process is completed successfully, perform a full synchronizationoperation to upload hand templates to the system.To enroll an employee using the clock menu:1. Press the SPACE key to access the clock menu. 2020, Attendance on Demand , Inc. Information in this document is subject to change without notice.9
2. If the menu is locked, enter the administrator’s PIN to access the GT-400 menu. The Enrollmentmenu is highlighted.3. Press ENTER. Enroll is highlighted. Follow the instructions on how to enroll an employee usingfunction key, see Enroll an Employee on page 7.Special Enrollment of an EmployeeBefore employees can use the system, they must be enrolled at the GT-400 by a supervisor. Sometimesemployees are unable to get a good hand reading from the clock and need to have their individual badgethreshold changed for special enrollment so that they can perform transactions without placing their hadfor identification.1. Press the function key to enroll an employee.2. Enter PIN to access the enrollment function key. 2020, Attendance on Demand , Inc. Information in this document is subject to change without notice.10
3. The Enrollment menu is highlighted. Press ENTER.4. The Enroll menu is highlighted. Press ENTER.5. Select Special Enrollment. Press ENTER.6. Enter the employee badge number.7. The message “The badge has been enrolled as a special enrollment” is displayed. 2020, Attendance on Demand , Inc. Information in this document is subject to change without notice.11
Perform Employee OperationsThis section describes common function operations for employees. Your time clock may be set up toperform different operations. Contact your time and attendance partner for information about your timeclock setup.Punch In or OutAfter employee hands are enrolled in the system, they can punch In/Out.1. Enter the employee badge number or slide the badge through the barcode swipe card reader (if thebarcode reader is installed).2. Place the enrolled hand on the platen. It is important that the hand is placed on the platen in the samemanner every time.3. If the hand is read successfully, the employee name with the message “Transaction Accepted” isdisplayed on the screen.Otherwise, the employee badge number with the message “Verification Failed” is displayed on thescreen.If the hand read is not successful, error messages are displayed, such as “Access Denied”. Customizedmessages can be displayed for different situations, such as “Double Punch”, or “Not a member of thisunit”. Make sure the employee is enrolled using the correct badge. 2020, Attendance on Demand , Inc. Information in this document is subject to change without notice.12
Callback TransactionEmployees can add a callback punch for themselves.1. Press the function key to perform callback transaction.2. In the Enter badge number prompt, type the employee’s badge number. Press the left arrow to erasethe number and re-enter it if needed. Use the right arrow to navigate among OK, Cancel and the editfield. Press ENTER to confirm the selection.3. The employee name with the message “Completed. Thank you.” is displayed.Enter TipsSupervisors can enter tips for an employee; employees can also enter tips for themselves. See thefollowing process to enter tips.1. Press the function key to enter tips.2. In the Enter badge prompt, type the employee’s badge number. Press the left arrow to erase thenumber and re-enter it if needed. Use the right arrow to navigate among OK, Cancel and the editfield. Press ENTER to confirm the selection. 2020, Attendance on Demand , Inc. Information in this document is subject to change without notice.13
3. In the ENTER TIPS prompt, enter dollars to be credited. The maximum amount that you can enter is 999.99. To correct the amount, type numbers to represent the dollars and cents in order. Press theleft arrow to erase the number and re-enter it if needed. Use the right arrow to navigate among OK,Cancel and the edit field. Press ENTER to confirm the selection.4. The employee name with the message “Completed. Thank you.” is displayed.Employee ReviewEmployees can review their own information. See the following process to review employee information.1. Press the function key to review employee information.2. In the Enter badge number prompt, type the employee’s badge number.3. Press the left arrow to erase the number and re-enter if needed. Use the right arrow to navigate amongOK, Cancel and the edit field. Press ENTER to confirm the selection.The following employee personal information is displayed and updated one line at a time on thescreen. Press the left, right, up, or down arrow for navigation. 2020, Attendance on Demand , Inc. Information in this document is subject to change without notice.14
Last punch. Displays the date and time of the employee’s last punch since a synchronization,whether this punch is an In or Out punch. Schedules. Displays the employee’s standard schedules with schedule date, scheduled start time,and scheduled end time for the current week. Pay Designations. Displays pay designation summaries (hours). Benefit balances. Displays benefit balances.4. The employee name with the message “Completed. Thank you.” is displayed. 2020, Attendance on Demand , Inc. Information in this document is subject to change without notice.15
Simple Workgroup EntryEmployees can transfer themselves to other workgroups.1. Press the function key to perform simple workgroup entry.2. In the Enter badge number prompt, type the employee’s badge number.3. Press the left arrow to erase the number and re-enter it if needed. Use the right arrow to navigateamong OK, Cancel and the edit field. Press ENTER to confirm the selection.4. In the DEPARTMENT (workgroup level) prompt, enter the workgroup identifier for the workgrouplevel to transfer. Workgroups are defined in your system. Press the left arrow to erase the number andre-enter it if needed. Use the right arrow to navigate among OK, Cancel and the edit field. PressENTER to confirm the selection.5. The message “Completed. Thank you.” is displayed. 2020, Attendance on Demand , Inc. Information in this document is subject to change without notice.16
Multiple Level Workgroup TransferSupervisors can perform multiple level workgroup transfers for an employee; employees can also transferthemselves to other multiple level workgroups. See the following process to perform workgroup transfer.Press the left arrow to erase the number and re-enter it if needed. Use the right arrow to navigateamong OK, Cancel and the edit field. Press ENTER to confirm the selection.1. Press the function key to perform multiple level workgroup transfer.2. At the Enter badge number prompt, type the employee’s badge number.3. At the LOCATION (workgroup level 1) prompt, enter the workgroup identifier for the workgrouplevel 1.4. The DEPARTMENT (workgroup level 2) prompt is displayed. Enter the workgroup identifier for theworkgroup level 2.5. The POSITION (workgroup level 3) prompt is displayed. Enter the workgroup identifier for theworkgroup level 3. Workgroups are defined in your system.6. The employee name with the message “Completed. Thank you.” is displayed. 2020, Attendance on Demand , Inc. Information in this document is subject to change without notice.17
Quick Workgroup TransferEmployees can transfer themselves to other workgroups. Depends on the settings, the Quick WorkgroupTransfer support both simple workgroup entry and multiple level workgroup transfer.1. Press the function key to perform quick workgroup transfer.2. At the Enter badge number prompt, type the employee’s badge number.3. The specified workgroups are displayed and scrolled line by line on the screen. Select the number thatassociated with the workgroup to transfer to. If “*” and/or “#” are configured for quick workgrouptransfer, select CAPS for “*” and SPACE for “#” on the clock keypad.4. The employee name with the message “Completed. Thank you.” is displayed. 2020, Attendance on Demand , Inc. Information in this document is subject to change without notice.18
A Single Day Leave RequestEmployees can perform a single day leave request.1. Press the function key to request a single day off.2. At the Enter Badge/ID number prompt, type the employee’s badge number or slide a card through thereader. Press ENTER to confirm the selection.3. At the Enter Date prompt, enter the date of the request. To correct the date, type numbers to representthe month, day, and year in order. Press the left arrow to erase the number and re-enter it if needed.Press the Right arrow to navigate between OK, Cancel, and the edit field. Press ENTER to confirmthe selection.4. (Optional) At the Select Benefit prompt, select the type of benefit to use. Use the Up or Down keys tobrowse to the last or next benefit. Press ENTER to confirm the selection.5. At the Enter Amount of Time prompt, enter the number of hours and minutes you need to take off. Tocorrect the time, type numbers to represent the hours and minutes in order. Press the left arrow toerase the number and re-enter it if needed. Press the Right arrow to navigate between OK, Cancel,and the edit field. Press ENTER to confirm the selection.6. The message “Completed. Thank You.” is displayed. 2020, Attendance on Demand , Inc. Information in this document is subject to change without notice.19
2020, Attendance on Demand , Inc. Information in this document is subject to change without notice. 4 Meet the GT-400 The GT-400 is an industry grade time clock with streamlined technology that is easy to use and easy to configure. Here are the basic parts of the time clock. Display. It d