Transcription
Setting up your TouchNet MarketplaceuStore
Considerations What are the products, categories, and Budget Codesassociated with each product? Do we want to restrict access to the site or certainproducts? Do we want to offer sales or promotions? What information do we want to gather from the customer? Do we have an image for our products and store homepage? Who will need administrative access to the store?
Logging in to TouchNet TouchNet is a payment gateway and has very strict security protocols. Ifyou experience login problems:––Clear your browser cache and cookiesDo not login with a bookmark, use the links below:TouchNet TEST centraltestTouchNet PRODUCTION l If you do not have TouchNet login credentials or have been locked out ofyour account, please contact: pcihelp@uw.edu.
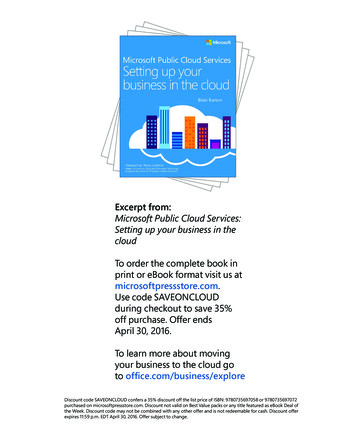
The quickest and easiest way to set up your uStore is tonavigate through each menu item under Store Settingsfollowing prompts and using wizards.Applications Marketplace [Merchant] Store SettingsEach store’s general settings can bechanged easily whenever necessary bythe store manager. You will have a betteridea of your store’s total design if youmake initial choices and then edit asnecessary while you build the store.
Throughout the editing process, you can view your store as the customerwill see it from the Marketplace Operations Center Home
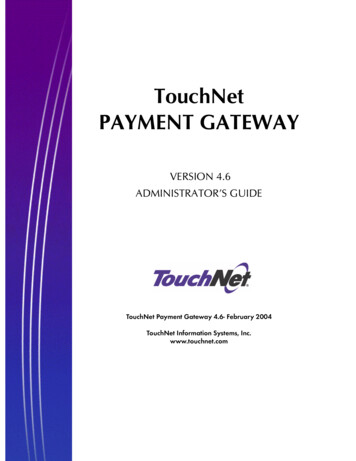
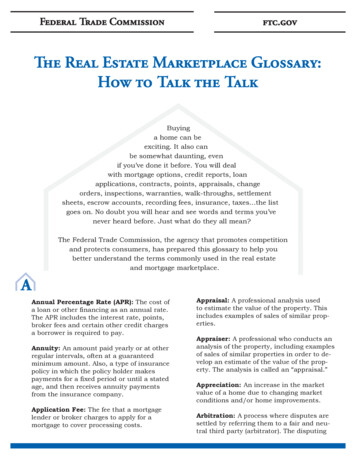
General SettingsIn the TEST Environment youcan use either “Enable” or“Preview”.Important:Do Not Enable your store inthe PRODUCTIONEnvironment. TheMerchant Services teamwill enable your storewhen it is ready to go live.
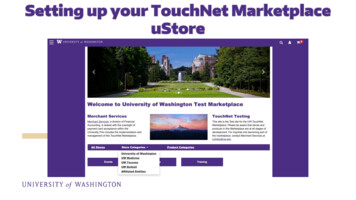
General Settings (cont.)Notification fields are intended tonotify store staff not customersIf your store will be selling digitalproducts and you do not haveenough available space, pleasecontact the eCommerce team.Always remember to click “Save”.There may be multiple “Save”buttons on each screen.
Email MessagesCustomers will have the option to print a copy of their order receipt from their web browser atthe conclusion of their purchase. They will also automatically receive email messages with orderstatus confirmation.Thank You Statement appears on fulfillmente-mail notifications, order cancellation e-mailnotifications, and refund confirmationgenerated to customers after orders havebeen placed.
Email Messages (cont.)Example of the screen seen bythe customer at the end ofthe checkout processExample of the email orderreceipt received by thecustomer
Single-Store SettingsIndicate if you would like the PromotionCode box to show during the checkoutprocess.Promotion details are set separately.
Single-Store Settings (cont.)Use Alternate Text Settings to make simple changes to button text (e.g., changing Add to Cartto Donate.)
Store Template SetupThe Designer: Fixed Width template is a new feature within TouchNet. It offers greater ability tocustomize and brand your uStore without needing to know HTML or CSS. The Classic templatewill eventually be phased out. We strongly recommend creating your store with the Designer:Fixed Width template.
Store Template Setup (cont.)On the General Layout tab, as you move your mouse over each component, a purple outline willappear around each component that can be configured. You can click on the variouscomponents to see the related configuration settings.Main Home Page ImageWe recommend you use an image: 1140 pixels wide by 320 pixels high Accepted file formats: JPG, GIF, or PNG Maximum file size is 250 KBOptional area for customized HTML and CSS.*Any major changes to the style sheetsshould be performed by an experienced webdesigner. Faulty CSS code can cause stores tostop loading correctly in the web browsers ofyour customers
Store Template Setup (cont.)The Single Store Images tab allows you to upload, manage, and preview images. These imagescan be used with fields that support HTML or CSS. Some of these HTML fields include: Feature 1field, Privacy Policy, Site Info, Help, Accessibility, Single Store Header, and Single StoreFooter.
Template Setup: Single Store Branding Cheat SheetFly-out Menu CurtainGlobal NavBarBody colorSingle Store HeaderMain Content ColorHeading 1Heading 2Body Font (size)HyperlinkGlobal Footer*Headings 3-6 are for optional template components
UsersEvery store needs to have at least one user assigned to the following roles:Store Managers – Responsible for managingstore settings, such as the store images, storecategories, store payment methods, andshipping rates. Responsible for assigningstore clerks, a store accountant, and fulfillers.Responsible for adding and editing productsand creating store promotions. [A StoreManager will not be able to perform thefunctions of the roles below unless theyassign themselves to these roles.]Fulfillers with refund/cancel rights –Responsible for fulfilling orders as well asrefunding and cancelling orders.Store Accountants – Responsible forreviewing the Revenue by Merchant report.
CategoriesExamples of category layouts/viewsDetailed Layout. The shopper sees productthumbnail images, short descriptions, names, andprices. This layout works well for categories thatdon’t contain many products, or when you want toquickly advertise more information about theproducts in a category.Thumbnail Layout. The shoppersees product thumbnail imagesand names. This layout works wellfor many product groupings.Category layout
ProductsThere are three ways to add products: Add a single product, import multiple from a .csv file, orclone an existing product.Once products are added, you cangroup them as Related Products.When a shopper views any productin this group, the page will displayrecommendations of other productsin that group.You can Clone an existing productfrom within that product’s settings.
Products (cont.)Adding a single productDepending on the chosen store orcategory layout, shoppers may addsome products to the cart withoutseeing the long descriptions. Putcritical details in both the short andlong descriptions to make sureshoppers see this information.You may want to use the longdescription to provide shopperswith additional information aboutthe available options. If the productrequires special shippinginformation or if its return policydiffers from the store policy, you canadd those details here.
Products (cont.)Adding a single productChoose from shipping classes youhave createdTax rates will vary, discuss with yourFinance Office and MarketplaceAdvisorAccess to purchase products can berestrictedMessage will appear on the packingslip that is printed during thefulfillment process
Products (cont.)Adding a single productImportant: Auto Fulfill willcomplete the purchase andcharge the customer’s card atthe time of purchase. Productsthat are set not to Auto Fulfillwill remain as pending and thecustomer’s card will not becharged until a storeadministrator assigned the roleof Fulfiller completes thefulfillment process.This field is intended to notify storeadministrators, not customers.
Products (cont.)After product has been added you can manage the product from the Products screen or selectthe desired product to add Options and Modifiers.Product settings can be changed byclicking on the product name orsettings gear dropdown menus.
Products (cont.)Important Product Settings: Options and Modifiers allow you to offer variations on productsand gather buyer info.
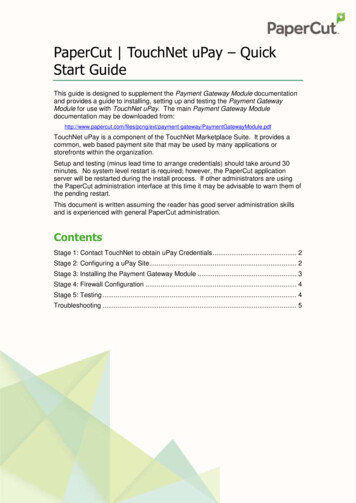
Products (cont.)Options vs. Modifiers: An Option is a factor such as size or color that may or may not changethe price but results in a different inventory item. A Modifier allows you to gather additionalbuyer info. It may or may not change the price but does not result in a different inventory item.The UW Status Option can beselected, resulting in a differentproduct/stock numberA Modifier was added togather additional buyer info foran optional featureExample of a product with both an Option and a Modifier
Products (cont.)To set up Options, you will first choose your Options, then you will assign them Values.Options as the customer sees themValues as the customer sees them
Products (cont.)To add a Modifier: select the desired product from Products to access General Settings andAdd Modifier. You will be taken to the Manage Modifiers screen.There are three types ofModifiers that can be used togather buyer info.These Modifiers can be arranged foreasier viewing with theTable Builder.
Products (cont.)Text Entry Modifiers: the shopper is asked to enter a text response to a prompt. This is usefulfor names and other custom buyer info.Frequency comes into play if twoor more the product is purchased.Static will display the modifierprompt only once.Dynamic will display it for eachquantity ordered.For example, if multiple peopleregister for an event, Static willonly ask for one name, Dynamicwill ask for each attendee’s name.
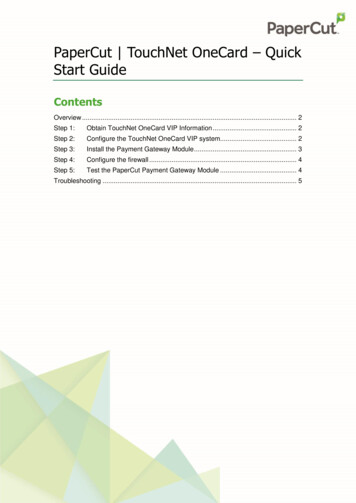
Products (cont.)Drop-down Selection Modifier: customer will be prompted to choose only one option from alist.Price adjustments can beincreased, decreased, or no changeExample of how the customer willsee the Drop-down Modifierduring the checkout process
Products (cont.)MultiSelect Checkbox: prompts customer to select one or more options.Example of Multiselect Checkboxseen by customer
Products (cont.)Attendee List: will allow prospective customers to see a list of people who have alreadyregistered (purchased the product.) Registrants can opt out of being included in the AttendeeList.The option to Add List will onlyappear after Modifiers have beenadded to a product.
Products (cont.)Table Builder: once Modifiers are added to a product, Table Builder can be used to used toorganize them maximizing horizontal space. This is especially useful if the customer is allowed topurchase two or more of the same item.
Products (cont.)To add a Digital Products:1. Request digital space from pcihelp@uw.edu2. When adding in Products, select Digital and add as you would any other productIndicate maximum amount oftimes the customer can downloadthe file from one purchase.Indicate how long the customerhas to complete their downloads.
Products (cont.)The Donation Product Type is used for any product that requires the user to enter a customamount such as an invoice.Product Name will be seen by thecustomerDonation must be selected
CategoriesTop-Level Categories will be displayed on your store’s home page.After adding TopLevel Category,select Edit or AddSub-Category tocontinuecustomizations foreach category.
PromotionsPromotional Code offers the opportunity to provide discounts to certain customers.Promo code as seen duringcheckout processChecking this box will give youthe opportunity to compose anemail to customers, offering thepromotion
User ModifiersA modifier that is not product related. It is used to collect additional buyer information duringthe checkout process.
ResourcesOffice of Merchant ServicesKevin es/Melissa HalleCommerce ommercepcihelp@uw.edu
TouchNet is a payment gateway and has very strict security protocols. If you experience login problems: . categories, store payment methods, and shipping rates. Responsible for assigning store clerks, a store accountant, and fulfillers.