Transcription
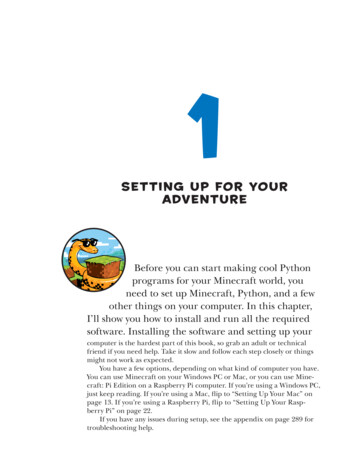
1Setti n g U p fo r You rAdv e ntu r eBefore you can start making cool Pythonprograms for your Minecraft world, youneed to set up Minecraft, Python, and a fewother things on your computer. In this chapter,I’ll show you how to install and run all the requiredsoftware. Installing the software and setting up yourcomputer is the hardest part of this book, so grab an adult or technicalfriend if you need help. Take it slow and follow each step closely or thingsmight not work as expected.You have a few options, depending on what kind of computer you have.You can use Minecraft on your Windows PC or Mac, or you can use Minecraft: Pi Edition on a Raspberry Pi computer. If you’re using a Windows PC,just keep reading. If you’re using a Mac, flip to “Setting Up Your Mac” onpage 13. If you’re using a Raspberry Pi, flip to “Setting Up Your Raspberry Pi” on page 22.If you have any issues during setup, see the appendix on page 289 fortroubleshooting help.
NoteFor more information and updates to these instructions, visit the book’s website etting Up Your Windows PCYou need to install five things so you can control Minecraft with Python: MinecraftPython 3JavaMinecraft Python APISpigot Minecraft ServerIn this section, I’ll guide you through installing each of these on yourcomputer. Let’s start with Minecraft.Installing MinecraftIf you already own Minecraft and have the latest version installed on your PC,skip ahead to “Installing Python” on page 3. If you’re not sure whetheryou have the latest version of Minecraft, follow the steps in this section toinstall the latest version.If you don’t already own the game, you can buy a copy from the officialMinecraft website, https://minecraft.net/. You might need to grab a grown-upto help you with that! Remember the username and password you use whenyou purchase Minecraft—you’ll need it to log in later.After you’ve purchased Minecraft, follow these steps to install Minecraft on your PC:1.2.3.4.5.6.Go to https://minecraft.net/download/.Under the Minecraft for Windows section, find and click the greenDOWNLOAD button to download the Minecraft installer. If you’regiven the option to save or open the file, select Save File.Wait for the file to download and then open it. If a dialog pops up asking whether you want to run this file, click Run. Don’t worry, we knowthis file is safe!When the Minecraft Setup Wizard opens, click Next. Then click Nextonce more. Then click Install.You might be asked whether you want to install Minecraft. Of courseyou do! Click Yes. Wait a bit while Minecraft installs. I got a glass ofwater and a cookie while the game installed.After the installation completes, click Finish.Minecraft should now be installed.2 Chapter 1
You know what would be a great idea? Playing Minecraft, of course.Take a few minutes to get it up and running:1.2.3.4.5.To open Minecraft, click the Start Menu (or press the Windows keyon your keyboard), find Minecraft in the list of programs, and clickthe icon.Minecraft will start up and might install updates.The login window will open next. Enter the username and passwordyou used when you purchased Minecraft and click Log In.Click Play. Minecraft will download a couple more updates beforeopening.Finally, click Single Player4 Create New World. Name your world whatever you want and click Create New World. The world will generate,and you can play to your heart’s content.Have some fun! If you’ve never played Minecraft before, try playingaround for a while, until it gets dark in your Minecraft world. Watch out formonsters! Note that when you use Minecraft with Python, you’ll be using amultiplayer game world, which will be different from this world. We’ll get tothat in “Running Spigot and Creating a Game Profile” on page 7.Back to work! It’s time to install Python. To free your cursor from Minecraft, just press esc on your keyboard. Close Minecraft before continuingthe rest of the installation.Installing PythonPython is the programming language you’ll learn in this book. Let’s installit now.1.2.3.4.5.Go to http://www.python.org/downloads/.Click the button labeled Download Python 3.6.2. (This is the latestversion of Python 3 at the time of this writing, but you might see alater version. Install the most recent version.)Python will begin to download. If you’re asked to choose between saving or opening the file, select Save File.When the installer has downloaded, click it. If a dialog pops up askingwhether you want to run the file, click Run.When the installer opens, select the Add Python 3.6 to PATH checkbox,as shown at the bottom of Figure 1-1. Then click Install Now.Setting Up for Your Adventure 3
Figure 1-1: Make sure you select Add Python 3.6 to PATH.6.7.A dialog might ask whether you want to allow the program to installsoftware on the computer. Click Yes and then wait for Python to install.I stood up to close the window while it was installing, and the installation had finished when I sat back down.Click Close. Python is now installed.Installing JavaNow that Minecraft and Python are both installed, you’ll have to set thingsup so that they can talk to each other. You’ll use a program called Spigot todo that, but in order for Spigot to work, you first need to make sure Java isinstalled on your computer. Let’s do that now.First, check whether Java is already installed:1.2.3.4.4 Chapter 1Click the Start Menu (or press the Windows key on your keyboard) andenter cmd in the search box. Open the program called cmd.You’ll see a window with a black background and a prompt (mine saysC:\Users\Craig ). At the prompt, type java -version and press enter.If you see a message like the one in Figure 1-2 and the Java version(that’s the number after the first period) is 8 or newer, the correct Javaversion is already installed. Skip ahead to “Installing the MinecraftPython API and Spigot” on page 6.If you get a message that says that Java is not recognized or the versionis older than 8, install it using the following instructions.
Figure 1-2: After entering the java -version command, I can see that Java is installed.To install Java, follow these steps:1.2.3.4.5.6.7.Go to http://www.java.com/en/download/.Click the Free Java Download button. Then click the Agree and StartFree Download button.When the installer has downloaded, click it. If a dialog pops up askingwhether you want to let the program make changes to your computer,choose Yes.When the installer opens, click Install.This bit is super important! If a page opens that asks if you want toinstall another program, such as the Ask Search App, a Yahoo! searchbar, or something else, uncheck the box so that this extra program willnot install. That’s just another program that you don’t need.You might be asked if you want to set Yahoo! as your homepage. Youprobably don’t. Select Do not update browser settings and click Next.Wait while Java installs. I wrote a short message to a friend before itinstalled. Click Close when it finishes.Now let’s check whether Java has installed properly:1.2.3.Click the Start Menu and enter cmd in the search box. Open the cmdprogram.In the cmd window, type java -version at the prompt and press enter.If you see a message like the one in Figure 1-2, Java installed correctly. Ifyou get an error that says “‘Java’ is not recognized as an internal or external command, operable program or batch file,” Java hasn’t installedproperly. To fix this, try reinstalling Java and running it again. If youstill get this error after reinstalling, go to http://www.java.com/en/download/help/path.xml for more information.That’s it! Java is set up and ready to run the Minecraft server! Let’s getto that next.Setting Up for Your Adventure 5
Installing the Minecraft Python APIand SpigotNext you need to install the Minecraft Python API and the Minecraft serveron your computer.API stands for application programming interface. It lets programs communicate with applications that other people have created. In this case, theMinecraft Python API allows programs that you write in Python to communicate with Minecraft. For example, you could write a Python program thatuses the API to tell Minecraft to make a block in the game or to change theposition of the player.A standard Minecraft single-player game doesn’t support an API.Instead, your programs will interact with a Minecraft server, which allowsthe use of APIs. Minecraft servers are mostly used online so that manypeople can play together in a single game world. But you can also run aserver on your own computer and play by yourself. Both multiplayer andsingle-player Minecraft servers allow you to use an API with Minecraft. Inthis book, you’ll be using a single-player Minecraft server called Spigot onyour computer.Now that you know what an API and a server do, let’s get them installedon your computer. I’ve created a handy download so you can get these setup quickly. Just follow these steps:1.Go to https://www.nostarch.com/programwithminecraft/ and click the“download the setup files for Windows (Minecraft Tools.zip)” link. Thiswill take you to a download page at SourceForge. Click the greenDownload button. If you’re given the option to save or open the file,select Save File.2.When the file has downloaded, right-click it and choose the Extract.option. You’ll be asked where you want to put the extracted files. Clickthe Browse button and go to your Documents folder. Then click the NewFolder button and call the new folder Minecraft Python. Select this folderand click OK. If prompted to, click Extract to extract the files.Go to the Minecraft Python folder in your Documents folder, where youshould see the extracted files.Open the Minecraft Tools folder. Its contents are shown in Figure 1-3.Double-click the file called Install API. This will open a new windowand install the Minecraft Python API. If you get a warning message,click Run Anyway.When the installation completes, press any key to finish.3.4.5.6.Note6 Chapter 1If you get an error message that says pip is not recognized, that means you didn’tinstall Python correctly. Go back to “Installing Python” on page 3 and reinstallPython. Make sure you select the checkbox that says Add Python 3.6 to PATH.
Figure 1-3: The Minecraft Tools folderThe Minecraft Python API and Minecraft server are now installed. Thefinal step is to run the server. We’ll do that in the next section.Running Spigot and Creating a GameProfileWhen Spigot runs for the first time, it’ll create a Minecraft world for you,but you need to do some setup before you can use it for the first time. You’llneed to set up a profile to make sure Spigot and Minecraft are always running the same version.To start Spigot, follow these steps:1.2.3.4.Go to your Minecraft Python folder and open your Minecraft Tools folder.In the Minecraft Tools folder, double-click the Start Server file. If you geta message asking whether you want to allow access, click Allow.A window will appear and begin to set up the server. Once the setupis finished, scroll to the top of the text in the window. Near the top(around the third or fourth line), you should see text saying Startingminecraft server version x.x.x. For example, in Figure 1-4, the serverversion is 1.11.2.Make a note of the version number shown on your screen, and keep thiswindow open.Setting Up for Your Adventure 7
Figure 1-4: The version of this server is 1.11.2.Choosing the Right Minecraft VersionNow that you know which server version you’re using, you can set up thegame profile:1.2.3.4.5.6.Open the Minecraft launcher, but don’t click the green PLAY buttonquite yet (make sure you leave the server window open when you do this).At the top-right of the Minecraft launcher, click the menu button(which looks like three parallel lines), then click the Launch Optionsbutton. This will allow you to access the profile editor.Click the Add New button to create a new configuration.In the Name field, type Learn to Program with Minecraft.In the Version drop-down menu, select the version of the server thatyou’re using. For example, in Figure 1-5, I’m using version 1.11.2.Click the Save button. Your profile has now been set up. Click the central Minecraft logo to return to the screen with the green PLAY button.Figure 1-5: I’ve created a profile called Learn to Programwith Minecraft that uses version 1.11.2.8 Chapter 1
From now on, every time you want to use Minecraft with this book,click the arrow next to the Minecraft launcher’s start button. Select theLearn to Program with Minecraft option to use the correct version for theserver. You can swap back to the latest version of Minecraft at any time bychanging this drop-down menu to the Latest Release option. Once youhave selected the correct version, click PLAY!Creating the WorldNow that you have a profile set up, it’s time to get into your new Minecraftworld:1.2.3.Open Minecraft and click Multiplayer.Click the Add Server button.In the Server Name box, name your server Minecraft Python World, andin the Server Address box, type localhost, as shown in Figure 1-6. Thenclick Done.Figure 1-6: Setting up the server4.Double-click Minecraft Python World, and the world created by Spigotwill open.Let’s have a quick look at your new Minecraft world on the Spigotserver. The world is set up in Creative Mode so you can fly around. Doubletap the spacebar to fly. Holding the spacebar will make you fly higher, andholding shift will lower you toward the ground. If you want to stop flying,just double-tap the spacebar again.Setting Up for Your Adventure 9
Starting Over with a New WorldCreating a brand-new Minecraft world with a server is a little different fromcreating a new world in single-player mode. First, you need to disconnectfrom the current server:1.2.Press esc in the game and then click Disconnect to return to yourserver list.Stop your server by closing the cmd window it’s running in.Then, follow these steps to make a copy of the serve
computer is the hardest part of this book, so grab an adult or technical friend if you need help. Take it slow and follow each step closely or things might not work as expected. You have a few options, depending on what kind of computer you have. You can use Minecraft on your Windows PC or Mac, or you can use Mine-craft: Pi Edition on a Raspberry Pi computer. If you’re using a Windows PC .