Transcription
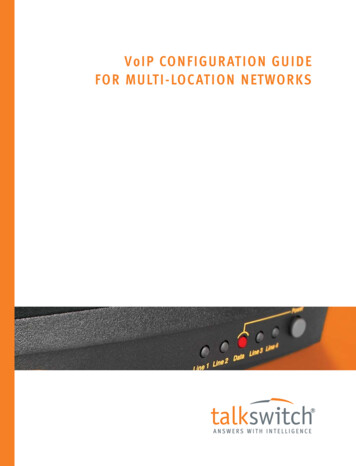
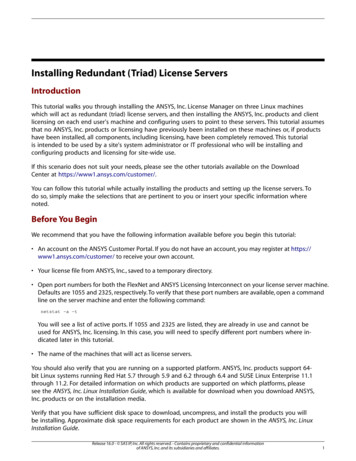
TALKSWITCH QUICK GUIDEINSTALLINGTALKSWITCHSOFTWAREINSTALLING TALKSWITCH SOFTWARE1. CHECK TALKSWITCH PARTSUnpack the TalkSwitch, and make sure you have the following parts:C T.T S 0 0 5 . 5 1 7 . E N – 0 2EFADBCA TalkSwitch unitD 2 or 4, 6 foot telephone cables (RJ-11)B USB cable with 24-CA or RJ-45Ethernet cable with 48-CA/48-CVAE Configuration Software CD-ROMF AC Adapter 16VAC, 1.5 AC Quick Reference CardsSystem Requirements PC running Windows XP/2000/98* 120 MB free hard disk space 128 MB RAM 800x600 video resolution*Although TalkSwitch will function with Windows 98, we cannot guarantee fullcompatibility with any operating system that Microsoft no longer supports.2. INSTALL TALKSWITCH SOFTWAREStep ATurn on the computer and insert the CD into the CD-ROM drive.Step BThe Install main window appears within 20 seconds. Click ‘INSTALL’ and follow the instructions. Note: If using Windows XP or 2000, ensure that you have Administrator privileges.If the install process does not start, do the following: From the desktop, double click on “My Computer” icon Double click on the “TalkSwitch” icon Double click on the “Setup.exe”, click “Install” andfollow the instructions on the screen.W W W.T A L K S W I T C H . C O M1
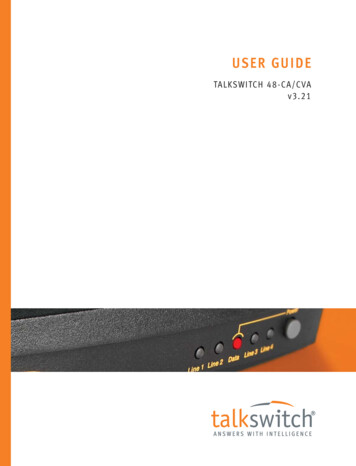
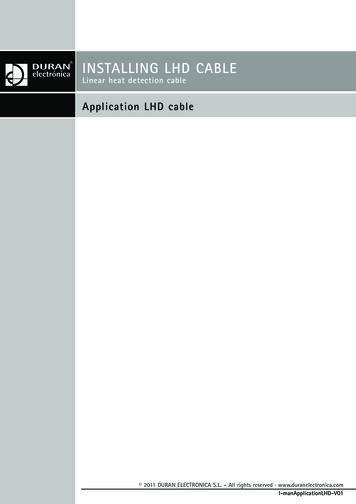
INSTALLING TALKSWITCH SOFTWARE3. CONNECT TALKSWITCH TO YOUR COMPUTERStep AUse the provided USB cable to connect TalkSwitch to an open COM port on your PC, ORfor 48-CA/48-CVA use the provided Ethernet cable to connect to your LAN equipment.Step BConnect the AC Adapter from the electrical outlet to the TalkSwitch.Step CTurn your TalkSwitch on by pressing the “Power” button on the front of the unit. Thelights on the front panel will flash for a few moments during boot-up, then stop. Thecenter light marked “Data” will remain lit indicating that the TalkSwitch unit is on.to AC AdapterLAN (Ethernet)ConnectionSerial Connectionto ComputerTalkSwitch 48-CA/48-CVA Rear Panel.4. OPEN TALKSWITCH SOFTWARE PROGRAMStep 1Double-click the TalkSwitch icon on your desktop or from the “Start” button, click on“Programs” then choose “TalkSwitch Configuration 3.21” from the “TalkSwitch 3.21” folder.TalkSwitch Folder and ProgramWindows start menuW W W.T A L K S W I T C H . C O M2
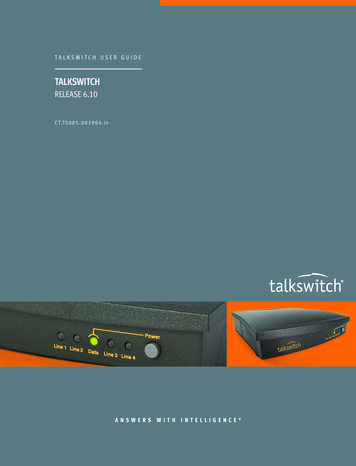
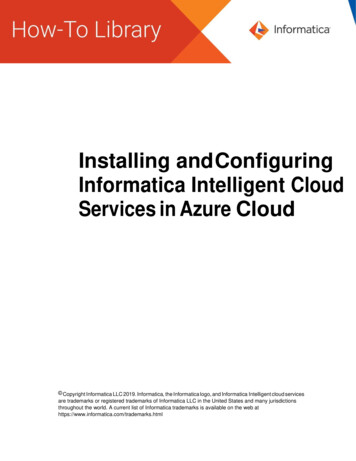
INSTALLING TALKSWITCH SOFTWAREStep 2If you are connected to TalkSwitch via a USB or Serial connection, a dialog box opensasking you to select the connection type. Select “USB”, or “Serial” and the Serial Port,and click “Connect.” A progress bar appears showing the connection to TalkSwitch inprogress.If you are connected to TalkSwitch via a LAN (Ethernet) connection, a progress barappears showing the connection to TalkSwitch in progress.TalkSwitch Retrieving SettingsTalkSwitch Software ProgramThese are the main elements of the TalkSwitch Software and are referred to throughoutthe documentation.Configuration NavigationMenu ItemsA drop down menu system to show configuration topics.TalkSwitch Software ProgramSoftware may look slightly different from the above diagramSystem InformationView information such as system unit ID numbers, local IP addresses, firmwareand software versions, mailbox informationW W W.T A L K S W I T C H . C O M3
INSTALLING TALKSWITCH SOFTWARE5. WHAT NEXT?Set up my phones, fax, music on hold, P.A.?Answer incoming calls with an auto attendant?Detect incoming faxes and automatically route themto the fax machine?Screen calls, and what happens if I don't want totake the call?Ring a group of local extensions?Create 'departments' within the office?Recognize the type of incoming call by the ring tone?Mimic services like ident-a-call?Get my voicemail when out of town?Use my office long distance savings plan when awayfrom the office?Make calls from my office when I am inanother country?Remote Management over IPW W W.T A L K S W I T C H . C O MRemote Management over IPAdding Call Back / Call BridgeAdding Extension Ring GroupsConfiguring Call CascadeConfiguring Mode Scheduling Connect my cell phone to the office?Connect an external number to the office?Transfer a call off site?Automatically change the auto attendant greetingbased on time of day?Automatically change my call handling afterbusiness hours?Automatically forward calls to my cell phone whenI am not at my desk?Send a call to my partner when I am on the phone?Get calls to automatically find me?Adding Remote ExtensionsCreating an Auto AttendantHow do I?Detecting FaxesRead the question below, then use the QuickGuide to get you started.Quick GuideConnecting Phones & DevicesWe recommend that you change your defaultcall handling settings to suit your environment.Use the Installation and User Guide suppliedwith TalkSwitch or these Quick Guides toconfigure those options that interest you. 4
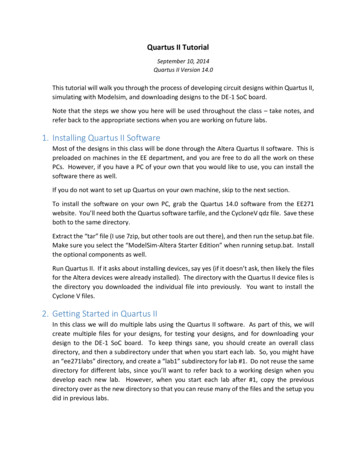
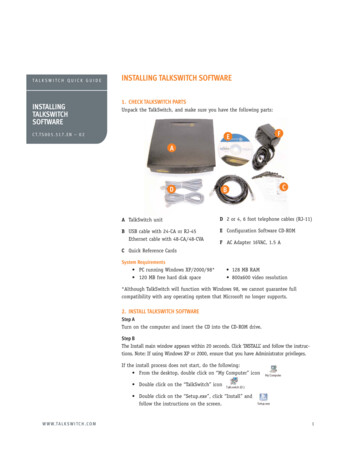
INSTALLING TALKSWITCH SOFTWARE6. SAVE SETTINGS TO TALKSWITCH!Once you have configured the TalkSwitch Setting using the Quick Guides, orUser Manual you need to save the settings to TalkSwitch to invoke your changes.Step 1Choose “File” then “Save to TalkSwitch”. A progress bar will show the data exchangeto the TalkSwitch unit which should take only a few seconds to complete.Saving TallSwitch Settings.Software may look slightly different from theabove diagram.About TalkSwitchTalkSwitch is dedicated to providing smalland multi-location businesses with innovativetelecommunications solutions. Since 1990,TalkSwitch has delivered rich features, highfunctionality and unbeatable value. Ideal forbusinesses with up to 32 telephone users peroffice, TalkSwitch systems provide users withoptions to connect to both the traditionaltelephone network (PSTN) and Voice over IP(VoIP) networks. TalkSwitch is headquarteredin Ottawa, Canada. For more informationcall (888) 332-9322 or visit our website atwww.talkswitch.com TalkSwitch 2005W W W.T A L K S W I T C H . C O M5
INSTALLING TALKSWITCH SOFTWARE 1. CHECK TALKSWITCH PARTS Unpack the TalkSwitch, and make sure you have the following parts: A TalkSwitch unit B USB cable with 24-CA or RJ-45 Ethernet cable with 48-CA/48-CVA C Quick Reference Cards System Requirements PC running Windows XP/2000/98* 128 MB RAM 120 MB free hard disk space 800x600 .