Transcription
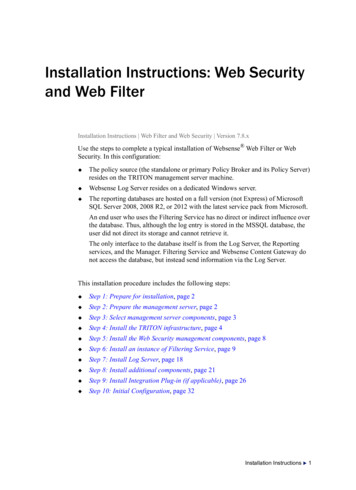
Installation Instructions: Web Securityand Web FilterInstallation Instructions Web Filter and Web Security Version 7.8.xUse the steps to complete a typical installation of Websense Web Filter or WebSecurity. In this configuration: The policy source (the standalone or primary Policy Broker and its Policy Server)resides on the TRITON management server machine.Websense Log Server resides on a dedicated Windows server.The reporting databases are hosted on a full version (not Express) of MicrosoftSQL Server 2008, 2008 R2, or 2012 with the latest service pack from Microsoft.An end user who uses the Filtering Service has no direct or indirect influence overthe database. Thus, although the log entry is stored in the MSSQL database, theuser did not direct its storage and cannot retrieve it.The only interface to the database itself is from the Log Server, the Reportingservices, and the Manager. Filtering Service and Websense Content Gateway donot access the database, but instead send information via the Log Server.This installation procedure includes the following steps: Step 1: Prepare for installation, page 2 Step 2: Prepare the management server, page 2 Step 3: Select management server components, page 3 Step 4: Install the TRITON infrastructure, page 4 Step 5: Install the Web Security management components, page 8 Step 6: Install an instance of Filtering Service, page 9 Step 7: Install Log Server, page 18 Step 8: Install additional components, page 21 Step 9: Install Integration Plug-in (if applicable), page 26 Step 10: Initial Configuration, page 32Installation Instructions 1
Step 1: Prepare for installationMake sure that a supported version of Microsoft SQL Server (not Express) is installedand running in your network, and that: The SQL Server Agent service is running on the database host.The database host can be reached from the machine that will host the managementserver.You have identified a SQL Server or Windows Trusted account with appropriatepermissions to create the database and run SQL Agent jobs.If you will be integrating your Web Security solution with a third-party proxy, cache,firewall, or network appliance: Verify that you have selected a supported integration product. Cisco Adaptive Security Appliance (ASA) v8.0 and later, or Cisco IOS routersv15 and laterSee Integrating Web Security with Cisco for more information. Citrix XenApp 5.0, 6.0, and 6.5See Integrating Web Security with Citrix for more information. Microsoft Forefront Threat Management Gateway (TMG)See Integrating Web Security with Microsoft Products for more information. Blue Coat appliances via ICAPSee Integrating Web Security using ICAP Service for more information.Other third-party products are supported using the “universal integrations” option. See alliancepartners.aspx for a list of supported vendors.See Installing Web Security for Universal Integrations for more information.Make sure that the integration product is installed and running before you begin.Step 2: Prepare the management serverIn a typical installation, the TRITON management server hosts managementcomponents, Policy Broker, and Policy Server.1. On the Windows machine that will host the TRITON management server:a. Make sure there are no underscores in the machine’s fully-qualified domainname (FQDN). The use of an underscore character in an FQDN is inconsistentwith Internet Engineering Task Force (IETF) standards.NoteFurther details of this limitation can be found in the IETFspecifications RFC-952 and RFC-1123.2 Web Security Gateway Anywhere
b. Make sure all Microsoft updates have been applied. There should be nopending updates, especially any requiring a restart of the system.c. Verify that there is sufficient disk space to download the installer, extracttemporary installation files, and install the management components on theWindows installation drive (typically C).d. Make sure that the appropriate version of .NET Framework is installed. Youcan use Server Manager to install the appropriate version of .NETFramework. Windows Server 2008 R2: Use version 2.0 or higher.Windows Server 2012 or 2012 R2 (v7.8.2 or later): Version 3.5 is required.Note that .NET Framework 3.5 must be installed before adding anylanguage packs to the operating system (as noted in the following articlefrom Microsoft: deployment-considerations.docx).e. Synchronize the clocks on all machines (including appliances) where aWebsense component will be installed. It is a good practice to point themachines to the same Network Time Protocol server.f.Disable the antivirus software on the machine before installation. Afterinstallation, before restarting your antivirus software, see ExcludingWebsense software from antivirus scans.g. Disable any firewall on the machine before starting the Websense installer andthen re-enable it after installation. Open ports as required by the Websensecomponents you have installed, and make sure that required ports are notbeing used by other local services on the machine.Some ports are used only during installation and can be closed onceinstallation is complete.See Web Security Default Ports for more information about ports.h. Disable User Account Control (UAC) and Data Execution Prevention (DEP)settings, and make sure that no Software Restriction Policies will block theinstallation.2. Log on to the machine with domain admin privileges.3. Download the TRITON Unified Installer (WebsenseTRITON782Setup.exe)from mywebsense.com.Step 3: Select management server componentsUse the TRITON Unified Installer to install components on the management servermachine.1. Right-click WebsenseTRITON78xSetup.exe and select Run as administratorto launch the installer. After a few seconds, a progress dialog box appears, as filesare extracted.2. On the Welcome screen, click Start.Installation Instructions 3
3. On the Subscription Agreement screen, select I accept this agreement, then clickNext.4. On the Installation Type screen, select TRITON Unified Security Center, thenmark the Web Security check box and click Next.5. On the Summary screen, click Next to continue the installation.TRITON Infrastructure Setup launches.Step 4: Install the TRITON infrastructureThe TRITON infrastructure includes data storage and common components for themanagement modules of the TRITON console.1. On the TRITON Infrastructure Setup Welcome screen, click Next.2. On the Installation Directory screen, specify the location where you wantTRITON Infrastructure to be installed and then click Next. To accept the default location (recommended), simply click Next. To specify a different location, click Browse.ImportantThe full installation path must use only ASCII characters.Do not use extended ASCII or double-byte characters.3. On the SQL Server screen, select Use existing SQL Server on another machine,then specify the location and connection credentials for a database server locatedelsewhere in the network.4 Web Security Gateway Anywhere
a. Enter the Hostname or IP address of the SQL Server machine, including theinstance name, if any, and the Port to use for SQL Server communication.If you are using a named instance, the instance must already exist.If you are using SQL Server clustering, enter the virtual IP address of thecluster.b. Specify whether to use SQL Server Authentication (a SQL Server account)or Windows Authentication (a Windows trusted connection), then providethe User Name or Account and its Password.If you use a trusted account, an additional configuration step is required afterinstallation to ensure that reporting data can be displayed in the Web Securitymanager. See Configuring Websense Apache services to use a trustedconnection.c. Click Next. The installer verifies the connection to the database engine. If theconnection test is successful, the next installer screen appears.If the test is unsuccessful, the following message appears:Unable to connect to SQLMake sure the SQL Server you specified is currently running. If it is running,verify the access credentials you supplied.Click OK to dismiss the message, verify the information you entered, andclick Next to try again.4. On the Server & Credentials screen, select the IP address of this machine andspecify network credentials to be used by TRITON Unified Security Center. Select an IP address for this machine. If this machine has a single networkinterface card (NIC), only one address is listed.Installation Instructions 5
Administrators will use this address to access the TRITON console (via a webbrowser), and Websense component on other machines will use the address toconnect to the TRITON management server. Specify the Server or domain of the user account to be used by TRITONInfrastructure and TRITON Unified Security Center. The name cannot exceed15 characters.Specify the User name of the account to be used by TRITON UnifiedSecurity Center.Enter the Password for the specified account.5. On the Administrator Account screen, enter an email address and password forthe default TRITON console administration account: admin. When you arefinished, click Next.System notification and password reset information is sent to the email addressspecified (once SMTP configuration is done; see next step).It is a best practice to use a strong password as described on screen.6 Web Security Gateway Anywhere
6. On the Email Settings screen, enter information about the SMTP server to beused for system notifications and then click Next. You can also configure thesesettings after installation in the TRITON console.ImportantIf you do not configure an SMTP server now and you losethe admin account password (set on previous screen)before the setup is done in the TRITON console, the“Forgot my password” link on the logon page does notprovide password recovery information. SMTP serverconfiguration must be completed before passwordrecovery email can be sent. IP address or hostname: IP address or host name of the SMTP serverthrough which email alerts should be sent. In most cases, the default Port (25)should be used. If the specified SMTP server is configured to use a differentport, enter it here.Sender email address: Originator email address appearing in notificationemail.Sender name: Optional descriptive name that can appear in notificationemail. This is can help recipients identify this as a notification email from theTRITON Unified Security Center.7. On the Pre-Installation Summary screen, verify the information and then clickNext to begin the installation.8. The Installation screen appears, showing installation progress. Wait until all fileshave been installed.Installation Instructions 7
If the following message appears, check to see if port 9443 is already in use onthis machine:Error 1920. Server ’Websense TRITON Central Access’ (EIPManagerProxy)failed to start. Verify that you have sufficient privileges to start systemservices.If port 9443 is in use, release it and then click Retry to continue installation.9. On the Installation Complete screen, click Finish.You are returned to the Installer Dashboard and, after a few seconds, the WebSecurity component installer launches.Step 5: Install the Web Security managementcomponentsIn a typical deployment, the Web Security manager, the standalone or primary PolicyBroker, and the central Policy Server reside on the TRITON management server.1. On the Select Components screen, select: TRITON - Web Security (selected by default) Real-Time Monitor Policy Broker and Policy Server2. On the Policy Broker Replication screen, indicate which Policy Broker mode touse. Select Standalone if this will be the only Policy Broker instance in yourdeployment.Select Primary, then create a Synchronization password if you will laterinstall additional, replica instances of Policy Broker.The password may include between 4 and 300 alphanumeric characters.ImportantIf you are installing the primary Policy Broker, be sure torecord the synchronization password. You must providethis password each time you create a Policy Broker replica. Do not select Replica at this stage. You must install a standalone or primaryPolicy Broker before you can install a replica.If you are not sure about which Policy Broker mode to choose, see ManagingPolicy Broker Replication.3. If the management server machine does not include a supported version of theMicrosoft SQL Server Native Client and related tools, you are prompted to installthe required components. Follow the on-screen prompts to complete this process.4. On the Pre-Installation Summary screen, verify the information shown, then clickNext.8 Web Security Gateway Anywhere
5. A progress screen is displayed. Wait for installation to complete.6. On the Installation Complete screen, click Next.Step 6: Install an instance of Filtering ServiceWhen the standalone or primary Policy Broker and the central Policy Server reside onthe TRITON management server, you must install at least one instance of WebsenseFiltering Service that connects to the central Policy Server.This instance of Filtering Service may reside: On a supported Linux server On a supported Windows server On a filtering only applianceNote that using a software installation for this instance of Filtering Service maymake for a more convenient deployment. A software deployment allows you toalso install components like User Service and Usage Monitor for the centralPolicy Server. (These components don’t reside on a filtering only appliance.)Although other components (like Network Agent or a transparent identification agent)may be installed with Filtering Service, a second instance of Policy Server may notreside on this machine. This Filtering Service instance must connect to the centralPolicy Server on the TRITON management server machine.Using a filtering only applianceThe instructions that follow assume that you have already set up your appliancehardware as directed on the in-box Quick Start poster for your appliance.Gather the dataGather the following information before running the firstboot configuration script.Some of this information may have been written down on the Quick Start posterduring hardware setup.Security modeWebWhich Web Security subscription?(if prompted)Websense Web SecurityHostname (example: appliance.domain.com)1 - 60 characters long.The first character must be a letter.Allowed: letters, numbers, dashes, or periods.The name cannot end with a period.IP address for network interface CInstallation Instructions 9
Subnet mask for network interface CDefault gateway for network interface C(IP address) OptionalNOTE: If you do not provide access to the Internetfor interface C, use the Web Security manager toconfigure P1 to download Master Database updatesfrom Websense servers.See the Appliance Manager Help for informationabout configuring the interfaces. See the WebSecurity Help for information about configuringdatabase downloads.Primary DNS server for network interface C(IP address)Secondary DNS server for network interface C(IP address) OptionalTertiary DNS server for network interface C(IP address) OptionalUnified password (8 to 15 characters, at least 1letter and 1 number)This password is for the following: Appliance manager Web Security managerIntegration method for this appliance (Choose one): Standalone (Network Agent only) Microsoft TMG Cisco ASA CitrixChoose your third-party integrationproduct (if any).Send usage statistics?Usage statistics from appliancemodules can optionally be sent toWebsense to help improve theaccuracy of categorization.Run the firstboot scriptRun the initial command-line configuration script (firstboot) as follows.10 Web Security Gateway Anywhere
1. Access the appliance through a USB keyboard and monitor, or a serial portconnection.NoteTo configure the appliance, connect through the serial portor the keyboard/video ports and complete the firstbootscript. For serial port activation, use: 9600 baud rate 8 data bits no parity2. Accept the subscription agreement when prompted.3. When asked if you want to begin, enter yes to launch the firstboot activationscript.To rerun the script manually, enter the following command:firstboot4. At the first prompt, select the a security mode Web, then select Websense WebSecurity.5. Follow the on-screen instructions to provide the information collected above.After the activation script has been completed successfully, you can access Appliancemanager by opening a supported browser and entering this URL in the address bar:http:// IP-address-of-interface-C :9447/appmng/Use the Appliance manager to configure your appliance network interfaces and policysource mode (filtering only). See your appliance Getting Started guide for details.Installing Filtering Service on WindowsTo install Filtering Service on a supported Windows platform:1. On the Windows machine that will host the first instance of Filtering Service:a. Make sure there are no underscores in the machine’s fully-qualified domainname (FQDN). The use of an underscore character in an FQDN is inconsistentwith Internet Engineering Task Force (IETF) standards.NoteFurther details of this limitation can be found in the IETFspecifications RFC-952 and RFC-1123.b. Make sure all Microsoft updates have been applied. There should be nopending updates, especially any requiring a restart of the system.Installation Instructions 11
c. Verify that there is sufficient disk space to download the installer, extracttemporary installation files, and install the management components on theWindows installation drive (typically C).d. Make sure that the appropriate version of .NET Framework is installed. Youcan use Server Manager to install the appropriate version of .NETFramework. Windows Server 2008 R2: Use version 2.0 or higher.Windows Server 2012 or 2012 R2 (v7.8.2 and later): Version 3.5 isrequired.Note that .NET Framework 3.5 must be installed before adding anylanguage packs to the operating system (as noted in the following articlefrom Microsoft: deployment-considerations.docx).e. Synchronize the clocks on all machines (including appliances) where aWebsense component will be installed. It is a good practice to point themachines to the same Network Time Protocol server.f.Disable the antivirus software on the machine before installation. Afterinstallation, before restarting your antivirus software, see ExcludingWebsense software from antivirus scans.g. Disable any firewall on the machine before starting the Websense installer andthen re-enable it after installation. Open ports as required by the Websensecomponents you have installed, and make sure that required ports are notbeing used by other local services on the machine.Some ports are used only during installation and can be closed onceinstallation is complete.See Web Security Default Ports for more information about ports.h. Disable User Account Control (UAC) and Data Execution Prevention (DEP)settings, and make sure that no Software Restriction Policies will block theinstallation.2. Log on to the machine with domain admin privileges.3. Download the TRITON Unified Installer (WebsenseTRITON78xSetup.exe)from mywebsense.com.4. Right-click WebsenseTRITON78xSetup.exe and select Run as administratorto launch the installer. After a few seconds, a progress dialog box appears, as filesare extracted.5. On the Welcome screen, click Start.6. On the Subscription Agreement screen, select I accept this agreement, then clickNext.7. On the Installation Type screen, select Custom and then click Next.8. On the Custom Installation screen, click the Install link next to Web Security orRiskVision.12 Web Security Gateway Anywhere
9. If the machine has multiple NICs, on the Multiple Network Interfaces screen,select
Use the steps to complete a typical installation of Websense Web Filter or Web Security. In this configuration: The policy source (the standalone or prim ary Policy Broker and its Policy Server) resides on the TRITON management server machine. Websense Log Server resides on a File Size: 562KBPage Count: 34
