Transcription
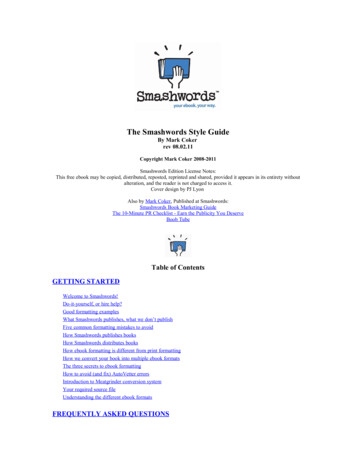
Formatting for SmashwordsBefore you start, I advise you to download the Smashwords Style Guide by Mark Coker. It’sfree, you can read it online if necessary, and you should read it from front to back – even theparts that won’t pertain to you. It helps to have read everything once before you start.My books are fiction with no pictures other than the cover. Everything is straight typing fromchapter one to the end. I type and format in Microsoft Word 2007.If you are formatting a simple book with front matter, a linked table of contents, text withnothing more than bold, italics, underline, etc., and back matter – then you can use this simpleguide to format your book. Obviously, start with a new page in Word. The default margins should already be set to 1”top/bottom/left/right. You can double-check this under Page Layout/Margins. It will likely be theNormal setting.The first thing I type is the name of my book – Sunshine Hunter – followed by Chapter One.Now I type for days/weeks/months on end until I get to ### - the end.After editing until I’m blue in the face, it’s time to format, and I’m going to choose the NuclearOption before I even consider formatting. If I would have done this with my first book, Iwouldn’t have had so many problems. Before proceeding, be sure to make a backup copy –just in case! There is only ONE thing I need to watch for before I nuke, and that is italics. I like to useitalics during oddball scenes or to show emphasis, and when I nuke, they will all be gone. If youuse bold, underline, strikethrough, etc., these will be gone as well, and you will have to go backand change them by hand. Make notes in your notebook, or use a highlighter on a hard copy,which is what I do, but you will have to redo these instances. Ready. Nuke. Simply select all, from chapter one to the end (CTRL A), copy, and drop it intothe Notepad from your Accessories folder on your computer. All formatting – even sneakyhidden formatting which you can’t see – will be stripped away. Copy it again, this time from theNotepad, and drop it into a new, blank, word document. Save at this time in a .doc format – not .docx. Choose Save As / Word 97-2003; your fileextension will be .doc. Highlight your entire book again by pressing CTRL A.
While your entire book is highlighted, do the following eight steps:
Click anywhere in your document to remove the highlight. Save.Now is the time to go back through and fix italics, bold, underline, etc. If you use a designationbetween scene breaks (I use ), and you had this centered, it isn’t now. See #9. Recenter by hand. I no longer center these while I’m typing; I do it when I format.
Time to turn on the Show/Hide feature. See #10. This will show all of your formatting thus far –your first line indents, your single spacing, your paragraph returns.Time to put in page breaks after each chapter. Insert/Page Break. See #11 Be sure to have twoparagraph returns before the page break.See #12 for the appearance of my page breaks at the end of my chapters.
Time for the Table of Contents. I fix my chapter headings at this time, too.It’s important to use the normal type that you’ve been using to create your TOC. Don’t use aheading style. Simply put your cursor where you want your TOC to appear in your book –which will be the page before your Prologue or Chapter One.Now manually type out your TOC:Table of ContentsChapter OneChapter TwoChapter ThreeEtc.That’s it; we’ll come back to them in a bit.Now it’s time to bookmark the chapter headings.I start by making sure each chapter heading is left justified, bold, with a paragraph returnfollowing:I personally don’t do anything fancy with my chapter headings. A page break always starts themon a new page, and I simply bold them. In one of my books, I used bold and underline. If youwant to change the font and/or type size, now is the time to do it, but be warned, some formats inthe meatgrinder will automatically upsize and bold your chapter headings, so if you make themtoo big, they will be crazy whack big in a couple of the formats. That’s one of the reasons Isimply stick with Times New Roman 12 and bold.
Now, highlight the chapter, Insert/Bookmark, and name the bookmark the same name as yourchapter:Do that for each of your chapter headings.Time to go back to the Table of Contents you typed out at the beginning of your book.Here you will place one last bookmark. Highlight your phrase Table of Contents,insert/bookmark, name it ref TOC, and add:
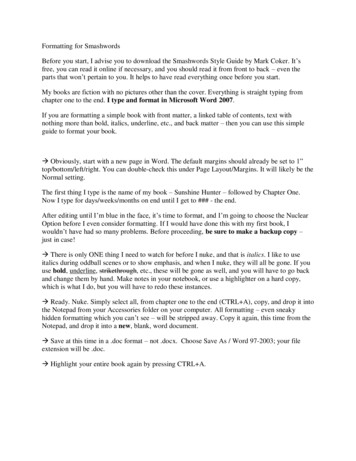
Now, make the Table of Contents active, clickable links.Highlight Chapter One, right mouse click Hyperlink:
A hyperlink box will come up. Click “Place in this document.” Your bookmarks will come up inthe bookmark box. Select your bookmark (ChapterOne), and click ok. Repeat this for eachchapter. For the illustration, I only set one bookmark.
Once all of your links are completed, you can control/click each chapter in the TOC to be sure itgoes to the right place, but you can also open the bookmark box again by simply clickinginsert/bookmark - then click the chapter and then the GO TO button. If all of your chapters havebeen bookmarked and linked properly, they will go to the correct chapter headings in your book.
One last step before we leave the TOC. You have to remove hidden bookmarks. Open thebookmark box again by clicking insert/bookmark.Uncheck and then check again the hidden bookmarks box.Hidden bookmarks start with an underline. There may be one hidden bookmark, or there may bea ton of them, but you need to delete them one by one:Whoo-hoo! Almost done. Everything from here on out is a cakewalk.
Time for front matter.Go to the top of your document. Return three or four times to move your title down on the page(or add your title at this time). Your book should never have more than four returns at any onetime.Type your title with your name underneath. Return three or four times and insert a page break.I set my title in 16 pt. with my name in 12 pt.
Next is your copyright page. DO NOT include the copyright symbol . If you do, your bookwill not pass the AutoVetter. Ask me how I know.Rather than to show copyright text here, you should check samples in books at Smashwords.You can view any book quickly by simply choosing the view online option for the sample.You can view several copyright pages and write yours as you feel best suits you. It must includethe words Smashwords Edition. When you are finished, center your text on the page and insert apage break.Copyright 2012 by Maddie CochereSmashwords EditionCopyright text.You should now be to your Table of Contents. If you have an extra page break before the TOC,simply delete.
Back Matter. At the end of my book, I show my other titles with blurbs and links to my books atSmashwords:There is only one more step. Go to the top of your document and add your cover image. I use a.jpg image 1600 x 2400. Insert a page break.Your’re done!I don’t zip. I don’t’ save in html.Scroll through the entire thing with your show/hide button on (backward P), and see howeverything looks; it should look great. Now scroll through with the show/hide off. Your bookshould look wonderful.Send it up to Smashwords! It will pass the AutoVetter and be in their premium catalog in a dayor two.
Formatting for Smashwords Before you start, I advise you to download the Smashwords Style Guide by Mark Coker. It's free, you can read it online if necessary, and you should read it from front to back - even the parts that won't pertain to you. It helps to have read everything once before you start.