Transcription
Import Windows Server toAmazon EC2 withPowerShellcrAvihdeFebruary 2017This paper has been archived.For the latest technical content about this subject,see the AWS Whitepapers & Guides page:http://aws.amazon.com/whitepapers
2017, Amazon Web Services, Inc. or its affiliates. All rights reserved.NoticesThis document is provided for informational purposes only. It represents AWS’scurrent product offerings and practices as of the date of issue of this document,which are subject to change without notice. Customers are responsible formaking their own independent assessment of the information in this documentand any use of AWS’s products or services, each of which is provided “as is”without warranty of any kind, whether express or implied. This document doesnot create any warranties, representations, contractual commitments,conditions or assurances from AWS, its affiliates, suppliers or licensors. Theresponsibilities and liabilities of AWS to its customers are controlled by AWSagreements, and this document is not part of, nor does it modify, any agreementbetween AWS and its customers.crAvihde
ContentsIntroduction1Amazon EC21Amazon EC2 Dedicated Instances1Amazon EC2 Dedicated Hosts1AWS Server Migration Service2deVM Import/Export2AWS Tools for Windows PowerShellAWS ConfigvihLicensing ConsiderationsPreparing for the WalkthroughsOverviewPrerequisitescrAWalkthrough: Import Your Custom ImageWalkthrough: Launch a Dedicated Instance33355569Walkthrough: Configure Microsoft KMS for BYOL11Walkthrough: Allocate a Dedicated Host and Launch an Instance13Conclusion16ContributorsFurther Reading1616
AbstractThis whitepaper is for Microsoft Windows IT professionals who want to learnhow to use Amazon Web Services (AWS) VM Import/Export to import customWindows Server images into Amazon Elastic Compute Cloud (Amazon EC2).PowerShell code is provided to demonstrate one way you could automate thetask of importing images and launching instances, but there are many otherDevOps automation techniques that could come into play in a well thought-outcloud migration process.crAvihde
Amazon Web Services – Import Windows Server to Amazon EC2 with PowerShellIntroductionAmazon EC2Amazon Elastic Compute Cloud (Amazon EC2) is a web service that providesresizable compute capacity in the cloud. Amazon EC2 reduces the time requiredto obtain and boot new server instances. It changes the economics of computingby allowing you to pay only for capacity that you actually use.deYou have full administrator access to each EC2 instance, and you can interactwith your instances just as you do with your on-premises servers. You can stopyour instance and retain the data on your boot partition, then restart the sameinstance using PowerShell or a browser interface.vihAmazon EC2 Dedicated InstancesDedicated Instances are Amazon EC2 instances that run in a virtual privatecloud (VPC) on hardware that's dedicated to a single customer. Your DedicatedInstances are physically isolated at the host hardware level from instances thatbelong to other AWS accounts. However, Dedicated Instances may sharehardware with other instances from the same AWS account that are notDedicated Instances. Dedicated Instances allow you to bring your own licensesfor Windows Server. For more information, azon EC2 Dedicated HostsAn Amazon EC2 Dedicated Host is a physical server with Amazon EC2 instancecapacity fully dedicated to your use. Dedicated Hosts can help you addresscompliance requirements and reduce costs by allowing you to use your existingserver-bound software licenses.Dedicated Hosts allow you to allocate a physical server and then launch one ormore Amazon EC2 instances of a given type on it. You can target and reusespecific physical servers and be within the terms of your existing softwarelicenses.In addition to allowing you to Bring Your Own License (BYOL) to the cloud toreduce costs, Amazon EC2 Dedicated Hosts can help you to meet stringentPage 1
Amazon Web Services – Import Windows Server to Amazon EC2 with PowerShellcompliance and regulatory requirements, some of which require control andvisibility over instance placement at the physical host level. In theseenvironments, detailed auditing of changes is also crucial. You can use the AWSConfig service to record all changes to your Dedicated Hosts and instances.Dedicated Hosts allow you to use your existing per-socket, per-core, or pervirtual machine (VM) software licenses, including Microsoft Windows Serverand Microsoft SQL Server. Learn more S Server Migration ServiceAWS Server Migration Service (AWS SMS) is an agentless service that makes iteasier and faster for you to migrate thousands of on-premises workloads toAWS. AWS SMS allows you to automate, schedule, and track incrementalreplications of live server volumes, making it easier for you to coordinate largescale server migrations.vihEach server volume replicated is saved as a new Amazon Machine Image (AMI),which can be launched as an EC2 instance in the AWS Cloud. AWS SMScurrently supports VMware virtual machines, and support for other physicalservers and hypervisors is coming soon.crAAWS SMS supports migrating Windows Server 2003, 2008, 2012, and 2016,and Windows 7, 8, and 10.VM Import/ExportVM Import/Export enables you to easily import virtual machine images fromyour existing environment to Amazon EC2 instances and export them back toyour on-premises environment. This allows you to use your existing virtualmachines that you have built to meet your IT security, configurationmanagement, and compliance requirements by bringing those virtual machinesinto Amazon EC2 as ready-to-use instances. VM Import/Export is available atno additional charge beyond standard usage charges for Amazon EC2 andAmazon Simple Storage Service (Amazon S3).Page 2
Amazon Web Services – Import Windows Server to Amazon EC2 with PowerShellYou can use PowerShell to import a Hyper-V or VMware image. VM Import willconvert your virtual machine (VM) into an Amazon EC2 AMI, which you canuse to run Amazon EC2 instances.AWS Tools for Windows PowerShellThe AWS Tools for Windows PowerShell are a set of PowerShell cmdlets thatare built on top of the functionality exposed by the AWS SDK for .NET. AWSTools for Windows PowerShell enable you to script operations on your AWSresources from the PowerShell command line. Although the cmdlets areimplemented using the service clients and methods from the SDK, the cmdletsprovide an idiomatic PowerShell experience for specifying parameters andhandling results. For example, the cmdlets for Tools for Windows PowerShellsupport PowerShell pipelining—that is, you can pipeline PowerShell objectsboth into and out of the cmdlets. Learn more .devihAWS ConfigcrAAWS Config is a fully managed service that provides you an inventory of yourAWS resources, as well as configuration history, and configuration changenotifications to enable security and governance. Config Rules enable you toautomatically check the configuration of your AWS resources. You can discoverexisting and deleted AWS resources, determine your overall compliance againstrules, and dive into configuration details of a resource at any point in time.These capabilities enable compliance auditing, security analysis, resourcechange tracking, and troubleshooting. This enables you to manage yourWindows Server licenses on Dedicated Hosts as required by Microsoft.Licensing ConsiderationsOrganizations that own Microsoft software licenses and Software Assurancehave the option of bringing their own licenses (BYOL) to the cloud under theterms of Microsoft’s License Mobility program (included with SoftwareAssurance). In many cases, software license costs can dominate the cost of thecomputing, storage, and networking infrastructure in the cloud, so BYOL can bevery beneficial. However, you must evaluate BYOL carefully.Page 3
Amazon Web Services – Import Windows Server to Amazon EC2 with PowerShellFor Windows Server and SQL Server, AWS also offers License Included (LI) asan option. It’s called License Included because the software is pre-installed inthe AMI and the complete software licenses are included when you launch anAmazon EC2 instance with those AMIs, even Client Access Licenses (CALs). Youpay as you go for the Windows Server and SQL Server licenses, either hourlywhile the instance is running or with a 1- or 3-year Reserved Instance. ReservedInstances offer substantial discounts.The LI model is convenient and flexible, but if you move a licensed on-premisesworkload to the cloud with LI instances then you would essentially be paying fordual software licenses. Even though that sounds expensive, it still might makesense to do in some cases, particularly if you plan to consolidate some of yourworkloads, or re-platform some application servers, or discontinue purchasingSoftware Assurance. So you need to consider your options, including BYOL,carefully.devihHowever, don’t assume that BYOL is always more economical. It’s advisable tocreate a simple spreadsheet to make a balanced comparison of BYOL vs. LI.With BYOL, if you haven’t bought the licenses yet, you need to know yourMicrosoft reseller bulk license discount. You also need to include the cost ofSoftware Assurance (even if it’s already a sunk cost, consider whether you planto renew it), and the cost of EC2 Dedicated Hosts and Instances. Don’t forget toinclude the correct number of licenses for all the cores on the instances you planto use for Windows Server and SQL Server. With LI, you need to considerwhether you are purchasing Reserved Instances, which offer substantialdiscounts.crATip: When using the AWS Simple Monthly Calculator to determineinstance costs without licenses, select Amazon Linux even though you’llbe importing your own Windows Server image. This avoids the licensecost that the calculator automatically assumes for Windows Server.Also, there are considerable advantages with LI: The licenses are fully managed by AWS, so you don’t need to worryabout auditing. You can forego the cost of Software Assurance for those licenses.Page 4
Amazon Web Services – Import Windows Server to Amazon EC2 with PowerShell You don’t need to buy CALs. Each LI for Windows Server includes two Remote Desktop CALs. LI reduces your costs if you decide to consolidate workloads later. LI reduce your costs when you stop the instances. LI reduces your costs if you don’t need the full capacity of a DedicatedHost. You retain the freedom to re-platform your workload.dePreparing for the WalkthroughsOverviewvihThe remainder of this paper walks you through several activities with WindowsPowerShell. You can adapt and reuse these code snippets in your own AWSaccount to automate the following tasks: Import a Windows Server virtual machine to Amazon EC2. Launch and terminate a Dedicated Instance using your custom AMI. Configure Microsoft Key Management Services (KMS) to apply usersupplied licensing. Allocate a Dedicated Host and launch an instance in the host using yourcustom AMI, and then terminate the instance and the Dedicated Host.crAImportant: If you choose to follow along with the remaining sections inthis paper, you will be creating resources in your AWS account, whichwill incur billing charges.PrerequisitesThese walkthroughs assume that you have previously exported a WindowsServer image (for example, from VMware as an Open Virtualization Archive orOVA file) and stored it in an Amazon S3 bucket in your account. VMImport/Export also supports Microsoft Hyper-V, but an OVA is referenced hereas an example.Page 5
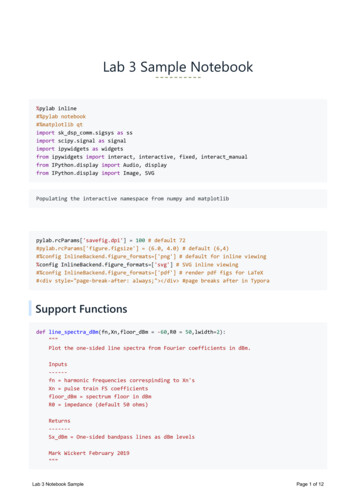
Amazon Web Services – Import Windows Server to Amazon EC2 with PowerShellYou’ll need to have the AWS Tools for Windows PowerShell and grant securityrights for PowerShell to access your AWS account. The easiest way to do that isto launch a Windows Server instance in Amazon EC2 with an AWS Identity andAccess Management (IAM) role.You’ll also need an Amazon Virtual Private Cloud VPC, a subnet, a securitygroup, and a key-pair in the Region where you import the image. You certainlycan create those in PowerShell, but it’s generally more reliable to create as muchof your infrastructure as possible using AWS CloudFormation. The reason isthat you need to consider how to roll back your stack in case any errors occurwhile building it. AWS CloudFormation provides a simple mechanism toautomatically roll back so that you won’t be left paying the bill for an incompletestack after an error occurs. To roll back in PowerShell, you would need to trappotential errors at the point where each resource is created in your script andthen write the code to remove or deallocate every other resource that the scripthad successfully created up to that point. That would get very tedious in regularPowerShell but could be more easily handled with PowerShell Desired StateConfiguration (DSC).devihcrATo comply with your Windows Server license terms and implement BYOL, you’llneed to a have a Microsoft KMS instance running in your VPC. The walkthroughshows you how to configure the BYOL instance for Microsoft KMS, though youcan proceed with this walkthrough without having Microsoft KMS running.Finally, these walkthroughs assume that your own workstation is runningWindows Server 2016, though these steps should work with other versions withminor modifications.Walkthrough: Import Your Custom Image1.On the Windows Start menu, choose Windows PowerShell ISE.2. In the Windows PowerShell ISE, press Ctrl R to show the ScriptPane (or on the View menu, choose Show Script Pane).3. The AWS Tools for PowerShell allow you to specify the AWS Regionseparately in most cmdlets, but it’s simpler to set the default Region foryour whole session. For example, run the following commands inPowerShell to set “us-west-2” as the default Region. You’ll be using thePage 6
Amazon Web Services – Import Windows Server to Amazon EC2 with PowerShell“lab region” variable again later in this walkthrough, so make sure youset it here to your preferred Region. lab region "us-west-2"Set-DefaultAWSRegion lab region4. To use the VM import service role in your own AWS account, create anIAM policy document to grant access for the Amazon EC2 Import API(vmie.amazonaws.com). You must name the role “vmimport”. (Note:you could create this policy in the AWS Management Console, but thisexample shows how to do it with a document in PowerShell.)de importPolicyDocument New-IAMRole -RoleName vmimport -AssumeRolePolicyDocument importPolicyDocumentvihcrA5.Page 7Associate a policy with the “vmimport” role so that VM Import/Exportcan access the VM image in your S3 bucket and create an AMI inAmazon EC2. If you’d like to create your own restrictive policy forsecurity reasons, see this page for st/userguide/import-vmimage.html. AWS also provides a couple of managed (built-in) policies
Amazon Web Services – Import Windows Server to Amazon EC2 with PowerShellthat make it convenient to grant access to the VM import service role toAmazon S3 and Amazon EC2. (Note: This code consists of twocommands that are wrapped to fit the document.)Register-IAMRolePolicy -RoleName vmimport cessRegister-IAMRolePolicy -RoleName vmimport essde6. Create a userBucket object to define the location of your image file andan ImageDiskContainer parameter, both of which are passed to theImport-EC2Image cmdlet. However, before running these commands,replace UniqueBucketName with the name of the bucket where youstored the OVA file. If you are importing Hyper-V, change the Formatproperty to “VHD”.vih userBucket New-Object Amazon.EC2.Model.UserBucket userBucket.S3Bucket " UniqueBucketName " userBucket.S3Key filecrA windowsContainer New-Object Amazon.EC2.Model.ImageDiskContainer windowsContainer.Format "OVA" windowsContainer.UserBucket userBucket7.Now create an object for the remaining parameters for the import task.Set the "Platform” parameter to match the imported operating systemtype. The “LicenseType” parameter controls how the instance that isimported is configured for licensing. Set it to BYOL. params @{"ClientToken" "MyCustomWindows " (Get-Date)"Description" "My custom Windows image""Platform" "Windows""LicenseType" "BYOL"}8. Now you’re ready to start the import task. When you run this command,the import process will take about 45 minutes, but you can proceed withthe remaining steps in this paper if you’re willing to temporarily usePage 8
Amazon Web Services – Import Windows Server to Amazon EC2 with PowerShellother AMI IDs. This command is all one line, but wrapped here to fit thepage.Import-EC2Image -DiskContainer windowsContainer @params –region lab region9. You can check the progress of the import task with the followingcommand, which will show the Progress property and the Statusproperty. The Progress property reports the current percentage completestatus for the import task. The Status property indicates the migrationphase.Get-EC2ImportImageTask -region lab regiondevihWalkthrough: Launch a Dedicated Instance1. While waiting for your own image to be imported, you can follow the restof the walkthroughs using an AWS AMI. All the steps will work the sameregardless of the AMI, except that you’ll need to provide a key-pair toaccess an AWS AMI. When you launch an instance from your ownimported AMI, you don’t need to provide a key-pair if you already havean Administrator password. The command below obtains the AMI ID ofthe latest version of the AWS AMI for Windows Server 2016 (“base”means without SQL Server). The my ami variable will be used later, somake sure you set it here. If you run this step after your import process iscomplete, you can use that AMI ID instead.crA my ami (Get-EC2ImageByName "Windows 2016 Base").ImageId2. Configure two variables for use when launching the instance. Setting theinstance type to "dedicated" means that you want a Dedicated Instance.With the exception of the t2 instance type, most instance types can beused for Dedicated Instances. tenancy type "dedicated" instance type "m4.large"Page 9
Amazon Web Services – Import Windows Server to Amazon EC2 with PowerShell3. This step configures variables to store the networking parameters you’lluse when you launch a new instance. Enter the Classless Inter-DomainRouting (CIDR) address of a subnet you’ve created in your VPC whereyou want to launch the new instance. If you don’t provide a private IPaddress during launch, one will be assigned automatically within thesubnet. However, you may want to script it for various reasons.The New-Ec2Instance cmdlet will use this private IP address, and youwill log into the instance in the next walkthrough to configure MicrosoftKMS. If your workstation is not an EC2 instance in a public subnet in thesame VPC where you are launching this instance in a private subnet,then you will need to do one of the following: (a) launch the instance in apublic subnet; (b) use Remote Desktop Protocol (RDP) to allow remoteconnections into another instance in its associated public subnet; or (c)set up a Remote Desktop Gateway in its public subnet (see RemoteDesktop Gateway on the AWS Cloud: Quick Start Reference test/rdgateway/welcome.html).vihcrA private IP "10.50.3.10" Subnet "10.50.3.0/24"de SubnetObj Get-EC2Subnet -Filter @{Name "cidr"; Values Subnet}4. Configure a variable to store the security group parameter you will usewhen you launch the new instance. Later in this walkthrough, you’lllogin to the instance through Remote Desktop to set up KMS for BYOL,so make sure the security group allows inbound RDP access from theInternet. SecurityGroup "MySecurityGroup" SGObj Get-EC2SecurityGroup -Filter @{Name "tag-value";Values SecurityGroup}5.Page 10Create a variable for the key-pair name parameter you will use todecrypt the administrator password for the new instance. Don’t includethe file extension .PEM. If you are launching an imported image onwhich you know the administrator password, you don’t need to provide akey-pair.
Amazon Web Services – Import Windows Server to Amazon EC2 with PowerShell key pair " key-pair-name "6. Now you’re ready to launch your Dedicated Instance. Many otheroptional parameters can be configured with this cmdlet to customize theinstance. However, the following is the minimum you need to launch aninstance with BYOL. my instance New-EC2Instance -ImageId my ami -Tenancy tenancy type -InstanceType instance type -SubnetId SubnetObj.SubnetID -PrivateIpAddress private IP -securityGroupId SGObj.GroupID -KeyName key pair7.devihIt’s a good idea to create a name tag for the new instance. The last twolines are a single cmdlet, wrapped here to fit the page.crA Tag New-Object amazon.EC2.Model.Tag Tag.Key 'Name' Tag.Value "Server2016-Imported"New-ec2Tag -ResourceID my instance.runninginstance[0].instanceID -Tag TagWalkthrough: Configure Microsoft KMS forBYOLTo comply with Microsoft licensing requirements for EC2 Dedicated Instancesusing the BYOL model, you must either supply a Windows license key for theinstance, or configure it to use Microsoft KMS on a server that you manage.In this task you will configure the Dedicated Instance to use a manuallyspecified Microsoft KMS. You will connect to the new instance using WindowsRemote Desktop Connection. If you used an AWS AMI to launch this instance,you need to decrypt the password using the lab key-pair in order to connect. IfPage 11
Amazon Web Services – Import Windows Server to Amazon EC2 with PowerShellyou launched this instance using your imported image, you already know thelocal administrator account and password.1. Log in to the AWS Management Console and go to the EC2 Dashboard.2. Select only the instance you just launched with PowerShell.3. Choose Connect.4. In the Connect To Your Instance dialog box, choose Get Password.You might need to retry this a couple of times to give the instance a fewminutes to initialize.de5. For Key Pair Path, choose Choose File (the button is named Browsein some browsers).vih6. Browse to the .pem file on your local machine for the key-pair youspecified when launching the instance, and choose Open.7. Choose Decrypt Password.8. Copy the decrypted password to your clipboard buffer.crA9. Run Remote Desktop Connection.10. In the Computer box enter the IP address of the Dedicated Instance youlaunched and choose Connect.11. When prompted for credentials, log in as Administrator and paste thedecrypted password from your clipboard buffer.12. On the Remote Desktop Connection warning dialog box, choose Yes toignore the verification warning.13. In the Remote Desktop Connection session for the Server2016-Importedinstance, when the desktop appears, choose No in the Networks dialogbox to disable discovery (this is a Windows Server 2016 feature that isnot available in earlier versions).14. In the Remote Desktop Connection session for the Server2016-Importedinstance, launch Windows PowerShell and run the following command todisplay the current configuration settings of the Microsoft KMS client.slmgr.vbs /dlvPage 12
Amazon Web Services – Import Windows Server to Amazon EC2 with PowerShell15. Enter the following commands to update the active Microsoft KMSconfiguration and confirm the change. Replace the IP address with afunctioning KMS server that you have installed in your VPC. Thiscommand won’t immediately fail if you don’t have a running KMSinstance at the given IP address.slmgr.vbs /skms 10.50.3.100slmgr.vbs /dlvde16. Close the Remote Desktop Connection to the Dedicated Instance andreturn to your workstation instance where you launched the instance.Terminate the Dedicated Instance. This cmdlet should be entered as asingle line.vihRemove-EC2Instance -InstanceId my instance.Instances[0].InstanceId -ForcecrAWalkthrough: Allocate a Dedicated Hostand Launch an InstanceIn this task you will launch and terminate an instance in a Dedicated Host.1. Create variables for the Availability Zone and quantity parameters. Editthe AZ variable appropriately before running this command. AZ 'us-west-2a' Qty 1 AutoPlace 'On'2. Request a Dedicated Host. This reuses the instance type variable youcreated earlier, which was m4.large. Note that Dedicated Hosts are notavailable for all instance types.new-EC2hosts -InstanceType instance type -AvailabilityZone AZ -quantity QtyPage 13
Amazon Web Services – Import Windows Server to Amazon EC2 with PowerShell -AutoPlacement AutoPlace3. Query the properties of your Dedicated Host. This command mayinitially return no data. Wait a moment and retry it. This commandreturns the number of physical CPU cores and sockets, the total numberof virtual CPUs, and the type of instance supported on your DedicatedHost.de(get-EC2hosts).HostProperties4. List the instances running on your Dedicated Host. This shows thatinitially there are no instances running in the host.vih(get-EC2hosts).Instances5.Specify the tenancy type "host” to launch an instance inside theDedicated Host.crA tenancy type "host"6. Indicate the AMI ID to be deployed in the Dedicated Host. There areMicrosoft licensing restrictions for Dedicated Hosts. AWS and AWSMarketplace AMIs for Windows cannot be used. Ordinarily, you wouldspecify the AMI ID of your imported image here. However, if the importtask you started earlier is still running in the background, that AMI isnot available yet. In order to demonstrate how to deploy instances to aDedicated Host you can use an Amazon Linux AMI as a placeholder forthe next few tasks. my ami (Get-EC2Image –Filters @{Name "name"; Values "Amazon CentOS*"}).ImageID7.Page 14Launch the instance inside the Dedicated Host. Once again, the onlydifference is the requirement to provide a key-pair when launching anAWS AMI.
Amazon Web Services – Import Windows Server to Amazon EC2 with PowerShell host instance New-EC2Instance -ImageId my ami -Tenancy tenancy type -InstanceType instance type -SubnetId SubnetObj.SubnetID -PrivateIpAddress private IP -securityGroupId SGObj.GroupID -KeyName key pairde8. Create a name tag for the new instance. The last two lines are a singlecmdlet. Tag New-Object amazon.EC2.Model.Tag Tag.Key 'Name' Tag.value "DedicatedHost-Instance"New-ec2Tag -ResourceID host instance.runninginstance[0].instanceID -Tag TagcrAvih9. List the instances running on your Dedicated Host.(get-EC2hosts).Instances10. You must terminate all instances on a Dedicated Host before you canrelease it.Remove-EC2Instance –InstanceId host instance.Instances[0].InstanceId -Force11. Finally, release the Dedicated Host. The command below reportssuccessful and unsuccessful attempts to release hosts. It doesn’t reportsuccess until all running instances have been terminated. Repeat thiscommand until your host-id is listed in the Successful column. dedicated host get-EC2hosts Select-Object -first 1Remove-EC2Hosts -HostId dedicated host.HostId –ForcePage 15
Amazon Web Services – Import Windows Server to Amazon EC2 with PowerShell12. Switch back to the EC2 Dashboard in your browser. In the navigationpane, choose Dedicated Hosts to confirm that DedicatedHostInstance has been terminated. You might need to refresh the consoledisplay.ConclusionThis paper has demonstrated how to use Windows PowerShell and VMImport/Export to import a custom Windows Server image into Amazon EC2.You can adapt and reuse the PowerShell code snippets to automate the processin your own AWS account.deIn addition to VM Import/Export, consider using the AWS Server MigrationService. It currently supports VMware vCenter, and support for additionalimage formats is coming soon.vihContributorsThe following individuals and organizations contributed to this document:crA Scott Zimmerman, Solutions Architect, AWSFurther ReadingFor additional information, please consult the following sources: Page 16Getting Started with Amazon EC2 Windows WindowsGuide/EC2WinGetStarted.html
Import Windows Server to Amazon EC2 with PowerShell. Page 3 . You can use PowerShell to import a Hyper-V or VMware image. VM Import will convert your virtual machine (VM) into an Amazon EC2 AMI, which you can use to run Amazon EC2 instances. AWS Tools for Windows PowerShell . The AWS Tools for Windows PowerShell are a set of PowerShell cmdlets that
