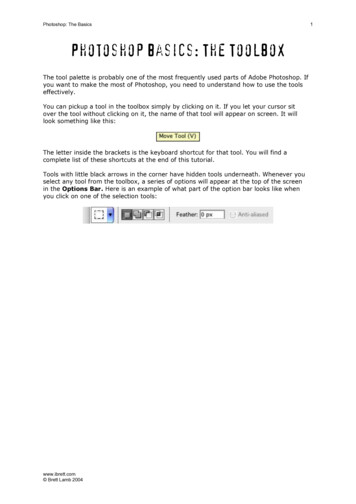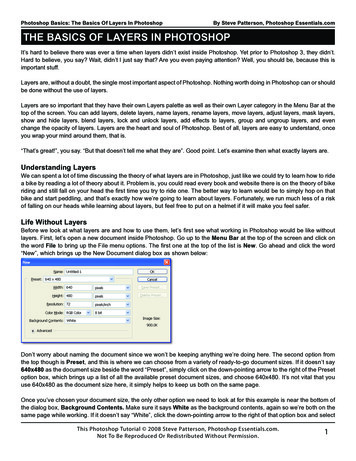
Transcription
Photoshop BasicsMark Wallacesnapfactory
Session One Photoshop Basics1Introducing PhotoshopAdobe Photoshop CS3 is a powerful image editing application. In addition to basic image editing it provides tools for animation, web production, medical professionals, and scientists. Photoshopwas originally created for basic image editing but now has tools for many users including: Professional photographers Serious amateur photographers Graphic designers Web designers Film, video, and multimedia professionals Graphic and web designers using 3D and motion Manufacturing professionals Medical professionals Architects and engineers Scientific researchersPhotoshop is a part of Adobe’s Creative Suite Family of products which enables users to designacross media — print, web, interactive, mobile, video, and film — in the most comprehensive creativeenvironment ever produced.Hands-On: Copy Sample FilesCreate a folder on your desktop called “Sample Files” and copy all of the files from the workshopCD to the “Sample Files” folder.Hands-On: Launch PhotoshopTurn on your laptop and launch the Photoshop application. It’s not important to know what anything does at this point. Get ready to learn!Hands-On: Opening Files Double Tap on blank workspace File - Open CTRL O Use BridgeHands-On: Using BridgeClick on the Bridge Icon to open Adobe Bridge.Adobe BridgeSometimes referred to as The Bridge, Adobe Bridge is an application that allows you to previewmedia files, manipulate metadata, and move assets between Adobe applications.2
Session One Photoshop BasicsAdobe Bridge provides a clean interface for working with digital media assets.Opening your first fileUsing adobe bridge to open the sample file “Jess Portrait.jpg” by double clicking on the thumbnail. If Photoshop is not currently open it will automatically launch. Photoshop comes to the front of the screen. The file “Jess Portrait.jpg” is opened and ready for editing.Hands-On: Exploring The Interface Make sure you’ve selected the Default Workspace.You create and manipulate your documents and files using various elements such as panels, bars, andwindows. Any arrangement of these elements is called a workspace. When you first start an AdobeCreative Suite component, you see the default workspace, which you can customize for the tasks youperform there. For instance, you can create one workspace for editing and another for viewing, savethem, and switch between them as you work.Don’t Miss It! Hit F1 for a wealth of informationAll of the material we are going to cover in this session is documented in detail in the Adobe Helpfiles. Just click Help- Photoshop Help to launch the Adobe Help Viewer.3
Session One Photoshop BasicsBACDEGFHDefault Photoshop workspaceA. Document windowB. Dock of panels collapsed to iconsC. Panel title barD. Menu barE. Options barF. Tools paletteYou can restore thedefault workspace atany time by choosingthe default optionon the Window Workspace menu.G. Collapse To Icons buttonH. Three palette (panel) groups in vertical dockHands-On: Rearrange the workspace Drag the Document Window, toolbar, and other panels to new locations. Experiment with opening and closing different windows. “Mess up” the workspace. Restore the workspace by choosing Window - Workspace - Default Workspace.4
Session One Photoshop BasicsHands-On: Using The ToolsThere are six categories of tools: Selection Tools Crop and Slice Tools Retouching Tools Painting Tools Drawing and Type Tools Annotation, Measuring, and Navigation ToolsIn this session we will be working with the Selection and NavigationTools.The Options BarThe ToolbarExercise One: The Options BarThe options bar appears below the menu bar at the top of the workspace. The options bar is contextsensitive—it changes as you select different tools. Some settings in the options bar (such as paintingmodes and opacity) are common to several tools, and some are specific to one tool.You can move the options bar in the workspace by using the gripper bar, and you can dock it at thetop or bottom of the screen. Tool tips appear when you position the pointer over a tool. To show orhide the options bar, choose Window Options. Click on different tools in the toolbar to see the options bar change.Exercise Two: Finding Hidden ToolsYou can expand some tools to show hidden tools beneath them. A small triangle at the lower rightof the tool icon signals the presence of hidden tools. Click and hold on any tool in the toolbar that has a triangle at the lower right to see the hiddentools pop out.5
Session One Photoshop BasicsHands-On: NavigationThe Screen Mode Button.The Hand ToolThe Zoom ToolScreen Mode Change the screen mode by clicking the Screen Mode button in the Tools palette. Change the screen mode by using the keyboards shortcut - “F”.Magnification Select the Zoom tool , and click either the Zoom In or Zoom Out button in the options bar.Click the area you want to magnify. Select the Zoom tool. The pointer becomes a magnifying glass with a plus sign in its center.Click the center of the area that you want to magnify, or hold down Alt (Windows) or Option (Mac OS) and click the center of the area that you want to reduce. Each click magnifies orreduces the view to the previous preset percentage. Note: When you use the Zoom or Zoom Out tool, each click magnifies or reduces the image tothe next preset percentage and centers the display around the point you click. When the imagehas reached its maximum magnification level of 1600% or minimum size of 1 pixel, the magnifying glass appears empty. Select the Zoom tool and drag a dotted rectangle, called a marquee, around the area you want tomagnify. To move the marquee around the artwork, hold down the spacebar and continue dragging until the marquee is in the desired location. Choose View Zoom In or View Zoom Out. When the image reaches its maximum or minimum magnification, the command is dimmed. Set the zoom level at the lower left corner of the document window or in the Navigator palette. To display a file at 100%, choose View Actual Pixels. To change the view to fit the document window, choose View Fit on Screen. Double Click the Zoom Tool to view the image at 100% Double Click the Hand Tool to fit image on screen.The NavigatorThe Navigator To display the Navigator palette, select Window Navigator. To change the magnification, type a value in the text box, click the Zoom Out or Zoom In button, or drag the zoom slider. To move the view of an image, drag the proxy view area in the image thumbnail. You can alsoclick the image thumbnail to designate the viewable area. To change the color of the proxy view area, select Palette Options from the palette menu. Selecta preset color from the Color pop‑up menu, or double-click the color box to choose a customcolor.The Hand ToolUse the Hand Tool to quickly pan the image around. To use the Hand tool while another tool is selected, hold down the spacebar as you drag in theimage.6
Session One Photoshop BasicsHands-On: Selection ToolsMarching AntsThe area that is selected will be surrounded by an animated outline that many refer to as “marchingants”.Marquee ToolLasso ToolMagic Wand ToolDeselecting Choose Select Deselect. If you are using the Rectangle Marquee tool, the Elliptical Marquee tool, or the Lasso tool, clickanywhere in the image outside the selected area. Use the handy keyboard shortcut CTRL D to deselect.The Marquee ToolThe marquee tools make rectangular, elliptical, single row, and single column selections.Exercise One: Select using the Marquee Tool Use the various Marquee Tools to select areas of the image. Use one or more of the deselection techniques listed above to deselect the area.The Lasso ToolThe lasso tools make freehand, polygonal (straight-edged), and magnetic (snap-to) selections.Exercise Two: Select using the Lasso Tool Use the Lasso Tool to make freehand selections. Use the Polygonal Lasso Tool to make straight-edged selections. Use the Magnetic Lasso Tool for snap-to selections.The Magic Wand ToolThe Magic Wand tool selects similarly colored areas. The Quick Selection Tool allows you to quickly“paint” a selection.7
Session One Photoshop BasicsExercise Three: Selecting with the Magic Wand and QuickSelect Tools. Use the Magic Wand Tool to select the white area around Jess. Use the SHIFT key to select additional areas. Use the Quick Selection Tool to quickly draw a selection around Jess.Jess-n-beansQuick Demo: Jess Loves Beans!The selection tools allow us to quickly select parts of our image to edit or delete. We can then usethe rest of the image in creative ways. We’ll be covering Layers and Retouching Tools in Session Two.Hands-On: The History PaletteYou can use the History palette to jump to any recent state of the image created during the currentworking session. Each time you apply a change to an image, the new state of that image is added tothe palette.The History Palette You may need to expand the History Palette to see it. History is not saved with the document. Once you close the document the history is gone. Advanced features of the History Palette are not covered in this workshop.Exercise One: Undo That! Use the History Palette to undo changes made to the document.8
Session One Photoshop BasicsImage ResolutionThe pixel dimensions (image size or height and width) of a bitmap image is a measure of thenumber of pixels along an image’s width and height. Resolution is the fineness of detail in a bitmapimage and is measured in pixels per inch (ppi). The more pixels per inch, the greater the resolution.Generally, an image with a higher resolution produces a better printed image quality.Bit DepthBit depth specifies how much color information is available for each pixel in an image. The morebits of information per pixel, the more available colors and more accurate color representation. Forexample, an image with a bit depth of 1 has pixels with two possible values: black and white. An image with a bit depth of 8 has 28, or 256, possible values. Grayscale mode images with a bit depth of8 have 256 possible gray values.Heads Up: Some Filters and other features are not available for 16 and 32bit images.Next Session: Layers, Masks, and Nondestructive Editing! We will build on the principles we learned in this session. Use this week to explore Photoshop and play with some of the sample images.9
Session Two Photoshop Basics2Layers, Masks, andNondestructive EditingAbout LayersLayers are the building blocks of many image creation workflows. You may not need to work withlayers if you are doing simple image adjustments, but layers help you work efficiently and are essential to most nondestructive image editing.Photoshop layers are like sheets of stacked acetate. You can see through transparent areas of a layerto the layers below. You move a layer to position the content on the layer, like sliding a sheet of acetate in a stack. You can also change the opacity of a layer to make content partially transparent.Hands-On: 1-2-3 LayersThe Layers PaletteOpen the document “1-2-3 Layers.PSD” to follow along with this demonstration. The file can be found in the“Sample Files” folder you created in Session One.Note: You cannot changethe opacity of a backgroundlayer or a locked layer. Youcan, however, convert abackground layer into aregular layer, which doessupport transparency.OpacityA layer’s opacity determines to what degree it obscures or reveals the layer beneath it. A layer with1% opacity appears nearly transparent, whereas one with 100% opacity appears completely opaque.To adjust Opacity: In the Layers palette, enter a value in the Opacity text box or drag the Opacity pop‑up slider. Choose Layer Layer Style Blending Options. Enter a value in the Opacity text box or dragthe Opacity pop‑up slider.10
Session Two Photoshop BasicsIn addition to settingopacity, which affects anylayer styles and blendingmodes applied to the layer,you can specify a fill opacity for layers. Fill opacityaffects pixels painted in alayer or shapes drawn on alayer without affecting theopacity of any layer effectsthat have been applied tothe layer.Photoshop Layers paletteFor example, if your layercontains a drawn shapeor text that uses a dropshadow layer effect, adjustthe fill opacity to changethe opacity of the shape ortext itself without changingthe opacity of the shadow.A. Layers palette menu B. Layer Group C. Layer D. Expand/Collapse Layer effects E. Layer effectF. Layer thumbnailLayer OrderYou can select the layersthat you want to movedirectly in the documentwindow. In the Move tool’soptions bar, select AutoSelect, the choose Layerfrom the drop-down menu.Shift-click to select multiplelayers. Select Auto Select,then choose Group, to selectthe entire group whenyou select one layer in thegroup. Drag the layer or group up or down in the Layers palette. Release the mouse button when thehighlighted line appears where you want to place the layer or group. To move a layer into a group, drag a layer to the group folder . If the group is closed, the layer isplaced at the bottom of the group.Moving Contents of a Layer1.From the Layers palette, select the layers containing the objects you want to move.2.Select the Move tool.3.Do one of the following: In the document window, drag any object on one of the selected layers. (All objects on thelayer will move together.) Press an arrow key on the keyboard to nudge the objects by 1 pixel. Hold down Shift and press an arrow key on the keyboard to nudge the objects by 10 pixels.Locking LayersClick one or more lock options in the Layers palette. Lock TransparencyConfines editing to the opaque portions of the layer. This option isequivalent to the Preserve Transparency option in earlier versions of Photoshop. Lock Image Lock Position Lock AllPrevents modification of the layer’s pixels using the painting tools.Prevents the layer’s pixels from being moved.Locks all properties of the layer or group.11
Session Two Photoshop BasicsHiding LayersOnly visible layers areprinted Click the eye icon next to a layer, group, or layer effect to hide its content in the documentwindow. Click in the column again to redisplay the content. To view the eye icon for styles andeffects, click the Reveal Effects In Palette icon . Choose Show Layers or Hide Layers from the Layers menu. Alt-click (Windows) or Option-click (Mac OS) an eye icon to display only the contents of thatlayer or group. Photoshop remembers the visibility states of all layers before hiding them. If youdon’t change the visibility of any other layer, Alt-clicking (Windows) or Option-clicking (MacOS) the same eye icon restores the original visibility settings. Drag through the eye column to change the visibility of multiple items in the Layers palette.The Background LayerWhen you create a new image with a white background or a colored background, the bottommostimage in the Layers palette is called Background. An image can have only one background layer. Youcannot change the stacking order of a background layer, its blending mode, or its opacity. However,you can convert a background into a regular layer, and then change any of these attributes.When you create a new image with transparent content, the image does not have a background layer.The bottommost layer is not constrained like the background layer; you can move it anywhere in theLayers palette and change its opacity and blending mode.To convert a background into a layer: Double-click Background in the Layers palette, or choose Layer New Layer From Background.Demonstration: Groovy 3Let’s put a few of the things we know to use and make a groovy looking “3”.Our groovy “3” Open “1-2-3 Layers.PSD” Hide all layers except the “3” layer. Use the Magic Wand tool to select all of the red. Hit the DELETE key to delete the red. Deselect (CTRL D). Lock the transparency of the “3” layer. Use the Brush tool to paint wacky colors. Use different colors and brush sizes. Use a large and soft black brush to outline the 3. Use a large and soft white brush with a flow of 7% to give the “3” depth. Use the Free Transform (CTRL T) tool to rotate your image.Layer Effects and StylesPhotoshop provides a variety of effects—such as shadows, glows, and bevels—that change the appearance of a layer’s contents. Layer effects are linked to the layer contents. When you move or editthe contents of the layer, the same effects are applied to the modified contents. For example, if youapply a drop shadow to a text layer and then add new text, the shadow is added automatically to thenew text.The effects menuA layer style is one or more effects applied to a layer or layer group. You can apply one of the presetstyles provided with Photoshop or create a custom style using the Layer Styles dialog box. The layereffects icon appears to the right of the layer’s name in the Layers palette. You can expand the style inthe Layers palette to view or edit the effects that compose the style.12
Session Two Photoshop BasicsHands-On: 1-2-3 EffectsPhotoshop allows you tomix Layer Effects and createyou own styles for futureuse. If you like the waysomething looks - save it asa new layer style. How coolis that? Open “Layers 1-2-3.PSD” from your “Sample Files” folder. Hide all layers except the “3” layer. Use the Magic Wand tool to select all of the red. Hit the DELETE key to delete the red. Deselect (CTRL D). Create a new layer and name it “white”. Use the Paint Bucket tool to fill the “white” layer with white. Move the “white” layer directly under the “3” layer. Make sure you’ve selected the “3” Layer. Click the FX button in the layers palette and choose “blending options”. The “Layer Style” dialog box will appear. Choose “Styles” from the upper left-hand corner of the Layer Style dialog box. Apply different styles from the window on the right. Click “OK” when you are happy with the look of your “3”.Hands-On: Jess On BeansOpen “Jess Portrait.jpg” and “Beans.jpg” to participate in this exercise.Jess on beansThis in-class demonstration will show you: How to Drag and Drop an image from one document window to another. How to use the Free Transform Tool (CTRL-T). Blending Modes.13
Session Two Photoshop BasicsHands-On: Layer MasksLayer Masks are one of the most powerful and often used features in Photoshop.You can add a mask to a layer and use the mask to hide portions of the layer and reveal the layers below. Masking layers is a valuable compositing technique for combining multiple photos into a singleimage or for making local color and tonal corrections.White VisibleLayer mask thumbnailBlack HiddenLayer Mask link iconAdd adjustment layerAdd maskYou can edit a layer mask to add or subtract from the masked region. A layer mask is a grayscale image, so areas you paint in black are hidden, areas you paint in white are visible, and areas you paint inshades of gray appear in various levels of transparency.Exercise: Mask out the white. Mask out the white areas of “Jess Portrait” using the brush tool. Use the Selection tools and the Paint Bucket tool to mask out areas of “Jess Portrait”.Hands-On: Adjustment LayersAn adjustment layer applies color and tonal adjustments to your image without permanently changing pixel values. For example, rather than making a Levels or Curves adjustment directly to yourimage, you can create a Levels or Curves adjustment layer. The color and tone adjustments are storedin the adjustment layer and apply to all the layers below it. You can discard your changes and restorethe original image at any time.Advantages of using Adjustment Layers:Adjustment Layers Nondestructive edits. You can try different settings and re‑edit the adjustment layer at any time.You can also reduce the effect of the adjustment by lowering the opacity of the adjustment layer. Reduced loss of image data through combined multiple adjustments. Each time you adjust pixelvalues directly, you lose some image data. You can use multiple adjustment layers and make smalladjustments. Photoshop combines all the adjustments before it applies them to the image. Selective editing. Paint on the adjustment layer’s image mask to apply an adjustment to part ofan image. Later you can control which parts of the image are adjusted by re-editing the layermask. You can vary the adjustment by painting on the mask with different tones of gray. Ability to apply adjustments to multiple images. Copy and paste adjustment layers between images to apply the same color and tone adjustments.14
Session Two Photoshop BasicsMartian Jess Use an Adjustment Layerto turn Jess green. For added fun use one ormore of the artisitc filtersto make Jess more martianlike. Filter - Artistic - PlasticWrap Use masks to add andsubtract from the layers.Advanced Compositing using layersLayers are a powerful tool that allow you to do advanced compositing of images. Take a look at the“Composite Master.PSD” file for an example of compositing.Only one model was usedto create this image. Thecamera was locked intoposition and our model,Jess,changed outfits and poses.The images were thenedited together usingLayers and Layer Masks.All of the images used to create this composite can be found in your sample files. After class try to recreate this image using the skills you learned during this session. Use the “Master Composite.PSD” file as a guide to help you along. Make sure you pay close attention to the shadows, masking them out will look unnatural.Nondestructive EditingNondestructive editing allows you to make changes to an image without overwriting the originalimage data, which remains available in case you want to revert to it. Because nondestructive editingdoesn’t remove data from an image, the image quality doesn’t degrade when you make edits.15
Session Two Photoshop BasicsYou can perform nondestructive editing in Photoshop in several ways:For more information aboutnondestructive editingopen the Help Viewer inAdobe Photoshop (F1) andsearch for “nondestructiveediting”. Working with adjustment layers Adjustment layers apply color and tonal adjustments to an image without permanently changing pixel values. Transforming with Smart Objects Smart Objects enable nondestructive scaling, rotating, andwarping. Filtering with Smart Filters Filters applied to Smart Objects become Smart Filters and allowfor nondestructive filter effects. Adjusting variations, shadows, and highlights with Smart Objects Shadow/Highlight andVariations commands can be applied to a Smart Object as Smart Filters. Retouching on a separate layer Clone Stamp, Healing Brush, and Spot Healing Brush tools letyou retouch nondestructively on a separate layer. Be sure to select Sample All Layers from theoptions bar (select Ignore Adjustment Layers to ensure that adjustment layers won’t affect theseparate layer twice). You can discard unsatisfactory retouching, if necessary. Editing in Camera Raw Adjustments to batches of raw, JPEG, or TIFF images preserve theoriginal image data. Camera Raw stores adjustment settings on a per-image basis separately fromthe original image files. Opening Camera Raw files as Smart Objects Before you can edit Camera Raw files in Photoshop, you must configure settings for them with Camera Raw. Once you edit a Camera Raw filein Photoshop, you can’t reconfigure Camera Raw settings without losing the changes. OpeningCamera Raw files in Photoshop as Smart Objects enables you to reconfigure Camera Raw settings at any time, even after you edit the file. Cropping nondestructively After you create a cropping rectangle with the Crop tool, selectHide from the options bar to preserve the cropped area in a layer. Restore the cropped area anytime by choosing Image Reveal All or by dragging the Crop tool beyond the edge of the image.The Hide option is unavailable for images that contain only a background layer. Masking Layer and vector masks are nondestructive because you can re‑edit the masks withoutlosing the pixels they hide. Filter masks let you mask out the effects of Smart Filters on SmartObject layers.Bonus Information: Smart ObjectsSmart Objects are layers that contain image data from raster or vector images, such as Photoshopor Illustrator files. Smart Objects preserve an image’s source content with all its originalcharacteristics, enabling you to perform nondestructive editing to the layer.Smart Objects are notcovered in this workshopbut are important enoughto bring to your attention. For more informationabout Smart Objects openthe Help Viewer in AdobePhotoshop (F1) and searchfor “Smart Objects”.You can create Smart objects using several methods: by using the Open As Smart Objectcommand; placing a file, pasting data from Illustrator; or converting one or more Photoshoplayers to Smart Objects.With Smart Objects, you can: Perform nondestructive transforms. You can scale, rotate, or warp a layer without losingoriginal image data or quality because the transforms don’t affect the original data. (Sometransform options, such as Perspective and Distort, aren’t available.) Work with vector data, such as vector artwork from Illustrator, that otherwise would berasterized in Photoshop. Perform nondestructive filtering. You can edit filters applied to Smart Objects at any time. Edit one Smart Object and automatically update all its linked instances.You can’t perform operations that alter pixel data—such as painting, dodging, burning, orcloning—directly to a Smart Object layer, unless it is first converted into a regular layer, whichwill be rasterized. To perform operations that alter pixel data, you can edit the contents of a SmartObject, clone a new layer above the Smart Object layer, edit duplicates of the Smart Object, orcreate a new layer.16
Session Two Photoshop BasicsHands-On: SharpeningSharpening enhances the definition of edges in an image. Whether your images come from a digitalcamera or a scanner, most images can benefit from sharpening. The degree of sharpening neededvaries depending on the quality of the digital camera or scanner. Keep in mind that sharpening cannot correct a severely blurred image.Exercise: Using Smart Sharpen Open the file “Sandy.JPG” Create a copy of the background layer by dragging it to the New Layer icon. Select the “Background Copy” layer and rename it “Sharpen”. Choose Filter - Sharpen - Smart Sharpen. Follow along during the demonstration to sharpen your image.Don’t be misled by the nameUnsharp Mask, which comesfrom a darkroom technique used in traditionalfilm‑based photography.The filter sharpens imagesrather than the opposite.The Smart Sharpen dialog boxNext Session: Retouching tools, Workflow We will build on the principles we learned in this session. Use this week to explore the sample files and practice using layers and masks.17
Session Three Photoshop Basics3Retouching Tools, WorkflowHistogramsA histogram illustrates how pixels in an image are distributed by graphing the number of pixels ateach color intensity level. The histogram shows whether the image contains enough detail in theshadows (shown in the left part of the histogram), midtones (shown in the middle), and highlights(shown in the right part) to make a good correction.There is more than one typeof histogram. In additionto the RGB histogram thereare also luminance andcolor histograms.A simple RGB histogramLevelsYou use the Levels dialog box to correct the tonal range and color balance of an image by adjustingintensity levels of image shadows, midtones, and highlights. The Levels histogram is a visual guidefor adjusting the image key tones.You can open the levelsdialog in two ways:Image- Adjustments - Levels (CTRL-L) or use anadjustment layer fromthe layers palette. Usingan adjustment layer isusually a better choicebecause it allows you to editnondestructively.18
Session Three Photoshop BasicsCurvesJust like levels you canopen the curves dialogin two ways: Image- Adjustments - Curves(CTRL-M) or use anadjustment layer fromthe layers palette. Usingan adjustment layer isusually a better choicebecause it allows you to editnondestructively.You can use the Curves dialog box or Levels dialog box to adjust the entire tonal range of an image.The Curves dialog box lets you adjust up to 14 different points throughout an image’s tonal range(from shadows to highlights). The Levels dialog box has only three adjustments (white point, blackpoint, gamma). You can also use the Curves dialog box to make precise adjustments to individualcolor channels in an image. You can save Curves dialog box settings as presets.The Patch Tool and the RedEye Tool can be found “hidden” under the Spot HealingBrush and the HealingBrush Tool.The Healing Brush ToolThe Healing Brush tool lets you correct imperfections, causing them to disappear into the surrounding image. Like the cloning tools, you use the Healing Brush tool to paint with sampled pixels froman image or pattern. However, the Healing Brush tool also matches the texture, lighting, transparency, and shading of the sampled pixels to the pixels being healed. As a result, the repaired pixelsblend seamlessly into the rest of the image.The Spot Healing Brush ToolThe Spot Healing Brush tool quickly removes blemishes and other imperfections in your photos.The Spot Healing Brush works similarly to the Healing Brush: it paints with sampled pixels from animage or pattern and matches the texture, lighting, transparency, and shading of the sampled pixelsto the pixels being healed. Unlike the Healing Brush, the Spot Healing Brush doesn’t require youto specify a sample spot. The Spot Healing Brush automatically samples from around the retouchedarea.19
Session Three Photoshop BasicsThe Clone Stamp ToolThe Clone Stamp tool paints one part of an image over another part of the same image or over another part of any open document that
Session One Photoshop Basics 2 1 Introducing Photoshop Adobe Photoshop CS3 is a powerful image editing application. In addition to basic image edit-ing it provides tools for animation, web production, medical professionals, and scientists. Photoshop was originally created for basic image editing but now has tools for many users including:

![Adobe Photoshop 2021 (Version 22.1.1) [32 64bit] [2022] - GWBC](/img/64/adobe-photoshop-2021-version-2211.jpg)
