Transcription
Perfect ResizeUser ManualCopyright 2007 2014 onOne Software, Inc. All Rights Reserved.
Table of ContentsChapter 1: Welcome to Perfect ResizeChapter 2: IntroductionUsing the Help SystemContacting onOne SoftwareAdditional HelpSystem RequirementsInstallationLicensing and RegistrationOpening and Saving FilesUsing ModulesUsing as StandaloneUsing with Adobe PhotoshopUsing with Adobe LightroomUsing with Apple ApertureUsing with Other ApplicationsManaging ExtrasPreferencesChapter 3: Browse ModuleGetting StartedBrowse WorkspaceFinding and Opening FilesUsing the Browse ModuleUsing the Info PaneNavigating SourcesNavigating FoldersNavigating Recent PaneWorking in Thumbnail ViewWorking in Detail ViewNavigating the PreviewNavigatorManaging Files and FoldersOpening an ImageMenusKeyboard ShortcutsChapter 4: Perfect ResizeGetting StartedHow Big Can You PrintUnderstanding ResolutionWhen Should I Use Perfect ResizeSupported Color ModesUser 34353637383940414344454647484950
Navigating the PreviewNavigator, Loupe, Histogram and InfoBrowsing PresetsUsing Perfect ResizeCropping the ImageAdjusting the Image SizeUsing Document Size PresetsSettingsSharpeningFilm GrainTilingGallery WrapPresetsMenusKeyboard Shortcuts51525456575860616263646567Chapter 5: Perfect BatchGetting StartedBatch WorkspaceHow to Access BatchUsing Perfect BatchSelecting FilesAdding a ModuleDestination PaneBatch Presets727374757677788082Chapter 6: Index8371
Welcome to Perfect Resize 1Welcome to Perfect ResizeGet the highest quality image enlargements with Perfect Resize, which features Genuine Fractals technology—patented, fractal based interpolation algorithms—that quickly enlarge your imageswithout the loss of sharpness or detail that you might normally expect. Relied on by industryprofessionals, you too can create high quality enlargements easily and showcase your images at theirbest—even those taken with your mobile device!Perfect Resize
2 IntroductionIntroductionThis introductory chapter includes general helpful information about how to use this help system, how to contact onOne Software, how to install and access thesoftware, etc. It covers many of the foundation topics that you will need to understand to get started.Pages in this SectionUsing the Help SystemContacting onOne SoftwareAdditional HelpSystem RequirementsInstallationLicensing and RegistrationOpening and Saving FilesUsing ModulesUsing as StandaloneUsing with Adobe PhotoshopUsing with Adobe LightroomUsing with Apple ApertureUsing with Other ApplicationsManaging ExtrasPreferencesPerfect Resize
Introduction 3Using the Help SystemThis user guide is html based and readable in most web browsers. On the left side, you will see a table of contents that make it easy to find the section you arelooking for. The table of contents is hyperlinked and will take you to the specified section by clicking on them. The main body of the page will show you thecontent you have requested. Use the scroll-bar at the right to scroll down for additional content. You may see hyperlinks in the body text. They will be blue andunderlined. Clicking on one of these hyperlinks will take you to more relevant information.You use the same forward and back buttons in your browser to navigate this user guide as you would a regular web page. You can even bookmark pages soyou can find them quickly later.If you don't see what you are looking for in the table of contents, try the search field at the upper right. You can type in what you are looking for and an indexof pages will be created automatically that contain your search term.Printing the ManualYou can print individual pages by pressing the Print button at the top of the page. A complete printable PDF version of this user guide is available in the userguide section of the onOne website. This version may be downloaded and viewed when you do not have an internet connection. The PDF version may also beinstalled on your tablet or eReader device for viewing off our computer.Perfect Resize
4 IntroductionContacting onOne SoftwareAt onOne Software, we value our customers and offer a variety of ways to be contacted. Visit our company website at:www.onOnesoftware.com For technical support please visit:www.onOnesoftware.com/supportonOne Software, Inc.15333 SW Sequoia Parkway Suite 150Portland, OR 97224Telephone: 503-968-1468Fax: 503-968-1469 2007 2014 onOne Software, Inc. All rights reserved. onOne Software is a registered trademark of onOne Software, Inc. The onOne Software logo are trademarksof onOne Software, Inc. Adobe, Photoshop, Photoshop Elements, Lightroom are either registered trademarks or trademarks of Adobe Systems, Incorporated in the UnitedStates and/or other countries. Mac OSX, the Mac logo, iPhoto and Aperture are trademarks of Apple, Inc., registered in the U.S. and other countries. Microsoft, Windows7, Windows 8 are registered trademarks of Microsoft Corporation. All other trademarks are the property of their respective owners. The activation system usedby onOne Software, Inc. is licensed under Patent No. 5,490,216. For a full list of license disclosures view the LICENSE.TXT file installed with the software.Perfect Resize
Introduction 5Additional HelpTechnical SupportContact technical support at www.ononesoftware.com/support or by filing out a request form.Knowledge BaseSearch the Knowledge Base for common issues, tips & tricks, and compatibility questions.Frequently Asked QuestionsCheck the list of Hot Topics on the onOne web site. This covers the most frequently asked questions.Video TutorialsVisit the onOne University for free online video tutorials and archived webinars. Many users find these to be the best and fastest way to getstarted and learn new techniques.Perfect Resize
6 IntroductionSystem RequirementsOperatingSystemMinimumMac OSX 10.7, 10.8, 10.9Windows Windows 7 or Windows 8current maintenance releases, 64 bit onlyProcessorIntel Core 2 Duo, Xeon or better processor(s)RAM8 GB RAMHard Drive1 GB for therOpenGL 2.0 compatible video card with 256 MBdedicated video RAM, 1280x720 resolutionPhotoshop CS5, CS6, CC, CC 2014Photoshop Elements 10, 11, 12Photoshop Lightroom 4, 5Apple Aperture 3.4Internet connection for activation, auto updatechecking, content downloads and tutorials.Adobe Flash PlayerRecommendedMac OSX 10.8, 10.9Windows Windows 7 or Windows 8current maintenance releases, 64 bitQuad-core Intel Core i5, Xeon or betterprocessors(s)8 GB RAM1 GB for installationFast 7200 RPM or SSD drivesOpenGL 4.0 compatible video card with 1GBdedicated video RAM, 1920x1080 resolutionPhotoshop CS6, CC, CC 2014Photoshop Elements 11, 12Photoshop Lightroom 5Apple Aperture 3.4Wacom tablet for pressure sensitive inputHardware display calibration toolAbout Windows Video CardsIf you are using Perfect Resize from a Windows based computer, it is important that you have the latest drivers for your video card installed to get the bestperformance. Check with your video card manufactures website for the latest drivers. Be sure your video card is OpenGL 2 compliant and has 256MB or more ofdedicated VRAM. Many integrated video cards on low-end laptops may not meet these requirements.Perfect Resize
Introduction 7InstallationTo install Perfect Resize, double click the installer icon and allow the installer to guide you. You may have downloaded the installer from the onOne Softwarewebsite or it may be on a DVD if you elected for a physical shipment.You should close any supported host applications such as Photoshop, Lightroom or Aperture as well as any standalone versions ofonOne products before installing or updating.Mac OSXThe application is installed in the Perfect Resize folder in the Applications folder.All plug-in files for supported host applications (such as Photoshop, Lightroom, Aperture, and Photoshop Elements) found during the installation processwill be installed automatically. You will see a summary of installed plug-ins at the end of installation.If a previous versions of Perfect Resize is found, it will be maintained or replaced based on your preference during installation.Support files are installed into /Library/Application Support/ and /Library/Application Support/ folder.WindowsThe application is installed in the Perfect Resize directory in the onOne Software directory in the Program Files directory.All plug-in files for supported host applications (such as Photoshop, Lightroom, Aperture, and Photoshop Elements) found during the installation processwill be installed automatically. You will see a summary of installed plug-ins at the end of installation.If a previous versions of Perfect Resize is found, it will be maintained or replaced based on your preference during installation.Support files are installed into \ProgramData\onOne Software\.UninstallingTo uninstall Perfect Resize, follow these instructions.You should deactivate your product before uninstalling. This will allow you to transfer your license to another computer.Mac OSX1. Go to the Applications/Perfect Resize/Documentation folder.2. Double click on the Remove Perfect Resize application.Windows1. Go to Control Panels.2. Under Programs select Uninstall a program.3. In the list that comes up select Perfect Resize and then click on the Uninstall button.Perfect Resize
8 IntroductionLicensing and RegistrationPerfect Resize will operate as a trial version for 30 days from when it is installed. If you have purchased Perfect Resize, you will want to license it so you cancontinue to use it past the trial period. When you install Perfect Resize it will prompt you to license it. Simply click on the license button and enter your licensecode. Your license code can be found in your order confirmation email if you purchased the download version directly from onOne Software. If you purchased aphysical copy of Perfect Resize, a sticker on the information card will have the license code on it. Your license code allows you to install Perfect Resize on twocomputers. When you enter your license code, Perfect Resize communicates with the onOne activation server and will activate your software. Your softwaremust be licensed and activated to function past the trial period. If the computer you are activating does not have access to the internet, you can manuallyactivate your software by following the manual activation instructions in the license dialog.If you wish to move your copy of Perfect Resize from one activated computer to new computer you will need to deactivate it first. Deactivation is a simpleprocess. Simply open Perfect Resize and select Deactivate from the Help menu. This will deactivate Perfect Resize on the current machine, allowing you to installand activate it on another machine.If you lose your activation code, have your computer stolen and can not deactivate it, need to install on more than two computers or have other activationissues please contact onOne customer service at 1-888-968-1468 or visit the support section of the onOne software website.It is important to register your copy of Perfect Resize if you did not purchase it directly from onOne Software, so we can provide you with the best possibleservice. Registered users of Perfect Resize are eligible for free technical support, information regarding new versions and products, free updates, upgradepricing and special offers on new products.Product Improvement ProgramWe believe that the best products are made by listening to our customers. We use many methods to gather your ideas and feedback including: emails, surveys,direct conversations, market analysis and the Product Improvement Program. The Product Improvement Program is built into our software and gathersinformation about how our software is used. It is the most accurate way for us learn what features are important to you and how our products fit into yourworkflow.Enrollment in the program is voluntary. When you participate, we collect basic information about how you use our programs and basic information about yourcomputer. This information helps us learn what features are important to you and how we can make our software easier to use. No personal information iscollected and you will not be contacted.You can choose to participate in the Product Improvement Program the first time you launch an onOne product. You can change your participation later, justclick the Help menu, then Help Improve onOne Products.You can learn more about the Product Improvement Program here.Perfect Resize
Introduction 9Opening and Saving FilesSupported File TypesPerfect Resize uses the Photoshop (PSD) file format as its default file type. The Photoshop file format is a commonly supported, publicly documented file formatthat is also the standard file for Adobe Photoshop. It is also supported by Photoshop Elements, Lightroom, Aperture and many other image editing applications.It supports multilayered images and layer masks making it the perfect format for durable, adjustable imaging. Perfect Resize also supports the opening andsaving of the following file types, in RGB either 8 or 16 bits per pixel.Photoshop (PSD)Photoshop Large Document (PSB)Tagged Image File Format TIFF (TIF)Joint Photographic Experts Group JPEG (JPG)Portable Network Graphic (PNG)Camera Raw files from over 200 digital camerasPhotoshop PSD files will maintain all the layers and layer masks you create in Perfect Resize and are recommended as your main file format. If your saved file willbe larger than 2 GB or 30,000 pixels on a side, your image will automatically be saved in the .PSB or Large Document format. This is a newer version of the PSDfile format and still maintains all your layers and masks.You can use the Edit a Copy or Save As command to save flattened TIF and JPG files or PNG files with transparency. Camera raw files can only be opened, notsaved directly. They must be saved as another file type.Opening FilesYou may open an existing file in several ways.1.2.3.4.Selecting a file(s) in the Browse module, then clicking on another module, like Layers or Effects.Open the file from the File Open menu if you are using the Layers module.Dragging a file onto the Perfect Resize icon.Sending a file to Perfect Resize from a host application like Photoshop or Lightroom using the Perfect Resize plug-in.When opening an existing PSD file that has been editing in Photoshop it may contain unsupported layer types such as text layers, adjustmentlayers, etc. you will see a warning. You can still open a flattened version of the image if this happens. You can learn more here.Opening OptionsPerfect Resize
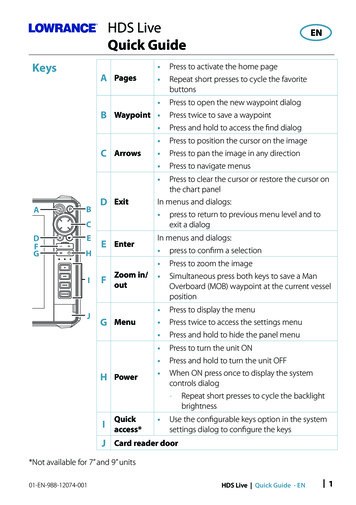
10 IntroductionWhen you open a file(s) in the standalone application you will be presented with thedialog to the right. It allows you to choose to work on the original file, a copy, or tostack the files together as layers.Edit a Copy: A copy of the original file is made using the Copy Options belowand saved in the same folder as the original.Edit Original: The original file is edited directly. This overwrites the original filewith your changes. This option is disabled for Raw or read-only files.Add as a Layer: The original file is added as a layer(s) into the current imagein Perfect Layers. If no image is opened, a copy of the first image in yourselection is created.If you select to open a copy, you can control the file type, color space, bit-depth andresolution. If you have multiple files selected, they will all be handled the same way.Saving Files1. You may save the open file using the save option command in the Layers module anytime.2. If you opened your image from the Browse module, simply return to Browse to save and close the file.3. If you have accessed Perfect Resize using a plug-in from another application, follow the instructions from that application for saving.Perfect Resize
Introduction 11Using ModulesPerfect Resize is a complete photo editor. It uses a modular approach, allowing each module to focus on one task. This makes accomplishing the task easier byremoving unnecessary tools and giving access to just what you need to get the task done. When used as a standalone application, Browse is the default moduleupon first launch, it is used to navigate your drives and cloud services to find images to begin working. In the Preferences you may change the default startupmodule to Perfect Layers. If you prefer a layered workflow you can use the Layers module as the heart of your workflow, similar to using AdobePhotoshop. Depending on how you access Perfect Resize you may never notice Browse or Layers.The Module SelectorIf you access Perfect Resize as a standalone application you will start inBrowse or Layers module.When you are ready to edit an image you will select the module you wishto use from the Module Selector in the upper right corner of the mainwindow. You can easily switch between modules by clicking on another inthe Module Selector. This allows you to perform multiple tasks during thesame editing session.This is the module selector from the Perfect Photo Suite. It contains all of theavailable modules that onOne Software makes. If you have purchased a singleproduct, you will only see that product module and Perfect Layers in your moduleselector.When you have completed your work, you return the Perfect Layersmodule to save your work.If you access Perfect Resize as a Photoshop Plug-in you see the Module selector, but it will be disabled, you can only use one module at a time throughPhotoshop. The Module Selector will also be disabled if you use the following modules through Lightroom or Aperture:Perfect PortraitPerfect EffectsPerfect B&WPerfect EnhancePerfect ResizeWhen you access these modules, you use them on their own and then return back to Lightroom or Aperture directly. Your file will be saved and closedautomatically. If you access Layers or Mask through Lightroom or Aperture you will start in the Layers module.If you want to have access to all your modules during an editing session from Lightroom or Aperture, select the Perfect Layers plug-in. This will startyou in Perfect Layers and the Module Selector will be visible, allowing you to access all of the installed modules.Perfect Resize
12 IntroductionUsing as StandalonePerfect Resize can be used as a standalone application without the need of Photoshop, Lightroom or other host application. To launch it follow these steps:Mac OSX1.2.3.4.Open your Hard Drive.Navigate to the Applications folder.Navigate to the Perfect Resize folder.Double click on the Perfect Resize application icon.You can add Perfect Resize to your dock for easy access by clicking and holding the icon in the dock, then select the Keep In Dock option. If you use Launchpadit can be found there as well.Windows 71. Go to your Start Menu.2. Select the onOne Software group.3. Select Perfect Resize.If you selected the "Add Icon to Desktop" option during installation you can also access Perfect Resize from there.Windows 81. Open the Start screen by pressing the Window key.2. Select Perfect Resize.If you selected the "Add Icon to Desktop" option during installation you can also access Perfect Resize from there.Perfect Resize
Introduction 13Using with Adobe Photoshop If you have the Premium Edition of Perfect Resize, you can access it as a plug-in through Adobe Photoshop or Photoshop Elements . Thisincludes the onOne panel for Photoshop for fast access to plug-ins and their presets. As a Photoshop plug-in you can use modules in the Photoshopworkflow. This includes using selections and masks as well as Smart Objects and Smart Filters. You can also record actions for automating and batchprocessing.If you do not have the Premium Edition of Perfect Resize and would like to use it inside of Photoshop, contact onOne Customer Service aboutupgrading to the Premium Edition.To use Perfect Resize inside of Adobe Photoshopfollow these steps:1. Open the image you want to work on.2. Select the layer you want to work on.Generally Perfect Resize works on a copy ofyour selected layer, not the entire image.3. From the File menu, select Automate, andthen the module you would like to use.To use Perfect Resize inside of Adobe PhotoshopElements, follow these steps:1. Open the image you want to work on.2. Select the layer you want to work on.Generally Perfect Resize works on a copy ofyour selected layer, not the entire image.3. From the File menu, select Automation Tools,and then the module you would like to use.Perfect Layers and Browse are not accessible from Adobe Photoshop or Photoshop Elements.You can use the for Adobe Lightroom and Apple Aperture Edition inside of Adobe Photoshop Elements as well.onOne PanelPerfect Resize
14 IntroductionUsers of Adobe Photoshop CS5 and higher can also access Perfect Resize as plug-ins usingthe onOne Extension Panel. This provides fast access to the Perfect Resize and its presets.To access the onOne panel, go the Window Extensions menu in Photoshop and selectonOne.The onOne panel behaves just like any other panel in Photoshop. It can be minimized ornested with other panels. To access a module, simple double-click on it. To use a preset,single click on the module name. A menu of available presets will be displayed. Simply doubleclick on one to apply it to your selected layer.If you wish to record actions using Perfect Resize be sure to access it from theFile Automate menu when recording.Perfect Resize
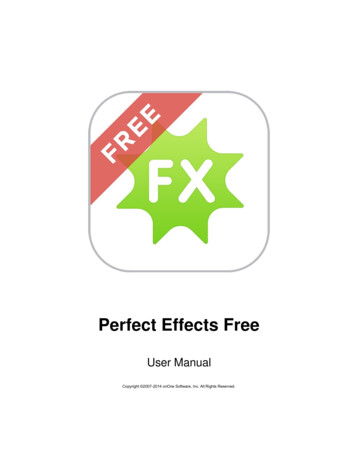
Introduction 15Using with Adobe Lightroom If you have the Premium or for Adobe Lightroom & Apple Aperture version of Perfect Resize you can access Perfect Resize as a plug-in insideof Lightroom. This provides an integrated, round-trip workflow.Perfect Resize is the perfect companion for Adobe Photoshop Lightroom. It integrates tightly with it and provides a seamless experience forenhancing your images. There are several ways to use Perfect Resize with Lightroom.Plug-In ExtrasPerfect Resize can be accessed from the File Plug-in Extras menu. This is the preferred way toaccess it. It gives you access to all installedmodules and has the most flexibility in how the filesare handled. To edit an image in Perfect Resizefollow these steps.1. Select the image in Lightroom.2. Go the File menu and select the Plug-InExtras flyout.3. Select the module you would like to use.When you access Perfect Resize as a plug-in fromLightroom the module selector is only available forPerfect Layers or Perfect Mask. When you selectone of these modules you can use as manymodules as you desire during the same editingsession. At the end of the editing session you mustsave and close the image from the Perfect Layersmodule.When you select a module other than PerfectLayers or Perfect Mask your image will be sent to itdirectly and when you press Apply, the image issaved and closed automatically and you arereturned back to Lightroom.Selecting Multiple ImagesIf you have multiple images selected, the behaviorvaries depending on which modules you select.Perfect Layers or Perfect Mask: Each filewill be opened in its own tab. Then youmay access any modules available in theModule Selector.All other plug-ins: Each image is opened inturn and you may adjust the settings on animage by image basis.Lightroom Plug-in PreferencesWhen you use Perfect Resize through the Plug-In Extras menu there are importantfile handling options that are controlled in the Preferences dialog of the PerfectLayers module. These need to be configured in advance based on your desiredworkflow.File Type: The file type drop-down menu determines what type of file willbe created. The default is PSD, which maintains layers. You can also selectJPG or TIF if you prefer those formats and are not concerned aboutmaintaining layers. The last option is same as source, which maintains thefile type of the original file, except for Camera raw files which are saved asPSD.Color Space: The color space drop-down menu determines what RGBworking color space is used; Adobe RGB 1998, sRGB or ProPhotoRGB.Bit Depth: The bit-depth drop-down menu determines the bit depth,either 8-bit or 16-bit per pixel.Resolution: The resolution drop-down menu determines the resolution ofthe file.Stack with Original: When enabled, the new image is stacked with theoriginal image, making it easier to organize.Use Original for Single PSDs: When enabled, if you select a single PSDfile, it will be edited directly, rather than having a copy made.External EditorPerfect Resize
16 IntroductionYou can also access modules asexternal editors for all modulesexcept Perfect Layers or PerfectMask. You can access them fromthe Edit In. contextual menu.These behave similarly to theplug-ins in the Plug-In Extrasmenu but ignore the preferencesset in Perfect Layers. Insteadyou have the option to control asubset of these options each timeyou access a module, in the sameway you do when you accessPhotoshop or any other externaleditor.Batch ProcessingThere are two ways to batch process multiple images in Lightroom with Perfect Resize.Perfect BatchPerfect Batch is the preferred way to batch process. You start with a selection ofimages in Lightroom or folder on disk, then batch-process them with multiple modulesat the same time to solve complex workflows. For example a portait photographercan prepare images for a sales session by retouching every face, adding theirstylized look and output small JPGs with their logo watermark, all in the same batchprocess. You can access Perfect Batch from the File Plug-In Extras menu inLightroom. You can learn more about using in the Perfect Batch section of this userguide.Key batch processing features include:Start with a selection of images from Lightroom or any folderyou select.Batch process with a single module for simple jobs or createworkflows where you string multiple modules together.Save workflows to use over and over.Pause on the first image to confirm your set-up, thenautomatically process the rest to match.Add a visual watermark, like your logo, to every image.Edit files in place or create new files with different size, name orfile type.Lightroom ExportPerfect Resize
Introduction 17You can also batch process with a single modulethrough the Export menu in Lightroom. This is useful ifyou need to remove metadata or are morecomfortable with Lightroom's Export. Batch processingthrough Export is driven by presets, so you need tocreate a preset that accomplishes the work you desirefirst.1. Select the images you wish to batch process.2. Go the Export under the File menu.3. At the top under the Export to drop-down,select the module to use.4. Complete the module specific options below.These will start with the preset, followed byoptions for selecting the export location, filenaming, file size, etc.5. Press the export button.You cannot save Lightroom exportpresets or use the Export withPrevious option.Perfect Resize
18 IntroductionUsing with Apple Aperture If you have the Premium or for Adobe Lightroom & Apple Aperture Edition of Perfect Resize you can access Perfect Resize as a plug-in insideof Aperture. This provides an integrated, round-trip workflow.Perfect Resize integrates tightly with Apple Aperture and provides a seamlessexperience for enhancing your images.Perfect Resize can be accessed from the Photo Edit with Plug-In menu. Toedit an image in Perfect Resize follow these steps.1. Select the image in Aperture.2. Go the Photo menu and select the Edit with Plug-In flyout.3. Select the module you would like to use.When you access Perfect Resize as a plug-in from Aperture the module selectoris only available for Perfect Layers or Perfect Mask. When you select one ofthese modules you can use as many modules as you desire during the sameediting session. At the end of the editing session you must save and close theimage from the Perfect Layers module.When you select a module other than Perfect Layers or Perfect Mask yourimage will be sent to it directly and when you press Apply, the image is savedand closed automatically and you are returned back to Aperture.Selecting Multiple ImagesIf you have multiple images selected, the behavior varies depending on whichmodules you select.Perfect Layers or Perfect Mask: Multiple images will be opened inseparate tabs.All other plug-ins: Each image will open in a series so you can adjust thesettings on each image.The file type, bit-depth and color space of the image is determined by the preferences in Aperture for external editors. Perfect Resize will maintain thefile type, either PSD or TIF automatically to support compatibility with plug-ins from other manufactures. Keep in mind only PSD files store re-editablelayers and mask.Batch ProcessingPerfect Batch is the preferred way to batch process. You start with a selection ofimages in Aperture or folder on disk, then batch-process them with multiple modulesat the same time to solve complex workflows. For example a portait photographercan prepare images for a sales session by retouching every face, adding theirstylized look and output small JPGs with their logo watermark, all in the same batchprocess. You can access Perfect Batch from the Photo Edit with Plug-in menu inLightroom. You can learn more about using in the Perfect Batch section of this userguide.Key batch processing features include:Start with a selection of images from Lightroom or any folderyou select.Batch process with a single module for simple jobs or createworkflows where you string multiple modules together.Save workflows to use over and over.Pause on the first image to confirm your set-up, thenautomatically process the rest to match.Add a visual watermark, like your logo, to every image.Edit files in place or create new files with different size, name orfile type.Perfect Resize
Introduction 19Using with Other ApplicationsYou can use Perfect Resize as an external editor with many other workflow applications such as Adobe Bridge or Apple iPhoto. First check the application usergui
Photoshop CS5, CS6, CC, CC 2014 Photoshop Elements 10, 11, 12 Photoshop Lightroom 4, 5 Apple Aperture 3.4 Photoshop CS6, CC, CC 2014 Photoshop Elements 11, 12 Photoshop Lightroom 5 Apple Aperture 3.4 Other Internet connection for activation, auto update checking, content downloads and tutorials. Adobe Flash Player Wacom tablet for pressure .