Transcription
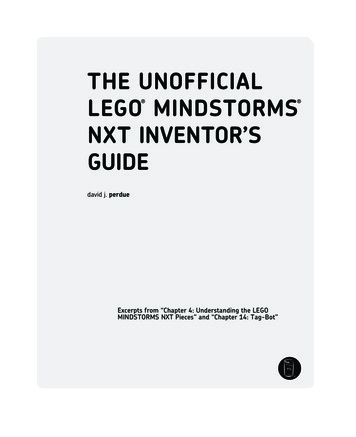
Introduction: What is NXT-G?Saturday, August 22, 200911:59 PMWelcome to the wonderful world of graphical programming for Lego Robotic Systems! Before you areintroduced to any actual code, it is necessary to settle a few fundamental questions regarding this newlanguage you must be so eager to tackle.What is NXT-G?If you don't know, don't worry. The language itself is rather uncommon outside of circles that dealdirectly with the Lego NXT Block on a regular basis. Now let's establish the correct terminality from thebeginning: This is an NXT Module. It is the metaphorical brain of anysystem you could conceive for your Legos. The unit isresponsible for receiving signals from your sensors,performing calculations based on input, and movingmotors and servos accordingly. The unit can be attachedto four sensors and three motors; more than enough for atruly amazing system! This is NXT-G. It is a graphics based language developed byNational Instruments and Mindstorms to allow novice usersto develop and implement simple robotic systems. Don't letmy description fool you though, the language is quite capableof handling moderately complex designs, especially at a lowlevel. It is a common issue to confuse the two terms. NXT-Gis a Language, while "the brick" (NXT Module) is a physicalLego piece Do other languages exist?Yes. NXT-G is not the only way to program a robot using the Lego NXT Module, however it is theeasiest to learn for an inexperienced programmer, as well as the easiest to understand. The two otherlanguages which are commonly used are called RobotC and LabView. NXT-G, although it's ownlanguage, is built on top of LabView which is also a graphics based language. RobotC however, is entirelycode based. Only NXT-G will be further addressed after this point.Why NXT-G?So, there are other languages, huh? Even as an experienced programmer, it is necessary to understandthe learning curve of a language and the amount of time necessary to gain experience using it. NXT-G iseasy to grasp, therefore it can be implemented quickly to solve a variety of programs. Unlike LabView orRobotC, errors are easy to find and correct due to a unique Lego-like layout. Building a program (intheory) is just as easy as building with Legos.NXT-G Page 1
Chapter One: Getting StartedSunday, August 23, 200912:40 AMIn this chapter you will:-Build a small robotLearn the basics of the NXT-G InterfaceLearn to manage memroyProgram your robot to moveResources you will need:-Your orange box of Legos-- Contains all parts necessary for building a robotAn NXT BrickA USB cable for your NXTAn install CD for NXT-GNXT-G Page 2
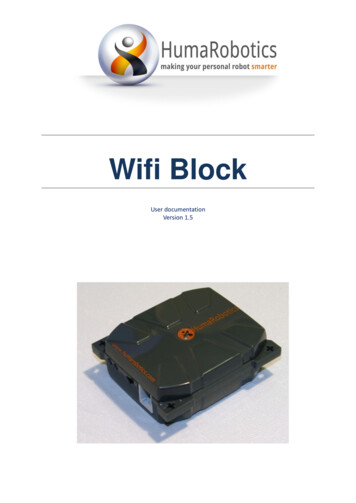
Chapter One: Before you beginSunday, August 23, 200912:43 AMThis is a guide on teaching you to program robots in a proprietary language. That's great and all, however it seems you may b e missing one thing. A robot Beforeprogramming is addressed, it will be necessary to fabricate a small drive train and space to mount sensors. Don't worry, it's not terribly difficult and it will give you agood idea of how to physically design the systems you will later provide logic to. It always pays to be well rounded!It is necessary however, to tell you that Lego includes a guide on programming as well as building right in it's software. I f you have ever put together furniture fromIKEA, you know that sometimes having words, or at least part numbers can be helpful. The following instructions have been inc luded in this document for yourconvenience, however they can be accessed directly from NXT-G if you so desire.Building the Robot-Just follow these directions before you continue any further.1.Aha! This is one of those times it helps to be able to comment! You may notice there is an eight next to the black shaft. Th at is to denote it's length in "Lego units".The piece displayed is just as long as the width of eight single units, meaning it could span eight blocks side by side. The circle denotes length of the unit, while asquare would represent width.2.3.Disoriented? Make sure you flipped your motor over. Also, the square with the thirteen in it is used to show the widths or length of a piece with holes in it. I mustadmit, counting the holes is much easier than trying to understand how long those black and grey shafts are.NXT-G Page 3
admit, counting the holes is much easier than trying to understand how long those black and grey shafts are.4.TIP: its usually easier to build the unit in yellow separately and then attach it to the larger unit than to build both simul taneously.5.6.7.NXT-G Page 4
8.9.10.11.NXT-G Page 5
12.Great Job! You just built the mount for your NXT to sit on! Now for the other components.This wheel will be built separately, and then attached once you are finished.13.NXT-G Page 6
14.15.16.NXT-G Page 7
17.NOTE: Make sure you have your motor-unit turned to the orientation in the diagram. The round end of the motor should be facing up.All that is left is mounting the NXT.18.It goes up!NOTE: Although pictured, you do not need to use the rechargeable battery as shown in the diagram.19.NXT-G Page 8
20.21.IMPORTANT!!: When looking at the unit shown with the NXT directly facing you, make sure the RIGHT motor is connected to port C, and the LEFT on port B. If this isincorrect your programs will not work. Period.22.NXT-G Page 9
Chapter One: Getting to know the NXT-G interfaceSunday, August 23, 20091:28 AMCongratulations! You just built a robot! In it's current state, you creation just stands as a trophy to your[perhaps] newly acquired engineering skills with Legos. Let's make it do something worthwhile!Again, before we start with programming it is necessary to introduce to you the NXT -G interface, seeingas you will be using it extensively from now on. To begin, launch NXT -G.Note: The program itself is not directly labeled by the language it is used as an interfacefor. Nowhere in the name is NXT-G. Funny, huh?When you begin, you will be greeted by a screen giving you a few options, much like other GUIs.For this lesson, you are going to create a newprogram called "Move Forward". Go aheadand use the program creation menu to do so.This project will be the name of the file storedon your NXT device, so make sure to make itdescriptive. If you are going to make changesto something that currently works, it's often agood idea to save it as a new file first.File versions are also often helpful to includein a file name, especially for large projects. As a new project, your canvas will be blank. You should see a starting blockThink of this as the beginning of a word document. What makes NXT-Gsomewhat different from other languages is that it is represented inlinear fashion, meaning data is read from left to right.Start --- [function] --- [function ]--- endMost languages are read from top to bottom or bottom to top.StartFunctionFunctionEndNXT-G Page 10
The Three Function MenusTo add different "blocks" to create your program, take a look at the left hand side of the screen.CommonCompleteCustomThere you should find a menu looking like one of thetree seen here.Toggle between these windows by using the tabs at thebottom:Each of the tabs is called a "palette", and just like anartists palette it contains an array of different formulasused to create something larger.NXT-G offers three palettes: common, complete, andcustom. For the purpose of this guide, we will always beusing the complete palette with the occasional use ofthe custom one. The common palette is a smallcollection of very basic functions that you will outgrowrather quickly.The complete palette contains several menus for usersto use.The Common menu: You don't quite escapethe common palette by switching to thecomplete menu. This collection of functionsare the basic workings of any program. Fromthis menu you can access functions availablefrom other menus, however it is the onlyplace you can access the Move function,which as the name states, allows you robotto move.The Action menu: From here you haveaccess to functions that cause your robot toDO something, such as moving a motor oremitting a sound. This menu is for when youwant something physical to happen withinyour program.The Sensor menu: As the name implies, the sensor menu is were one would go to accessfunctions dealing with sensors. The functions created by this menu are primarily used tointerface with the sensor directly. For example, you would use a function from here with anUltrasonic sensor to see the distance the sensor was currently reporting.NXT-G Page 11
The Flow menu: This is were the majority of your program's structure will come from. If youhave had any experience with programming before, you will know the necessity of loops andswitch statements, however an interesting concept called "wait" has been added, whichpauses the continuation of the program till the statement has been met.The Data menu: Although for extremely basic programs this menu is unnecessary, it is usedin more complex situations to perform calculations as well as create and store variables.Functions found here can be used to test if a situation is true or false, perform basicarithmetic, and compare values.The Advanced menu: Although it is called "advanced", this menu might as well be calledmiscellaneous, seeing as it’s contents have no relative correlation and really nowhere elseto go. There are only a few functions in this menu you will use to begin with, however keepit in the back of your mind.The NXT Control PanelFound on the lower right hand corner of the screen , the small collection ofbuttons allows you to control the NXT while it is connected to the computer.The Download and Run key: This key is used to compile,download, and execute the current program on the currentlyrunning NXT. The program will start soon after you press thisbutton, so be careful if your robot is still plugged in!The Stop key: Used to stop the current program running on the NXT. This only works if theNXT is connected to the computer.The Download key: Unlike the download and run key, this will just download the currentproject to the NXT. This is often helpful if you want to start the program after you havemoved your robot away from the computer, or have unplugged it.The Download and Run Selected key: Do not use this key. It is used to change only parts ofthe code that you specify and can lead to problems later on. If you want to make changes toonly part of the code, save it as a new file and download it as a new program.The NXT Window key: This is an important button to keep in mind. From this you can accessinformation about the currently connected NXT device.NXT-G Page 12
Chapter One: Programming Your RobotSunday, August 23, 20096:04 PMFinally! Time to get into the real portion of this guide.In the following lesson, you will be programming your robot to go forward, as well as understandingwhat is happening when you do so. A good programmer understands what he is engineering, just as agood pharmacist understands the disease they are treating. Without a fundamental understanding ofengineering AND programming, developing competent systems can be quite a challenge.Your first task will be to start a new program. If you created a project called "Move Forward" previously,then you are where you need to be, otherwise create that file now.To program your robot to go forward, grab the "move" block from the common menu, dragging it ontothe square labeled "start".----Drag---- Now that you have placed the block on the beginning of your "program timeline", click on your newlyplaced function and look at the bottom of your screen to find a menu like the one shown below.The Move block is a unique function that allows you to control multiple motors simultaneously, oftenwith the intent of driving or steering a robot. Within the menu you will come across multiple options tocontrol the speed and direction of the motors, a few of which are briefly outlined in the followingsection. Each of these will be covered more in depth in later lessons.Port: Selects the motor/s that are to be controlled by the function. Up to two can be selected . Motorscorrespond with the port letters they are plugged into on the top of the NXT unit.Direction: as the name implies, the radio button array can be used to select the direction a motor goesin. There is one button however, that is used for braking.Using this setting will cause the motorsto LOCK, meaning they will not slow down to a stop, but rather stop immediately.Steering: This is a setting unique to the Move block, seeing as it can be used to determine the directionof two motors, whereas the Motor block can only be used to control one. Use the slider to determinethe direction you want your robot to go in.Power: this particular type of power determines the speed of the motor, not it's strength.NXT-G Page 13
Duration: Within duration you can select four methods to determine the length of time the motorshould turn.Time: Motor turns for a specified unit of time.Degrees: The motor itself turns a select number of degrees. Please note that this does not causethe robot to rotate that exact distance, just the motor.Rotations: Motor/s turn a specified number of times.Unlimited: The motor turns until it is told to stop by another function, or not at all.Next Action: Used only if duration is not unlimited, the next action is used to determine if the motorsare locked or not after they turn their specified distance.Finalizing your program and putting it on the robotNow that you understand a bit about how the Move block works, it's time to compile the program andexecute it.Start by setting the "rotations" setting to 5.At the moment, your program should look like this:Here's the big surprise: that's all you need! Plug in your NXTUnit to the computer and turn it on.NOTE: It is always a good idea to have a long cord and setyour robot on the ground, as the program will start as soonas soon as it is downloaded.In the lower right hand corner of the screen, press theDownload and Run key (center) from the NXT controlpanel.At this point you should feel giddy with joy as you watch your robot move forward a foot or so and thenstop. The best part? You did that.NXT-G Page 14
Chapter One: Memory ManagementMonday, August 31, 20093:34 PMThere are times when there may be too much content on your NXT device to load a program onto it.You can easily manage and delete files from your NXT from the memory window.To access the memory window, first open the NXT screen window from thecontrol station in the lower right hand corner of the screen. This will bring up amenu showing the name of your NXT and the type of connection you currentlyhave established.A few otherinteresting things suchas battery life andremaining memorycan be found from thismenu, however todirect man agememory, go to thememory tab.The menu is composed to two differentelements. There is the memory usage graph,which is to the right, and there is the programmenu, which shows all of the componentscurrently on the NXT. From the graph, selectdifferent types of programs to see the files oftheir type on the NXT.There are also buttons which allow you to control how programs on the NXT are dealt with. Interestinglyenough, you can actually upload from the NXT a program you might not have saved on your computer.NXT-G Page 15
Chapter One: Firmware UpdatesTuesday, September 01, 20094:35 PMIn hindsight, this will prove to be useful if you understand how it is done before you encounter aproblem. If you are using the new NXT-G 2.0 software, as you most likely are, it may be necessary toupdate the firmware of your NXT Device to load programs onto it.You will know if you need a firmware update if you press the downloadand run button and get an error message. Such as the one shown to theleft.Don't worry, fixing this isn't difficult at all, however you will need anactive network connection to download the new files.NXTFirmwarePCFor your convince, I have included a file with an updateto version 1.05. This may not help you if you are usingNXT-G 2.0 however, so know there is another way toaccess the files. Although you can find firmware updatesonline at locale 2057&pagename softu&l2id 3 2&l3id 3 2 4&l4id 3 2 4 2 , there exists a better way to get files.To get the latest firmware automatically, first go to the "tools" menu onthe file bar and then go to update NXT-G Firmware. This will open up amenu much like the one shown.Shown here, my NXT has firmware version 1.21currently installed. NXT-G 2.0 uses firmware1.25 and above.To check and see if there is a new version offirmware available for download, press the"Check" button at the top of the menu.To install firmware, select the version youwould like to use (the latest version of course)and press the download button below.If everything downloads correctly, the progressbars should fill up as shown below.NXT-G Page 16
Chapter Two: NXT Related Functions and Wait StructuresSunday, August 23, 200911:16 PMIn this chapter you will:- Learn to use the Display of the NXT Module- Learn to put out sound through the NXT Module.- Learn about wait functionYou will need:- Your NXT Device- A USB cableNXT-G Page 17
Chapter Two: The NXT Display and Wait StructuresThursday, August 27, 200912:45 PMIf you have ever programmed before, chances are that using NXT-G is somewhat different than anythingyou have experienced before. By programming a robot, you loose the familiar interface of a computerscreen and instead see the results of your code through physical movement.The NXT Brick allows you to show functions on it's screen and NXT-G provides an easy way to "print"the image or text you want to the screen.To begin, we will print a simple diagram to the screen.Open up NXT-G and create a new program called "Print To Screen"'Displaying an ImageSelect Display from the Action menu and drag it onto the main timelineOnce you have the function on the timeline, click on it to get to it'sproperties. From here you will change the image to the checkmarkbelow.If you were to export this now, the screen would display the image for a fraction of a second and thenexit.Consider the way the code is built:Start --- Display --- EndWhen run, the current program will do everything you tell it to, however it will not necessarily do whatyou WANT it to do.What you want is for the NXT screen to display your image long enough for you to read it, or until someother stimulus gets rid of it. What you are looking for is for the program to wait till you are ready for itto continue. Fortunately, such a structure exists.Using the Wait StructureUsing your current program, you will introduce the Wait Structure from the Flow menu.NXT-G Page 18
Place the structure after the display function, seeing as you are waiting before going on to the nextpiece of the program (which in this case is the end.)If you notice, the default setting for the Wait structure is forit to be used with a touch sensor. Although that could workfor this program, it is easier to just set the structure to waitfor a period of time.Go to the function properties (bottom ofthe screen), and change the "control" ofthe function from sensor to time. Set thenumber of seconds to 5.Go ahead and run this function on your NXT. Your screen should display the following for five seconds:After it does this, the program ends.Displaying TextIn retrospect, I realize it may be helpful to demonstrate how to display text through the Displayfunction. Go ahead and change the "action" in the display panel from image to text.Using the textbox provided, write what youwould like to be displayed.NOTE: You are limited to 15 characters.NXT-G Page 19
Chapter Two: Using SoundSaturday, August 29, 200910:52 PMAlthough sound may not play a huge part in the actual logic in a system, it can help developers know whatstage of a program is currently executing, or if the robot is encountering something unexpected.To start, create a program called "Sound"Take the Sound function from the Action menu and drop it onto the starting square.From here, it is necessary to explain the two different types of sound thatcan be played. The NXT can play a sound file, which can be anything from anumber to a phrase such as "hello"; and the NXT can play a Tone, which isjust a note.Using Sound FilesThe difference in the two is the fact that a sound file takes up a lot of memory. The NXT device has lessmemory than a floppy diskette. Much less. A tone however, requires no legitimate memory at all, seeing asthe capabilities are already built into the device. To select which you would like to play, look at theproperties menu for the sound function.By default, NXT-G has the sound function play "Good Job" . Download and Run the current program as it is,and listen to the sound file it plays.At this point it may be necessary to point out a key difference in the use of a Sound Function over that of aDisplay Function. If you notice, a Sound function waits until it has played it's sound to move on to the nextpart of the program. This is an optional piece that builds in a wait function.It is helpful to recognize that you don't need to add a wait function on top of a sound function to get thedesired result.Using TonesLike sound files, tones have a built in wait function as well.NXT-G Page 20
Like sound files, tones have a built in wait function as well.You can select the note you would like the NXT to play, as well as the length of time you would like to playit.Note: When a program starts on the NXT, it plays a tone automatically. If you play a tone at the beginning ofyour program, you will hear both tones.Create a programTo illustrate the difference between the built in wait functions and the real ones, build a program that playsa note, displays what note is playing, and then waits a second to play the next, higher note.If you need some help, look at the following model:If you are using Microsoft One Note to view this, you can right click the file to the right andsave it to your computer or double click to open it in OneNote. It contains the above code.If you are not a OneNote user, then all that is an image.NXT-G Page 21Sound
Chapter Three: Math and VariablesSaturday, August 29, 200911:47 PMAt first, I thought it would be a good idea to teach about sensors in this chapter, however then I realizedthat the majority of new programmers reading this might want to familiarize themselves with the logicbehind programming before building anything to control robots.In this chapter you will learn about:- Variables- Basic arithmetic- Advanced function controls in NXT-G (Data Wires)You will need:- Your NXT Device- A USB cableNXT-G Page 22
Chapter Three: VariablesSunday, August 30, 200912:02 AMIf you are not a programmer, chances are you have little concept of what a variable is. Withinprogramming, there are many types of variables, however they all have one thing in common: theyrepresent a named place to store a value. Consider them like a box. You can put things in a box, hidethem away, and then take them out when you need them again. Variables are used in much the sameway. You can create a variable, naming it "NUMBER" and then assign a number for it to store. When youask what the value of "NUMBER" is, it will give you that number back.Variables are most often used to keep track of things, and compare them to other things. An ambiguousdefinition, I know. It is helpful to use variables, however, because things in a program change. Thesethings need to be kept somewhere while tests are performed on them to determine what to do withthem. These "tests" are functions.Variables in NXT-GAt this point, it will be easier to show you within NXT-G how to use variables than to give you a rant onthem.To begin, create a new program called "My First Logic"From here you will need to do something that is quite unlike any other programming experience.Usually, when you write code, you create variables manually. In NXT-G, you are required to go to theedit menu (at the top toolbar) in order to create variables.In the menu, click "Define Variables" from the options.A menu like the oneon the left will comeup. This menu willallow you to createthe variables you willuse in your program.Click on the "create"button to create avariable.Call it "loop number"NXT-G Page 23
When creating a variable, make sure to set the datatype to the type of variable you want to create. Forthis program, "loop number" should be a number.When you have done all of this, close the menu.Now, get the variable block from the Data menu, and put it into your program.The default value of a variable is one of NXT-G's predefined variables.Make sure to go into the properties of the block and change it to the variable you want it to beIn this case, we want this variable to be the one we just defined, so we select "loop number"You are also given the option to read or write and in this case we will be later reading the variable.Before we do anything more, it is necessary to understand how to do simple math to change variables. Attached is a copy of the program up to this point. If you are using OneNote, youcan open the icon to the right directly into NXT-G.NXT-G Page 24My First Logic
Chapter Three: Basic MathSunday, August 30, 200912:31 AMUnfortunately, we are not going to be flying a rocket into space, or piloting an aircraft with this system.The mathematic functions offered by NXT-G are basic arithmetic. They are most commonly used inconjunction with a variable.Using MathTo perform a mathematic function, go to the Data menu and select MathWe will be building on top of our previous program using variables, so drag this function to the next slotin the program "timeline"One of the things you may notice at this point in time thatyou have not yet encountered with other blocks, is thedrop down menus. These menus are used for what arecalled "data wires". Data wires can be used to connectblocks and exchange information.The purpose of this is going to be to add one to "loop number".The math function works by taking two numbers, A and B, and adding them together. To set a numberto either A or B, click on the little wire holes next to the Pound Symbol on the Variable (#), or the letterA. End the wire by clicking on the other one.When you are finished, it should look something like this.The next step is adding a set number (in this case 1), to thenumber set to A.To do this, go to the properties menu of the math function.O f course, this is going to be addition,however you will need to set the staticvalue of B to 1.At this point, the function will add A and B together, however you have not written anything to do withthe number it produces.The sum of the two numbers can be linked to a variable by drawing a wire from this:In this case, you want to set the new value of "Loop Number" to be the result of this equation.To do so, enter another variable block, this time setting it to "write" in the properties bar.NXT-G Page 25
Your final program should look like thediagram to the left. My First LogicAttached is a copy of the program up to this point. If you are using OneNote, youcan open the icon to the left directly into NXT-G.NXT-G Page 26
Chapter Three: The Number to Text FunctionSunday, August 30, 200912:54 AMThis is more of a trivial addition to the guide, however it is important to be able to take a data value anddisplay it on the NXT screen. You will be displaying the value of the variable "Loop Number".To begin, select the Number to Text function from the Advanced MenuPut this on your timeline after the last variable. In order to have a number to convert to text, you willneed to read the variable "Loop Number" again. Draw a wire connection from the value of the variable,to the input on the Number to Text function. You program should look like the following:Now, you will take the text and display it on the screen using the Display function from the Action menu.When you add it to the timeline, click on the lower left hand corner to extend the fullbank of input options.Be sure to change the type of input to "text" from the properties bar.As you may be able to figure out, you will be using the text output from the Text toNumber function to draw a data wire to the text input on the display. Once you havedrawn the wire, you can click the lower corner again to collapse all unused connectors.Remember, this is a display function, therefore you will need a wait function after it inorder to read what is going on.The addition to the program should look like this (There is more to the left):Run this program now.The NXT screen shoulddisplay the number 1.My First LogicAttached is a copy of the program up to this point. If you are using OneNote, youcan open the icon to the left directly into NXT-G.NXT-G Page 27
Chapter Four: Programming StructuresTuesday, September 01, 20099:35 PMThe next logical step in establishing your foundation in computer science and programdevelopment is to explain the use of different program structures. While different languagescall these "structures" different things , the concepts behind them remain the same.In this chapter you will learn about:-Loop or repeat statementsSwitch statementsComparative operatorsWait Statements (This is a type of structure, however we have already covered it)You will need:- Your NXT Device- A USB cable- Code from the previous chapterNXT-G Page 28
Chapter Four: Loop StatementsSunday, August 30, 20092:31 PMUsing the program we created before, we will now actually put that "Loop Number" variable to use.Open up the program "My First Logic" if you do not already have it open. The following chapter willuse the entire program created in the previous chapter, therefore if you have not written it yet, thefollowing code may not make sense.Using Loop Statements:To access loops, go to
NXT-G is not the only way to program a robot using the Lego NXT Module, however it is the easiest to learn for an inexperienced programmer, as well as the easiest to understand. . of handling moderately complex designs, especially at a low level. It is a common issue to confuse the two terms. NXT-G is a Language, while "the brick" (NXT Module .