Transcription
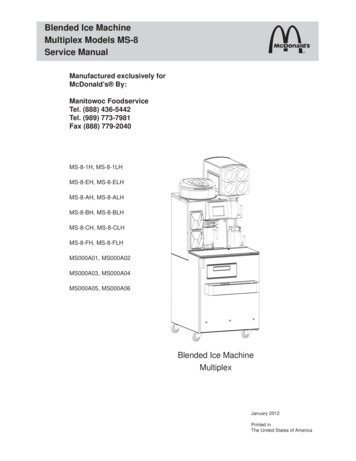
Blended Ice MachineMultiplex Models MS-8Service ManualManufactured exclusively forMcDonald’s By:Manitowoc FoodserviceTel. (888) 436-5442Tel. (989) 773-7981Fax (888) 779-2040MS-8-1H, MS-8-1LHMS-8-EH, MS-8-ELHMS-8-AH, MS-8-ALHMS-8-BH, MS-8-BLHMS-8-CH, MS-8-CLHMS-8-FH, MS-8-FLHMS000A01, MS000A02MS000A03, MS000A04MS000A05, MS000A06Blended Ice MachineMultiplexJanuary 2012Printed inThe United States of America
Important Warning And Safety InformationWARNING READ THIS MANUAL THOROUGHLY BEFORE OPERATING, INSTALLING,OR PERFORMING MAINTENANCE ON THE EQUIPMENT.WARNING FAILURE TO FOLLOW INSTRUCTIONS IN THIS MANUAL CAN CAUSEPROPERTY DAMAGE, INJURY OR DEATH.WARNING DO NOT STORE OR USE GASOLINE OR OTHER FLAMMABLE VAPORS ORLIQUIDS IN THE VICINITY OF THIS OR ANY OTHER APPLIANCE.WARNING UNLESS ALL COVER AND ACCESS PANELS ARE IN PLACE ANDPROPERLY SECURED, DO NOT OPERATE THIS EQUIPMENT.WARNING THIS APPLIANCE IS NOT INTENDED FOR USE BY PERSONS WHO LACKEXPERIENCE OR KNOWLEDGE, UNLESS THEY HAVE BEEN GIVENSUPERVISION OR INSTRUCTION CONCERNING USE OF THE APPLIANCEBY A PERSON RESPONSIBLE FOR THEIR SAFETY.WARNING THIS APPLIANCE IS NOT TO BE PLAYED WITH.WARNING DO NOT CLEAN WITH WATER JET.WARNING DO NOT USE ELECTRICAL APPLIANCES INSIDE THE FOOD STORAGECOMPARTMENT OF THIS APPLIANCE.CAUTIONObserve the following: Minimum clearances must be maintained from all walls and combustible materials. Keep the equipment area free and clear of combustible material. Adequate clearance for air openings. Operate equipment only on the type of electricity indicated on the specification plate. Retain this manual for future reference.We reserve the right to make product improvements at any time.Specifications and design are subject to change without notice.
Table of ContentsGeneral InformationModel Numbers . . . . . . . . . . . . . . . . . . . . . . . . . . . . . . . . . . . . . . . . . . . . . . . . . . . . . . . . . . . .Serial Number Location . . . . . . . . . . . . . . . . . . . . . . . . . . . . . . . . . . . . . . . . . . . . . . . . . . . . . .Warranty Information . . . . . . . . . . . . . . . . . . . . . . . . . . . . . . . . . . . . . . . . . . . . . . . . . . . . . . . .Component Identification . . . . . . . . . . . . . . . . . . . . . . . . . . . . . . . . . . . . . . . . . . . . . . . . . . . . .Electrical . . . . . . . . . . . . . . . . . . . . . . . . . . . . . . . . . . . . . . . . . . . . . . . . . . . . . . . . . . . . . . . . .Clearance Requirements . . . . . . . . . . . . . . . . . . . . . . . . . . . . . . . . . . . . . . . . . . . . . . . . . . . . .Heat of Rejection . . . . . . . . . . . . . . . . . . . . . . . . . . . . . . . . . . . . . . . . . . . . . . . . . . . . . . . . . . .General Specifications. . . . . . . . . . . . . . . . . . . . . . . . . . . . . . . . . . . . . . . . . . . . . . . . . . . . . . .Location . . . . . . . . . . . . . . . . . . . . . . . . . . . . . . . . . . . . . . . . . . . . . . . . . . . . . . . . . . . . . . . . . .General Maintenance Instructions . . . . . . . . . . . . . . . . . . . . . . . . . . . . . . . . . . . . . . . . . . . . . .Daily Preventive Maintenance Card . . . . . . . . . . . . . . . . . . . . . . . . . . . . . . . . . . . . . . . . . . . .Weekly Preventive Maintenance Card . . . . . . . . . . . . . . . . . . . . . . . . . . . . . . . . . . . . . . . . . .55567888891012OperationHow to Make a Drink . . . . . . . . . . . . . . . . . . . . . . . . . . . . . . . . . . . . . . . . . . . . . . . . . . . . . . . .How to Replace a Product Bag . . . . . . . . . . . . . . . . . . . . . . . . . . . . . . . . . . . . . . . . . . . . . . . .Shaver Blade Replacement . . . . . . . . . . . . . . . . . . . . . . . . . . . . . . . . . . . . . . . . . . . . . . . . . . .Energize Sequence Flowchart. . . . . . . . . . . . . . . . . . . . . . . . . . . . . . . . . . . . . . . . . . . . . . . . .Make a Drink Energized Component Flowchart . . . . . . . . . . . . . . . . . . . . . . . . . . . . . . . . . . .Rinsing Energized Flowchart . . . . . . . . . . . . . . . . . . . . . . . . . . . . . . . . . . . . . . . . . . . . . . . . . .Manager’s Menu Screen . . . . . . . . . . . . . . . . . . . . . . . . . . . . . . . . . . . . . . . . . . . . . . . . . . . . .Centering the Scale . . . . . . . . . . . . . . . . . . . . . . . . . . . . . . . . . . . . . . . . . . . . . . . . . . . . . . . . .1718192021242626TroubleshootingDisplay Assembly . . . . . . . . . . . . . . . . . . . . . . . . . . . . . . . . . . . . . . . . . . . . . . . . . . . . . . . . . .Blender And Scale . . . . . . . . . . . . . . . . . . . . . . . . . . . . . . . . . . . . . . . . . . . . . . . . . . . . . . . . . .Cooling . . . . . . . . . . . . . . . . . . . . . . . . . . . . . . . . . . . . . . . . . . . . . . . . . . . . . . . . . . . . . . . . . .Cabinet/Product Thermistors . . . . . . . . . . . . . . . . . . . . . . . . . . . . . . . . . . . . . . . . . . . . . . . . . .Ice Shaver/Ice Bin Cover . . . . . . . . . . . . . . . . . . . . . . . . . . . . . . . . . . . . . . . . . . . . . . . . . . . . .Product Dispensing . . . . . . . . . . . . . . . . . . . . . . . . . . . . . . . . . . . . . . . . . . . . . . . . . . . . . . . . .Rinsing And Water Dispensing . . . . . . . . . . . . . . . . . . . . . . . . . . . . . . . . . . . . . . . . . . . . . . . .Refrigeration Operation . . . . . . . . . . . . . . . . . . . . . . . . . . . . . . . . . . . . . . . . . . . . . . . . . . . . . .Will Not Run Flowchart . . . . . . . . . . . . . . . . . . . . . . . . . . . . . . . . . . . . . . . . . . . . . . . . . . . . . .Weight Beam Diagnostic Flowchart . . . . . . . . . . . . . . . . . . . . . . . . . . . . . . . . . . . . . . . . . . . . .Ice Shaver Will Not Run Flowchart . . . . . . . . . . . . . . . . . . . . . . . . . . . . . . . . . . . . . . . . . . . . .2728292930313233343637Component Check ProceduresON/OFF Rocker Switch . . . . . . . . . . . . . . . . . . . . . . . . . . . . . . . . . . . . . . . . . . . . . . . . . . . . . .Transformer . . . . . . . . . . . . . . . . . . . . . . . . . . . . . . . . . . . . . . . . . . . . . . . . . . . . . . . . . . . . . . .Control Board Fuse . . . . . . . . . . . . . . . . . . . . . . . . . . . . . . . . . . . . . . . . . . . . . . . . . . . . . . . . .IO (Input/Output) Board . . . . . . . . . . . . . . . . . . . . . . . . . . . . . . . . . . . . . . . . . . . . . . . . . . . . . .LCD Touchscreen & Microprocessor Control Board . . . . . . . . . . . . . . . . . . . . . . . . . . . . . . . .Cabinet Temperature Thermistor . . . . . . . . . . . . . . . . . . . . . . . . . . . . . . . . . . . . . . . . . . . . . . .Product Chase Temperature Thermistor . . . . . . . . . . . . . . . . . . . . . . . . . . . . . . . . . . . . . . . . .Chase Fan . . . . . . . . . . . . . . . . . . . . . . . . . . . . . . . . . . . . . . . . . . . . . . . . . . . . . . . . . . . . . . . .38383939404041411/123
Table of Contents (continued)Component Check Procedures, continuedEvaporator Fan . . . . . . . . . . . . . . . . . . . . . . . . . . . . . . . . . . . . . . . . . . . . . . . . . . . . . . . . . . . .Condenser Fan . . . . . . . . . . . . . . . . . . . . . . . . . . . . . . . . . . . . . . . . . . . . . . . . . . . . . . . . . . . .Ice Bin Lid Microswitch . . . . . . . . . . . . . . . . . . . . . . . . . . . . . . . . . . . . . . . . . . . . . . . . . . . . . .Product Pump . . . . . . . . . . . . . . . . . . . . . . . . . . . . . . . . . . . . . . . . . . . . . . . . . . . . . . . . . . . . .Solenoid Valves . . . . . . . . . . . . . . . . . . . . . . . . . . . . . . . . . . . . . . . . . . . . . . . . . . . . . . . . . . . .Shaver Motor . . . . . . . . . . . . . . . . . . . . . . . . . . . . . . . . . . . . . . . . . . . . . . . . . . . . . . . . . . . . . .Circuit Breaker . . . . . . . . . . . . . . . . . . . . . . . . . . . . . . . . . . . . . . . . . . . . . . . . . . . . . . . . . . . . .Blender Motor . . . . . . . . . . . . . . . . . . . . . . . . . . . . . . . . . . . . . . . . . . . . . . . . . . . . . . . . . . . . .Manual Rinse Push Button . . . . . . . . . . . . . . . . . . . . . . . . . . . . . . . . . . . . . . . . . . . . . . . . . . .Compressor Electrical Diagnostics . . . . . . . . . . . . . . . . . . . . . . . . . . . . . . . . . . . . . . . . . . . . .Discharge Pressure High Checklist . . . . . . . . . . . . . . . . . . . . . . . . . . . . . . . . . . . . . . . . . . . . .Discharge Pressure Low Checklist . . . . . . . . . . . . . . . . . . . . . . . . . . . . . . . . . . . . . . . . . . . . .Suction Pressure High Checklist . . . . . . . . . . . . . . . . . . . . . . . . . . . . . . . . . . . . . . . . . . . . . . .Suction Pressure Low Checklist . . . . . . . . . . . . . . . . . . . . . . . . . . . . . . . . . . . . . . . . . . . . . . .Recovery/Evacuation. . . . . . . . . . . . . . . . . . . . . . . . . . . . . . . . . . . . . . . . . . . . . . . . . . . . . . . .424242434343444444454646464647Assembly & Replacement Parts ListBase . . . . . . . . . . . . . . . . . . . . . . . . . . . . . . . . . . . . . . . . . . . . . . . . . . . . . . . . . . . . . . . . . . . .Top . . . . . . . . . . . . . . . . . . . . . . . . . . . . . . . . . . . . . . . . . . . . . . . . . . . . . . . . . . . . . . . . . . . . . .Duct Outlet. . . . . . . . . . . . . . . . . . . . . . . . . . . . . . . . . . . . . . . . . . . . . . . . . . . . . . . . . . . . . . . .Door . . . . . . . . . . . . . . . . . . . . . . . . . . . . . . . . . . . . . . . . . . . . . . . . . . . . . . . . . . . . . . . . . . . . .Miscellaneous . . . . . . . . . . . . . . . . . . . . . . . . . . . . . . . . . . . . . . . . . . . . . . . . . . . . . . . . . . . . .Top Valve & Pump . . . . . . . . . . . . . . . . . . . . . . . . . . . . . . . . . . . . . . . . . . . . . . . . . . . . . . . . . .Lower Pump . . . . . . . . . . . . . . . . . . . . . . . . . . . . . . . . . . . . . . . . . . . . . . . . . . . . . . . . . . . . . .VitaMix Assembly . . . . . . . . . . . . . . . . . . . . . . . . . . . . . . . . . . . . . . . . . . . . . . . . . . . . . . . . . .Condensing Unit . . . . . . . . . . . . . . . . . . . . . . . . . . . . . . . . . . . . . . . . . . . . . . . . . . . . . . . . . . .Evaporator Coil . . . . . . . . . . . . . . . . . . . . . . . . . . . . . . . . . . . . . . . . . . . . . . . . . . . . . . . . . . . .48495050505151525353Refrigerant Recovery/Evacuation & Charging ProceduresCharging Procedures. . . . . . . . . . . . . . . . . . . . . . . . . . . . . . . . . . . . . . . . . . . . . . . . . . . . . . . .System Contamination Cleanup . . . . . . . . . . . . . . . . . . . . . . . . . . . . . . . . . . . . . . . . . . . . . . .Mild System Contamination Cleanup Procedure . . . . . . . . . . . . . . . . . . . . . . . . . . . . . . . . . . .Severe System Contamination Cleanup Procedure . . . . . . . . . . . . . . . . . . . . . . . . . . . . . . . .R-290 Service Procedure . . . . . . . . . . . . . . . . . . . . . . . . . . . . . . . . . . . . . . . . . . . . . . . . . . . .Filter-Driers . . . . . . . . . . . . . . . . . . . . . . . . . . . . . . . . . . . . . . . . . . . . . . . . . . . . . . . . . . . . . . .Total System Refrigerant Charge . . . . . . . . . . . . . . . . . . . . . . . . . . . . . . . . . . . . . . . . . . . . . .Operating Pressures Chart . . . . . . . . . . . . . . . . . . . . . . . . . . . . . . . . . . . . . . . . . . . . . . . . . . .5454555556565656Specifications/Wiring Diagrams/SchematicsWiring Diagrams . . . . . . . . . . . . . . . . . . . . . . . . . . . . . . . . . . . . . . . . . . . . . . . . . . . . . . . . . . . 57Blender Scale & Shaver Schematics . . . . . . . . . . . . . . . . . . . . . . . . . . . . . . . . . . . . . . . . . . . . 58Electronic Control Board . . . . . . . . . . . . . . . . . . . . . . . . . . . . . . . . . . . . . . . . . . . . . . . . . . . . . 60BIM Warranty Guidelines . . . . . . . . . . . . . . . . . . . . . . . . . . . . . . . . . . . . . . . . . . . . . . . . . . . . . . . . . . . . . . . . 61Notes. . . . . . . . . . . . . . . . . . . . . . . . . . . . . . . . . . . . . . . . . . . . . . . . . . . . . . . . . . . . . . . . . . . . . . . . . . . . . . . . . 6241/12
General InformationModel NumbersLABORThis manual covers the Blended Ice Machine, modelnumbers MS-8-1H, MS-8-1LH, MS-8-EH, MS-8-ELH,MS-8-AH, MS-8-ALH, MS-8-BH, MS-8-BLH, MS-8CH, MS-8-CLH, MS-8-FH, MS-8-FLH, MS000A01,MS000A02, MS000A03, MS000A04, MS000A05 andMS000A06.Labor required to repair or replace defectivecomponents is covered for three (3) years from the dateof original installation.Serial Number LocationThis number is required when requesting informationfrom your local distributor. The serial number is listedon the SERIAL NUMBER DECAL affixed to the middleof the lower back panel on the Blended Ice Machine. Asecond decal is located on the front right side of cupdispenser.EXCLUSIONSThe following items are not included in the Blended IceMachine warranty coverage:Normal maintenance, adjustments and cleaning asoutlined in this manual.Repairs due to unauthorized modifications to theBlended Ice Machine or use of non-standard partswithout prior written approval from Multiplex.General Warranty InformationDamage caused by improper installation of the BlendedIce Machine, electrical supply, water supply or drainage,or damage caused by floods, storms, or other acts ofGod.Your Blended Ice Machine comes with a three-yearwarranty on parts and labor and a five-year warranty oncompressor. Consult your local Multiplex Distributor forterms and conditions of your warranty. Your warrantyspecifically excludes all general adjustments, cleaning,accessories and related servicing.Premium labor rates due to holidays, overtime, etc.;travel time; flat rate service call charges; mileage andmiscellaneous tools and material charges not listedon the payment schedule. Additional labor chargesresulting from the inaccessibility of equipment are alsoexcluded.The warranty card must be returned to activate thewarranty on this equipment. If a warranty card is notreturned, the warranty period can begin when theequipment leaves the Multiplex factory.Parts or assemblies subjected to misuse, abuse,neglect or accidents.No equipment may be returned to without a writtenReturn Materials Authorization (RMA). Equipmentreturned without an RMA will be refused at dock andreturned to the sender at the sender’s expense.Please contact your local distributor for returnprocedures.The following Warranty outline is provided for yourconvenience. For a detailed explanation, read thewarranty bond shipped with each product.Contact your local Multiplex representative or Multiplexif you need further warranty information.PARTSMultiplex warrants Blended Ice Machine parts againstdefects in materials and workmanship, under normaluse and service for three (3) years from the date oforiginal installation.Damage or problems caused by installation, cleaningand/or maintenance procedures inconsistent with thetechnical instructions provided in this manual.AUTHORIZED WARRANTY SERVICETo comply with the provisions of the warranty, arefrigeration service company qualified and authorizedby your Multiplex Distributor, or a Contracted ServiceRepresentative must perform the warranty repair.SERVICE CALLSNormal maintenance, adjustments and cleaningas outlined in this manual are not covered by thewarranty. If you have followed the procedures listed inthis manual, and the Blended Ice Machine still doesnot perform properly, call your Local Distributor or theMultiplex Service Department.The compressor is covered by an additional two (2) yearpart only warranty beginning on the date of the originalinstallation.1/125
Component IdentificationIce Hopper spenser(1706142)Manual RinseButtonBlender RinseLocationBlender FillPitcherProductBins(1706268)WhippedCream Door(000-187-0016)Syrup Rail(1706194)Syrup Rail Divider(1706195)Pull Out Tray(076-CDZ-0000)General System OverviewThe Blended Ice Machine is a self-contained dispensingunit that allows the operator to make flavor combinationsof blended ice drinks. It contains product flavoring in areach-in enclosure, a refrigeration system and an iceshaving machine.The operator controls and accesses the unit usinga lighted touch screen. Icons on the Drink Selectionscreen represent the primary flavor combinations forthe blended ice drinks. A second screen provides drinksize options (S, M, L) and ingredient options, such as“no yogurt.” Menu changes and additions are uploadedusing a USB mass storage device.On-screen instructions also include operator proceduresfor cleaning/sanitizing, checking inventory, replacingproduct bags, selecting drink sizes and manuallypreparing drinks. Managers and technicians haveaccess to menu/software updates, diagnostics andother service screens.6Part DescriptionNumberCleaning KitCleaning PitcherCup DispenserGasket, DoorGasket, Whipped Cream DoorHinge KitIce Hopper LidLid DispenserProduct BinPull Out TraySyrup RailSyrup Rail DividerWhipped Cream 000-187-00161/12
MINIMUM CIRCUIT AMPERAGE CHARTElectricalGENERALImportant! WarningAll wiring must conform to local, state and nationalcodes.Due to continuous improvements, this information isfor reference only. Please refer to the serial numbertag to verify electrical data. Serial tag informationoverrides information listed on this page.MINIMUM CIRCUIT AMPACITYModelNumbersThe minimum circuit ampacity is used to help selectthe wire size of the electrical supply. (Minimum circuitampacity is not the Blended Ice Machine’s running ampload.) The wire size (or gauge) is also dependent uponlocation, materials used, length of run, etc., so it mustbe determined by a qualified electrician.ELECTRICAL REQUIREMENTSRefer to Blended Ice Machine Model/Serial Plate forvoltage/amperage specifications. A dedicated electricalcircuit is DING INSTRUCTIONS! WarningThe machine must be grounded in accordance withnational and local electrical codes.This appliance must be grounded. In the event ofmalfunction or breakdown, grounding provides a pathof least resistance for electric current to reduce therisk of electric shock. This appliance is equipped witha cord having an equipment-grounding conductorand a grounding plug. The plug must be pluggedinto an appropriate outlet that is properly installedand grounded in accordance with all local codes andordinances.EXPORT NOTE: For export models replace the supplycord with a 1.5mm2 minimum, 3 conductor H05VV-Fharmonized cord.1/127
Clearance RequirementsLocationModelAir CooledTop8" (20 cm)Sides6" (15 cm)Back6" (15 cm)Front30" (76 cm)Heat of RejectionHeat of RejectionAir ConditioningBTUh/kW2100/0.62 The air temperature must be at least 40 F (4 C), butmust not exceed 90 F (32 C), climate class 4. The location must not be near heat-generatingequipment or in direct sunlight and must beprotected from weather. Water temperature min/max 40 F/110 F(4 C/43 C). Water pressure min/max 20 psi/40 psi(138kPa/276kPa) Always use the water supply line supplied wheninstalling this appliance. Never reuse an old supplyline. Main supply CO2 pressure to Blended IceMachine regulator min/max 55 psi/150 psi(379kPa/1034kPa)Peak2600/0.76General Specifications8The location selected for the Blended Ice Machine mustmeet the following criteria.Temperature Control Setting36 F setpoint 4 F differential2 C setpoint 2 C differentialcontrolled by softwareIce Capacity23 lbs (10 kg)Shipping Weight430 lbs (195 kg)Product Bin Capacity19.8lbs (9kg) per binCO2 Regulator Setting40psi (276 kPa)Water Regulator Setting30psi (207 kPa)! WarningCarbon Dioxide (CO2) displaces oxygen. Exposureto a high concentration of CO2 gas causes tremors,which are followed rapidly by loss of consciousnessand suffocation. If a CO2 gas leak is suspected,particularly in a small area, immediately ventilatethe area before repairing the leak. CO2 lines andpumps must not be installed in an enclosed space.An enclosed space can be a cooler or small roomor closet. This may include convenience stores withglass door self serve coolers. If you suspect CO2may build up in an area, venting of the B-I-B pumpsand / or CO2 monitors must be utilized.1/12
MaintenanceDoor Gasket MaintenanceDoor gaskets require regular cleaning to prevent mold andmildew build up and also to retain the elasticity of the gasket.Gasket cleaning can be done with the use of warm soapy water.Avoid full strength cleaning products on gaskets as this cancause them to become brittle and crack. Never use sharp toolsor knives to scrape or clean the gasket. Gaskets can be easilyreplaced and do not require the use of tools or an authorizedservice person. The gaskets are “Dart” style and can be pulledout of the groove in the door and new gaskets can be “pressed”back into place.Drain Maintenance - BaseEach unit has a drain located inside the unit that removesthe condensation from the evaporator coil and routes it to anexternal condensate evaporator pan. Each drain can becomeloose or disconnected during normal use. If you notice wateraccumulation on the inside of the unit be sure the drain tubeis connected to the evaporator drain pan. If water is collectingunderneath the unit make sure the end of the drain tube is inthe condensate evaporator in the machine compartment. Theleveling of the unit is important as the units are designed todrain properly when level. Be sure all drain lines are free ofobstructions.Caster MaintenanceWipe casters with a damp cloth monthly to prevent corrosion.The power switch must be turned to OFF and theunit disconnected from the power source wheneverperforming service, maintenance functions orcleaning the refrigerated area.RefrigeratorsThe interior and exterior can be cleaned using soap andwarm water. If this isn’t sufficient, try ammonia and water or anonabrasive liquid cleaner. When cleaning the exterior, alwaysrub with the “grain” of the stainless steel to avoid marring thefinish. Do not use an abrasive cleaner because it will scratch thestainless steel and can damage the breaker strips and gaskets.Stainless Steel Care and CleaningTo prevent discoloration or rust on stainless steel severalimportant steps need to be taken. First, we need to understandthe properties of stainless steel. Stainless steel contains 70- 80%iron, which will rust. It also contains 12-30% chromium, whichforms an invisible passive film over the steel’s surface, whichacts as a shield against corrosion. As long as the protectivelayer is intact, the metal is still stainless. If the film is brokenor contaminated, outside elements can begin to breakdown thesteel and begin to form discoloration or rust. Proper cleaning ofstainless steel requires soft cloths or plastic scouring pads.NEVER USE STEEL PADS, WIRE BRUSHES OR SCRAPERS!Cleaning solutions need to be alkaline based or non-chloridecleaners. Any cleaner containing chlorides will damagethe protective film of the stainless steel. Chlorides are alsocommonly found in hard water, salts, and household andindustrial cleaners. If cleaners containing chlorides are used besure to rinse repeatedly and dry thoroughly. Routine cleaningof stainless steel can be done with soap and water. Extremestains or grease should be cleaned with a non-abrasive cleaner1/12and plastic scrub pad. Always rub with the grain of the steel.There are stainless steel cleaners available which can restoreand preserve the finish of the steels protective layer. Early signsof stainless steel breakdown are small pits and cracks. If thishas begun, clean thoroughly and start to apply stainless steelcleaners in attempt to restore the passivity of the steel.Never use an acid based cleaning solution! Manyfood products have an acidic content, which candeteriorate the finish. Be sure to clean the stainlesssteel surfaces of ALL food products. Common itemsinclude, tomatoes, peppers and other vegetables.Cleaning the Condenser CoilIn order to maintain proper refrigeration performance, thecondenser fins must be cleaned of dust, dirt and greaseregularly. It is recommended that this be done at least everythree months. If conditions are such that the condenser is totallyblocked in three months, the frequency of cleaning should beincreased. Clean the condenser with a vacuum cleaner or stiffbrush. If extremely dirty, a commercially available condensercleaner may be required.Failure to maintain a clean condenser coil can initially cause hightemperatures and excessive run times. Continuous operationwith a dirty or clogged condenser coil can result in compressorfailure. Neglecting the condenser coil cleaning procedures willvoid any warranties associated with the compressor and cost toreplace the compressor.Never use a high-pressure water wash for thiscleaning procedure as water can damage theelectrical components located near or at thecondenser coil.Doors/HingesOver time and with heavy use doors the hinges may becomeloose. If this happens tighten the screws that mount the hingebrackets to the frame of the unit. Loose or sagging doors cancause the hinges to pull out of the frame, which may damageboth the doors and the hinges. In some cases this may requirequalified service agents or maintenance personnel to performrepairs.Do not place hot pans on/against the blue ABSliner. Do not throw items into the storage area.Failure to follow these recommendations couldresult in damage to the interior of the cabinet orto the blower coil. Overloading the storage area,restricting the airflow, and continuous opening andclosing of the doors and drawers will hamper theunits ability to maintain operational temperature.Preventing blower coil corrosionTo help prevent corrosion of the blower coil, store all acidicitems, such as pickles and tomatoes, in sealable containers.Immediately wipe up all spills.Continuous opening and closing of the doors will hamper theunit’s ability to maintain optimum refrigeration temperature. Topsection is not intended for overnight storage. Product should beremoved from pans. Pans can remain in unit while empty.9
Clean Blended Ice Machine (BIM-8)DailyBE 23 D1To break the bacteria cycleTime required5 minutes to prepare15 minutes to completeTime of dayAt closeFor 24-hour restaurants: During low-volume periodsHazard iconsPrecaution:ChemicalsHazard Communication Standard (HCS) – The procedures on this card include the use of chemical products.These chemical products will be highlighted with bold face letters followed by the abbreviation (HCS) in thetools portion of the procedure. See the Hazard Communication Standard (HCS) manual for the appropriateMaterial Safety Data Sheet(s) (MSDS).Tools and suppliesBucket, clean andsanitized towelsScoopBucket, soiled towels KAY 5 Sanitizersolution (HCS)KAY BeverageNo-Scratch PadEquipment CleanerProcedure1 Cycle touch pad to cleaning.On the Menu Screen pressCleaning, then DailyCleaning.5 Remove parts for cleaning andsanitizing.Remove the following itemsand take them back to the 3compartment sink to wash,rinse and sanitize.x Blender pitchersx Ice hopper lidx Syrup railx Drip panx Splash guardDo not place parts in “PowerSoaker” or dishwasher.2 Gather items shown.3 Empty ice hopper.continued XRemove ice hopper lid. Usean ice scoop and an emptybucket to remove as much iceas possible from above the iceshelf. Replace ice hopper lid.Daily4 Manually dispense ice.BE 23 D1Place a blend pitcher on thepitcher pad. Press Manual IceDispense button until icehopper is empty. Removeblender pitcher of ice anddiscard in back sink. McDonald’s Corporation · Planned Maintenance Manual · October 201110Blended Ice Machine Models MS-8-1H, MS-8-1LH, MS-8-EH, MS-8-ELH, MS-8-BH, MS-8-BLH, MS-8-CH, MS-8-CLH, MS000A03, MS000A04WhyPage 1 of 21/12
Clean Blended Ice Machine (BIM-8) (continued)the 3-compartment sink, cleanpitchers.Place one KAY BeverageEquipment Cleaner packetinto the first pitcher and fillwith hot water from the backsink. Allow the product tosoak in the pitcher for 5minutes. Use a no-scratch padto remove any film build-up.Pour the solution into thesecond pitcher and soak for 5minutes. Once this is done,discard solution, rinse andsanitize both pitchers in the 3compartment sink. Allow toair dry.KAY Beverage EquipmentCleaner7 Sanitize ice chuteUse a spray bottle withSanitizer solution and asanitized towel to sanitize:x Above and around theice chutex Inside the ice chuteKAY 5 Sanitizer8 Clean pitcher pad and drainarea.xxBlend pitchers, ice hopper lid,syrup rails, drip pan andsplash guard.10 Clean with APSC the interior ofthe blended ice machine with aclean, sanitized toweldampened with KAY 5Sanitizer solution:x Clean inside themachine.x Pull out the whippedcream holder and cleanthe holder and sidesinside the machine thathold the holderx Clean all door gasketsKAY 5 Sanitizer11 Clean with APSC the exteriorof the blended ice machinewith a clean, sanitized toweldampened with KAY 5Sanitizer solution:x Clean lid holders, cupholder tubes, cabinet,front of door, top ofwork surface, touchscreen, outside of icehopperKAY 5 SanitizerUse coffee pot of hotwater from the backsink to rinse drainarea and drain.Spray the drain areawith Sanitizersolution and wipewith a clean sanitizetowel.Clean top and sidesof the pad.Dailyx9 Re-install all components.Blended Ice Machine Models MS-8-1H, MS-8-1LH, MS-8-EH, MS-8-ELH, MS-8-BH, MS-8-BLH, MS-8-CH, MS-8-CLH, MS000A03, MS000A046 With the blender pitchers atKAY 5 SanitizerBE 23 D1 McDonald’s Corporation · Planned Maintenance Manual · October 20111/12Page 2 of 211
Clean Blended Ice Machine (BIM-8)WeeklyBE 23 W1To break the bacteria cycleTime required10 minutes to prepare
The Blended Ice Machine is a self-contained dispensing unit that allows the operator to make fl avor combinations of blended ice drinks. It contains product fl avoring in a reach-in enclosure, a refrigeration system and an ice shaving machine. The operator controls and accesses the unit using a lighted touch screen. Icons on the Drink Selection