Transcription
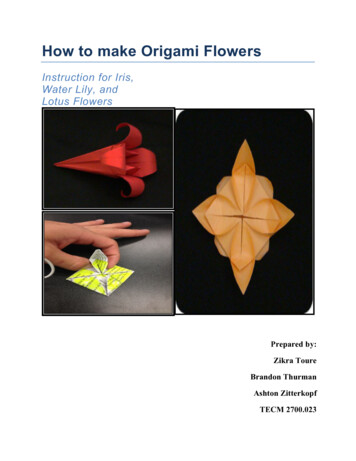
How to make Origami FlowersInstruction for Iris,Water Lily, andLotus FlowersPrepared by:Zikra ToureBrandon ThurmanAshton ZitterkopfTECM 2700.023
Table of contentsiiiTable of contentsTable of contents . iiiIntroduction to How to Make Origami Flowers . vInstructions for making an origami Iris flower . 3Material needed . 3Folding into a rectangle shape . 3Making the diamond shape . 4Making the squash fold . 5Making the petal folds . 8Finishing the formation of the petals . 10Instructions for making an origami Water Lily flower . 15Material needed . 15Preparing the paper . 15Making the petals for the water lily . 16Making the secondary petals . 17Instructions for making an origami Lotus flower . 21Material needed . 21First Folding Process. 21Second Folding Process . 22Making the Petals of the Flower . 23Conclusion to the Instruction Manual . 27Reference . 29
Introduction to How to Make Origami FlowersvIntroduction to How to Make Origami FlowersThe purpose of this document is give step-by step instructions on how to make iris and lotusflowers origami. The instructions are for beginners in origami and trained origamists who wouldlike to go back to the basics knowledge in the field. The user has to know how to properly foldpapers. The manual is ideal for children, but an adult should assist them during the process.This document will cover 3 sections:1. Step-by-step instruction for iris flower origami2. Step-by-step instruction for lotus flower origami3. Step-by-step instruction for lily flower origami
Instructions for making an origami Iris flowerInstructions for making an origami Iris flowerMaterial neededYou will only need one square sheet of paper. Colored origami paper is preferred.Folding into a rectangle shape1. Start with a square sheet. Fold the paper along both diagonals.2. Unfold it; it will give you an “X“shaped crease.Figure 13. Turn the paper.4. Fold from left to right in half.5. Unfold.Figure 26. Fold the paper in half from top to bottom. (Do not unfold.)3
4How to Make Origmi FlowersFigure 3You will end with a rectangle shape. Next we will make it a diamond shape.Making the diamond shape1. Gently push together the top-left and top-right corner of the paper. (The bottom layer ofthe paper will lift up as you push the corners toward each over.)Figure 42. Pivot the front flat of the paper that point toward you to the right.3. Turn the paper; there is another flat that point back.4. Pivot it to the right (opposite to the front flat).Figure 5
Instructions for making an origami Iris flowerYou will end up with a diamond shape with equal side, which is called the “preliminary base”.Next we will turn it into a squash fold.Making the squash foldFirst, you have to make sure the open-end of the paper points down.1. Lift the upper layer of the right side.Figure 62. Open it by putting your fingers in the pocket.Figure 73. Squash it down.5
6How to Make Origmi Flowers4. Turn the paper on the other side.Figure 85. Repeat step 1 to 3.a. Lift the upper layer of the right side.b. Open it by putting your fingers in the pocket.c. Squash it down.6. Like turning the pages of a book, pivot the squashed flap from the left to the right.Figure 87. Repeat step 1 to 3.a. Lift the upper layer of the right sideFigure 9
Instructions for making an origami Iris flowerb. Open it by putting your fingers in the pocketFigure 10c. Squash it downFigure 118. Turn the model over and repeat step 1 to 3a. Lift the upper layer of the right side.Figure 12b. Open it by putting your fingers in the pocket.c. Squash it down.7
8How to Make Origmi FlowersFigure 13Next, you will be doing the petal foldsMaking the petal foldsFor this part, make sure the part that looks folded points downward.Figure 14
Instructions for making an origami Iris flower4. Crease the sides into thepocket. This will create apointing little flat.5. Fold the pointy flapdown.Figure 15Figure 16Next, we will finish the formation of the petals.96. Turn the paper andrepeat step 1 to 5.
10How to Make Origmi FlowersFinishing the formation of the petals1. Like turning thepages of a book,pivot one flap of thepaper from the rightto the left.Figure 17Figure 182. Turn the paper to theback and do the samething. You will end upwith something likethis.3. Fold the top left andright edge to thecenter.
Instructions for making an origami Iris flower7. Repeat step 3 forboth sides. You willend up with this.8. Wrap the flaps ona pencil to curlthem and form thepetals.Figure 19You are now done with the making of iris flower origami. This is what it should look like.Figure 2011
Instructions for making an origami Water Lily flower15Instructions for making an origami Water Lily flowerMaterial neededYou will only need one square sheet of paper, colored origami paper is preferred.Preparing the paper1. Fold the sheet of paper in half fromtop to bottom.2. Fold the paper in half from left toright.3. Unfold the paper; the creases shouldlook similar to the illustration below.5. Fold the outside corners of the paperagain so that the points all meet inthe center of the sheet.Figure 23Figure 214. Fold the four corners of the paper sothat the points all meet in the centerof the sheet.Figure 226. Flip the paper model over so that thefolds are now on the bottom.7. Fold the outside corners of the paperagain so that the points all meet inthe center of the sheet.Figure 24
16How to Make Origmi FlowersNext, you will make the petals of the water lily.Making the petals for the water lily1. Slightly unfold the top two flaps ofthe paper.3. Pull the two corners of the flaps backtogether.Figure 252. Lift and pull out the flap from thebottom side.Figure 274. Turn the model ¼ turn to the nextcorner.Figure 26Figure 28
Instructions for making an origami Water Lily flower175. Repeats steps 1 through 3 for thethree remaining corners. The modelshould look like the illustrationbelow.Figure 29Next, you will make the secondary petals of the water lily.Making the secondary petals1. Flip the model over.2. Open the four flaps withoutunfolding them.3. Gently fold each flap over so that thecorner is between each of the petals.4. Flip the model back over and youhave now created a water lily.Figure 30Next, you will learn how to make an origami lotus flowerFigure 31
Instructions for making an origami Lotus flower21Instructions for making an origami Lotus flowerMaterial neededYou will only need one square sheet of paper, colored origami paper is preferred.First Folding Process1.Fold the paper diagonally.5.Figure 34Figure 322.Unfold the paper.3.Fold the paper horizontally.4.Unfold the paper again. The papershould now look like the one below.(Notice the creases)Fold a corner toward the middle ofthe square.6.Repeat step 5 for all of the corners.Once all of the corners are folded,the model should look like thepicture below.Figure 35Figure 33
22How to Make Origmi FlowersSecond Folding Process1. Fold a corner into the middle oncemore. Repeat for all four corners.3.Figure 38Figure 362.Repeat step 7 for all four corners.The model should now resemble theillustration belowFold all four of the corners to themiddle again as in previous steps.4.Flip the model to the backside.5.Fold a corner to the middle asillustrated below, repeat this processfor all corners. The model shouldnow resemble the illustration below.Figure 37Figure 39
Instructions for making an origami Lotus flower6.Unfold two of the adjacent corners that were previously folded in step 11.Figure 40Next, you will make the petals of the flower.Making the Petals of the Flower1. On the side that was just unfolded, pull the corner from behind. Be sure to leave thecorner up that was just pulled up in step 12.Figure 4123
24How to Make Origmi Flowers2. Now fold back ONLY the corners that were unfolded in step 12.Figure 423. Continue Steps 8A-8D a total of 4 times until your product resembles the one belowFigure 43
254. Be sure the flower is facing up. Reach behind and pull the corner out from behind likeso.Figure 445. Continue step 9A a total of 4 times and it should now resemble the model picture belowFigure 45
26How to Make Origmi Flowers6. You’re not quite done. Use your thumb and index finger to pinch and hold only theyellow part of the “flower” as you pull up the “petal”Figure 467. Continue step 10A a total of four times8. This finished product should resemble the one belowFigure 47
Conclusion to the Instruction Manual27Conclusion to the Instruction ManualThe purpose of this document is to explain how to make iris, water lily, and lotus origamiflowers. This document is important because it guides someone step by step in making theorigami. Making origami demands a lot of concentration and ability, and this manual will makeit easier due to the precision of the steps
ReferencesReferenceMake-Origami.com (n.d), Chapters 2, 3, and cover page figures.Retrieved from http://www.make-origami.com/29
Instructions for making an origami Water Lily flower 15 Instructions for making an origami Water Lily flower Material needed You will only need one square sheet of paper, colored origami paper is preferred. Preparing the paper 1. Fold the sheet of paper in half from top to bottom. 2. Fold the paper in half from left to right. 3.