Transcription
www.ATIBOOK.ir
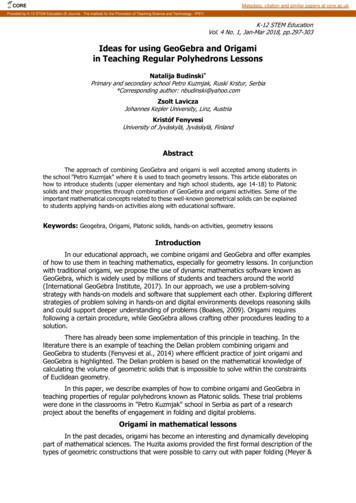
Marvelous Modular Origamiwww.ATIBOOK.irMukerji book.indd 18/13/2010 4:44:46 PM
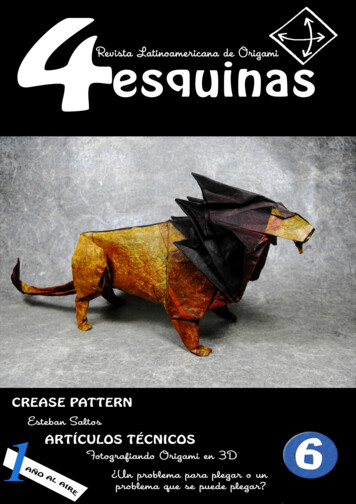
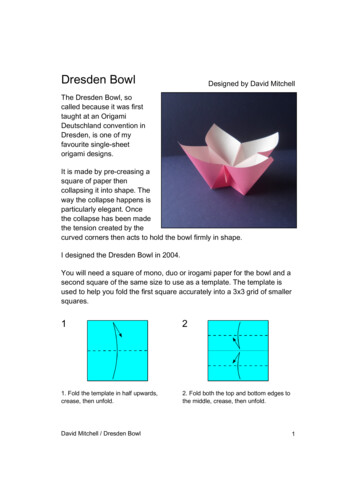
Jasmine Dodecahedron 1 (top) and 3 (bottom). (See pages 50 and 54.)www.ATIBOOK.irMukerji book.indd 28/13/2010 4:44:49 PM
Marvelous Modular OrigamiMeenakshi MukerjiA K Peters, Ltd.Natick, Massachusettswww.ATIBOOK.irMukerji book.indd 38/13/2010 4:44:49 PM
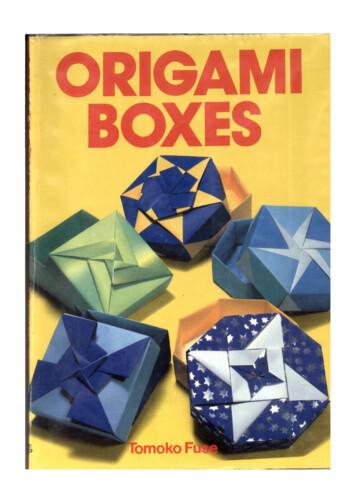
Editorial, Sales, and Customer Service OfficeA K Peters, Ltd.5 Commonwealth Road, Suite 2CNatick, MA 01760www.akpeters.comCopyright 2007 by A K Peters, Ltd.All rights reserved. No part of the material protected bythis copyright notice may be reproduced or utilized inany form, electronic or mechanical, including photocopying, recording, or by any information storage andretrieval system, without written permission from thecopyright owner.Library of Congress Cataloging-in-Publication DataMukerji, Meenakshi, 1962–Marvelous modular origami / Meenakshi Mukerji.p. cm.Includes bibliographical references.ISBN 978-1-56881-316-5 (alk. paper)1. Origami. I. Title.TT870.M82 2007736 .982--dc222006052457ISBN-10 1-56881-316-3Cover PhotographsFront cover: Poinsettia Floral Ball.Back cover: Poinsettia Floral Ball (top) and CosmosBall Variation (bottom).Printed in India14 13 12 11 10 10 9 8 7 6 5 4 3 2www.ATIBOOK.irMukerji book.indd 48/13/2010 4:44:50 PM
To all who inspired meand to my parentswww.ATIBOOK.irMukerji book.indd 58/13/2010 4:44:50 PM
www.ATIBOOK.ir
ContentsPrefaceAcknowledgmentsPhoto CreditsPlatonic & Archimedean SolidsOrigami BasicsFolding Tipsixxxxixiixv1 Sonobe Variationsâ ‡ (Created 1997–2001)Daisy SonobeStriped SonobeSnow-Capped Sonobe 1Snow-Capped Sonobe 2Swan SonobeSpiked Pentakis Dodecahedron168101214152 Enhanced Sonobesâ ‡ (Created October 2003)Cosmos BallCosmos Ball VariationCalla Lily BallPhlox BallFanTasticStella161820212224273 Floral Ballsâ ‡ (Created June 2003)Poinsettia Floral BallPassion Flower BallPlumeria Floral BallPetunia Floral BallPrimrose Floral Ball2830323436374 Patterned Dodecahedra Iâ ‡ (Created May 2004)Daisy Dodecahedron 1Daisy Dodecahedron 2Daisy Dodecahedron 3384042435 Patterned Dodecahedra IIâ ‡ (Created June 2004)Umbrella DodecahedronWhirl DodecahedronJasmine Dodecahedron 1Jasmine Dodecahedron 2Jasmine Dodecahedron 3Swirl Dodecahedron 1Swirl Dodecahedron 24447485052545557Contentsviiwww.ATIBOOK.irMukerji book.indd 78/13/2010 4:44:50 PM
viii6 Miscellaneous (Created 2001–2003)Lightning BoltTwirl OctahedronStar Windows58606264AppendixRectangles from SquaresHomogeneous Color TilingOrigami, Mathematics, Science and Technology65656668Suggested ReadingSuggested WebsitesAbout the Author737475Contentswww.ATIBOOK.irMukerji book.indd 88/13/2010 4:44:50 PM
PrefaceNever did I imagine that I would end up writing anorigami book. Ever since I started exhibiting photos of my origami designs on the Internet, I beganto receive innumerable requests from the fans ofmy website to write a book. What started as a simple desire to share photos of my folding unfoldedinto the writing of this book. So here I am.To understand origami, one should start with itsdefinition. As most origami enthusiasts alreadyknow, it is based on two Japanese words oru (tofold) and kami (paper). This ancient art of paperfolding started in Japan and China, but origamiis now a household word around the world. Everyone has probably folded at least a boat or anairplane in their lifetime. Recently though, origami has come a long way from folding traditionalmodels, modular origami being one of the newestforms of the art.The origin of modular origami is a little hazy dueto the lack of proper documentation. It is generally believed to have begun in the early 1970s withthe Sonobe units made by Mitsunobu Sonobe.Six of those units could be assembled into a cubeand three of those units could be assembled intoa Toshie Takahama Jewel. With one additionalcrease made to the units, Steve Krimball firstformed the 30-unit ball [Alice Gray, “On Modular Origami,” The Origamian vol. 13, no. 3, June1976]. This dodecahedral-icosahedral formation,in my opinion, is the most valuable contributionto polyhedral modular origami. Later on KunihikoKasahara, Tomoko Fuse, Miyuki Kawamura, LewisSimon, Bennet Arnstein, Rona Gurkewitz, DavidMitchell, and many others made significant contributions to modular origami.PrefaceModular origami, as the name implies, involvesassembling several identical modules or units toform a finished model. Modular origami almostalways means polyhedral or geometric modularorigami although there are a host of other modulars that have nothing to do with polyhedra. Generally speaking, glue is not required, but for somemodels it is recommended for increased longevity and for some others glue is required to simplyhold the units together. The models presented inthis book do not require any glue. The symmetryof modular origami models is appealing to almosteveryone, especially to those who have a love forpolyhedra. As tedious or monotonous as foldingthe individual units might get, the finished modelis always a very satisfying end result—almost like areward waiting at the end of all the hard work.Modular origami can fit easily into one’s busyschedule. Unlike any other art form, you do notneed a long stretch of time at once. Upon mastering a unit (which takes very little time), batches ofit can be folded anywhere, anytime, including veryshort idle-cycles of your life. When the units areall folded, the assembly can also be done slowlyover time. This art form can easily trickle into thenooks and crannies of your packed day withoutjeopardizing anything, and hence it has stuck withme for a long time. Those long waits at the doctor’s office or anywhere else and those long ridesor flights do not have to be boring anymore. Justcarry some paper and diagrams, and you are readywith very little extra baggage.Cupertino, CaliforniaJuly 2006ixwww.ATIBOOK.irMukerji book.indd 98/13/2010 4:44:50 PM
AcknowledgmentsPhoto CreditsSo many people have directly or indirectly contributed to the happening of this book that it wouldbe almost next to impossible to thank everybody,but I will try. First of all, I would like to thank myuncle Bireshwar Mukhopadhyay for introducingme to origami as a child and buying me those Robert Harbin books. Thanks to Shobha Prabakar forleading me to the path of rediscovering origami asan adult in its modular form. Thanks to Rosalinda Sanchez for her never-ending inspiration andenthusiasm. Thanks to David Petty for providingconstant encouragement and support in so manyways. Thanks to Francis Ow and Rona Gurkewitz for their wonderful correspondence. Thanksto Anne LaVin, Rosana Shapiro, and the Jaiswalfamily for proofreading and their valuable suggestions. Thanks to the Singhal family for muchsupport. Thanks to Robert Lang for his invaluableguidance in my search for a publisher. Thanks toall who simply said, “go for it”, specially the fans ofmy website. Last but not least, thanks to my family for putting up with all the hours I spent on thisbook and for so much more. Special thanks to mytwo sons for naming this book.Daisy Sonobe Cube (page xvi): photo by HankMorrisxStriped Sonobe Icosahedral Assembly (page xvi):folding and photo by Tripti SinghalSnow-Capped Sonobe 1 Spiked Pentakis Dodecahedron (page xvi): folding and photo by RosalindaSanchez90-unit dodecahedral assembly of Snow-CappedSonobe 1 (page 5): folding by Anjali PemmarajuCalla Lily Ball (page 16): folding and photo byHalina Rosciszewska-NarlochPassion Flower Ball (page 28): folding and photoby Rosalinda SanchezPetunia Floral Ball (page 28): folding and photo byCarlos Cabrino (Leroy)All other folding and photos are by the author.Acknowledgmentswww.ATIBOOK.irMukerji book.indd 108/13/2010 4:44:50 PM
Platonic & Archimedean SolidsHere is a list of polyhedra commonly referenced for origami constructions.Platonic Solids8 out of the 13 Archimedean SolidsFaces:8xTetrahedron6 edges, 4 vertices.Faces: 4x6xCuboctahedron24 edges, 12 verticesCube12 edges, 8 vertices.Faces: 6xFaces:8x18xRhombicuboctahedron48 edges, 24 verticesFaces:6x8xTruncated Octahedron36 edges, 24 verticesFaces:12x8x6xTruncated Cuboctahedron72 edges, 48 verticesOctahedron12 edges, 6 vertices.Faces: 8xIcosahedron30 edges, 12 vertices .Faces: 20xDodecahedron30 edges, 20 vertices.Faces: 12xPlatonic & Archimedean SolidsIcosidodecahedron60 edges, 30 vertices.Faces: 20x, 12xRhombicosidodecahedron120 edges, 60 vertices .Faces: 20x, 30x , 12xTruncated Icosahedron90 edges , 60 vertices., 20xFaces: 12xSnub Cube60 edges, 24 vertices .Faces: 32x, 6xxiwww.ATIBOOK.irMukerji book.indd 118/13/2010 4:44:51 PM
Origami BasicsThe following lists only the origami symbols and bases used in this book. It is not by any means acomplete list of origami symbols and bases.An evenly dashed line represents avalley fold. Fold towards you in thedirection of the arrow.A dotted and dashed line representsa mountain fold. Fold away from youin the direction of the arrow.A double arrow means to fold andopen. The new solid line shows thecrease line thus formed.Turn paper over so that theunderside is now facing you.Rotate paper by the number ofdegrees indicated and in thedirection of the arrows.90Zoom-in andzoom-out arrows.Inside reverse fold or reverse foldmeans push in the direction of thearrow to arrive at the result.orPull out paperxiiEqual lengthsEqual anglesOrigami Basicswww.ATIBOOK.irMukerji book.indd 128/13/2010 4:44:52 PM
Repeat once, twice or asmany times as indicated bythe tail of the arrow.Figure is truncated fordiagramming convenience.**: Tuck in opening underneath.Fold from dot to dot.Fold repeatedly to arriveat the result.1/32/3Folding a square into thirdsACrease and opencenter fold and diagonal.Then crease and opendiagonal of one rectangleto find 1 3 point.Squash Fold : Turn paper to theright along the valley fold whilemaking the mountain creasesuch that A finally lies on B.BCupboard Fold: First crease andopen the center fold and then valleyfold the left and right edges inwards.AOrigami BasicsBWaterbomb Base : Valleyand open diagonals, thenmountain and open equator.‘Break’ AB at the center andcollapse such that A meets B.xiiiwww.ATIBOOK.irMukerji book.indd 138/13/2010 4:44:54 PM
www.ATIBOOK.ir
Folding Tips Use paper of the same thickness and texturefor all units. This ensures that the finished modelwill hold evenly and look symmetrical. One doesnot necessarily have to use the origami paperavailable in stores. Virtually any paper from colorbond to gift-wrap works. Pay attention to the grain of the paper. Makesure that, when starting to fold, the grain of thepaper is oriented the same way for all units. This isimportant to ensure uniformity and homogeneityof the model. It is advisable to fold a trial unit before foldingthe real units. This gives you an idea of the finishedunit size. In some models the finished unit is muchsmaller than the starting paper size, and in othersit is not that much smaller. Making a trial unit willgive you an idea of what the size of the finishedunits and hence a finished model might be, whenyou start with a certain paper size. After you have determined your paper size,procure all the paper you will need for the modelbefore starting. If you do not have all at the beginning, you may find, as has been my experience,that you are not able to find more paper of thesame kind to finish your model.Folding Tips If a step looks difficult, looking ahead to thenext step often helps immensely. This is becausethe execution of a current step results in what isdiagrammed in the next step. Assembly aids such as miniature clothespins orpaper clips are often advisable, especially for beginners. Some assemblies simply need them whetheryou are a beginner or not. These pins or clips maybe removed as the assembly progresses or uponcompletion of the model. During assembly, putting together the last fewunits, especially the very last one can get challenging. During those times remember that it is paperyou are working with and not metal! Paper is flexible and can be bent or flexed for ease of assembly. After completion, hold the model in both handsand compress gently to make sure that all of the tabsare securely and completely inside their corresponding pockets. Finish by working around the ball. Many units involve folding into thirds. Thebest way to do this is to make a template using thesame size paper as the units. Fold the template intothirds by the method explained in “Origami Basics.” Then use the template to crease your units.This saves time and reduces unwanted creases.xvwww.ATIBOOK.irMukerji book.indd 158/13/2010 4:44:54 PM
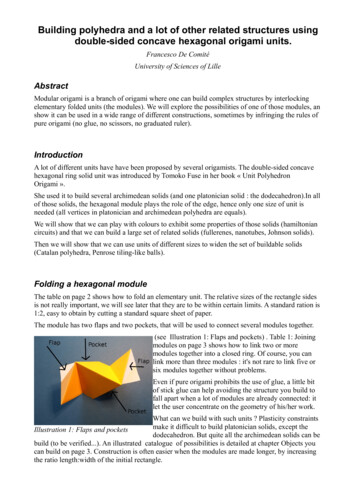
Daisy Sonobe Cube (top left), Striped Sonobe Icosahedral Assembly (top right), Snow-Capped Sonobe 1 Spiked Pentakis Dodecahedron (middle), and Snow-Capped Sonobe 1 (bottom left) and 2 (bottom right) Icosahedral Assemblies.xviSonobe Variationswww.ATIBOOK.irMukerji book.indd 168/13/2010 4:44:55 PM
1 Sonobe VariationsAs previously discussed in the preface, the Sonobeunit is one of the foundations of modular origami. The variations presented in this chapter mayhave been independently created by anyone whohas played around enough with Sonobe units likeI have. Nevertheless, it is worthwhile to presentsome of my variations in a dedicated chapter.The Daisy Sonobe is my very first own creation. Iborrowed the idea of making variations to simpleSonobe units to achieve dramatic end results frommodular origami queen Tomoko Fuse. After mak-ing some of these models, you will be on your wayto creating your own variations.With the addition of extra creases to a finished unitas listed in the table on page 2, Sonobe units can beassembled into a 3-unit Toshie’s Jewel, a 6-unit cube,a 12-unit large cube, a 12-unit octahedral assembly,a 30-unit icosahedral assembly, a 90-unit dodecahedral assembly, other bigger polyhedral assemblies, and even other objects such as birds, flowers,and wreaths. You may try making any shape fromthe table with any Sonobe variation.Toshie’s Jewels made with Sonobe variations (clockwise from top left: Swan Sonobe,Snow-Capped Sonobe 1, Daisy Sonobe, Snow-Capped Sonobe 2, and Striped Sonobe).Sonobe Variations1www.ATIBOOK.irMukerji book.indd 18/13/2010 4:44:57 PM
Sonobe TableModel2Shape# of Unitsto FoldToshie Takahama’sJewel3Cube6Large ked 90Finished UnitCrease PatternSonobe Variationswww.ATIBOOK.irMukerji book.indd 28/13/2010 4:44:58 PM
Sonobe Assembly BasicsSonobe assemblies are essentially “pyramidized” polyhedra with each pyramidconsisting of three Sonobe units and eachunit, in turn, being a part of two adjacentpyramids. The figure below shows a genericaSonobe unit and how to form one pyramid.When constructing a polyhedron, the keything to remember is that the diagonal ab ofeach Sonobe unit will lie along an edge of thepolyhedron.PocketTabTabPocketbA generic sonobeunit representationForming one pyramidSonobe Assembly Guide for a Few Polyhedra1. Toshie’s Jewel: Crease three finished units asexplained in the table on page 2. Form a pyramidas above. Then turn the assembly upside downand make another pyramid with the three looseEach face will be made up ofthe center square of one unitand the tabs of two other units.Do Steps 1 and 2 to form oneface. Do Steps 3 and 4 to formone corner or vertex. Continueinterlocking in this manner toarrive at the finished cube.Sonobe Variationstabs and pockets. This assembly is also sometimesknown as a Crane Egg.2. Cube Assembly: Crease six finished units asexplained in the table on page 2.34123www.ATIBOOK.irMukerji book.indd 38/13/2010 4:44:59 PM
3. Large Cube Assembly: Crease 12 finished units as explained on page 2.5The 12-unit large cube is the only assemblythat does not involve pyramidizing. Eachface is made up of four units with each unitbeing a part of two adjacent faces. Do Steps1 4 to form one face. Do Steps 5 and 6 toform a vertex or corner. Continue formingthe faces and vertices similarly to completethe cube.634214. Octahedral Assembly: Crease 12 finished units as explained on page 2.Assemble four units in a ring as shownfollowing the number sequence. Take afifth unit and do Steps 5 and 6 to form apyramid. Continue adding three more unitsto form a ring of four pyramids. Completemodel by forming a total of eight pyramidsarranged in an octahedral symmetry.5213465. Icosahedral Assembly: Crease 30 finished units as explained on page 2.761253Assemble five units in a ring as shownfollowing sequence numbers. Take asixth unit and do Steps 6 and 7 to form apyramid. Continue adding four more unitsto form a ring of five pyramids. Completemodel by forming a total of 20 pyramidsarranged in an icosahedral symmetry.44Sonobe Variationswww.ATIBOOK.irMukerji book.indd 48/13/2010 4:45:00 PM
6. Spiked Pentakis Dodecahedral Assembly: Thismodel will be discussed at the end of this chapter.Please see page 15.7. Dodecahedral Assembly: This is similar to theicosahedral assembly. Fold 90 units and crease thefinished units as explained in the table on page 2.Form a ring of five pyramids. Surround this withfive rings of six pyramids such that each of thefirst five original pyramids is also a part of a ringof sixes. Continue in this manner to complete theball. You can also think about this assembly as adodecahedron where the faces are not flat but consist of a ring of five pyramids.Striped Sonobe Cube, Swan Sonobe Octahedral Assembly, and Daisy Sonobe Large Cube.90-unit dodecahedral assembly of Snow-Capped Sonobe 1.Sonobe Variations5www.ATIBOOK.irMukerji book.indd 58/13/2010 4:45:06 PM
Daisy Sonobe1. Crease and opendiagonals.2. Bring two cornersto center.453. Turn over.5. Tuck back top and bottom corners underfirst layer. Fold in left and right corners.64. Bring edges to center,top layer only.6. Fold as shown,top layer only.Sonobe Variationswww.ATIBOOK.irMukerji book.indd 68/13/2010 4:45:06 PM
8. Valley fold as shown.7. Mountain fold corners andtuck back.Pocket**TabTab9. Tuck flaps markedin opening underneath.*PocketFinished UnitAssemblyRefer to pages 2–5 to determine howmany units to fold, the crease patternon the finished unit, and how to assemble.insert12-unit large cubeassembly6-unit cubeassembly12-unit octahedralassemblyDaisy Sonobe7www.ATIBOOK.irMukerji book.indd 78/13/2010 4:45:07 PM
Striped Sonobe1.Valley fold into thirds and open.2 .Valley fold and open as shown.4.Turn over.3.Valley fold twice on eachedge.5. Fold corners, then valleyfold existing creases.6.Valley fold corners.8Sonobe Variationswww.ATIBOOK.irMukerji book.indd 88/13/2010 4:45:07 PM
*PocketTab*7. Tuck flaps markedin opening underneath.*TabPocketFinished UnitPocketA Variation:TabTo get narrower stripes ofwhite, fold into thirds insteadof halves in Step 3.TabPocketAssemblyRefer to pages 2–5 to determine howhow many units to fold, the creasepattern on the finished unit, and howto assemble.insert12-unit octahedralassembly6-unit cubeassemblyStriped Sonobe12-unit largecube assembly9www.ATIBOOK.irMukerji book.indd 98/13/2010 4:45:08 PM
Snow-Capped Sonobe 1901. Cupboard fold and open.3. Fold corners to bisectmarked angles.5 . Turn over.102. Fold corners, then rotate 90º.4 . Re-crease folds fromStep 1.6 . Fold corners.Sonobe Variationswww.ATIBOOK.irMukerji book.indd 108/13/2010 4:45:09 PM
458 . Rotate.7. Turn over.PocketTabAssemblyTabPocketFinished UnitinsertRefer to pages 2–5 to determine howmany units to fold, the crease patternon the finished unit, and how to assemble.12-unit octahedralassembly6-unit cube assemblySnow-Capped Sonobe 112-unit large cubeassembly11www.ATIBOOK.irMukerji book.indd 118/13/2010 4:45:10 PM
Snow-Capped Sonobe 21/31. Cupboard fold and open.3. Fold corners.2 . Fold thirds as shown.4. Re-crease cupboard folds.6. Fold corners.121/35. Turn over.7. Turn over.Sonobe Variationswww.ATIBOOK.irMukerji book.indd 128/13/2010 4:45:11 PM
PocketTabTabPocketFinished Unit45Assembly8 . Rotate.Refer to pages 2–5 to determinehow many units to fold, the creasepattern on the finished unit, andhow to assemble.insert12-unit octahedralassembly6-unit cube assemblySnow-Capped Sonobe 212-unit large cubeassembly13www.ATIBOOK.irMukerji book.indd 138/13/2010 4:45:12 PM
Swan SonobeStart by doing Steps 1 through 5 of Daisy Sonobe on page 6.7. Mountain fold existingcreases to tuck underneath.6. Crease and open to bisect angles.**8. Valley fold as shown.9. Tuck flaps markedin opening underneath.*PocketAssemblyTabTabPocketFinished UnitRefer to pages 2–5 to determine how manyunits to fold, the crease pattern on thefinished unit, and how to assemble.insert12-unit octahedralassembly6-unit cube assembly1412 -unit large cube assemblySonobe Variationswww.ATIBOOK.irMukerji book.indd 148/13/2010 4:45:13 PM
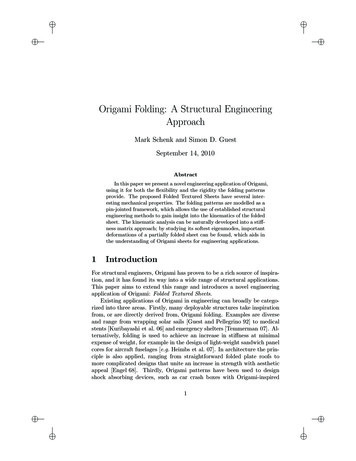
Spiked Pentakis DodecahedronMake 60 units of any Sonobe variation. This example uses Snow-Capped Sonobe 2 (see page 12). (This60-unit Sonobe construction was first known to have been made by Michael J. Naughton in the 1980s.)aa1. Crease all 60units as shown.bb2 . Orient twounits as shownand insert.3 . Re-creasemountain fold.ab4. Turn over.5 . Re-crease valleyfold and insert tabin pocket.6. Make 30 suchcompound units.7. Assemble compound unitsas above, five in a ring.Complete assembling in adodecahedral manner to arriveat the finished model.Spiked Pentakis Dodecahedron15www.ATIBOOK.irMukerji book.indd 158/13/2010 4:45:14 PM
Cosmos Ball Variation (top left), Calla Lily Ball (top right), Phlox Ball (middle), Fantastic (bottom left), and Stella (bottom right).16Enhanced Sonobeswww.ATIBOOK.irMukerji book.indd 168/13/2010 4:45:22 PM
2 Enhanced SonobesThe units made in this chapter are Sonobe-typeunits but with some enhancements. Hence, theywill be called Enhanced Sonobe or eSonobe units.To assemble these units, follow the same generalinstructions as previously presented in Chapter 1,“Sonobe Variations” (page 1). The Phlox Ball, unlike the other models, will involve additional stepsafter completion of assembly. The 12-unit and the30-unit assemblies are recommended for theseunits. Larger assemblies may not produce pleasingresults.folding with a rectangle, often with spectacular results. Sometimes I see no need to be a slave to tradition. It is a positive outcome when arts can adaptand change with the influences of new generationsof thinkers.In this chapter we will use rectangles as our starting paper instead of squares. This is a deviationfrom traditional origami—some might call it evolution. As in so many art forms, deviations oftenlead to a host of additional possibilities. It is notat all uncommon for origami artist to begin theirThe paper used for these models should not bethicker than the kami variety (regular origami paper available in most craft stores). Paper too thickwill lead to uncontrollable holes at the five-pointvertices and will diminish the visual impact of thefinal piece.There are origami ways to achieve the rectanglesof desired aspect ratios, starting with a square paper. You may refer to the section “Rectangles fromSquares” in the Appendix on page 65. When yousize one rectangle, use that as a template to cut allthe other rectangles needed for your model.RecommendationsPaper Size: Rectangles 3.5"–4.5" in width, lengthwill vary proportionately with model.Paper Type: Kami or slightly thicker (but notmuch thicker). Try harmony paper for Cosmosand Calla Lilly Balls.Finished Model SizePaper 4" wide yields model of height 4.75".Enhanced Sonobes17www.ATIBOOK.irMukerji book.indd 178/13/2010 4:45:22 PM
Cosmos Ball1. Start with 1: 2 paper. Creaseand open centerlines . Thencupboard fold and open.3. Fold and openas shown.**2. Fold corners, then re crease folds from Step 1.4 . Inside reversefold corners.185. Tuck areas markedunder flap below.*6 . Valley fold preexisting crease.Enhanced Sonobeswww.ATIBOOK.irMukerji book.indd 188/13/2010 4:45:23 PM
8 . Fold flap up.7 . Fold corner.9 . Fold flap down.Reorient the unit so that you arelooking down at the point shown.Gently pull flaps out so that the unitnow looks like the figure below.x 30PocketFinished Unit10 . Repeat Steps 7–9on the reverse side.TabTabPocketAssemble the 30 units asexplained on page 4.Cosmos Ball19www.ATIBOOK.irMukerji book.indd 198/13/2010 4:45:24 PM
Cosmos Ball VariationStart with a Cosmos Ball finished unit as described on the previous page.2 . Fold and opento bisect markedangle.1. Turn flap down.3. Squash fold.x 304 . Mountain fold.5 . Fold flap backup and repeat Steps1–4 on the reverse side.Reorient the unit so that you are looking downat the point shown. Gently pull flaps out sothat the unit now looks like the figure on the right.Finished UnitPocketTabTabPocketAssemble the 30 units asexplained on page 4.20Enhanced Sonobeswww.ATIBOOK.irMukerji book.indd 208/13/2010 4:45:25 PM
Calla Lily BallStart with a regular Cosmos Ball unit as described on page 18 (do all Steps 1 through 10).1. Turn flap down.2. Curl upperflap tightly intoa cone, inwards.3. Lift flap back up.Reorient the unit so that you arelooking down at the pointshown. Gently pull flaps outso that the unit now looks likethe figure below.x 304. Repeat Steps 1–3on the reverse side.Finished UnitPocketTabTabPocketAssemble the 30 units asexplained on page 4.Calla Lily Ball21www.ATIBOOK.irMukerji book.indd 218/13/2010 4:45:26 PM
Phlox Ball1. Start with 3 : 4 paper. Creaseand open centerlines. Thencupboard fold and open.2 . Fold corners and recrease cupboard folds.3 . Fold and openas shown.**4. Inside reversefold corners.7 . Crease andopen as shown.225 . Tuck areas markedunder flap below.*8 . Fold corneras shown.6 . Mountain foldpre-existing crease.9 . Fold to bisectmarked angle.Enhanced Sonobeswww.ATIBOOK.irMukerji book.indd 228/13/2010 4:45:27 PM
10. Fold flapback up.12. Repeat Steps 7–11on the reverse side.11. Fold as shown.x 30Reorient the unit so that you are looking down atthe point shown. Gently pull flaps out so thatthe unit now looks like the figure below. Note thatflaps A and B need to be pulled out AFTER assembly.PocketFinished UnitAssemble the 30 units asexplained on page 4.BTabATabPocketInitial assemblylooks like model onthe left. “Bloom”petals as describedabove to arrive atthe finished model.Phlox before bloomingPhlox BallPhlox after blooming23www.ATIBOOK.irMukerji book.indd 238/13/2010 4:45:28 PM
FanTasticStart with 2:3 paper and do Steps 1 through 7 of the Phlox unit as on page 22.1. Fold corner.2. Fold to bisectmarked angle.3. Valley foldexisting crease.6. Swivel flap down.4. Fold asshown.5. Repeat Steps1–4 on the reverse side.8. Valley fold and opento bisect marked angle.7. Swivel flap back up butmountain fold alongexisting crease as shown.24Enhanced Sonobeswww.ATIBOOK.irMukerji book.indd 248/13/2010 4:45:28 PM
9. Reverse fold.10. Repeat Steps 6–9on the reverse side.x 30Reorient and assemble asexplained in Phlox Ball.PocketFinished UnitTabTabPocketFanTastic25www.ATIBOOK.irMukerji book.indd 258/13/2010 4:45:29 PM
12-unit and 6-unit assemblies of FanTastic.26Enhanced Sonobeswww.ATIBOOK.irMukerji book.indd 268/13/2010 4:45:33 PM
StellaStart with a finished Phlox unit as on page 22; do all 12 steps.1. Swivel the tip of the unit markedwith a dot towards the top right.2. Valley fold to bisect angles upto where new creases meet. Tipsways back to the top.3. Rotate 180º and repeatSteps 1 and 2.Finished UnitPocketTabx 30Assemble likePhlox Ball.TabPocket12-unit assembly of StellaStella27www.ATIBOOK.irMukerji book.indd 278/13/2010 4:45:34 PM
Poinsettia (top left), Plumeria (top right), Passion Flower (middle), Petunia (bottom left), and Primrose (bottom right) Floral Balls.28Floral Ballswww.ATIBOOK.irMukerji book.indd 288/13/2010 4:45:42 PM
3 Floral BallsMy floral balls are inspired by Miyuki Kawamura’s Sakura (Origami Tanteidan 4th ConventionBook, 1998) and Toshikazu Kawasaki’s Sakuradama (Origami Dream World, 2001). Althoughmy units are much simpler and the locking is quitedifferent, the basic idea that two petals belongingto two adjacent flowers may be formed with oneunit, and that 30 of those units may be assembledin a dodecahedral manner to create a floral ball,came from the above mentioned models.You will notice that all of the floral ball modelsstart with a cupboard fold. The different petalshapes are achieved by altering the folds at thetips of the petals. The center of the flowers canbe of two types: exposed lock type and hiddenlock type. The exposed lock gives the look andfeel of the pistil and stamen of a flower, rendering a much more realistic look. In summary, wewill look at five kinds of petal tips and two kindsof centers formed by exposed or hidden locks.Some variation can also be achieved by changingthe aspect ratio of the starting paper: the longerthe paper, the longer the petals. So, other thanthose flowers diagrammed here, please go aheadand create new flowers on your own with different combinations that I have not tried out formyself.RecommendationsPaper Size: Rectangles 3.5"–5" in length. Widthwill vary proportionately with model.Paper Type: Everything works except highlyglossy paper (need a little friction to hold).Foil paper produces the best locks.Finished Model SizePaper 4.5" long yields model of height 5.5".Floral Balls29www.ATIBOOK.irMukerji book.indd 298/13/2010 4:45:42 PM
Poinsettia Floral Ball1. Start with 1 : 2 paper. Foldand open centerlines. Thencupboard fold and open.2. Match dots to formnew creases as shown.3. Re-creasecupboard folds.7. Crease andopen corners.4. Fold and openalong existingcreases behind.305. Inside reversefold corners.6 . Valley fold andopen as shown,then mountain foldpre-existing crease.8 . Inside reversefold corners.Floral Ballswww.ATIBOOK.irMukerji book.indd 308/13/2010 4:45:42 PM
Finished UnitLockingx 30PocketInsert tabinside pocket.TabNote that a tab-pocketpair is at the back.Firmly creas
origami book. Ever since I started exhibiting pho-tos of my origami designs on the Internet, I began to receive innumerable requests from the fans of my website to write a book. What started as a sim-ple desire to share photos of my folding unfolded into the writing of this book. So here I am. To understand origami, one should start with its