Transcription
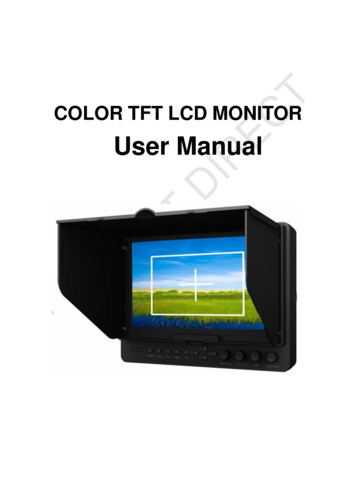
COLOR TFT LCDMONITORManual
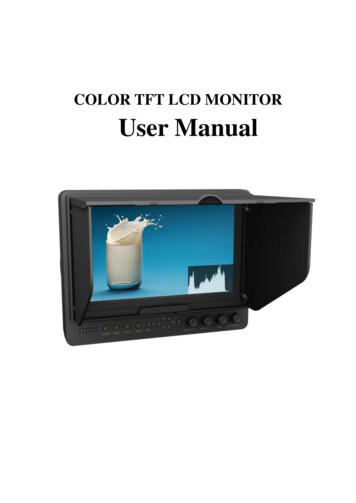
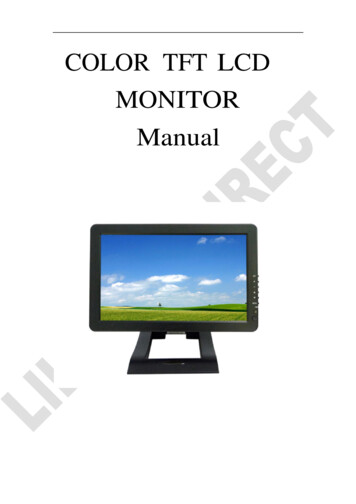
DEAR CUSTOMERSThank you for purchasing the liquid crystal display monitor. This product employsnew integrate circuits and high quality TFT LCD modules. It is putting out with itslow power consumption, emits no radiation, and other advantage characteristics. Thisproduct is shaped with modern style and is easy to be carried with. The color TFTLCD is the most suitable display for VGA,VCD, DVD and GPS system for motorcarsand ships .It also can be used in the office ,in flat ,at home also in other suitableposition. You will certainly benefit from this monitor in lots of ways, for example,convenience, safety, space-saving.We hope that you will have the enjoyment of your new mini color TFT LCD.Toensurethebestuseoftheunit, pleasereadthishandbookcarefully beforehand.CAUTION1.Please use the adapter attached in the accessory.2.Do not expose this product to direct sunlight, heat or humid conditions.3. Keep away from strong light while using this product so as to obtain theclearest and the most colorful picture.4.Please avoid heavy impact or drop onto the ground.5. Do not use chemical solutions to clean this unit. Please simply wipe with aclean soft cloth to keep the brightness of the surface.6.If the product does not operate normally when the instructions are followed.Adjust only those controls that are covered by the instructions. Improperadjustment of other controls may result in damage and will often requireextensive work of a qualified technician.Please unplug the power if non-use for a long-term, or a thunder and happens.
CONTENTS1. PRODUCT DESCRIPTION --------------------2. REMOTE CONTROLLER-----------------------3. MATCHED CABLES------------------------4. MENU OPERATION ---------------------------IN AV MODE-------------------------------------IN PC MODE-------------------------------------IN DVI&HDMI MODE--------------------------5. RAIL SLOT-----------------------------------6. ACCESSORIES ---------------------------------7. PARAMETER -----------------------------------8. TROUBLESHOOTING -------------------------9. REMARK--------------------------------------
1.PRODUCT DESCRIPTION
1.AV/PC:PC、DVI、VIDEO1、VIDEO2、HDMI switch2. :Volume up or to adjust the value of menu setting function3.-:Volume down or to adjust the value of menu setting function4. :To select function on OSD or to adjust the brightness directly under 6classes5. :to select item on the OSD or push the key in PC mode directly toadjust phase automatically6.MENU: To activate OSD menu( PS: Long press "MENU" buttonto zoom in or out picture
automatically when receiving HDMI signal.)7. Indicate light8. Infrared receiving window9.POWER:Power on/off10.USB interface(connection HUB: Optional)11.Mini USB interface(Optional)12.Power input13.DVI、HDMI input interface14.14P SKS input interface15.Mounting Process: Standard VESA Sockets (75mm)2.REMOTECONTROLLER
1. MUTE2. Display switch: PC、DVI、VIDEO1、VIDEO2、HDMI switch3.: Left move,Volume down or to adjust the value of settingfunction4.: Down move, to select function on OSD5. POWER ON/OFF6.:UP move, To select function on OSD7. MENU8.: Right move, Volume up or to adjust the value of settingfunction3.MATCHED CABLES
Match cableSKS cable:1. 14P SKS Input Jack: all kinds of AV signal input, note that put it correctly into theSKS input jack of the monitor2. Black 9-pin VGA signal input jack3. Yellow RCA: Video signal 1 input4. Yellow RCA: Video signal 2 input5. White RCA: Audio signal input6. Black Jack: DC 12V Power inputVGA cable1. Black 9-pin VGA connector, contact to the 9-pin VGA signal input jack of SKScable.2. USB end connect the USB port of computer for touch screen function.3. 15-pin VGA signal input end connect VGA port of the computer.HDMI to DVI cable:1. HDMI signal input end2. DVI signal input connect with device with DVI signal3. USB connect with the USB port of computer for touch function(Optional)HDMI to HDMI cable:
1. HDMI signal input end2. HDMI signal input connect device with HDMI signal3. USB port connect computer for touch function(Optional)4.MENUOPERATIONAfter connected correctly and then Power on, Press “MENU” on the unit or by remotecontrol to show MENU.IN AV MODEPress “ / ”on the unit or “,/” on the remote control to select item, eg.and it will be highlighted; and then press “ / -”on the unit or/on theremote control to adjust the favorite values. It shows current picture format(NTSC&PAL) below the dialog box.BRIGHTNESS: to adjust the luminance of brightnessCONTRAST: to adjust the level of contrastSATURATION: to adjust the level of saturationTINT: to adjust the hue of imageSHARPNESS: to adjust the level of sharpnessLANGUAGE:There are 2 languages provided for choice, English and Chinese
RESET: you can reset adjustment of the unit when click “YES”OSD H-POSITION ADJUSTMENT: to adjust the OSD move in horizontaldirectionOSD V-POSITION ADJUSTMENT: to adjust the OSD move in verticaldirectionOSD DURATION: to adjust the duration of OSD from5-100secondsMode shift between 4:3 and 16:9EXIT OSD: select “YES” to exitIN PC MODE:Press “ / ”on the unit or “/” on the remote control to select item, eg., and it will be highlighted; and then press “ / -”on the unit or/on theremote control to adjust the favorite values. It shows current picture modespecifications below the dialog box.BRIGHTNESS: to adjust the luminance of brightnessCONTRAST: to adjust the level of contrastPHASE: to adjust the beginning point and terminal point of imageFREQUENCY: to adjust the frequency range of image
OSD H-POSITION: to adjust the picture position in horizontal directionOSD V-POSITION: to adjust the picture position in vertical directionRESET: you can reset adjustment of the unit when click “YES”COLOR TEMPERATURE:choose color and temperature at first, such as: 65000K, 75000 K or 93000 K.Only if under “USER” mode, can adjustRED,GREEN andBLUE to meet the color value you need.LANGUAGE:There are 2 languages provided for choice, English and ChineseMISCELLANEOUS:to selectto enter next pageAs follows:OSD MISCELLANEOUSOSD H-POSITION ADJUSTMENT: to adjust the OSD move in horizontaldirectionOSD V-POSITION ADJUSTMENT: to adjust the OSD move in verticaldirectionOSD DURATION: to adjust the duration of OSD from5-100seconds.OSD AUTO COLOR:If select “YES” it will adjust automatic color system tothe best.Mode shift between 4:3 and 16:9EXIT OSD: select “YES” to exit
IN DVI & HDMI MODEDVI MODEHDMI MODEPress “ / ”on the unit or “/” on the remote control to select item, eg.and it will be highlighted; and then press “ / -”on the unit or/,on the remotecontrol to adjust the favorite values. It shows picture mode specifications below thedialog box in DVI mode, but not in HDMI mode.BRIGHTNESS: to adjust the luminance of brightnessCONTRAST:to adjust the level of contrastSATURATION: to adjust the level of saturation (this function doesn’t workunder DVI/HDMI mode)TINT: to adjust the hue of image (this function doesn’t work under DVI/HDMImode)OSD H-POSITION ADJUSTMENT: to adjust the OSD move in horizontaldirection
OSD V-POSITION ADJUSTMENT: to adjust the OSD move in verticaldirectionRESET: you can reset adjustment of the unit when click “YES”COLOR TEMPERATURE:choose color and temperature at first, such as: 65000K, 75000 K or 93000 K.Only if under “USER” mode, can adjustRED,GREEN andBLUE to meet the color value you need.LANGUAGE:There are 2 languages provided for choice, English and ChineseMISCELLANEOUS:to selectto enter next page of menu.As follows:OSD MISCELLANEOUS OF DVI MODEOSD MISCELLANEOUS OF HDMI MODEMode shift between 4:3 and 16:9EXIT OSD: select “YES” to exit
5.RAIL SLOT6.ACCESSORIES1.Remote control1piece2.Manual1copy3.Touch pen1piece4.Drive disk1piece(touch driver, please choose and install correct touch driver as per your PCOS)5.DC adapter 12V1piece6.14PIN SKS1Piece7.VGA cable1Piece8. HDMI to HDMI cable1piece9. HDMI to DVI cable1piece10. VESA 75mm rail slot (optional) 1piece
7.PARAMETERPanel10.1” LED (16:9)Touch FunctionResistive touch panelResolution1024 600Brightness250cd/ Contrast500:1Viewing Angle140 / 110 (H/V)Color SystemPAL-4.43,NTSC-3.58Input VoltageDC 12VInput SignalAV1,AV2,PC(VGA), HDMI, DVIPower Consumption 9WAudio Output 1.2WMounting ProcessStandard VESA Sockets (75mm)Feature4 or 5-wire resistive touch panel (FA1011)Multi-touch function (Windows 7 OS only!) (FA1012)Dimension(LWD)253.5 162.5 35/65.5mm (with bracket)Weight1166g
8.TROUBLE SHOOTING1. Only black-and-white imageCheck whether the level of color saturation and brightness is proper or not.2. Power on but no pictureMake sure the PC、DVI、VIDEO、HDMI cable is tightly connected exactlycorrectly Make sure you are using the standard power adapter coming with themonitor.3. Wrong or abnormal colorsIf any color is missing, check the cables to make sure it is securely connected.Broken or loose pins in the cable connector can cause a bad connection.4. Remote controller doesn't workCheck the battery to make sure the battery is installed properly and make sure it isnot a low battery. The signal is interfered by some obstructions.5. If any abnormal matters happened, pls enter “MENU” chooseto reset6. If it can’t be touch, pls check the USB connect exactly correct or not, or installthe correct touch driver as per the PC OS ?9.REMARK:If there are still any problems, you can connect with the related deals*If interruptive image occurs, it maybe that the VGA signal frequency isn’t matchedwith normal standard*It is a normal condition that some bright lines appear on the screen when you turnthe unit.Note: due to constant effort to improve products and product features,specifications may change without notice.
product is shaped with modern style and is easy to be carried with. The color TFT LCD is the most suitable display for VGA,VCD, DVD and GPS system for motorcars and ships .It also can be used in the office ,in flat ,at home also in other suitable position. You will certainly benefit from this monitor in lots of ways, for example,
