Transcription
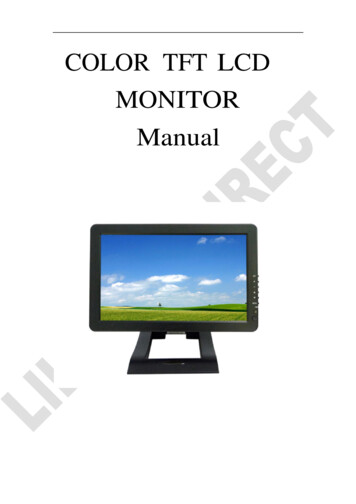
TFT LCD Monitor
Before You Start※ Assembling the base to your monitor step by step.STEP 1STEP 2※ Disassembling your monitor and the base step by step.STEP 1STEP 2Before You Start
ContentsContents. 1English . 3 Notice.3 Safety Information.3 Precaution.3Package Contents .3Hardware Installation.4Input .4Control Buttons .4OSD (On-Screen Display) Menu Mode .5Troubleshooting.6Supported Timing .6Specification .7Francais . 8 Avertissement .8 Information de securite .8 Precautions .8Contenu de l'emballage.8Installation du materiel .9Entree .9Boutons de configuration du menu.9Mode de menu OSD (On-Screen Display) .10Depannage.11Minutages acceptes .11Caractéristiques .12Deutsch . 13 Hinweise .13 Sicherheitsvorkehrungen .13 Zu beachten.13Verpackungsinhalt .13Hardware-Installation .14Eingangsanschlus .14Befehlstasten .14OSD-Menu-Modus (Anzeige auf dem Bildschirm).15Fehlersuche .16Unterstutztes Timing.16Spezifikationen .171
Espanol . 18 Noticia.18 Informacion de Seguridad.18 Precaucion.18Contenidos del Paquete .18Instalacion de Hardware.19Entrada .19Botones de control .19Menu de Modo de OSD (Exhibicion sobre la Pantalla) .20Solucion de Problemas .21Tiempo apoyado.21Especificación .22Italiano. 23 Notifica.23 Informazioni per la sicurezza .23 Avvertenze .23Contenuto della Confezione .23Installazione dello Hardware .24Ingresso .24Tasti di Controllo.24Modalita Menu OSD (On-Screen Display).25Ricerca Guasti.26Sincronizzazione Supportata.26Specifiche.27Portugues . 28 Aviso .28 Informacao de seguranca .28 Precaucao.28Conteudo do pacote .28Instalacao do hardware .29Input .29Botoes de controlo .29Modo do menu OSD (On-Screen Display) .30Localizador e Reparador de Defeitos .31Tempo apoiado.31Especificação .322
English Notice‧ All Information in this manual may change from time to time without prior notice.‧ To ensure safety operation of this product, please read the following menu carefully before usingthis product. Safety Information‧‧‧‧Do not place anything wet on the monitor or the power cord.Be sure to turn the monitor off before plugging the power cord into the socket.Be sure to check the power cord and the other cords are securely and rightly connected.Do not attempt to open the monitor. You may be hurt by electric shock. For service, call your placeof purchase. Precaution‧‧‧‧Do not expose the monitor to direct sunlight or heat.Do not spill liquid on the monitor.Do not use your monitor when magnets or electronic products are operating nearby.Do not use harsh chemicals or strong cleaning solvents to clean the monitor screen. Wipe it withclean, soft clothes applied with mild solution.‧ Do not place anything on your monitor. Bad ventilation may elevate temperature in the monitor.‧ Do not use your fingers to touch the LCD Screen directly. Fingerprint that contains oil and may bedifficult to clean.Package ContentsOur LCD monitor contains these following items. Make sure you get items listed below, otherwisecontact to your dealer or store.1.19” TFT LCD Monitor2.Power Cord3. VGA Cable4.Audio Cable* The audio function is optional.5. User’s Manual3
Hardware InstallationBe carefully to your LCD monitor, it’s very exquisite but easy to broken. Turn off LCD’s and PC’s powerbefore you set it up. Follow our installation step by step.InputAC input:This is for connecting the power cable.VGA port : This can be connected with the D-Sub 15 pin signalCable.DVI port : This can be connected with the DVI signal Cable.Audio In:This can be connected to the PC audio-out connectorof sound resource.*NOTICE: DVI and Audio functions are optional features.Control ButtonsThere are 5 keys for user to set up the monitor, including "Auto Adjust", "OSD menu", "Power", "Adjust - ", "Adjust ". The following descriptions are the introduction of these Keys.Auto Adjust (Function)A Function Select Button: This button allows you to select the control functions up in the OSD.Hotkey: Press this button to apply the monitor setting automatically.Menu (Function)M Function Select Button: This button allows you to select the control functions down in the OSD.Hotkey: Press this button to get a pop-up OSD menu.Power: Turn the LCD power on and off. When the power is on, the light is showing green,Stand by will be orange.-Adjust - : Decrease the option value in the OSD menu. Adjust : Increase the option value in the OSD menu.4
OSD (On-Screen Display) Menu Mode*Pleaseadjust your Speaker Volume via your PC computer Speaker Volume control icon.Pleasenotethat Sound will continue to play when your monitor is off, to turn off please turn off your*PC computer or mute the Speaker Volume control icon.Press the OSD button to access menu, and press Increase / Decrease button for adjustment.BRIGHTNESS*BRIGHTNESSCONTRASTAdjust the brightness of the display.IBT (Light Sensor)-(Optional): This feature automatically adjust yourmonitor brightness base on ambient light changes. To activate this featureplease select Auto icon within the main OSD Brightness icon.To deactivate please select Manual instead of Auto.Adjust the difference between light and dark area.PHASEThe phase of the dot clock is adjusted.CLOCKThe ratio of dividing frequency of the dot clock is adjusted.H-POSITIONAdjust the horizontal position of the display.V-POSITIONAdjust the vertical position of display.RESETCOLOR TEMPERATUREREDGREENBLUELANGUAGEMISCELLANEOUSEXIT OSDRecall the default setting.Adjust the color temperature.Adjust the Red color temperature.Adjust the Green color temperature.Adjust the Blue color temperature.Select the display language of the OSD Menu.〝No〞will take you to the exit menu.〝Yes〞will bring you to the sub menusof the Miscellaneous menu.Saving and Leave.MISCELLANEOUSRETURNOSD H-POSITIONAdjust the horizontal position of the OSD.OSD V-POSITIONAdjust the vertical position of the OSD.OSD DURATIONAdjust the timing of the OSD menu.AUTO COLOR*Return to main menu.SOURCEAdjust the color automatically.Select input Video source:VGA or DVINotice: * Source is optional feature.5
TroubleshootingMake sure that your monitor is properly installed if you have encountered any trouble using thisproduct. There is no picture on the screen.Check: 1.Power saving mode. Press any key and move the mouse to deactivate the mode.2.Signal cable connector pins. If there are bent or missing pins, consult your place ofpurchase. Characters look too dark or too lightCheck: Using OSD Menu to adjust the Brightness. When your monitor shall be adjusted?Check: If the resolution of frequency is being changed. The text appears on the screen are unclear.Check: Make sure the resolution or refresh rate match with the Display Mode.Supported TimingDisplay ModeResolutionVertical Frequency (Hz)Horizontal Frequency 075.0360.060.0049.61440x90060.0055.96
SpecificationInput SignalsVGAVGA compatible analog RGBComposite sync supportedDVI*DDWG compliant Single Link TMDS Digital VisualInterface (DVI)CompatibilityPCUp to 1440X900@60Hz(Non-interlaced)ConnectorVGAD-sub 15-pinsDVI*DVI-D*Audio*Stereo Phone JackPowerA/C InputVoltageBuilt-in universal power supply:100-240 VAC, 50/60 HzConsumptionActive 45 Watt Max.Power saving modeStandby 3 WattPowerSpeaker x2 *Internal SpeakerUser InterfaceOperating ConditionDimensionsLED IndicatorActive- BlueStandby- FlashTemperatureOperating: 5 to 40 Humidity20% 80% R.H.Physical467mm(W) x 383mm(H) x 169mm(D)Net Weight4.5 Kg 1DDCDDC2BPower ManagementVESA DPMSRegulation (Certifications)UL/CUL, FCC, CEOthersLight Sensor *Notice: * DVI, Speaker and Light Sensor are optional.7
Français Avertissement‧ Les informations données dans ce manuel sont sujettes à modification sans préavis.‧ Veuillez lire et suivre les informations et précautions suivantes avant d’utiliser l’appareil. Information de sécurité‧‧‧‧Ne placez aucun objet mouillé sur le moniteur ou le cordon d’alimentation.Eteignez votre moniteur avant de connecter le cordon d’alimentation sur une prise de courant.Vérifiez que le cordon d’alimentation et les autres câbles sont correctement connectés.N’essayez jamais d’ouvrir le moniteur, un incendie ou une électrocution pourrait se produire.Contacter votre revendeur ou un centre de service pour la maintenance. Précautions‧‧‧‧‧Evitez d’exposer le moniteur aux rayons directs du soleil ou à toutes autres sources de chaleur.Evitez de renverser des liquides sur le moniteur.N’utilisez pas votre ordinateur à proximités des aimants ou des produits électroniques.N’utilisez jamais de solvants tels que : diluants, alcool, ou autre pour nettoyer l’écran.Ne placez pas des objets sur votre moniteur. Une ventilation insuffisante peut causerl’augmentation de la température dans le moniteur.‧ Evitez de toucher l’écran LCD avec vos doigts. La graisse de la peau est difficile à enlever.Contenu de l’emballageL’emballage du moniteur LCD contient les éléments ci-dessous. Vérifiez le contenu et contactezimmédiatement votre revendeur, si quelque chose manque.1.Moniteur LCD 19” TFT2. Cordon d’alimentation3. Câble VGA4. Câble audio5.* Fonction audio est optionnelle.Manuel de l’utilisateur8
Installation du matérielPrenez soin de votre moniteur LCD. Eteignez votre moniteur LCD et votre ordinateur avant decommencer l’installation. Suivez les étapes ci-dessous pour compléter l’installation.EntréeEntrée en C.A:Pour connecter le câble d’alimentationPort VGA : Peut être connecté avec le câble D-Sub 15broches.Port DVI: Pour connecter le câble de signal DVI.Entrée audio In:Pour connecter le câble de signal de ligne desortie venant de l’ordinateur.*REMARQUE: Les fonctions DVI et Audio sont optionnelles.Capteur optique (en option)Boutons de configuration du menuIl existe 5 touches utilisateur pour le réglage du moniteur "Réglage Auto ", " menu OSD ","Alimentation", "Réglage - ", "Réglage ". Vous trouverez ci-dessous une introduction à cestouches.Réglage Auto (Fonction)A Touche de sélection des fonctions: Cette touche vous permet de sélectionner les fonctions de contrôlesur l’ OSD (affichage écran).Raccourci clavier: Appuyez sur cette touche pour appliquer automatiqquement le réglage.Menu (Fonction)MTouche de sélection des fonctions: Cette touche vous permet de sélectionner les fonctions de contrôlesous l’ OSD (affichage écran).Raccourci clavier: Appuyez sur cette touche pour obtenir un menu contextuel OSD.Alimentation: Allumer et éteindre l’écran LCD. Quand l’appareil est allumé, la lumière s’allume en vert, Eten orange en mode attente.-Réglage - : Baisser l’option valeur dans le menu OSD. Réglage : Augmenter l’option valeur dans le menu OSD9
Mode de menu OSD (On-Screen Display)*Veuillez régler le volume haut parleur depuis l’icône de contrôle de volume de votre PC.*Veuillez noter que le son continuera quand votre moniteur est éteint ; pour l’éteindre, veuillez éteindre votrePC ou mettre l’icône de contrôle du volume en sourdine.Appuyez sur la touche OSD pour accéder au menu, et appuyez sur les touches Augmenter/Diminuer pourl’ajustement.*BRIGHTNESSAjuste la luminosité de l’image.BRIGHTNESSIBT (Capteur optique)-(en option): cette option règle automatiquement la baseluminosité de votre moniteur en function des changements de lumière ambiante. Pouractiver cette option, veuillez sélectionner l’icône Auto à partir de l’ icône LuminositéOSD. Pour désactiver, veuillez sélectionner Manuel au lieu de Auto.CONTRASTAjuste la différence entre les régions claires et foncées.PHASELa phase de l'horloge de point est ajustée.CLOCKLe rapport de diviser la fréquence de l'horloge de point est ajusté.H-POSITIONAjuste la position horizontale de l’imageV-POSITIONAjuste la position verticale de l’image.RESETCOLOR TEMPERATUREREDRappelle les paramètres par défaut.Ajuste la température de couleur des pixels.Ajuste la couleur du pixel rouge.GREENAjuste la couleur du pixel vert.BLUEAjuste la couleur du pixel bleu.LANGUAGEMISCELLANEOUSEXIT OSDSélectionne la langue du menu OSD.NO pour quitter le menu, YES pour accéder aux sous-menus de la partieMiscellaneous (Divers).Quitter et enregistrer les paramètres.MISCELLANEOUS (DIVERS)RETURNOSD H-POSITIONAjuste la position horizontale de l’OSD.OSD V-POSITIONAjuste la position verticale de l’OSD.OSD DURATIONAjuste le délai du menu OSD.AUTO COLOR*Retourne au menu principale.SOURCEAjuste la couleur automatiquement.Sélectionne la source entrée Vidéo: VGA ou DVINotice: * Source est une caractéristique en option.10
DépannageEn cas de problème avec votre écran, vérifiez dans un premier temps que le branchement a bien étéeffectué. Sinon, voir ci-dessous.‧Il n’y a pas d’image sur l’écran.Vérifier: 1. Mode Économie d'énergie. Appuyez sur une touche et utilisez la souris pourdésactiver ce mode.2. Les broches du connecteur de câble de signal. Lorsqu’il y a des broches abîmées,contactez votre revendeur.‧Les caractères sont trop foncés ou trop clairsVérifier: Utilisez le menu OSD pour ajuster la luminosité.‧Quand dois-je faire l’ajustement du moniteur?”Vérifier: Si la résolution ou la fréquence de rafraîchissement a été changée.‧Le texte qui apparaît sur l’écran n’est pas très clair.Vérifier : Assurez-vous que la résolution ou la fréquence de rafraîchissement correspond aumode d’affichage.Minutages acceptésMode d’affichageRésolutionFréquence verticale (Hz)Fréquence x7681280x80075.0360.060.0049.61440x90060.0055.911
CaractéristiquesSignaux d’entréeVGAVGA compatible analogique RGBComposite sync acceptéDVI*Interface Digital Visual (DVI) conforme DDWG SingleLink TMDSCompatibilitéPCJusqu’à 1440X900@60Hz(non-entrelacé)ConnecteurVGAD-sub 15-brochesDVI*DVI-D*Audio*Prise téléphone stéréoAlimentationEntrée A/CVoltageAlimentation universelle intégrée:100-240 VAC, 50/60AlimentationHzConsommationActive 45 Watt Max.Mode économie d’énergieEn attente 3 WattHaut parleur x2 *Internal SpeakerUser InterfaceLED IndicatorActive- BleuEn attenteCondition opératoireDimensions- FlashTempératureFonctionnement: 5 to 40 Humidité20% 80% R.H.Physique467mm(L) x 383mm(H) x 169mm(P)Poids Net4.5 Kg 1DDCDDC2BGestion AlimentationVESA DPMSRégulation (Certificats)UL/CUL, FCC, CEAutresCapteur optique *Note: * Le DVI, les haut- parleurs et le capteur optique sont en option.12
Deutsch Hinweise‧ Eine jederzeitige Änderung aller Informationen in diesem Benutzerhandbuch ohne Vorbenachrichtigung istvorbehalten.‧ Für einen sicheren Betrieb dieses Gerätes lesen Sie die folgende Anleitung bitte sorgfältig durch, bevor Siedas Gerät in Betrieb nehmen. Sicherheitsvorkehrungen‧ Keine feuchten oder nassen Gegenstände auf den Monitor oder auf das Stromkabel stellen.‧ Vor dem Anschließen des Steckers an eine Netzsteckdose stellen Sie sicher, dass der Monitorausgeschaltet ist.‧ Stellen Sie sicher, dass das Stromkabel und die anderen Kabel gut, fest und richtig angeschlossen sind.‧ Versuchen Sie nicht, das Monitorgehäuse zu öffnen, da Sie sich so einem Risiko eines elektrischenSchlages und somit einer Verletzungsgefahr aussetzen. Für Reparaturen und Wartungen wenen Sie sichbitte an die Verkaufsstelle. Zu beachten‧ Den Monitor jederzeit vor direkter Sonneneinstrahlung oder Hitze schützen.‧ Keine Flüssigkeiten über dem Monitor verschütten.‧ Den Monitor nicht in der Nähe von Magneten oder elektrischen Geräten, wenn diese in Betrieb sind,benutzen.‧ Zum Reinigen des Monitorbildschirmes verwenden Sie keine scharfen Chemikalien oder starkeReinigungsmittel. Wischen Sie den Bildschirm mit einem sauberen und trockenen Tuch, welches leicht miteinem milden Reinigungsmittel benetzt ist, sauber.‧ Keine Gegenstände auf den Monitor stellen. Eine schlechte Belüftung führt zu einer Überhitzung imMonitor.‧ Den LCD-Bildschirm nicht direkt mit den Fingern berühren. Fingerabdrücke und Hautfett lassen sich nurschwer entfernen.VerpackungsinhaltIm Lieferumfang dieses LCD-Monitors müssen die folgenden Artikel vorhanden sein. Stellen Sie sicher, dassdieser Verpackungsinhalt vollständig ist. Wenn nicht, wenden Sie sich umgehend an Ihren Händler oder an dasGeschäft, von dem Sie dieses Produkt gekauft haben. Sie können auch mit uns Kontakt aufnehmen.1.19-Zoll-LCD-Monitor mit TFT2. * Die Audiofunktion ist optional.13
Hardware-InstallationSeien Sie vorsichtig beim Umgang mit diesem LCD-Monitor. Trotz seinem einzigarten Design kann eraber auch leicht beschädigt werden. Schalten Sie die Stromzufuhr zum LCD-Bildschirm und zum PCaus, bevor Sie das Gerät aufstellen. Befolgen Sie den Installationsvorgang Schritt für Schritt.EingangsanschlußAC Eingang:Dient dem Anschluss des Netzkabels.VGA port : Hier kann das D-Bub 15-Pin Signalkabelangeschlossen werden.DVI port: (DVI-Port) Zum Anschließen des DVI-Signalkabels.Audio In: (Audio-Eingang) Zum Verbinden mit demPC-Audio-Ausgangsanschluß (PC Audio Out) einesSoundgerätes.*HINWEIS: Die DVI- und Audiofunktionen sind optionale Merkmale.Lichtsensor (Optional)BefehlstastenEs gibt 5 Tasten die der Benutzer zum Einszellen des Monitors benutzen kann, inklusive "AutoEinstellen", "OSD-Menü", "Netz", "Regeln - ", "Regeln ". Die folgende Beschreibung stellt dieseTasten vor.Auto Einstellen (Funktion)A Funktionsauswahltaste: Diese Taste dient der Wahl von Kontrollfunktionen oben im OSD.Hotkey: Drücken Sie diese Taste, um die Monitoreinstellung automatisch zu aktivieren.Menü (Funktion)M Funktionsauswahltaste: Diese Taste dient der Wahl von Kontrollfunktionen unten im OSDHotkey: Drücken Sie diese Taste, um das Pop-up OSD-Menü aufzurufen.Netz: Schaltet die LCD Netzversorgung ein und aus. Wenn eingeschaltet, leuchtet das Lichtgrün, Standby wird orange angezeigt.-Regeln - : Verringert die Optionswerte des OSD-Menüs. Regeln : Erhöht die Optionswerte des OSD-Menüs.14
OSD-Menü-Modus (Anzeige auf dem Bildschirm)*RegelnSie die Lautsprecherlautstärke über Ihr PC-Lautstärke-Kontrollesymbol.*Beachten Sie, dass der Sound auch bei ausgeschaltetem Monitor aktiv ist, schalten Sie zum Beenden IhrenPC aus oder deaktivieren Sie das Lautstärke-Kontrollsymbol.Drücken Sie die OSD-Taste. Um auf das Menü zuzugreifen, und drücken Sie die Erhöhen / VerringernTaste zum Einstellen.*BRIGHTNESS(Helligkeit) Zum Einstellen der Helligkeit auf dem Bildschirm.BRIGHTNESSIBT (Lichtsensor)-(Optional): Diese Funktion passt die Monitorhelligkeitautomatisch der Umgebungsbeleuchtung an. Wählen Sie zum Aktivierendieser Funktion das Auto Symbol im Helligkeitssymbol des OSDHauptmenü. Wählen Sie zum Deaktivieren Manuell anstelle von Auto.CONTRASTReguliert die Differenz zwischen helle und dunkele Fläche.PHASEDie Phase des Punkttaktgebers wird justiert.CLOCKDas Verhältnis des Teilens der Frequenz des Punkttaktgebers wird justiert.H-POSITION(Horiz. Position) Zum Einstellen der horizontalen Positionen der Anzeigeauf dem Bildschirm.V-POSITIONRESETCOLOR TEMPERATUREREDGREENBLUELANGUAGEMISCELLANEOUSEXIT OSD(Vertik. Position) Zum Einstellen der vertikalen Positionen der Anzeige aufdem Bildschirm.(Rücksetzen) Zum Wiederabrufen der Standardeinstellungen.(Farbtemperatur) Zum Einstellen der Farbtemperatur.(Rot) Zum Einstellen der roten Farbtemperatur.(Grün) Zum Einstellen der grünen Farbtemperatur.(Blau) Zum Einstellen der blauen Farbtemperatur.(Sprache) Zum Auswählen der Sprache, in der das OSD-Menü angezeigtwerden soll.(Verschiedenes) Mit “Nein” gelangen Sie zum Menü zum Verlassen. Mit“Ja” gelangen Sie zu den Untermenüs im Miscellaneous-Menü(Verschiedenes).(Verlassen) Zum Speichern und Verlassen.MISCELLANEOUS (VERSCHIEDENES)RETURNOSD H-POSITION(Horiz. Position des OSD) Zum horizontalen Verschieben desOSD-Menüs auf dem Bildschirm.OSD V-POSITION(Vertik. Position des OSD) Zum vertikalen Verschieben desOSD-Menüs auf dem Bildschirm.OSD DURATION(OSD-Dauer) Zum Einstellen, wie lange das OSD-Menü auf demBildschirm angezeigt werden soll.AUTO COLOR*(Zurück) Zum Zurückkehren zum Hauptmenü.SOURCE(Autom. Farbauswahl) Zum automatischen Einstellen der Farbe.Wahl der Eingangsvideoquelle: VGA oder DVINotice: * Source est une caractéristique en option.15
FehlersucheFalls Schwierigkeiten auftreten, stellen Sie wie nachstehend beschrieben sicher, dass der Monitorrichtig installiert wurde. Der Bildschirm bleibt leer.Nachprüfen:1. Energiesparmodus. Zum Deaktivieren dieses Modus drücken Sie auf eine beliebige Taste oderbewegen Sie die Maus.2. Anschlußpins des Steckers des Signalkabels. Falls Pins verbogen sind oder fehlen, wenden Siesich an die Verkaufsstelle. Die Zeichen erscheinen zu dunkel oder zu hellNachprüfen: Die Helligkeit im OSD-Menü einstellen. Wann muss der Monitor eingestellt werden?Nachprüfen: Die Auflösung oder die Frequenz abändern. Der Text erscheint unklar auf dem Bildschirm.Nachprüfen: Sicherstellen, dass die Auflösung oder Aktualisierungsrate mit demAnzeigemodus übereinstimmen.Unterstütztes TimingAnzeigemodusAuflösungVertikalfrequenz (Hz)Horizontalfrequenz .01280x80060.0049.61440x90060
19" TFT LCD Monitor 2. Power Cord 3. VGA Cable 4. Audio Cable * The audio function is optional. 5. User's Manual. 4 Hardware Installation Be carefully to your LCD monitor, it's very exquis ite but easy to broken. Turn off LCD's and PC's power before you set it up. Follow our installation step by step. Input AC input .