Transcription
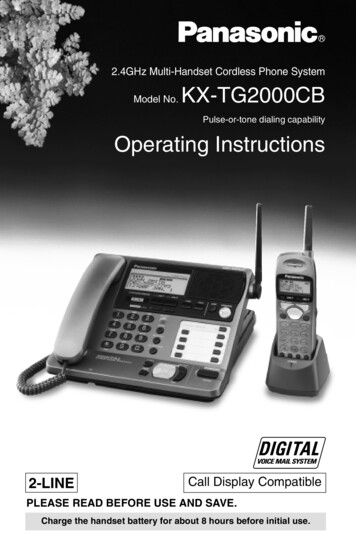
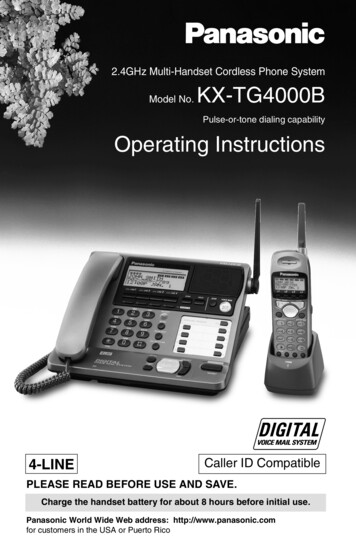
2.4GHz Multi-Handset Cordless Phone SystemModel No.KX-TG4000BPulse-or-tone dialing capabilityOperating Instructions4-LINECaller ID CompatiblePLEASE READ BEFORE USE AND SAVE.Charge the handset battery for about 8 hours before initial use.Panasonic World Wide Web address: http://www.panasonic.comfor customers in the USA or Puerto Rico
Before Initial UsePlease read IMPORTANT SAFETYINSTRUCTIONS on page 102 before use.Read and understand all instructions.Thank you for purchasing your new Panasonic cordlesstelephone.Caller ID and Call Waiting Service, where available, are telephonecompany services. After subscribing to Caller ID, this phone will displaya caller’s name and phone number. Call Waiting Caller ID, whichdisplays a second caller’s name and phone number while the user is onanother call on the same line, requires a subscription to both Caller IDand Call Waiting.Attach your purchase receipt here.For your future referenceSerial No.(found on the bottom of the unit)Name and address of dealer2Date of purchase
Accessories (included) For extra orders, call 1-800-332-5368.AC Adaptor for Base Unit (p. 13)AC Adaptor for Charger (p. 16)Order No. PQLV12ZOrder No. KX-TCA1-GoneoneBase Unit Handset (p. 13)Charger (p. 16)Order No. PQJXF0113ZOrder No. PQLV30001ZCHARGEoneone4-Wire Telephone Line Cord(p. 14, 15)Handset Cord (p. 13)twooneBackup Battery (p. 12)Belt Clip (p. 85)Order No. P-P507 (PQP50AA61)Order No. PQKE10101Z1oneoneOrder No. PQJA212NTo use more than one cordless handset, please purchase the optionalcordless handset KX-TGA400B. The charger is included. To order,contact your dealer or call 1-800-211-PANA(7262) to locate a dealer.3
For Best PerformanceHandset Battery ChargeA rechargeable Nickel-Metal Hydride(Ni-MH) battery powers the cordlesshandset. Charge the battery for about 8hours before initial use (p. 16). Make surethe handset faces forward as shown.The batteryis beneaththis cover. If you charge the discharged battery, it will becharged quickly. In that case the handsetmay feel warm. This is normal.Base Unit Location/NoiseCalls are transmitted between the base unit and the cordless handsetusing wireless radio waves. For maximum distance and noise-freeoperation, the recommended base unit location is:Away from electrical appliancessuch as a TV, personal computer oranother cordless phone.In a HIGH and CENTRAL locationwith no obstructions such as walls.Raisethe antenna.Note:4—If you use the cordless handset near a microwave oven which is being used,noise may be heard from the receiver. Move away from the microwave oven andcloser to the base unit.— If you use the cordless handset near another phone’s base unit, noise may beheard. Move away from the other cordless phone’s base unit and closer to yourbase unit.
ContentsPreparationBasic OperationChapter 4Chapter 5The Unit Capabilities (Operating More than One Handset) . 25Making Calls Base Unit Handset . 26With the Base Unit. 26With the Cordless Handset. 28Answering Calls Base Unit Handset . 30Using Other Lines During a Conversation Base Unit Handset . 31Intercom Base Unit Handset . 32Making Intercom Calls . 32Answering Intercom Calls. 33Transferring a Call Base Unit Handset . 34Conference Base Unit Handset . 35Using the Directory Base Unit Handset . 36Storing Names and Numbers in the Directory . 36Dialing from the Directory . 38Chapter 3Chapter 2Chapter 2Location of Controls. 8Displays . 11Installation. 12Installing the Backup Battery in the Base Unit. 12Connecting the Handset and AC Adaptor . 13Connecting the Telephone Line Cords . 14Connecting the AC Adaptor to the Charger. 16Handset Battery Charge . 16Programmable Settings . 18Programming Guidelines Base Unit Handset . 18Registration for Additional Cordless Handsets Base Unit & Handset . 19Date and Time Adjustment Base Unit . 20Selecting the Dialing Mode Base Unit . 21Selecting the Ringer Volume Base Unit Handset . 22Ring Group Setting Base Unit . 23Function Menu Table Base Unit Handset . 24Chapter 1Chapter 1Important:Base Unit : Must be carried out with the base unit.Handset : Must be carried out with the cordless handset.Base Unit & Handset : Must be carried out by both the base unit and cordlesshandset together.Base Unit Handset : Must be carried out separately by the base unit and thecordless handset.5
ContentsEditing an Item in the Directory . 39Erasing an Item in the Directory . 39Caller ID Service . 40Using the Caller List Base Unit Handset . 41Viewing the Caller List . 41Calling Back from the Caller List . 42Editing the Caller’s Phone Number . 43Storing Caller List Information in the Directory . 44Erasing Caller List Information . 45Chapter 3Advanced OperationSpecial Features . 46How to Use the PAUSE Button Base Unit Handset(For Analog PBX Line/Long Distance Service Users) . 46For Call Waiting Service Users Base Unit Handset . 46Temporary Tone Dialing Base Unit Handset (For Rotary or Pulse Service Users) . 46Setting the Key Lock Handset . 47FLASH Button Base Unit Handset . 47Other Programmable Settings. 48Setting the Auto Talk Feature Handset . 48Selecting the Ringer Pattern Base Unit Handset . 48Calling Line Selection Base Unit Handset . 49Setting Call Restriction Numbers Base Unit . 50Incoming Call Tone Base Unit Handset . 51Setting the PIN Base Unit . 52Registering Optional Cordless Handsets Using the PIN Base Unit & Handset . 53Canceling Cordless Handset Registration Base Unit & Handset . 54Selecting the Line Mode Base Unit . 55Erasing the Directory, Caller List and Redial List Base Unit Handset . 55Chapter 4 Voice Mail System/Automated Attendant System/Answering SystemVoice Mail System . 56Setting the Mailbox Password Base Unit Handset . 57Automated Attendant System . 58How Automated Attendant System Works . 58Setting the Automated Attendant System Base Unit . 59Setting the Handset Answer Mode Handset . 61Recording a Personal Greeting Message Handset . 626
Chapter 2Chapter 3Chapter 4Chapter 5Chapter 1Call Transfer Status. 63Call Operator Status . 64Answering System. 65Setting the Answering System Base Unit . 65Listening to Messages with the Base Unit . 68Transferring a Message. 70Erasing a Message. 70Listening to Messages with the Cordless Handset . 71Transferring a Message. 72Erasing a Message. 73Listening to Messages in the General Delivery Mailbox. 73Delivering Your Own Message Base Unit Handset . 74Other Voice Mail System Features. 75Call Monitoring Feature Base Unit . 75Recording Mode Base Unit . 75Transferring a Call to a Personal Mailbox Base Unit . 76Checking the Remaining Recording Time and Number of Messages Base Unit . 76Message Menu Mode Base Unit Handset . 77Automatic Message Delete Feature Base Unit . 77Erasing All Messages in Mailboxes Base Unit . 78Remote Operation from a Touch Tone Phone . 79How to Access the Voice Mail System . 79Pager Call Base Unit Handset . 82Storing a Pager Number . 82Storing the Pager Display Number . 83Setting the Unit to Call a Pager . 84Useful InformationChapter 5Using the Handset Belt Clip. 85Wall Mounting for the Charger . 85Using an Optional Headset Base Unit Handset . 86Clearing Settings Base Unit Handset . 89Handset Battery Replacement. 90Backup Battery Replacement . 90RESET Button . 91Adding Another Phone. 91Error Messages. 92Before Requesting Help . 95Important Safety Instructions.102FCC and Other Information.104Index .1067
Location of ControlsBase unitDisplay (p. 11)LINE Buttons andIndicators (p. 26, 28, 30, 31)(CONF) (Conference)Button (p. 35)(TONE) Button (p. 46)(HOLD) Button(p. 28, 31)Antenna(p. 4, TOP12GHI4DEF5PQRSOPERBATTERYREDIALWXYZINTERCOM/ TRANSFERVOICE MAALL1PAUSE/EDIT920CALL WAIT/FIASH534LINEMICR ONMNO6TUV8ANSWE3JKL7TONEVOICEMAILABC647ENTERIL SYSTEMCLEARBACKLOUSEARC D/H8FUNCTIONFWDDIGITALSP-PHONEEXITHEADSET(RESET) ButtonMIC (Microphone)(p. 26, 30, 60, 66)(p. 91)(CALL!WAIT/FLASH)Button (p. 46, 47)INTERCOM/TRANSFERButtons ((ALL), (1) to (8))(PAUSE/EDIT)(p. 32, 34)Button (p. 39, 43, 46)(REDIAL) Button (p. 27)BATTERY Indicator (p. 12)DIGITAL SP-PHONE (Speakerphone) /HEADSETButton and Indicator (p. 26, 30, 32, 87)8
Chapter 1(VOICE MAIL) Button (p. 68, 74)(STOP) Button (p. 69, 75)(ANSWER!ON) Buttonsand Indicators (p. 59, 65)MATEDATTEN(FUNCTION) ButtonDANTSTOP(p. 18, 36)MAILVOICEHOLDLINELINE2LINE1LINE3CONF4ANSWER ONALLSFER/ /FCALL4DIGITALOPERFUNC0ENTESETRKBACCLEAAILE MSTSYMICHeadset Jack(p. 86)(ENTER) Button (p. 18, 20, 36, 44)(CLEAR) Button (p. 37, 39, 45, 54, 70)Memory card:Remove the memory card and use it as aname index for the cordless handsets(p. 19, 53).(EXIT) Button(p. 18, 38, 41, 60, 66)Navigator Key( , , I, H)(p. 18, 27, 38, 41, 59, 65)CoverMemoryCard9
Location of ControlsCordless handsetAntennaDisplay (p. 11)(TALK) ButtonLINE Buttons(p. 28, 30, 31)(p. 28, 30, 33)L1Navigator Key( , , H, I)(p. 18, 29, 38, FUNC/EXIT1Button (p. 18, 38, 41, 47)(TONE) Button(p. 46)2DEF3GHI4JK L5MNOPQRS7TU V8WXYZOPER0TONE(REDIAL/PAUSE/EDIT)ENTER/ABC(p. 37, 39, 45, 54, 73)Headset Jack (p. 88)(ENTER)/(Voice Mail)Button (p. 18, 61, 71, 74)6(CALL!WAIT/FLASH)9Button (p. 46, 47)(CONF) (Conference)Button (p. 35)REDIAL/PAUSE/ CALL WAIT/CONF INTFLASHEDITERCOM/HOLDTRANSF /ERButton (p. 29, 39, 43, 46)(CLEAR) Button(INTERCOM/HOLD/TRANSFER)Button (p. 29, 33, 34)Charge Contacts (p. 17)ChargerCharge Contacts (p. 17)CHARGECHARGE Indicator(p. 16)10
DisplaysBAuto Attendant IconAHandset In-Use IconC12:00AMJAN.1Cordless handsetAThe voice mail icon flashes ifthere is at least one newmessage in your mailbox (p. 71).During playback, it will bedisplayed.PreparationAThe handset in-use icon indicates the status of registered cordlesshandsets. If a cordless handset is in the talk or intercom mode, orlistening to messages, the relevant number is displayed.BIf you turn the Automated Attendant System on, the relevant line icon isdisplayed (p. 59).CThe time and date are displayed on the first line in the standby mode.The display shows the dialed number, call status, programming optionsand directory items etc. If you subscribe to a Caller ID service, callerinformation will be displayed (p. 40).Chapter 1Base unitAVoice Mail Icon BLine Status IconCBattery Icon[1]DBThe line status icons function as follows.Off (invisible)OnFlashingFlashing quicklyThe line is free.The line is being used.A call is on hold. The Automated Attendant System orAnswering System is responding to a call (p. 58, 65).A call is being received.CThe battery icon indicates the battery strength (p. 17).DThe handset number ([1] to [8]) is displayed in the standby mode(p. 19, 53). The display shows the dialed number, call status,programming options and directory items etc. If you subscribe to a CallerID service, caller information will be displayed (p. 40).Backlit LCD displaysBoth the base unit and cordless handset have a backlit LCD display.The lighted cordless handset display will stay on for about 10 seconds afterpressing a button or lifting the handset off the charger.11
InstallationInstalling the Backup Battery in the Base UnitA rechargeable Ni-Cd battery works as emergency power during a powerfailure. The fully charged backup battery provides the base unit with aminimum of 20 minutes operation. The battery is charged in the base unitwhile the AC adaptor is connected (p. 13). It takes about 10 hours tocharge fully.1Open the battery cover.2Install the backup batteryin the battery compartment.Close the battery cover.BATTERY Indicator: The BATTERY indicator lights whilethe battery is being charged. (This isnormal.) During a power failure (or if the ACadaptor is disconnected), theBATTERY indicator shows thebattery strength:Full to Medium: The indicator lights.Low: The indicator flashes.No power: The indicator light is off.BATTERY Indicator The battery cannot be overcharged. If the backup battery has been discharged during a power failure, the unit will notwork. If required, you can connect a standard telephone on the same line. Seepage 91.12
HandsetRaise the antenna.Chapter 1Connecting the Handset and AC AdaptorPreparationHandsetCordFasten the AC adaptor cord toprevent it from being disconnected.Power Outlet(AC 120 V, 60 Hz)HookAC AdaptorPQLV12 Use only a Panasonic Handset for the KX-TG4000B. USE ONLY WITH Panasonic AC ADAPTOR PQLV12 (Order No. PQLV12Z). The AC adaptor must remain connected at all times. (It is normal for the adaptorto feel warm during use.) The BATTERY indicator lights while the AC adaptor is connected with the backupbattery installed (p. 12). (This is normal.)13
InstallationConnecting the Telephone Line CordsConnect the telephone line cords to the base unit.To connect 2 two-line telephone jacksTwo-Line TelephoneJacks (RJ14C)LINE3LINE4LINE1LINE2144-WireTelephoneLine CordLINE 3/4LINE 1/2
For this connection, please purchase two Panasonic T-adaptors KX-J24and two 2-wire telephone line cords (Order No. PQJA10075Z). To order,call the accessories telephone number on page 3.LINE4PreparationSingle-LineTelephone Jacks(RJ11C)Chapter 1To connect four single-line telephone jacks2-Wire TelephoneLine CordT-Adaptor(KX-J24)LINE34-Wire TelephoneLine CordLINE 3/4LINE2LINE 1/22-Wire TelephoneLine CordConnect the telephone line cords to theT-adaptor KX-J24.T-Adaptor (KX-J24)2-LINEPHONELINE 2LINE14-Wire Telephone 2-Wire Telephone LineLine CordCord15
InstallationConnecting the AC Adaptor to the ChargerPower Outlet(AC 120 V, 60 Hz)AC AdaptorKX-TCA1Bottom ofthe chargerFasten the AC adaptor cord toprevent it from being disconnected. USE ONLY WITH Panasonic AC ADAPTOR KX-TCA1 (Order No. KX-TCA1-G). The AC adaptor must remain connected at all times. (It is normal for the adaptorto feel warm during use.)Handset Battery ChargePlace the cordless handset on the charger andcharge for about 8 hours before initial use.Make sure the handset faces forward asshown. The CHARGE indicator lights. If you charge the discharged battery, it will becharged quickly. In that case the handset may feelwarm. This is normal.CHARGE Indicator16
Chapter 1Handset battery strengthYou can check the battery strength on the handset display.The battery strength is shown as in the chart below.Display promptBattery strengthFully chargedPreparationMediumLow(flashing)Needs to be recharged.RechargeRecharge the battery when:— “Recharge” is displayed on the handset,—“” flashes on the handset display, or— the handset beeps intermittently while it is in use.[1]Recharge If you DO NOT recharge the battery for more than15 minutes, the display will keep indicating“Recharge” and/or “” will continue to flash.Handset battery informationAfter your Panasonic battery is fully charged (p. 16):OperationApprox. battery lifeWhile in use (TALK)Up to about 8 hoursWhile not in use (Standby)Up to about 4 days Battery life may be shortened depending on usage conditions and ambienttemperature. Clean the charge contacts of the handset and the charger with a soft, drycloth once a month. Clean more often if the unit is subject to grease, dust orhigh humidity. Otherwise the battery may not charge properly. If the battery is fully charged, you do not have to place the handset on the chargeruntil “Recharge” is displayed and/or “” flashes. This will maximize thebattery life. The battery cannot be overcharged.17
Programmable SettingsProgramming Guidelines Base Unit HandsetThis unit has various programmable functions. Most of them are selectedfrom the function menu on the display (p. 24).(ENTER) (FUNCTION)Navigator Key( , , H, I)(ENTER)Navigator Key( , , H, I)(EXIT)(FUNCTION/EXIT)How to select a function item from the menu1. Press (FUNCTION) while in the standby mode. The main menu isdisplayed.Base Unit2. You can scroll through the menu byEx. “Ringer setting” is at the arrow.pressingor. Find the desireditem and point the arrow to the itemSave directoryDate and timeby pressingor.HR i n g e r s e t t i n g3. Press H to select the item.4. If the selected item has a sub-menu, it will be displayed. Select the submenu item by pressingor, and press H.5. You can then select the desired setting. (ENTER) is used to select or save a programming setting.6. When programming is complete, a confirmation tone sounds. Thedisplay will return to the main menu or the sub-menu (if the function itemis in the sub-menu). You can continue programming other items. Toreturn to the standby mode, press (EXIT).Useful information: You can go back to the previous display by pressing I except when enteringcharacters or numbers. To return to the main menu from the sub-menu, press I. You can exit the programming mode any time by pressing (EXIT). If you do not press any buttons for 60 seconds, the unit will return to the standbymode. If the unit detects a problem, an error message will be displayed (p. 92).18
1Base unit:Press (FUNCTION).2Pressoruntil the arrowpoints to “Registration”, andpress H.3Pressoruntil the arrowpoints to “HS registration”,and press H.Handsetregistering4Cordless handset:Press (FUNCTION).5Pressoruntil the arrowpoints to “Registration”, andpress H.6While “HS registration” isat the arrow, press H.Handsetregistering7PreparationThe included cordless handset is pre-registered at the factory andassigned the handset number 1. Do not try to register the handsetnumber 1 which has “[1]” on the display. Optional handsets must beregistered at the base unit. You can add up to 7 optional handsets to thehandset number 1. Only one handset can be registered at a time. Thehandset number is used as the extension number (p. 32, 58).The model number of the optional cordless handset is KX-TGA400B. Toorder, contact your dealer or call 1-800-211-PANA(7262) to locate adealer.Make sure that the base unit and cordless handset are in the standbymode. Registration must be completed within 1 minute.Chapter 1Registration for Additional Cordless Handsets Base Unit & HandsetBase unit/cordless handset:Wait until a beep sounds on thebase unit and handset and untilboth of the displays show theassigned handset number.Ex. Handset number is 2.Base UnitHandset2registeredCordless HandsetHandset2registered To return to the standby mode,press (EXIT). The handset number ([1] to [8]) willbe displayed on the handset.You can store a PIN (PersonalIdentification Number) to preventunauthorized persons from registeringand using a cordless handset (p. 52).Once the PIN is set, you must enterthe PIN at registration (p. 53). If youforget your PIN, please refer to“Clearing Settings” (p. 89).19
Programmable SettingsDate and Time Adjustment Base UnitMake sure that the base unit is in the standby mode.12Press (FUNCTION).Pressoruntil the arrowpoints to “Date and time”,and press H.Date:2000.01.01Time:12:00 AM PMENTER Save34 If you enter a wrong number, pressI or H to move the cursor to theincorrect number. Enter the correctnumber.5Press (ENTER). A beep sounds. The clock startsworking. To return to the standby mode,press (EXIT).9:30PMAPR.7 If 3 beeps sound, the setting is notcorrect. Start again from step 3. When entering the time in step 3, youcannot enter numbers greater than 12.Do not use military time. (To set13:00 hours, enter “0100” and select“PM” by pressing.)Voice Date/Time Stamp: After each message playback, a synthesized voice willannounce the date and time that each message was recorded (p. 68, 71, 79).If a power failure occurs, the adjusted date/time will be retained for at least 20minutes with the backup battery fully charged (p. 12). Readjust if the date/time isflashing on the display.For Caller ID service users (p. 40) The Caller ID information will re-set the clock after the first ring if the adjustedtime is incorrect. However, if the time has not previously been set, the CallerID information will not adjust the clock. The Caller ID information will automatically adjust the clock for daylight savingtime.20.Date:2000.04.07Time:09:30 PM AMENTER Save#Enter the year, and month andday using 4-digit numbers.Ex. To set Apr. 7, 2000, enter“2000”and “0407”. Enter the time (hour andminute) using a 4-digitnumber.Ex. To set 9:30, enter “0930”.Date:2000.04.07Time:09:30 AM PMENTER SaveSelect AM or PM by pressing
If your lines have touch tone service, set to “Tone”. If rotary or pulseservice is used, set to “Pulse”. Select the mode for each line. Your phonecomes from the factory set to “Tone”.Make sure that the base unit is in the standby mode.Press (FUNCTION).2Pressoruntil the arrowpoints to “Dial setting”, andpress H.3While “Set dial mode” is atthe arrow, press H.5Press (ENTER). A beep sounds. To return to the standby mode,press (EXIT).Preparation1Chapter 1Selecting the Dialing Mode Base Unit The current settings are displayed.Dial modeL1L2L3L4ToneToneToneTone4Select “Puls” (Pulse) or “Tone”by pressingorfor eachline. To move to another line,press H or I.21
Programmable SettingsSelecting the Ringer Volume Base Unit HandsetYou can set the base unit and cordless handset ringer volumes to HIGH,LOW or OFF. If set to OFF, the base unit/handset will not ring. Your phonecomes from the factory set to HIGH.Programming must be carried out separately for the base unit andcordless handset(s).Make sure that the base unit/cordless handset is in the standby mode.12Press (FUNCTION).3While “Ringer volume” is atthe arrow, press H.Pressoruntil the arrowpoints to “Ringer setting”,and press H. The current volume is displayed .4Pressto increase or pressto decrease the volume. Each time you pressor,the volume will change and ring. To turn the ringer OFF, pressand holduntil a beep sounds.HIGHRinger volumeLow High LOWLow HighOFFRingeroff To return to the standby mode,press (EXIT). If set to OFF, “Ringer off” willbe displayed in the standby mode.22To turn the ringer ON, pressstep 4.in The ringer will sound at the LOWlevel. You can also select the ringer volumewhile a call is being received. Pressorwhile the unit is ringing. To turn the ringer off for each line, usethe ring group feature (p. 23).
This feature allows you to specify which extensions (including the baseunit) can answer calls for each line. To stop certain extensions ringing forincoming calls on the line, remove the extensions from the ring group ofthe line. The extensions can make a call using the line.Make sure that the base unit is in the standby mode.Press (FUNCTION).2Pressoruntil the arrowpoints to “Ringer setting”,and press H.3Pressoruntil the arrowpoints to “Ring group”, andpress H.HR i n g g r o u p : L 1Ext.#:123456780IH4Select the desired line (LINE 1to 4) by pressing H or I.5Pressto select “Ext.#”.Ring group:L2HE x t . # : 1 2 3 4 5 6 7 8 0ENTER Save6Erase the extension numberswhich you do not want to ring bypressing the dialing buttons ((1)to (8)). Enter (0) for the baseunit. (Display the extensionnumbers which can answercalls.) If you make a mistake, press thenumber again to display it. To erase all the numbers, press(CLEAR).Ring group:L2HE x t . # : - 2 3 4 - 6 - 8 ENTER Save7Press (ENTER). A beep sounds. The extensions removed from thering group of the line will not ringand will not receive Caller IDinformation for incoming calls onthe line.Ex. Extension 1, 5, 7 and 0 (baseunit) will not ring for incomingcalls on LINE 2.Preparation1Chapter 1Ring Group Setting Base UnitRing group:L2Ext.#:-234-6-8 To program for another line, startagain from step 3. To return to the standby mode,press (EXIT). If the base unit is removed fromthe ring group of the line(s), thedisplay will show, for example, thefollowing in the standby mode.Ex. Base unit is removed from theLINE 2 ring group.9:30PM APR. 7BaseRcvOff L 2In this case the base unit will notring and will not receive Caller IDinformation for incoming calls onLINE 2. If the base unit ringervolume is OFF (p. 22), “Ringeroff” will display instead. Toreceive Caller ID information, addExt.# “0” into the ring group.23
Programmable SettingsFunction Menu Table Base Unit HandsetYou can use the following functions to customize your system according toyour needs. After pressing (FUNCTION), the main menu is displayed. Mostitems in the main menu have a sub-menu. The sub-menu is shown afterselecting the item in the main menu.See the corresponding pages for function details.Main menu items are written in bold and sub-menu items are under eachmain menu item on this page.Base unitSave directory (p. 36)Date and time (p. 20)Ringer settingRinger volume (p. 22)Ringer pattern (p. 48)Ring group (p. 23)Incoming call (p. 51)Dial settingSet dial mode (p. 21)Set flash time (p. 47)Call restrict. (p. 50)Line
Cordless handset AThe handset in-use icon indicates the status of registered cordless handsets. If a cordless handset is in the talk or intercom mode, or listening to messages, the relevant number is displayed. BIf you turn the Automated Attendant System on, the relevant line icon is displayed (p. 59).