Transcription
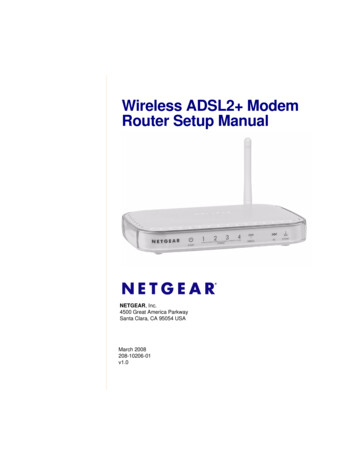
Wireless ADSL2 ModemRouter Setup ManualNETGEAR, Inc.4500 Great America ParkwaySanta Clara, CA 95054 USAMarch 2008208-10206-01v1.0
2008 by NETGEAR, Inc. All rights reserved.TrademarksNETGEAR and the NETGEAR logo are trademarks of NETGEAR, Inc. Microsoft, Windows, and Windows NT areregistered trademarks of Microsoft Corporation. Other brand and product names are registered trademarks or trademarksof their respective holders.Statement of ConditionsIn the interest of improving internal design, operational function, and/or reliability, NETGEAR reserves the right tomake changes to the products described in this document without notice.NETGEAR does not assume any liability that may occur due to the use or application of the product(s) or circuitlayout(s) described herein.ii
ContentsADSL2 Modem Wireless Router Setup ManualGetting to Know Your Wireless RouterUnpacking Your New Router . 1Hardware Features . 2Front Panel . 2Back Panel . 3Router Side Panel . 4Router Label . 5Positioning Your Wireless Router . 5Installing Your Wireless Modem Router . 6Installing Your Router Using theSmart WizardUsing the Smart Wizard . 9Accessing Your Router After Installation and Checking for New Firmware . 10Installing Your Router Manually(Advanced, Mac, and Linux Users)Understanding ADSL Microfilters . 12ADSL Microfilter . 12ADSL Microfilter with Built-In Splitter . 12Connecting Your Wireless Modem Router . 13Verifying Your Connection . 15Setting Up Your Router for Internet Access . 16Configuring Your Wireless NetworkSpecifying Wireless Settings . 19Setting Your SSID and Wireless Security Manually . 20Using Push 'N' Connect (WPS) to Configure Your Wireless Network . 21TroubleshootingBasic Functioning . 25iii
Power LED Not On . 26Power LED is Red . 26LAN or Internet Port LEDs Not On . 26Troubleshooting the Web Configuration Interface . 27Troubleshooting the ISP Connection . 28ADSL link . 28Obtaining an Internet IP Address . 29Troubleshooting PPPoE or PPPoA . 30Troubleshooting Internet Browsing . 30Troubleshooting a TCP/IP Network Using the Ping Utility . 31Testing the LAN Path to Your Router . 31Testing the Path from Your Computer to a Remote Device . 32Restoring the Default Configuration and Password . 32Resetting to Factory Default Settings . 32Technical Specifications and Default ConfigurationGeneral Specifications . 33Default Configuration . 34Related DocumentsRegistration and Certificationsiv
Getting to Know Your Wireless RouterCongratulations on your purchase of a NETGEAR high-speed wireless router, the 54 MbpsWireless ADSL2 Modem Router Model DG834G.Before you begin installing your router, check the package contents (see “Unpacking Your NewRouter” on page 1). Become familiar with the front and back panels of your router—especially theLEDs—and the important information on the router label (see “Hardware Features” on page 2).Then, read the section on “Positioning Your Wireless Router” on page 5 to ensure that you haveselected the best location to install your router.This chapter describes how to set up the router on your Local Area Network (LAN) and connect tothe Internet. It describes how to set up your wireless modem router for Internet access andconfigure basic wireless connectivity.Unpacking Your New RouterYour router should contain the following items: Wireless Modem RouterAC power adapter (varies by region)Category 5 (Cat 5) Ethernet cableTelephone cable with RJ-11 connectorMicrofilters (quantity and type vary by region)Resource CD, including:– The Smart Wizard Installation Assistant– This manualWarranty and Support Information cardsIf any of the parts are incorrect, missing, or damaged, contact your NETGEAR dealer. Keep thecarton, including the original packing materials, in case you need to return the product for repair.1
Hardware FeaturesBefore you install and connect your router, take a moment to become familiar with the front andback panels of the router—especially the LEDs on the front panel.Front PanelThe wireless modem router front panel shown below contains status LEDs.12345Figure 1You can use the LEDs to verify various conditions. The following table describes each LED.Table 1.LED DescriptionsLEDActivityDescription1. Power,factoryresetSolid greenSolid redOffFactory resetPower is supplied to the router.POST (Power-On Self-Test) failure or device malfunction.Power is not supplied to the router.During a reset, lights momentarily, blinks red three times, and thenturns green as the gateway resets to the factory defaults.Solid greenThe powered device is connected to the associated Ethernet LocalArea Network (LAN) port, which is operating at 100 Mbps.Data is being transmitted or received at 100 Mbps.The powered device is connected to the associated Ethernet LocalArea Network (LAN) port, which is operating at 10 Mbps.Data is being transmitted or received at 10 Mbps.No link is detected on this port, or modem powered off, or no cable orno powered device is connected to the associated port.Blinking green2. Ethernet Solid Amberports 1-4Blinking amberOffSolid green3. Wireless Blinking greenOff2The Wireless Access Point is enabled.Data is being transmitted or received over the wireless link.The Wireless Access Point is disabled.Getting to Know Your Wireless Router
Table 1.LED Descriptions (continued)Solid greenBlinking green4. DSLOffSolid green5. InternetBlinking greenRedOffThe ADSL port is synchronized with your ISP’s DSL AccessMultiplexer (DSLAM).The ADSL is synchronizing with the DSLAM. The LED blinks at a rateof 2 Hz when the wireless modem router is trying to detect a carriersignal, and blinks at 4 Hz when the carrier has been detected and thewireless modem router is trying to train.No link is detected on the ADSL port, or the wireless modem router ispowered off.The wireless modem router is connected to the Internet. The LED willremain solid green if the Internet session is dropped due to an idletime-out, but an ADSL connection is still present. If the session isdropped for any other reason, the LED will turn off.The wireless modem router is connected to the Internet and traffic ispassing through the device.The wireless modem router attempted to connect to the Internet butfailed.The wireless modem router is powered off, or in bridged mode, orthere is no ADSL connection.Back PanelThe back panel of the wireless modem router contains port connections described below.412 35Figure 2Getting to Know Your Wireless Router3
The ports on the router are color-coded to distinguish your Internet port from the other four portsthat connect to the wired computer(s) on your LAN. The rear panel contains the followingelements:1. Wireless antenna2. AC power adapter input3. Power switch4. Four local Ethernet RJ-45 LAN ports for connecting the router to the local computers5. RJ-11 ADSL port for connecting the router to an ADSL lineRouter Side PanelThe side panel of the router has a WPS button and a Wireless button.WirelessWPSFigure 3 WPS. You can use the Wi-Fi Protected Setup (WPS) feature with clients on the network thatare Wi-Fi certified and WPA capable. See “Using Push 'N' Connect (WPS) to Configure YourWireless Network” on page 21. Wireless. By default, the wireless modem router is set up to work as a wireless access point.Pressing this button turns the wireless access point feature off and on. You can also do thisthrough the Wireless Settings screen (see the link to your User Manual on the Resource CD.) Factory default settings. Pressing both buttons at the same time resets the unit the factorydefault settings.4Getting to Know Your Wireless Router
Router LabelThe label on the back of the wireless modem router shows the router’s MAC address, serialnumber, and factory default login information.Figure 4Positioning Your Wireless RouterThe wireless modem router lets you access your network from virtually anywhere within theoperating range of your wireless network. However, the operating distance or range of yourwireless connection can vary significantly depending on the physical placement of your router. Forexample, the thickness and number of walls the wireless signal must pass through may limit therange. For best results, place your router: Near the center of the area where your computers and other devices will operate, preferablywithin line of sight to your wireless devices. Accessible to an AC power outlet and near Ethernet cables for wired computers. In an elevated location such as a high shelf, keeping the number of walls and ceilings betweenthe wireless modem router and your other devices to a minimum. Away from electrical devices which are potential sources of interference, such as ceiling fans,home security systems, microwaves, or the base for a cordless phone.Getting to Know Your Wireless Router5
Away from any large metal surfaces, such as a solid metal door or aluminum studs. Largeexpanses of other materials such as glass, insulated walls, fish tanks, mirrors, brick, andconcrete can also affect your wireless signal.Failure to follow these guidelines can result in significant performance degradationor an inability to wirelessly connect to the Internet.Installing Your Wireless Modem RouterTo help you set up your router and get on the Internet quickly, the Resource CD contains a SmartWizard . The Smart Wizard walks you through the steps required to connect your router,microfilters, and PC(s); configure your wireless settings; and enable wireless security for yournetwork. When you have finished, you will be Internet ready!If you have a Macintosh or Linux system, you need to use the manual installationmethod (see “Installing Your Router Manually (Advanced, Mac, and Linux Users)”on page 11).You can set up your wireless modem router using one of two methods:. Smart Wizard Setup: The Smart Wizard setup is available on your Resource CD. See“Installing Your Router Using the Smart Wizard” on page 9 to use the Smart Wizard.–This is the easiest option. The wizard guides you through the setup process. It automatesmany of the steps and verifies that the steps have been successfully completed.–Smart Wizard requires a PC running Microsoft Windows.Before running the Smart Wizard on a corporate PC to set up your homerouter, check with your company’s network support staff. Corporatenetwork settings or Virtual Private Network (VPN) client software mayconflict with the default settings of a home router. If you are unsure aboutwhether there might be a conflict, use a different computer. 6Manual Setup: If you cannot or prefer not to use the Smart Wizard, see “Installing YourRouter Manually (Advanced, Mac, and Linux Users)” on page 11. For example, if you areconnecting to a Mac, are using a Linux operating system, or are technically knowledgeable,select this option. If you choose to use this option and install your router manually, for bestresults, install and set up your router in this order:Getting to Know Your Wireless Router
1. Install and connect your wireless router to your network (see “Connecting Your WirelessModem Router” on page 13).2. Set up your wireless router for Internet access (see “Setting Up Your Router for InternetAccess” on page 16).3. Configure your wireless network and select wireless security settings to protect yourwireless network (see “Configuring Your Wireless Network” on page 19).Getting to Know Your Wireless Router7
8Getting to Know Your Wireless Router
Installing Your Router Using theSmart WizardTo use the Smart Wizard, you must be using a PC with Windows Vista, or Windows 2000 orWindows XP with Service Pack 2. The Smart Wizard setup procedure should take about 15minutes to complete. Before using the Smart Wizard to set up your router, ensure that: You have an ADSL Internet service connection through an Internet Service Provider (ISP). You have the configuration information provided by your ISP.Using the Smart WizardThe NETGEAR Smart Wizard takes you through the procedure to connect your router, ADSLmicrofilters, and PC(s). It then helps you to configure your wireless settings and enable wirelesssecurity for your network. The Smart Wizard guides you through the setup process by automatingmany of the steps. At each step in the setup process, the Smart Wizard checks to ensure that thesteps you perform are successfully completed.To install your router using the Smart Wizard:1. Locate the ADSL settings information provided by your Internet Service Provider.2. Insert the Resource CD into your Windows PC. The CD will automatically start and detect thelanguage you are using on your PC. Select a different language option, if you prefer.If the CD does not automatically start, browse the CD and double-click.3. When the Welcome screen appears, click Setup to start the Smart Wizard. Follow theinstructions and prompts to complete the installation.The Smart Wizard guides you through installing your router, connecting your router to theInternet, configuring your wireless network settings, and selecting the optimum securityprotection for your network. If you choose not to select a security option during installation,9
you can log into the router later to select a security option (see “Accessing Your Router AfterInstallation and Checking for New Firmware” on page 10).To ensure optimum performance of your high-speed wireless router, thewireless adapter card for each computer in your network should support thesame technology as your router (see the online User Manual for moreinformation).You are now connected to the Internet!To set up your wireless network, see “Configuring Your Wireless Network” on page 19.Accessing Your Router After Installation andChecking for New FirmwareThe Smart Wizard only appears when you first install the router or when the router is in its factorydefault state (for example, if you have reset the router to its factory default settings). To change thesettings after installing and configuring your router using the Smart Wizard, you can click thedesktop shortcut—a preconfigured shortcutplaced on your desktop at installation—to openthe router main menu.1 Optionally, you can also open a browser window and log in to the router.For advanced features not covered in this manual, see the link to the online User Manual on therouter’s main menu.1. The shortcut icon is installed on your desktop only when using the Smart Wizard installation method.10Installing Your Router Using the Smart Wizard
Installing Your Router Manually(Advanced, Mac, and Linux Users)Before installing and connecting your router manually, review the list below and make sure thatyou have all of the necessary information. Internet ADSL service connection through an Internet Service Provider (ISP). The configuration information your ISP gave you. Depending on how your Internet accountwas set up, you may need the following information to set up your wireless modem router andaccess the Internet:– Host and Domain Name– Internet Login Name and Password (frequently an email address and password)– Domain Name Server (DNS) Addresses– Fixed or Static IP AddressYour ISP should have provided you with all the information needed to connect to the Internet.If you cannot locate this information, ask your ISP. ADSL Microfilters (see “Understanding ADSL Microfilters” on page 12.) Your computers set to DHCP enabled.If you have not already done so: Check the package contents of your router to ensure that it is complete (see “Unpacking YourNew Router” on page 1”). Select an optimum location for your wireless modem router after reviewing the guidelinespresented in “Positioning Your Wireless Router” on page 5.”11
Understanding ADSL MicrofiltersADSL technology uses the same wires as your telephone service. However, ADSL adds signals tothe telephone lines which create noise in the telephone service. You must use ADSL microfilters tofilter out these signals before they reach your telephone.If you purchased the wireless modem router in a country where a microfilter is notincluded, you must acquire one.ADSL MicrofilterFigure 5Each device such as a telephone, fax machine, answering machine, or caller ID display will requirean ADSL microfilter.Do not connect the wireless modem router to the ADSL line through a microfilterunless the microfilter is a combination microfilter/splitter specifically designed forthis purpose. Doing so will prevent block your connection to the Internet. If youhave any doubts about this, connect the wireless modem router directly to theADSL line.ADSL Microfilter with Built-In SplitterUse an ADSL microfilter with built-in splitter when there is a single wall outlet which mustprovide connectivity for both the wireless modem router and telephone equipment.Figure 612Installing Your Router Manually (Advanced, Mac, and Linux Users)
Connecting Your Wireless Modem RouterBefore you install your wireless modem router, make sure that the Internet Protocol (TCP/IP)Property settings on your computer are set to “automatically obtain an IP address” using DHCPand “Obtain DNS server address automatically.” You can check these settings by looking at theTCP/IP Properties of your Internal Network Connections, which are accessible through theControl Panel of your computer. If you are unsure about this, refer to the documentation for yourcomputer or see the link to TCP/IP Addressing in “Related Documents” on page 37.If you are replacing an existing router, disconnect it completely from your networkand set it aside before starting to install your new router.To connect the wireless modem router, the ADSL filter and the computer:1. Connect an ADSL filter as shown below.If you purchased the DG834G in a country where an ADSL filter is not included,you must acquire one.You must install an ADSL filter for every telephone that uses the same phone line as yourwireless modem routera. Select the filter and splitter that you need based on the type of phone line at your location.1321 One-Line Filter. Use with a phone or fax machine.2 Splitter. Use with a one-line filter to share an outletwith a phone and the modem router.3 Two-line filter with splitter. Use to share an outletwith a phone and the modem router.Figure 7Installing Your Router Manually (Advanced, Mac, and Linux Users)13
b. Connect the filter, and splitter (if used). For a two-line filter connection, insert the filter into the phone outlet and connect thephone to the phone line connector (A).Two-line filterconnectionAFigure 8 For a one-line filter with a separate splitter, insert the splitter into the phone outlet, connectthe one-line filter to the splitter, and then connect the phone to the filter2. Connect the wireless modem router to the ADSL filter. Using the included phone cable withRJ-11 jacks, connect the ADSL port (B) of the wireless modem router to the ADSL port (C) ofthe two-line filter.CBFigure 914Installing Your Router Manually (Advanced, Mac, and Linux Users)
Improperly connecting a filter to your wireless modem router will blockyour ADSL connection.3. Connect the Ethernet cable (D) from a wireless modem router LAN port to the Ethernetadapter in your computer.4. Connect the power adapter to the router and plug it in to a power outlet.DFigure 105. Connect any additional wired PCs to your router by inserting an Ethernet cable from a PC intoone of the three remaining LAN ports.Verifying Your ConnectionVerify that your router is connected correctly by checking the wireless modem router status lights. The power light is lit after turning on the router. The DSL Internet light is lit, indicating a DSL connection. The wireless light is lit after turning on the router. The Internet light is green, indicating you are connected to the ADSL network.Now, turn on your computer. If software usually logs you in to your Internet connection, do not runthat software. Cancel it if it starts automatically. Verify the following:Installing Your Router Manually (Advanced, Mac, and Linux Users)15
The local lights are lit for any connected computers.Setting Up Your Router for Internet AccessWhen configuring your wireless router manually, you must log in to your wireless modem routerto set it up initially and to make any changes to your wireless router’s settings later.The factory default state is reset when you use the Restore Factory Settings button.See “Restoring the Default Configuration and Password” on page 32 for moreinformation.To access the router:1. Type http://192.168.0.1 in the address field of your browser, and then click Enter.You can also enter either of these addresses to connect to your wireless router:http://www.routerlogin.net or http://www.routerlogin.com.A login screen similar to the one shown in the following figure displays:Figure 1116Installing Your Router Manually (Advanced, Mac, and Linux Users)
2. When prompted, enter admin for the router User Name and password for the routerPassword, both in lowercase letters. (For security reasons, the router has its own user nameand password.)The router user name and password are not the same as any user name orpassword you may use to log in to your Internet connection.The Main menu displays.3. From the menu options in the left navigation pane, click Setup Wizard. The Setup Wizardscreen displays.Figure 124. Select one of the following options: Select Yes to allow the Setup Wizard to detect your Internet connection. When prompted,click Next. The wizard will help you configure your wireless router to access the Internet.If you cannot connect to the wireless router, check the Internet Protocol(TCP/IP) properties in the Network Connections section of your ControlPanel. It should be set to obtain both IP and DNS server addressesautomatically. For assistance, see your computer documentation or see thelinks in “Related Documents” on page 37. Select No to set up the connection yourself. Click Next and the Basic Settings screendisplays. Enter the required information for your ISP connection in the appropriate fields.If you need assistance, follow the Basic Settings Help screens on the router interface orsee the online User’s Manual for this wireless modem router.5. Click Apply to save your settings and complete your connection.You should now be connected to the Internet!Installing Your Router Manually (Advanced, Mac, and Linux Users)17
If you do not connect successfully: Review your settings and make sure that you have selected the correct options and typedeverything correctly. Contact your ISP to verify that you have the correct configuration information. Read “Troubleshooting” on page 25.If problems persist, register your NETGEAR product and contact NETGEAR Technical Support.18Installing Your Router Manually (Advanced, Mac, and Linux Users)
Configuring Your Wireless NetworkAfter the router is installed and the Internet connection is working, configure its wireless networksettings. The wireless network settings of the router must match the wireless network settings ofany wireless devices that connect wirelessly to the router (such as wireless adapter cards andwireless computers).For a wireless connection, the router and each wireless computer must use the same SSID,also called the wireless network name, and the same wireless security. NETGEAR stronglyrecommends that you use wireless security.Indoors, computers can connect over wireless networks at a range of several hundredfeet. This can allow others outside of your immediate area to access your network.Specifying Wireless SettingsThe Wireless Settings screen lets you set your wireless network connections and the wirelesssecurity option for your network and router. To configure the wireless network, you can eithermanually specify your network name (SSID) and your wireless security settings (see “Setting YourSSID and Wireless Security Manually” on page 20) or, if the clients in your network are WPScapable, you can use Wi-Fi Protected Setup (WPS) to automatically set the SSID and implementWPA/WPA2 security on both the router and the client device (see “Using Push 'N' Connect (WPS)to Configure Your Wireless Network” on page 21).If you configure the router from a wireless computer and you change the router’sSSID, channel, or security settings, you will lose your wireless connection whenyou click Apply. You must then change your computer’s wireless settings to matchthe router’s new settings. To avoid this situation, you can use a computer that isconnected to the router with an Ethernet cable.For a complete overview of all the security configurations that can be implemented on this router,see the on-line User Manual. A link to the User Manual is on the Resrouce CD.19
Setting Your SSID and Wireless Security ManuallyTo specify the wireless settings, you must know the following: SSID. The default SSID for the router is NETGEAR. The wireless mode (802.11g/b, or 802.11n) that each wireless adapter supports. Wireless security option. NETGEAR strongly recommends that you use wireless security. Tosuccessfully implement wireless security, check each wireless adapter to determine whichwireless security option it supports.To set up basic wireless connectivity:1. Log in to the wireless modem router at its default LAN address of http://192.168.0.1 with itsdefault user name of admin and default password of password, or using whatever LANaddress and password you have set up.You can also enter either of these addresses to connect to your wireless router:http://www.routerlogin.net or http://www.routerlogin.com.2. On the main menu, select Wireless Settings to display the Wireless Settings screen.Note that the default SSID is NETGEAR.The SSID of any wireless adapters must match the SSID you configure in thewireless modem router. If they do not match, you will not get a wirelessconnection.3. Set the Region. Select the region where the router is located.4. Leave the wireless mode at the default setting of 54 Mbps.5. Click Apply to save your changes.To set up your computers for wireless connectivity:1. Program the wireless settings of each computer or wireless adapter to have the same SSID(wireless network name) as the router.2. Check that the wireless adapter on each computer can support the mode and security optionthat you selected. (If you have a question, see the online User Manual or review the settingsyou selected in “Specifying Wireless Settings” on page 19).20Configuring Your Wireless Network
3. Check that the security settings on each wireless device match the security settings of therouter. For example, if you selected a security option requiring a passphrase, then the samepassphrase must be used for each wireless computer.4. Check that each wireless computer has a wireless link and is able to obtain an IP address byDHCP from the router.For a Windows PC, go to the Control Panel and select Network Connections.Check the Wireless Connections Properties and ensure that TCP/IP Propertiesare set to Obtain an IP address automatically.To access the Internet from any computer connected to your wireless modem router, launch abrowser such as Microsoft Internet Explorer or Netscape Navigator. You should s
1. Install and connect your wireless router to your network (see "Connecting Your Wireless Modem Router" on page 13). 2. Set up your wireless router for Internet access (see "Setting Up Your Router for Internet Access" on page 16). 3. Configure your wireless network and select wireless security settings to protect your