Transcription
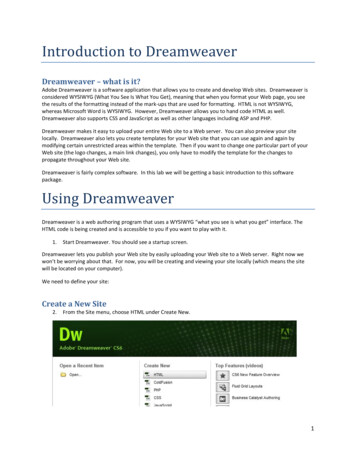
Dreamweaver Piece by Piece: Part 4 - Creating and ProcessingBasic FormsBy: Sheri GermanThe ability to interact with users is one of the great lures of the Internet for businesses and individuals.Most of you have filled out a form on the Internet, then hit the submit button to send your data off intocyberspace. How is it done? Most instructions give the old "setting up the script is beyond the scope ofthis tutorial" line, which has long been a frustration for many Web designers. I hope that this series helpsyou set up a feedback form that actually works. We will be using the free PHP script FormMail, which isoffered for download at p://www.boaddrink.com/projects/phpformmail/)Tip: Many developers have used Matt Wright's infamous cgi Formmail script. Unfortunately, there are security holes inthis script that allow spammers to use your webserver as an open relay. If you have PHP available on your server, thisPHP version of Matt's script will process your form safely and reliably.This two part series will take you through the process of creating your form, validating its fields, settingup hidden fields, adding the submit button, and configuring a PHP form processor to return the visitor'sdata to your email address. In this article, part one of the series, we will configure Dreamweaver formpreferences, set up our form, and cover most of the different types of form objects developers will usewhen creating interfaces for interacting with users.Download the PHP ScriptVisit the boaddrink.com site listed above, and download the phpformmail.php script. After you unzip thefolder, you'll see a number of documents within, including a "read me" and the script itself. Put theformmail.php script in your site's root folder. I usually change the name of the script document tosomething meaningful for my purposes. For instance, for a ballet studio registration form, I named itballet reg.php.Setting Up the Form and Form ObjectsNow we'll set up our form on the page. Have your form category selected in your Insert panel, andchoose the icon to the far left, the form icon. Alternatively, you can use the Dreamweaver Insert menu:Insert Form Form. Enter your settings as follows:Select POST as the method.
Browse for your PHP script (by clicking the blue folder and navigating for your site folder) as the Action.Give your form a name.Here is what your Properties inspector and page should look like:Image 1: Your page should now show a dashed red box, and your Properties inspector should looksimilar to mine.Tip: If you would like to know more about the differences between the POST and GET methods, read Adrian Senior'sarticle Form Processing: Post and Get--what are they? (http://www.communitymx.com/abstract.cfm?cid 45632)Configuring Accessibility PreferencesTo keep us honest, we're going to set up form accessibility preferences. Go toDreamweaver Preferences. Choose the "Accessibility" category on the left. Under "Show attributeswhen inserting" make sure you put a check next to "Form Objects." This will bring up an accessibilitydialog box every time you insert a form object. We will also configure the code rewriting category. Wewant to remove the check from "Rename form items when pasting" so Dreamweaver doesn't rewrite formelements if you move them around in Design View.Tip: To learn all about accessibility and forms, you'll want to read Tricia Littlefield's article and watch its includedvideo: Accessible Forms with Dreamweaver d D1E8F)Adding Our First Form Objects: Text FieldsIt is time to add our first form object. We're going to collect the names of our visitors, so let's use the"text field" form object to do that. Choose the second icon from the left in your Insert panel, or, from theInsert menu, choose Insert Form Text field. Our accessibility dialog box pops up, and we'll need to fillthat out now:
Image 2: Setting up accessibility attributes for our textfield objectLet's briefly discuss the meaning of each of our textfield attributes:Label: This is the label that appears next to the text field. Since we're requesting our visitor's name, we want thetext field to be labeled "name."Style: We can choose an implicit or explicit relationship (or no label at all, but you wouldn't want to do that,right?), and Tricia's article, referenced above, discusses the advantages of each. Since we're focusing on settingup our form objects for use with a form processor, let's keep it simple for now and just use the implicit relation:"Wrap with label tag."Position: We want the "name" label to appear before our textfield. Dreamweaver is pretty good at choosing anappropriate default for each form object.Access key and Tab index are also discussed in Tricia's article and video. These provide ways to move throughthe form fields without a mouse, and also provide another way to help the disabled navigate the relationshipsbetween labels and fields.Now that the text field is on our page, let's fill out the Properties inspector. I gave the text field the name"name" because the PHP script will then return the data to me as “name Person's Name.” If you havemany text field objects, you do not want to get an email with data entered as the default textfield1 ,textfield2 , etc. You may have trouble knowing what the data means!I can also add an initial value to give directions in the field itself to make the form more accessible topeople with disabilities. I made character width 35 so that there is room for longer names.Image 3: Setting up accessibility attributes for our textfield objectNow hit return, and add another text field under the name field. After filling in your accessibility dialogbox (label name: "Email"), name this text field email also, and enter an initial value of "Enter your emailaddress here.” I again set the character width to 35 to accommodate longer addresses.
Tip: Technically, we really should group our contact info (name and email address) into a fieldset. This is anotheraccessibility aid that shows a relationship between form objects, and you can read all about it at both Tricia's muchreferenced article, as well as Stephanie Sullivan's Styling Forms: Fieldsets and d 6B286) article.Tip: You may be dismayed that your form has a rather rudimentary appearance. You'll want to fix that after all of thebasic functionality of the form is in place. You can learn how to do that by reading Stephanie Sullivan's Simple FormStyling with CSS. (http://www.communitymx.com/abstract.cfm?cid 8CFDF)Using the Textarea Form ObjectSo far we have created single line text fields. Now we would like to give our visitors more space to entercomments. For that, we'll give the job to the robust textarea form object. Hit return so you can add atextarea object under the email field. You'll want to use the fourth icon from the left in the insert panel,or from the Insert menu choose Insert Form Textarea.You know the routine: Fill out your accessibility dialog box. Let's give the textarea a label of"Comments" and use the implicit label relationship for now. Once your textarea is actually on the page,you'll fill out your Properties inspector to match mine:Image 4: Setting up attributes for our textarea objectLet's review the meaning of the attributes we've added to the textarea object:Textfield name: commentsChar width and Num Lines set the row and column size for our multi-line boxInit val: allows us to add some directions to help the disabledWrap: Virtual inserts linebreaks within the textarea box in the browser, but allows the text to arrive in your emailin a continuous flow. Usually it is best to use the virtual setting.Tip: Use the password radio button when you want bullets (on the Mac) or asterisks (on the PC) to appear on screenrather than text.Now it's time to get more adventurous and use some of the fun stuff: checkbox and radio button groupform objects.Radio Button GroupsHit your return key again and type "Which pet do you prefer?" under your "Comments" textarea object.From your Insert panel choose the seventh icon from the left, or from the Insert menu, chooseInsert Form Radio Group. In addition to grouping choices, the radio button group also presents aneither/or, but not both, choice. The key to this functionality is that both of our radio buttons will have thesame name. So far, each of our form objects have had unique names--email, name, and comments. Bothour "cat" and "dog" radio buttons will be called "pets" in the radio group object, however.
Image 5: Setting up our radio group objectHere is what we have done to set up our radio group:Name: Both the cat and dog radio button will have the name "pets."Radio buttons: The label is the label your user will see in the browser, and the value is what you will receivewhen the data is returned to you. These two attributes are often one and the same. Use the plus button in thedialog to add as many radio buttons as you need. For instance, perhaps you want to include birds and snakes inthe list of favorite pets.Lay out using: We'll choose "Line breaks" because we'll do our styling and layout with CSS, of course.All that's left to do with our radio buttons is configure their checked status in the Properties inspector.Select the cat or dog radio button and add its Initial state:Image 6: Configuring our cat radio button to be checked by defaultAnyone who has read my blog entries probably realizes that I am a cat lover. Not that I would ever leadthe witnesses or anything, but I would like to make the cat radio button selected by default.The Checkbox Form ObjectWe're almost to the finish line of the first part of our series. Let's add a checkbox object. The checkboxicon is the fifth one from the left. Alternatively, you can choose Insert Form Checkbox. Note that theAccessibility dialog box will place the label after the checkbox as the default. Let's enter "Newsletter" asour label. Once the checkbox is on the page, we'll need to configure it in the Properties inspector:
Image 7: Configuring our checkbox object to be checked by defaultName your checkbox "newsletter" and configure the checkbox to have an initial state of checked. (Nowwhere have you seen that kind of sneakiness before? Perhaps everywhere?) You'll also want to decidewhat the check in the checkbox means. If the newsletter box is checked, we will decide it means yes, thevisitor wants to receive our newsletter.Let's take a look at how our form appears in the browser so far:Image 8: Go ahead and try typing into your fields or clicking on your checkbox and radio buttons.ConclusionOur form is really starting to take shape. In the next part of our series, we'll look at the menu/list formobject, add our submit button, use the validate form behavior, and configure our PHP form processor. Inthe interim, I hope you'll use one of the CSS form styling articles here at CMX to make your form look aspretty as it feels.KeywordsPHP scripts, forms, form objects, processing forms, Dreamweaver forms, feedback forms, radio buttongroups, checkbox form objects, menu and list form objects, accessibility
1 of 10Dreamweaver Piece by Piece Part 5: Creating and ProcessingBasic Forms Part 2By: Sheri GermanIn the first part of our basic forms series, we learned how to configure Dreamweaver form preferences,set up the form with the proper action and method, and use many of the different kinds of form objectssuch as text field, textarea, radio groups, and checkboxes. In this second article in the series, we'll look atthe menu/list form object, add our submit button, use the validate form behavior, and configure our PHPform processor. I have also included an ASP and a ColdFusion form processor, kindly provided by ourown Danilo Celic, for those of you who do not have access to PHP on your servers.I hope while you waited for part two, you did some beautiful CSS styling on your form and are all readyto complete it and try it out.The List/Menu Form ObjectThe MenuOpen the form that you started in part one of this series. Hit return (after the checkbox) and use eitherInsert Form List/Menu, or click on the eighth icon in the forms category of your Insert panel. Whenthe Accessibility dialog appears, type "Favorite Animal" for the label name.In the Properties inspector, give your form object a name of "animals" and choose the Menu type. (We'lltry out the List type later.) Click on the List Values button, click the plus button, and fill in animalnames for the Label and Value.Tip: The Label is the text the user sees in the menu itself, and the Value is what gets returned to you when you receivethe email with the data. These can be the same, but sometimes you might want them to be different. For instance, if youwere selling books, you might have "Gone with the Wind" as the Label, and GWW100 as an inventory number for theValue.
2 of 10Image 1: The List Values dialog box populated with a list of labels for the user to see, and a list ofvalues that will be returned to you when the form reaches your email box.The last option you'll want to fill out in the Properties inspector is Initially selected. This is the menuitem that will appear by default until the user selects something else. You can also type some directionsto appear as the selected item. For instance, you can type "Choose an animal" as the Label (you don'tneed a value), and then use the up and down arrows to move it to the top of the list. Then make sure thatthese directions are selected for Initially Selected.Image 2: The Properties inspector filled out for our menu of favorite zoo animals.Tip: Because you named this menu form object "animals," when someone chooses "Lions" as the favorite zoo animal,you will get something like the following in your email: Animals: Lions.The ListNow let's try out the List type, which is similar to the Menu, but allows for multiple selections, andallows for multiple options to be visible. To get a List form object, click the same icon or chooseInsert Form List/Menu. When the Accessibility dialog box pops up, type "Favorite Ocean Creatures"for the label.In the Properties inspector, give the form object the name "marine." Choose the List radio button, andenter a number for height--if you enter "five," for instance, you'll make all five items of your list visiblein the browser window. If you check the box for Selections, your user will be able to choose more thanone favorite by holding down the control key while selecting on a PC, or the command key whileselecting on the Mac.Click the List Values button and fill out the dialog box so that it matches the image below. And don'tforget to choose an Initially selected item or to type in some directions.
3 of 10Image 3: The List Values dialog box filled out with a list of favorite marine creatures.Image 4: The Properties inspector filled out for our list form object.The Submit ButtonNow that we have completed our basic form, we need to add the submit button that will take the data theuser fills in and send it to the PHP script you have designated in the Action of your form. You canchoose the third icon from the right in the form category of your Insert panel, or you can chooseInsert Form Button.You'll see that you can use the button to perform three different functions:Submit: By choosing the "Submit" radio button, your form will submit the user's data to the PHP script, whichwill then send the data to your email address.Reset: By choosing the "Reset" radio button, your form will clear all data that the users may have typed, and theycan start over.None: This will strip the button of its effect on the form data, and instead allow you to add interactive behaviorssuch as starting a Flash movie.We're going to add both a submit and a reset button to our form.Tip: When you select the "Button" form object, you can cancel out of the Accessibility dialog box: the button itselfincludes a label.You can leave the name "Submit" in place, or give the form object a different name, if you like. No onewill see it except you, in any case. You can also change the Label of the button. It doesn't have to say"submit." Mine says "Send Now" instead. Make sure the Action radio button is set to "Submit form."Image 5: The Properties inspector filled out for submit button.
4 of 10Now let's turn our attention to the reset button. Insert another button next to your submit button. All youneed to do here is change the radio button Action to "Reset form" and the button name will automaticallychange to "Reset." You can leave that name or change it to something else if you like. You can alsochange the Label from "reset" to anything else you prefer. Mine says "Start Over."Image 6: The Properties inspector filled out for our reset button.Custom Submit ButtonsSome people like to use a custom image instead of the generic submit form object. You can do that bychoosing Insert Form Image Field, or by clicking on the icon five from the right in your formcategory of the Insert panel.Click the blue folder next to the Src field and browse for your image. Don't forget to enter an alt attributefor your image.Image 7: The Properties inspector filled out for our custom submit button, the Image Field.We've now completed our form, and it's time to help out our form processor by adding some hiddenfields.The Hidden FieldYou're probably asking, "What is a hidden field?" It is really just as the name suggests: a hidden field thatthe user does not see, but that passes information to the script to aid in its processing. There is only onerequired hidden field for our PHP script, and that is the recipient field. We need to tell the script whichemail address to send the data to. Let's do that now. Put your cursor anywhere within your form. You canchoose Insert Form Hidden Field, or you can click the third icon on the form category of the Insertpanel.RecipientWe only have two fields to fill out in the Properties inspector to complete our hidden recipient field. Thestandard name for this hidden field is "recipient" and the value is your email address. Now the script willknow where to send the data!
5 of 10Image 8: The Properties inspector filled out for our recipient hidden field.SubjectYou may also want to add a subject hidden field. This way the email will have a subject when it entersyour email box, and you won't have a mysterious blank that may get sent to your junk mail box. Insertanother hidden field form object anywhere within your form. Again, this is as easy as adding the standardname "subject" to the HiddenField field and whatever subject name you want to enter into the Valuefield.Image 9: The Properties inspector filled out for our subject hidden field.RedirectAnother hidden field many people like to add is for a custom "thank you" page that the users getredirected to after they fill out and submit a form. You can do that with the following steps:Insert a hidden field.Add "redirect" into the HiddenField field.Create an HTML page with your thank you message.Put the link to that page in the Value field. The syntax calls for you to use the full URL starting with http://www.Image 10: The Properties inspector filled out for our redirect hidden field.Form ValidationWe want to make sure our users enter in a valid email address so that we can contact them if necessary.We can do that with a built-in Dreamweaver behavior. First we need to select the form. Put your cursorsomewhere within your form. You should see your form name in the tag selector at the bottom of yourdocument window. Click on it, and this will select your entire form on the page.
6 of 10Image 11: You can select HTML elements at the bottom of your Dreamweaver document window.Now make sure your Behaviors panel is open. If it is not, choose Window Behaviors. Now in yourBehaviors panel, choose the plus sign so that a drop down menu appears. From this menu, chooseValidate Form. Select "text email in form feedback" (or whatever you named your form) from theNamed fields option. Make sure the Value box is checked next to Required. Select the radio button forEmail address. That's it! Now a message will pop up if the user forgets to enter a valid email address.Image 12: The Form Validation dialog box: configuring the behavior so that the email address field isrequiredTip: The documentation that comes with our PHP form script includes directions for some basic form validation. If youprefer a server-side solution as opposed to our client side JavaScript validation, read on and I will tell you later how touse that.All Dressed Up and Nowhere to GoYou've done it: You've created a basic form with all the different kinds of form objects, and you've evenset up simple form validation. If you don't have a processing script to send the data from the browser toyou, however, it's dressed up with no place to go. Let's add that functionality to our submit button now.
7 of 10Image 13: The final form, ready for processing. The three yellow icons next to the name field are hiddenfield markers.Processing the FormNow we need to configure our PHP script so that it works properly when the submit button sends the datato it.Don't have PHP on your server? Our own versatile and knowledgeable Danilo Celic has written scripts for ASP andColdFusion server models. You'll find thankyou.asp and thankyou.cfm in the download files for this tutorial. Modifythe variables for subject, from, and email within the script itself. The advantage of having the email address in thescript is that spammers can't harvest it. Once you have modified your script, be sure to enter its file name into theAction for your form. After the visitor fills in the data and hits the submit button, the processor will send the data toyour email address and redirect the user to your thank you page. You'll notice that the ASP or ColdFusion code isactually in their respective thank you pages, placed at the top before any HTML. You can modify the body of the pageany way you like, but be sure to leave that code at the top!Tip: You can add validation from the PHP script itself by adding another hidden field with the following values:name "required" value "email,name" (You're adding whichever fields you want to validate to the value attribute, andseparating multiple fields with a comma.)Fortunately, it is very easy to configure the script. There is really only one line that you need to modify.Open your script in a plain text editor such as BBEdit, or even open it in Dreamweaver, but switch tocode view. Turn on line numbers and look for approximately line 40. You should see the following code:
8 of 10 r efe rer s ar ray ('w ww. exa mpl e.c om' , ' exa mple.com');You want to change the first value to the domain of the site where your form is hosted. (As you can seein the image below, we're pretending my form is located on Community MX.) The second value is thedomain where your email address is located. I want the form data to come to my email address atswanilda.com. You can add more email addresses by separating them with commas and enclosing themin single quotes.Image 14: Configuring the PHP scriptTip: As noted above, when the email address is put into a hidden field, it is not hidden from spam harvesting programs.There is a modification you can make to the PHP script to put the recipient into the script itself. The details are on theboaddrink.com forums (http://www.boaddrink.com/forum/index.php) in the General Discussion category. There is also amodified formmail.php script which hard codes the email address within the script. You can find it athttp://members.rogers.com/mail.4.donpro/ (http://members.rogers.com/mail.4.donpro/)Asking for PermissionWhile I have not had to change permissions on this particular script, and the default read-write-executesettings were enough to allow the script to work, sometimes you might need to set different permissionsfor your server and for other scripts. Also, you may not be able to use PHP on your server, and may needto use an ASP script or a CGI script, for instance.Tip: Many hosts provide a CGI script for you to use. Read your host's documentation and see if you don't already havea form mail script of some kind in a cgi-bin in your directory.If you find you need to set permissions on a script, you might want to try a free Dreamweaver extensioncalled Set Permissions. Head on over to the Macromedia Exchange and do a search for extensions in theDreamweaver Exchange. Enter "set permissions" in the search field. If you're using Dreamweaver MX2004, you can select the first result in the list. There is a permissions extension for older versions ofDreamweaver as well.Once you install the extension and re-launch Dreamweaver, connect to your remote host. Make sure you
9 of 10switch to the Remote view in your files panel so you can select your file on the server.Image 15: Switching to remote view in the popup menu of the Files PanelRight-click (or control-click on a Mac) the file you want to change, and you'll see a contextual menuappear. Choose "Set Permissions" from the list. You'll see a dialog box that allows you to set permissionson the file.Image 16: Setting permissions on your file on the server (or remote host)Access PermissionsWhat does it all mean? Read, write, execute. Sounds like a lot of techno babble, doesn't it? Let's see ifwe can make sense of it:Read: User can read fileWrite: User is able to write to or revise a fileExecute: User is able to run the scriptThe owner (that's you!) should be able to read, write, and execute the script, and the visitor should beable to only read and execute the script. A script can be set to 755, which allows everyone to read, theowner to write, and everyone to run it.
10 of 10Image 17: Setting CHMOD 755 on a scriptConclusionAll that's left once you've uploaded your files is to open a browser and head on over to the URL wherethey're located. Fill out the form, hit the submit button, and wait for the thank you page to appear and thedata to arrive in the mail. Think of the great feedback you can get from your visitors!Approximate download size: 268kKeywordsPHP scripts, ASP form processing, ColdFusion form processing, forms, form objects, processing forms,Dreamweaver forms, feedback forms, radio button groups, checkbox form objects, menu and list formobjects, submit buttons, form accessibility, form validation, setting permissions
1 of 4PHP Formmail Spam PreventionBy: Sheri GermanIt used to be that there were clear sides in the junk email battle: the spammers and the spammed. I alwaysconsidered myself a member of the latter group, and then one day I became amember—inadvertently—of the former. I had become a victim of the email injection attack via a PHPformmail script. In this update to the Dreamweaver Creating and Processing Form series, we'll take anew look at the PHP formmail script. You may first want to review the original articles in the series:Dreamweaver Piece by Piece: Part 4 - Creating and Processing Basic fm?cid F318C)Dreamweaver Piece by Piece Part 5: Creating and Processing Basic Forms Part id 796A8)In those articles we went through the process of setting up a basic form that uses many of the commonform controls. We then used a PHP script as the action of the form that, upon submit, took all the datathat the user entered and returned it to a specific email address.Image 1: A form set up with the formmail PHP script (with custom name) set up as its processorAt the time Part 2 of the series was published, the PHP formmail script was at version 1.06.0. It turns outthat under certain conditions there were some vulnerabilities in the script that allowed spammers tohijack contact forms to relay spam.If you haven't updated since then—and many of us set up our forms and forget about them untilsomething like this wakes us up fast—go to les/index.php) now to get version 1.07.2. Here is what they say aboutthis version:Let's take a look at what that means.
2 of 4The Email Injection AttackAs mentioned earlier, many of us set up online feedback or contact forms and then forget about them. Ishould know better about keeping scripts up-to-date, but that is exactly what I neglected to do on an oldersite. One day I got a message from my Web host to warn me that it had disabled the feedback form on thesite because it had been hijacked by spammers in an email injection attack. I have been with my host along time, and its administrators kindly substituted the updated script for me and instructed me to updatethe form.Spammers look for vulnerable contact forms that use the PHP m ai l () function, and attempt to insertextra data that lets them email large numbers of people with their often tawdry offers.An email includes instructions for delivery. These directions come in the form of required "headers" (aswell as some optional ones), that are inserted into the message. If the linebreak (”\r” and “\n”) is usedbetween headers and/or the body of the message, it can give a spammer the opportunity to injectadditional headers such as a bcc that adds hundreds of email addresses.Or, if the script accepts a name and email address from your input fields, and formats those into theFrom: field of your email so that you can see where it comes from and reply to the sender, then it too canbe used to insert extra email addresses.The other vulnerability is that MIME is multi-part; that means that messages can be nested inside othermessages. The top level header declares a boundary, which is used to process subsequent header/bodypairs. By injecting content into this top level header, the spammer can control the entire message.The bottom line is that if the spammer successfully injects additional headers in your form, he can sendhis spam to thousands
For instance, for a ballet studio registration form, I named it ballet_reg.php. Setting Up the Form and Form Objects Now we'll set up our form on the page. Have your form category selected in your Insert panel, and choose the icon to the far left, the form icon. Alternatively, you can use the Dreamweaver Insert menu: Insert Form Form. Enter .
