Transcription
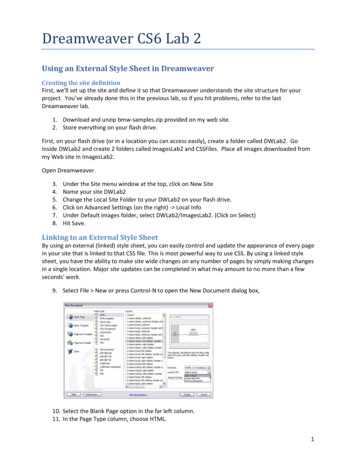
Dreamweaver CS6 Lab 2Using an External Style Sheet in DreamweaverCreating the site definitionFirst, we'll set up the site and define it so that Dreamweaver understands the site structure for yourproject. You’ve already done this in the previous lab, so if you hit problems, refer to the lastDreamweaver lab.1. Download and unzip bmw-samples.zip provided on my web site.2. Store everything on your flash drive.First, on your flash drive (or in a location you can access easily), create a folder called DWLab2. Goinside DWLab2 and create 2 folders called ImagesLab2 and CSSFiles. Place all images downloaded frommy Web site in ImagesLab2.Open Dreamweaver.3.4.5.6.7.8.Under the Site menu window at the top, click on New SiteName your site DWLab2Change the Local Site Folder to your DWLab2 on your flash drive.Click on Advanced Settings (on the right) - Local InfoUnder Default images folder, select DWLab2/ImagesLab2. (Click on Select)Hit Save.Linking to an External Style SheetBy using an external (linked) style sheet, you can easily control and update the appearance of every pagein your site that is linked to that CSS file. This is most powerful way to use CSS. By using a linked stylesheet, you have the ability to make site wide changes on any number of pages by simply making changesin a single location. Major site updates can be completed in what may amount to no more than a fewseconds' work.9. Select File New or press Control-N to open the New Document dialog box,10. Select the Blank Page option in the far left column.11. In the Page Type column, choose HTML.1
12. When HTML is selected as the page type, the Layout column to the right updates with anextensive list of layout options.13. Select the 2 column liquid, left sidebar, header and footer option.Notice that a visual display of the page is shown on the top right side, the looped lines indicate thelayout’s flexibility. (Some of the other options display straight lines and padlocks to indicate that theyare fixed width layouts).You can select a DOCTYPE (you’ve seen this!) version from the DocType drop-down menu. For now,keep the default setting of XHTML 1.0 transitional (we used html5 in class).The Layout CSS drop-down menu allows you to select how the layout you’ve selected will be added toyour new page. Selecting the option Add to Head will embed the CSS styles directly into the new HTMLdocument. The option Create New File lets you create a new external style sheet for this new HTMLpage. If you are working with an existing HTML page and want to add this new CSS layout code to it,choosing Link to Existing File lets you do this. It’s important to note that you also have the option to clickthe link icon next to the Attach CSS file option. This feature allows you to link this new CSS layout toanother pre-existing style sheet.14. Select the Create New File option and then click Create.15. The Save Style Sheet File As dialog box appears. Navigate to your CssFiles folder and Save theStyle Sheet file there (click on Save). The CSS file has been pre-named, and you should keep thisdefault name as you save the file.Next, save your HTML page in the root of your site's local root folder.16.17.18.19.Under the File dropdown menu, choose Save as.Navigate to your DWLab2 folderName the file index.html.Hit Save.Now that you've saved both your CSS and HTML files, it's time to take a look at the code in the HTMLpage.2
Select the code view button and review the CSS content created by Dreamweaver CS6.It should look like the code example below: link href "CssFiles/ twoColLiqLtHdr.css" rel "stylesheet" type "text/css" / !--[if lte IE 7] style .content { margin-right: -1px; } /* this 1px negative margin can be placed on any of the columns in thislayout with the same corrective effect. */ul.nav a { zoom: 1; } /* the zoom property gives IE the has Layout trigger it needs to correct extrawhitespace between the links */ /style ![endif]-- /head This layout will work well in the latest browsers, and the CSS also contains filters that allow the design torender successfully in older browsers, especially IE, as well. This is a huge time saver. Older browsersoften don’t display things the same way as the latest browsers, and it’s nice not to have to worry aboutmaking sure your web page looks okay on browsers that haven’t been updated.By the way, now you know how to see the code generated by Dreamweaver. Since you are now allexperts at html, you can also edit the code created by Dreamweaver here. Don’t knock it – the ability tohand-edit your code comes in very handy when working in Dreamweaver!Doc typesDreamweaver adds a complete doc type to every web page you create. We did this with our web pagesas well. An incomplete doc type can cause many problems when working with CSS.An example of an inserted doc type is shown below. In this case, the code displays a Transitional XHTMLdoc type: !DOCTYPE html PUBLIC "-//W3C//DTD XHTML 1.0 xhtml1-transitional.dtd" We just did !DOCTYPE html In class, which is for html5. But remember, html 5 isn’t quite standard yet. Here we’re usingtransitional. Transitional means we’ll allow xhtml 1.0 and older versions of html as well. html xmlns "http://www.w3.org/1999/xhtml" This is telling the browser where the standards are located for xhtml.Again, with html, we just did html 3
Working with XHTML pages that have an incomplete doc type will cause your browser to go into what iscalled "quirks mode". This will very quickly cause you to lose your hair and your sanity if you are aimingfor a perfect, consistent design.You should also be aware that if you put any text above the doc type—even a comment—and youviewed the page in Internet Explorer, the browser would go into quirks mode .20. To get back to viewing the page in Design mode, click on the Design button (to the right of theCode button).Accessibility IssuesEach element provided in the HTML specification is designed for a specific purpose and each elementhas a specific meaning. An h1 element is an example of a header. A screenreader recognizes text thatexists between header tags as a header (or title), just as text within p tags is recognized as aparagraph. However, not all tags are semantic in their makeup. Screenreaders are software programsused by those who are blind or visually impaired to read the content of a web page to the user.Take the div tag, for instance. A div tag has no implied meaning associated with it; it is simply acontainer element. The div tag can be useful for applying specific formatting to an element on thepage, but it should only be used if there are no tags already available for that element. For example, if a div tag is placed around a header text and then styled to emphasize text within a div tag, it willrender correctly in the browser, but it would be much better to use the h1 tag for this purpose. This iswhat the h1 tag was designed to do. When the screen reader encounters an h1 tag, it knows thatthis text should be emphasized because it is a title, and shouldn’t be read as if it is regular text in aparagraph.The header element you use depends on the location of the header in your document. For example, an h1 tag should surround the main heading on your page. The next level of subheadings would besurrounded by h2 , and so on. To screenreaders, h1 is the most important header and h6 is theleast important header. Each level of header has a natural place within your documents. It is veryimportant to set up your document in a hierarchical manner that is easily read by machine readers aswell as humans. Using hierarchical structure to present your site content in an organized fashion willensure that browsers and search engines can correctly navigate the elements on your page as well.Defining Style PropertiesRemoving Default Properties and ValuesBrowsers apply default styles to elements (remember what your page looked like before you attached astyle sheet?); unfortunately these default values are not consistent. These default values can, and do,vary greatly from browser to browser. With this in mind, we will create a CSS rule in our style sheet thatwill remove all the default values. It is a best practice to always "zero out" the default values, so thatyour page design is based on a standardized view, no matter which browser is used to view it.To remove the default properties efficiently, we will group selectors together. By grouping the selectors,we can create a single CSS rule and use the wildcard selector to zero off all the default values. Thewildcard selector is denoted with the asterisk symbol: *. The wildcard means "all"—which is a powerfulway to refer to all page elements (body, etc.) at once. Remember that the order in which you list therules in your style sheet is very important. The rule to remove the default values and start your designfrom a "zeroed out" space should always be the first rule in your CSS page. You could encounter odddisplay issues if the rule was placed below other rules, because when the browser "reads" the rule it4
would zero out all of the padding and margin values that were set in the rules that preceded it in thestyle sheet.Let’s get started.21. Make sure you are working with the CSS style sheet: twoColElsLtHdr.css22. Place your cursor at the very top of your style sheet right below @charset "utf-8"; and pressEnter twice to make room for the new CSS rule.23. Type the following:{margin: 0px;padding: 0px;border:0px;}This rule deletes the margin and padding values that already exist in some browsers, ensuring that thepage is displayed using only the values set in the CSS rules that follow this rule. This is especiallyimportant for older browsers.24. Save the CSS page25. Click on the Design tab to close the CSS stylesheet and view the design.It is highly recommended that you add this rule to any new CSS page you create, because it is veryhelpful in eliminating issues that you may encounter when troubleshooting the display of your pagelayouts.Once removed, we can begin the next task: adding specific values for the margin and padding for eachelement, to set the desired spacing.To achieve this goal, we’ll use the interface within Dreamweaver CS6, specifically the CSS Panel and we’lledit the index.html page while working in Design view in the Document window.twoColElstHdr.css may already be attached to index.html as its style sheet. If it isn’t, do the followingsteps: 26-3126. Make sure the file index.html is active in the Design view of the Document window27. If CSS Styles isn’t visible (right bar), select Window CSS Styles to open the CSS Styles panel28. Click on the Attach Style Sheet icon below CSS Styles (bottom right of CSS Styles).5
29. In the popup window, navigate to twoColElstHdr.css.30. Make sure Link is selected.31. Hit OK. You’ve just attached an existing style sheet to your index.html.32. Click the New CSS Rule button33. In the New CSS Rule dialog box, select Tag as the Selector Type34. Select p from the drop-down menu below the Selector name Tag field to select the p tag35. Ensure that twoColElstHdr.css is the file selected to define the p tag rule (at the bottom of thewindow)36. Click OK37. In the Category column, select Type (if it is not already selected)38. In the Font Size field, enter the value: 8039. In the drop-down menu immediately to the right of the Size field, select %40. Now select the Box option under Category41. In the Box option, under Margin, deselect Same for all42. In the margin field, next to top and bottom, enter 1.5 and em43. In the margin field, next right and left, enter 0 and ems44. Click OK.You’ve now modified the Style in the CSS for the p tag.45. Click on the index.html file to refresh the display in Design view (it may have automaticallyupdated the display for you). Notice how the page updates to reflect the new margin settings46. If you’d like to see the CSS rule generated by the changes made to the CSS Styles panel, look atthe code in the twoColElsLtHdr.css file to see the new CSS rule for the p tag. (Scroll to thebottom) It will look like this:6
p {font-size: 80%;margin-top: 1.5em;margin-right: 0em;margin-bottom: 1.5em;margin-left: 0em;}47. Save the twoColElsLtHdr.css fileUsing the em measurement setting ensures that the various elements on your page will scaleproportionately.Inheritance and specificityNow we’ve created a CSS rule for the p tag element to define both the text size and the margins thatsurround text that is inside p tags. As you know, when a CSS style is set, it will affect the elementitself, as well as any other page elements within it. In this case, the p tag surrounds all of the textelements on the index.html page, causing the text to display differently when different values are set.Let’s examine how inheritance works.48. At the top of the CSS Styles panel, click the All button to see all the styles.49. If the list below shows only twoColElsLtHdr.css, click the arrow to the left to expand the list ofstyles.50. Select the body rule by clicking on ---body51. The properties section of the CSS Styles panel updates to show the values of the body rule.52. Click the Color Picker next to the Color property. Select a reddish color.Notice that the text content in index.html is now displayed in red.7
In this example of inheritance, the text in the p tags (the paragraphs) as well as text inside any other tagis inheriting its color value from the body property. If you look at the CSS Styles panel again, you’ll seethe body has its font property set to 100% Verdana, Arial, Helvetica, sans-serif. Since the bodysurrounds all of the other elements on the page, changes made to the CSS rule for the body will cause allother elements to inherit the same styles throughout the page.53.54.55.56.57.58.59.60.61.62.63.Select the Color Picker again and select black.All of the text now returns to black.Select the P rule in the CSS Styles panel (you may need to scroll down).If closed, expand the font section by clicking the plus sign ( ).Click Add PropertyScroll down to colorClick the Color Picker next to the Color property. Select a blue color.All of the text that exists within p elements is now displayed in blue.Notice that all other text not surrounded by p tags remains black.Change your p element text back to blackSave the CSS page.In the example above, we’ve seen that when you add a color specifically to the p element, it overridesthe inherited color of black that was applied to the body rule. This is the basis of specificity, where theCSS rule applied to a tag that is most specific to a page element overrides the inherited values of otherCSS rules. In this case, the color setting on the p rule is more specific to the text than the color setting onthe body rule. That is why settings made to the p tag override the inherited settings of the body tag.Scaling font sizesIn the previous exercises, we added a CSS rule for the p tag with a font-size of 80% for text display. TheCSS rule for p is stating that the text should be 80% of the default font size. Since the body is set to100%, this means the text display of the font-size is rendered as 80% of the default size, or 80% of 100%.If you change the default font-size on the body rule to 200%, the 80% you set on the p rule increases insize proportionally. Now let’s modify the headers on the page. At the moment, they look a little too bigfor the page, because we’ve scaled down the font size of the p element. Let’s fix this by setting specificfont sizes for each of the headers.64. Click the text in the Main Content heading to select the h1 header. (Instructions) – you candouble-click on it to select the entire word and triple-click to select the the entire title.65. Click the New CSS Rule button.66. The New CSS Rule dialog appears. In the Selector Type choose Tag (redefines an HTMLelement). The Selector field should already hold the h1 tag.67. Double-check that the field next to Rule Definition: contains the CSS file twoColElsLtHdr.css.68. Click OK.69. In the CSS Rule Definition dialog box, enter the following value into the Font-size field: 150.70. In the drop-down menu to the right, select %.71. Click OK.The Main Content heading updates and its size is scaled in relation to the default size set in the CSSrule for the body.72. Save the CSS page. You may need to select twoColLiqLtHdr.css tab first. Notice that it shouldhave an asterisk next to it. That means it has changes that haven’t been saved.Repeat this process for each of the remaining headings, using the values shown below:8
Set the h1 tag in the header (text Header) to 150%Set the h2 tag in the lower content area (text H2 level heading) to 125%Set the h3 tag in the sidebar (text sidebar1 Content) to 115%Grouping selectorsGrouping selectors is an ideal way to avoid writing repetitive styles. So far we’ve set CSS rules for threeof the six available heading options; we’ve not yet specified the font sizes for h4, h5 or h6. It is likely thatwe’ll want to use these elements in our design at some point in the future, so let’s set the size for themnow. Since we want all of the headers to display at the same size, we can create a CSS rule that uses agrouped selector to hold the property and value. In this example, we’ll set the font size of all threeheaders to 105%.h4, h5, h6 {font-size: 105%}We’ll do that now:73. Click the New CSS Rule button.74. In the New CSS Rule dialog box, Select Compound (based on your selection) in Selector Type anddelete the contents of the Selector Name (just click on it and hit backspace).75. Type: h4, h5, h6 into the Selector text field, (note the commas and spaces).76. Double check that the twoColElsLtHdr.css is selected in the Define in: field.77. Click OK.78. In the CSS Rule Definition dialog box, enter the following value into the size field: 105.79. In the drop-down menu to the right, select %.80. Click OK.81. Look at the new rule in the style sheet.82. Save the CSS page.Working with floatsThe float property allows you to move a floated element either to the right or to the left within itsparent container. It is likely you will (and have) used the float property frequently when designing CSSlayouts. Let's start by examining how to float images within a p element. It is a common practice to setup two generic float classes. One class floats elements to the left; the other floats them to the right.When you use Dreamweaver to create your CSS layout, the code generated looks like the examplesbelow.fltrt {/* this class can be used whenever you wish to float an element to the rightside of the page. The floated element must be placed above the element thatwill display next to it in the source code. */float: right;margin-left: 8px;}.fltlft {/* this class can be used whenever you wish to float an element left on thepage */float: left;margin-right: 8px;}From the files from my Web site you unzipped, inside the images folder you’ll find an image file calledbmw.jpg. This image of a car will be used to demonstrate how images can be floated to the left and theright within a container (the p element).9
83. In Dreamweaver, make sure index.html is in the Design view.84. Place your cursor immediately to the left of the first letter of the top section in your maincontent area, right before the paragraph of text below the Main Content header (to the left ofBe aware ).85. Select the Insert- Image menu at the top86. In the Select Image Source dialog box, navigate to the images folder. Select bmw.jpg.87. In the Image Accessibility Attributes dialog box, enter a short description into the Alternate textfield, such as “Front picture of BMW”.88. Click OK.The image is inserted into your page.89. Make sure the image is selected (if it isn’t, click on it in the Design View).90. Next to Class (in the Properties area, usually at the bottom) In the drop-down menu, choosefltrt.Note that the image moves to the right side, and the text flows around it.91. Repeat this process to add bmw2.jpg to the lower content area (below H2 level heading, next to“Because all columns ”), but this time select Set Class fltlft.Note that the image moves to the left side, and the text displays to the right of it.92. Save your HTML page.Remember, when you float an element, you are effectively removing it from the document flow. Thisallows the other elements on the page that are placed directly below to move up alongside and whenpossible flow around the floated element. Applying the float class to an image allows the text to flowaround the image.Setting the image and changing the header’s background color93. Click on the Insert Logo box at the top left of the web page. Make sure the box (there’s ayellow line around it) is selected:94. Double-click on it.95. From the Insert pop-up box, select bmwHeader.jpg10
96. In the Image Tag Accessibility dialog box, add the alt text for the header image (bmw header).a. If this doesn’t come up, you can always add an Alt tag in the properties dialog box, atthe bottom of DW.97. Click OKThe image is now inserted in the header area of the page.98. In the CSS Styles panel, select .header.99. Underneath, where the Properties are displayed, click on Add Property and select backgroundcolor.100.Click the color chip to select a background color101.Use the eyedropper – run it over the background color at the right of the BMW-headerphoto.11
102.After making this selection, the header div displays as the same blue as the BMWbackground color103.In the CSS Styles panel, Click on Add Property and select the Border-bottom-colorproperty104.Add a bottom border to the header div by selecting the bottom border color using thecolor cube. Select black.105.Click Add Property and select Border-bottom-style.106.Choose the solid option.107.Click Add Property and select Border-bottom-width.108.Select the thin option.109.Click on index.htm in Design view to refresh the page content.The header div element displays the bottom border based on the applied settings110.111.Save the CSS file.Choose File Preview in Browser to review your work.Styling the main contentLet’s style the main content. First, we’ll focus on the sidebar element content and adding the navigationbar.112.Set the Document window to Design view, if it is not already.113.In the CSS Styles panel, click the All button to see all styles.114.Select the CSS rule for the element in . container115.Below, in the Properties area, select Add Property and select the margin-top116.In the drop-down menu next to width, enter: 1.117.As the unit of measurement, select ems118.Select Add Property and select color.119.Use the eyedropper tool to select a dark gray / blue color. I used a hex value of:#393B4A.120.Select the P rule listed in the CSS Styles panel121.Click the color cube to access the eyedropper tool. Select a color from the h1 color.122.Adjust the color to display P elements, to make them lighter123.By lightening the P element color, you ensure that the headings are always darker thanthe main content text.124.Save the CSS file.12
We’ve now completed the styling for the header and the main content area.Building a vertical unordered list navigationAt the moment, the sidebar1 div holds some default content; this content consists of a heading followedby three links in paragraph text content. First, we’ll remove the paragraph text. You can complete thistask by following the steps below:125.126.127.128.Click and drag over the text below the Sidebar1 Content heading (Below Link four)Press the delete key.The paragraph text is removed from the page design.Repeat the above steps and remove the second paragraphAfter you’ve removed the placeholder content in the sidebar1 Content div you are ready to beginbuilding your site navigation.129.Select Link one in the sidebar by double-clicking on it130.If it’s not still open, Open the CSS Styles panel by selecting Window Styles.131.Click the New CSS style button.132.Dreamweaver has created the descendant selector for you - .container .sidebar1 .nav lia. (Go with the defaults this time) It is displayed in the Selector text field.133.Make sure the menu option for Define in: twoColElsLtHdr.css134.Click OK.135.In the Category column, select Type.136.In the text field next to Font Size: type: 80137.In the drop-down menu next to Size: select %.138.Click OK.139.The page design updates to reflect the recent changesNext, we’ll add a little left margin to the li elements, to move the navigation away from the edge of thepage and give the design some breathing room.140.Select the first linked text item, (Link 1) if not still selected.141.In the Property inspector, type the number sign (#) into the Link field. Hit Return. (Notethat you could type in a url here instead of #. For now, we’re using # to make temporary linksthat go nowhere.)142.Repeat steps 1 and 2 twice, for Link 2 and Link 3 and Link 4 (Note: this may be thedefault)143.Click the cursor inside one of the link items on the page.144.Click the New CSS Rule button.145.Make sure .container .sidebar1 .nav li a is selected and Define in: twoColElsLtHdr.cssare selected and hit OK.146.Select the Type option from the Category column.147.Click the Color Picker cube.148.Select the blue header background color using the eyedropper tool in the Color Picker.149.In the Text-Decoration option, select none.150.Select the Box option from the category column.151.Deselect the "Same for all" option in the Margin section.13
152.153.154.155.156.157.158.159.160.161.162.163.In the right field, type 1.In the margin-left text box, type: 1In the adjacent drop-down menus, select em.In the padding option text field, type: 2 and px. This will add 2 px to all 4 sides.Deselect Same for all option for Padding.Next to Right, select 60In the adjacent drop-down menu, select px.Select the Background optionClick the Background Color Picker cube.Select the hexadecimal value #FFFFCC (shorthanded with #FFC) (a pale yellow color).Click OKSave index.html and the CSS style sheet.We created the basis for our navigation; we’ve added the text that will be used for the links. Next, we’llchange the text into navigation links.Now that we’ve created a style for the linked text in the navigation bar, we’ll add a hover effect that willinteract with the users cursor when they run their mouse over the links.164.Click the cursor inside one of the links in the sidebar1 div.165.In the CSS Styles panel, click the New CSS Rule button.166.In the New CSS Rule dialog box, by the Selector Name click to the right of the a element167.In the Selector text field, type :hover with no space after the a element. It should looklike this:168.Make sure your CSS style sheet is selected in the Rule Definition drop-down menu.169.Click OK.170.In the CSS Rule Definition box, select Type from the Category column.171.Click the Color Picker cube and select the hexadecimal value #000000 (or #000) (black).172.Select the Background option from the Category column.173.Set the background color to the hexadecimal value #CCCCCC (or #CCC).174.Click OK175.Save the CSS style sheet.176.Press F12 to view the index.html page in a browser. Test the navigation buttons byrolling your cursor over the linked text to check the rollover effects.14
The navigation system for the sample site is now complete.Let’s make the sidebar yellow to match the navigation.177.Click on the sidebar to the left of link one.178.Click on the edge of the sidebar until it is selected. Very carefully run your pointer overit. You should get a pop-up box like this:179.180.Now you know that the whole side area belongs to a div with the class of “sidebar1”.Over under CSS Styles, scroll down until you find sidebar1.15
181.182.183.184.185.186.Underneath, click Add PropertySelect background-colorChange the background color to #FFFFCC (or #FFC)Save.Preview in browser.You’re done! You’ve just created a Web page in Dreamweaver using your own stylesheet! Stylesheetstake a bit of getting used to, but with practice they become easier and make managing Web sitessimple.To turn in: DWLab2 Folder containing theo ImagesLab2 and CSSFiles Folders containing: CSSIndex.html twoColElsLtHdr.css The three downloaded images16
Dreamweaver CS6 Lab 2 Using an External Style Sheet in Dreamweaver Creating the site definition First, we'll set up the site and define it so that Dreamweaver understands the site structure for your project. You've already done this in the previous lab, so if you hit problems, refer to the last Dreamweaver lab. 1.

