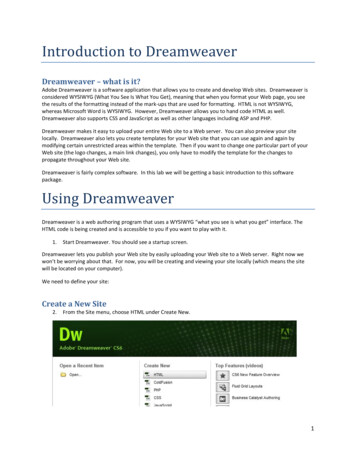
Transcription
PHL&I Instruction(734) i/training/Dreamweaver BasicsIntroductionAdobe Dreamweaver CS3 is a web authoring software that aids in the creation and maintenance of webpages. Dreamweaver uses tools similar to those found in a word processing program to allow for thedevelopment of web pages without knowledge of HTML. It also provides the option of hand-editing theHTML for greater control of the document.ContentsThis workshop will cover the following topics: Opening DreamweaverDefining a SiteThe Dreamweaver Work AreaModifying Page PropertiesFormatting TextSaving FilesAdding LinksAdding E-Mail LinksAdding AnchorsInserting ImagesInserting TablesLaying Out a Pageo Using Tableso Using Dreamweaver's Sample Pageso Using a Consistent Page Design for Multiple PagesPreviewing your SiteUploading FilesViewing your Published SiteFall, 2007Dreamweaver BasicsPage 1
Opening DreamweaverTo open Dreamweaver in the PHLI Training Room, double-click the Dreamweaver icon.To open Dreamweaver in the UM Computing Labs, go to Start Programs Web AuthoringSoftware Dreamweaver CS3. This path may vary on your work or home computer.Defining a SiteThere are two parts to your website – your local files, and your remote files. You create local files on yourcomputer using Dreamweaver, and upload them to your remote web space via FTP. It is very importantthat the files on your local computer are set up exactly the same as the files on your remote webserver. That is, that they are all in the same location relative to each other.Before you can upload local files to a web server, you must create what Dreamweaver calls a Site File.Site Files contain information about where your files are stored locally, where they are stored remotely,and how they will be transferred back and forth between your computer and the web server. You shoulddo this before you create your first web page.All UM students, faculty and staff have free website space available to them from ITCS. The URL of yourpersonal website space is http://www-personal.umich.edu/ youruniquename/. All of your website fileswill be stored in the Public/html folder of your IFS space. Please see http://wwwpersonal.umich.edu/ pattyb/webspace.html for instructions on checking your web space. If you do nothave an html folder, please contact ITCS.Location location location!If you are working in the PHLI Training Room or at a UM Computing Sites computer, like those in thebasement computing lab of SPH II or the Public Health Library, you can connect to your web space via anetwork. You do not need to set up SFTP (secure file transfer protocol). If you are working from any otherlocation, you will need to set up SFTP. Instructions for both are given here.To create a new Site File, click the Manage Sites link in your Site Files Panel.Manage SitesLinkThe Manage Sites dialogue window will come up. Click New and then Site. The Site Definition wizardwill come up:Fall, 2007Dreamweaver BasicsPage 2
Site Name: Give your site a desired name. Type in a name that provides a meaningful description ofyour site. This will not appear anywhere on your web site. Click Next.Fall, 2007Dreamweaver BasicsPage 3
Do you want to use web server technology such as ColdFusion, ASP.NET, etc., on your site?Unless you know that you do, choose No and click Next.Fall, 2007Dreamweaver BasicsPage 4
From PHLI Training Room ComputerHow do you want to work with your filesduring development? Select "Edit directlyon server using local network."Where are your files on the network?Click the folder icon and navigate to yourPublic/html folder in your AFS space: choose network drive I double-click the user folder double-click the folder named for thefirst letter of your uniqname double-click the folder named for thesecond letter of your uniqname double-click the folder named foryour uniqname double-click your Public folder double-click your html folderFrom any Other LocationHow do you want to work with your filesduring development? Select "Edit localcopies on your machine, then upload themto a server when ready."Where on your computer do you want tostore your files? Click the folder icon andnavigate to the folder where you want tokeep your local files.Click Next.Fall, 2007Dreamweaver BasicsPage 5
Please Note: If you working in the PHLI Training Room or at a UM Computing Sites computer,you should ignore this page.This next set of questions refer to the remote web server you are using. We will assume thatyou want to publish your website on the web server space you have available to you as a UMStaff, Student or Faculty. This web server is maintained by ITCS. Connect to your remote server via FTP The FTP address of your web server is sftp.itd.umich.edu The name of the folder on the web server that you want to store your files in is probablynamed Public/html. Unfortunately, this is not true for everyone. For some people, the pin Public is not capitalized. If you enter these values and cannot connect to the webserver, try it without specifying the folder. Once you connect, you can see what thefolder is called and change your Site Files definition accordingly. If you do not have aPublic/html folder, you will have to contact ITCS. Your FTP login is your UM uniqname. Your FTP password is your Kerberos password. Be sure to check the box that says Use Secure FTP (SFTP). You will not be able toconnect to the ITCS web server otherwise.Fall, 2007Dreamweaver BasicsPage 6
Change "How do you want to work with your files during development?" to Edit Directly onserver using local network. Then click the folder icon next to the "Where are your files onthe network?" box and navigate to the Public/html folder on the H: drive (your IFS space).Click the Test Connection button. If you have entered all of the information in successfully,you will see a message saying that you have connected successfully. Click OK and thenNext.Fall, 2007Dreamweaver BasicsPage 7
Do you want to enable checking in and checking out files? Only say yes to thisquestion if you will not be the only person updating this website. Enabling checking in andchecking out makes it so that only one person can edit a single file at the same time. ClickNext.You will see a summary of your Site Files definition. If everything looks good, click Done.You can modify your Site Files definition at any time by going to Manage Sites in the Site Filespanel. This will bring up the Site Definition dialogue box, where you can make the desiredchanges. You can also have as many different Site Files as needed.Fall, 2007Dreamweaver BasicsPage 8
The Dreamweaver Work AreaDocument WindowThe Document Window is your work area where you create and edit your web page.Dreamweaver has the option to display the Document Window in three different ways: the codeview, the design view, and the code and design view. The code view shows HTML only. Thedesign view shows only the design, or the visual layout of your page. The code and design viewshows a combination of the two.Fall, 2007Dreamweaver BasicsPage 9
To toggle between the different views, go to View and select Code, Design, or Code andDesign. You can also use the shortcut icons located at the upper left of your screen.CodeDesignCode and DesignObject ToolbarThe Object Toolbar allow you to insert web objects into your web pages, such as images, formsand media. Each Group (such as “common” listed here) contains a group of specific objects. TheCommon group has everything you will need today.Site Files PanelThe Site Files Panel is more than a file browser. It allows you to see the structure of all the filesand directories in your website. You can open, move, copy, rename and delete files from the SiteFiles Panel. We will talk more about your Site Files later in the workshop.Properties PanelThe Properties Panel provides details of the properties of a selected object. The Properties Panelwill change depending on the object or text that is selected.Tag SelectorThe Tag Selector is located in the bottom left corner of the screen. It shows the HTML Tags thatcorrespond to the area where your cursor is placed in the Document Window. Selecting a tag inthe Tag Selector it will select the corresponding area in the Document Window.Example of the Tag Selector when thecursor is placed on a linked image that isinside of a table.Fall, 2007Dreamweaver BasicsPage 10
File ToolbarThe Toolbar allows you to toggle between views, and shows the title of the document. It also hasshortcut icons that allow you to upload and download your file, and preview the page in a browser.Document TitleChange ViewsUpload/DownloadPreview/Debug in BrowserOther PanelsThere are several additional panels on the left side of the work area, including Design,Code, Application, and Tag Inspector. These panels are designed to provide additionalinformation about Web Development. For example, the Code Panel allows you to look upHTML tags, CSS syntax, Javascript syntax, and much more. We will not cover these panelsduring this workshop.Modifying Page PropertiesWhen you modify the Page Properties by clicking the Page Properties Button in the PropertiesPanel (or going to Modify Page Properties), you make global settings to your document.On the left side of the Page Properties window are several categories of page properties. The firstone is Appearance. Here you can choose the default font-family, font size, font color, backgroundFall, 2007Dreamweaver BasicsPage 11
color, background image and all four margins for your document. You can still use different fontsand colors in different parts of your web page. This just sets the default settings for the entire page.Font FamiliesYou will notice that when you click the carrot for page font, there are not many fonts on the list.This is because the font you choose will only display in the user's browser if the user has that fontinstalled on their machine. You may also notice that each item in the list contains more than onefont, for example, "Arial, Helvetica, sans-serif." Sans serif is what is known as a font family, as areserif, fantasy, script and monospace. By choosing "Arial, Helvetica, sans-serif," you are saying "Ifthe user has Arial installed, display my text in Arial. If they don't have Arial, but they haveHelvetica, display my text in Helvetica. If they don't have Arial or Helvetica, display my text inwhatever sans-serif font they have chosen as their default.Font SizesIt is important to choose a measurement of font size that allows users to increase or decrease thesize of text on your page, or a relational font size. This is especially true for users with visiondisabilities who need the text to be bigger in order to read it. While pixels is designed to relational,it is not treated as such by Internet Explorer. Try using 1 em instead of 12 pixels, or .8em insteadof 10 pixels.ColorsIt is important to use highly-contrasting foreground and background colors. For example, if you usea dark background, choose a light text color. Also, even if you want a white background and blacktext, you should select these, as gray is the default background color for the Netscape browser.All computer monitors can display 216 colors called the Browser Safe Colors. Browser SafeColors are defined by a hex (six-character) code containing 00, 33, 66, 99, CC, or FF. An exampleof a Browser Safe hex code is 33CCFF. Dreamweaver allows you to choose from the 216available Browser Safe Colors by using the color picker:You can click the color wheel at the top of the color picker to find additional colors.Background ImagesPlease note that background images tile on a web page. That means that they display over andover in rows and columns. If you use a background image, make sure that it is a small (usuallyaround 100 pixels by 100 pixels) and will blend well when tiled.Fall, 2007Dreamweaver BasicsPage 12
Here is the Appearance category of the Page Properties dialogue box with values filled in.Fall, 2007Dreamweaver BasicsPage 13
LinksThe next thing you will define is the Links category.Here you can change the font face, size and color of the four link states: Linked color: the color of linked textVisited links: the color of links to pages that the user has already visitedRollover links: the color of links while the user is rolling their mouse over themActive links: the color of links while they are being clicked onYou can also select an Underline style. The default is that links are always underlined, whichusers expect, but you can change it so that links are never underlined, are only underlinedduring mouse rollover, or are underlined except during mouse rollover.It is perfectly acceptable to leave these all on their defaults (which is blue underlined text forlinks and purple underlined text for visited links) but feel free to play around with these settings.What is most important is that your visited link color is different from your regular link color. Thisis a visual clue to users that they have already visited a page.Fall, 2007Dreamweaver BasicsPage 14
HeadingsThe final category of Page Properties that you should set are Headings.Headings are used for page titles, section titles, sub-section titles, and so on. They are used tostructure your web page. HTML offers six levels of headings, with Heading 1 being the largest andHeading 6 being the smallest. I rarely use more than three levels of headings to structure webpages.In the image above I have set the heading font, specified that all headings should be bold, and setthe font sizes for headings one through three. Note that I again used the em measurement of fontsize so that users can increase and decrease the size of the text .Once your selections have been made, press Apply to apply the settings to the page and OK toaccept the changes.Fall, 2007Dreamweaver BasicsPage 15
Page Titles for the Title BarThe last global page property that you will set is the page title for the title bar. The title bar is theblue space at the very top of every browser window, as circled in the below image:Enter the text that you want to appear in the title bar in the Dreamweaver title box:Whatever you enter there will appear in the web browser's title bar. Use short but descriptive pagetitles.Fall, 2007Dreamweaver BasicsPage 16
Formatting TextYou can modify individual sections of text by using the Properties Panel. First select the text youwould like to change and then make the necessary changes by using the options available to youin the Properties Panel. Using the available tools, you can:-Create headings and paragraphsChange the face and size of the fontChange the color of the textCreate bold, or italic textAdjust alignment to right, center, or leftIndent textCreate bulleted or numbered listsFormatFont TypeBold/ItalicFont SizeLeft, Center, RightColorIndentBulleted/Numbered ListFormatting Headings and ParagraphsThe first thing you want to put on your web page is the page title. Put your cursor in the documentwindow and type in the page title. Next click the drop-down for the Format property in theProperties Panel. Here you see your choices: paragraph format, any of the six levels of headings,and Preformatted. Since the level 1 heading is the highest level, it should be used for page titles.Choose Heading 1 in the Format drop-down list:Fall, 2007Dreamweaver BasicsPage 17
To go to the next line, put your cursor at the end of your page title and click the Enter (or Return)button on your keyboard. Type in your first paragraph. Notice that the value of the Format propertyin the Properties Panel now says Paragraph. This is because Dreamweaver is smart enough toknow that you wouldn't want two level-1 headings in a row.You might also notice that there is a blank line between your page title and your first paragraph.Any time you hit the Enter (or Return) button on your keyboard, you will skip down a line. This isbecause in HTML (the language web pages are written in) there is always a blank space betweenblock-level objects on a page, such as headings and paragraphs. If you want a line break insteadof a paragraph break, hold down the Shift key while hitting Enter (or Return).You can select any words in your paragraph and change their font-face, font-size, color, andmake them bold or italic by changing those properties in the Properties Panel. You can changethe alignment of headings or paragraphs by clicking any of the alignment icons in the Propertiespanel.ListsThere are two types of lists on web pages: Ordered (or numbered) and Unordered (or bulleted).To create a list, put your cursor just above where you want the list to be and hit Enter (or Return) tostart a new paragraph. For an ordered list, click the Ordered List icon in the Properties Panel. Foran umordered list, click the Unordered List icon in the Properties Panel.Type your first list item, and then hit Enter (or Return) to go the next line. Your list will continue.When you are finished with your list, hit Enter and click the Ordered or Unordered List icon again toturn it off (or just hit Enter twice).Nested ListsLet's say you want an unordered (bulleted) list nested inside an ordered (numbered) list as a sublist. Type in your ordered list, then put your cursor at the end of the line just above where you wantyour sub-list to start. Hit the Enter (or Return) button on your keyboard, then click the Indent Iconin the Properties Panel. Next, click the Unordered List icon in the Properties Panel to change thenested list to an unordered list. Type in your unordered list. When you want to return to yourordered list, hit Enter (or Return) and click the Ordered List icon in the Properties panel to resumeyour ordered list. Here is an example:Fall, 2007Dreamweaver BasicsPage 18
Saving PagesTo save the web page you are working on, click the File drop-down menu and choose Save.Please note the following file naming conventions for the World Wide Web:1.2.3.4.5.All web page files must end with the extension .htm or .html.Your default homepage must be named index.htm or index.html.Use all lower-case letters and numbers in your file and folder names.Do not use spaces.Do not use special characters like &, %, etc. Underscores ( ), dashes(-) andperiods(.) are OK.If you are saving your work to your personal space on the UM web server, you may notice that youalready have a file in your file list called index.html. It is fine to over-write this file. You cannot havetwo index files in your html folder, one named index.htm and the other named index.html. Youshould have only one default home page file.Once you have your page properties and formatting set, an easy way to create secondary pages isto click the File drop-down menu and choose Save As Give the page a new file name and editits content appropriately.Adding LinksTo add a link to another web page, first place your cursor where you want the link to appear. Next,click the Link icon on Common Object Toolbar.Click on Link iconThe Hyperlink dialogue box will open. Here you will need to type in the text that you want to beclickable in the Text field, and the full URL of the webpage you want to link to in the Link field. TheTarget field allows you to have the link open in a new window by choosing “ blank.” If you do notwant the link to open in a new window, leave the Target field blank. You may also leave the TabIndex, Title and Access Key fields blank.Fall, 2007Dreamweaver BasicsPage 19
But what if you want to make text that you have already typed link to another webpage? First selectthe text you would like activated as a link. Once the text is selected, type in the full URL (e.g.http://www.sph.umich.edu) in the Link field of the Properties Panel.Link FieldAdding Email LinksEmail Links are special links that you can use to make e-mail addresses on your webpageclickable. If your user has an email client installed on their computer, when they click an email link,their email client will open a new message addressed to the email address you have specified.To add an email link, first place your cursor where you want the link to appear. Next, click theEmail Link icon on Common Object Toolbar.Click on Email Link iconThe Email Link dialogue box will open. Type in the text that you want to be clickable, and the email address, and click OK.Fall, 2007Dreamweaver BasicsPage 20
Note: Email links are often harvested by robots that search the web, collecting email addresses forspammers.Adding AnchorsAnchors are links that jump to a specified location within the same page. Creating an Anchor is atwo-step process. First, you must indicate where you want the link to jump to in the page (namethe anchor). Then you have to create a link to that location (link to the named anchor).Creating a Named AnchorTo create a Named Anchor, place the cursor in the Document Window in the location you wouldlike your link to jump to. Then click on the Named Anchor icon.Click on the Named Anchor iconAfter clicking on the Named Anchor icon, an Insert Named Anchor dialog box will appear. Typea short one-word name for the anchor in this. Press OK. The anchor has been named and youcan now link to the anchor.Linking to a Named AnchorIn the Document window, select the text you would like activated as a link. In the Link Field of theProperties Panel, type the number sign (#) followed by the name of your anchor (e.g. type #top inthe Link field if you named your anchor top).Fall, 2007Dreamweaver BasicsPage 21
Inserting ImagesTo insert images into your web page, place the cursor in the Document window in the location youwould like the image inserted. Next, click on the Insert Image icon in Common Object Toolbar.This will open a dialogue box that will allow you search for the file where the image is located.Browse to the desired image file and press Select. This will insert the image into the DocumentWindow.Insert Image IconImportant Things to Remember about Using ImagesIt is against U.S. copyright law to take images from someone else's web page and display them onyour own pages without permission.Always make sure that your images are small – both in dimensions and in file size. The smaller thefile, the faster it will download and be displayed on your page. I try to keep my images under 100k.Always make your images the size you want them to display before inserting them into your page.Don't insert them and then resize them.Always supply alternate text for your images using the Alt field in the properties panel. This helpsusers with vision disabilities who can't see your images understand what your images are about.Use short, descriptive words for your alternative text.Formatting ImagesOnce inserted, you can use the tools available to you in the Properties Panel to resize and alignthe image (left, center, right), make the image into a link, or place a border around your image.You may notice that images you insert into your page are contained in their own paragraph. Thereare two ways to make other content – like text – wrap around your images. One is with tables, andthe other is with alignment, as shown in the following image:Fall, 2007Dreamweaver BasicsPage 22
Changing the value of the Align field to Left will make text wrap around your image on the right.Similarly, changing the value of the Align field to Right will make text wrap around your image onthe left.Inserting TablesTo insert a table into your web page, place the cursor in Document Window the location you wouldlike the table inserted. Next, click on the Insert Table icon in Common Object Toolbar.Insert Table IconFall, 2007Dreamweaver BasicsPage 23
The InsertTable DialogueWindowThe Insert Table dialogue window allows you to control all aspects of your table: how many rowsand columns it has, how wide it is, whether or not it has a border, and if it does, how thick thatborder is, how much space there is between cells (cellspacing), how much space there is betweena cell’s content and the edge of the cell (cellpadding), header rows and/or columns, and more. Textinside header rows and columns is automatically bolded and centered. Have text appear aboveyour table by entering a Caption.Once the desired format has been specified in the Insert Table dialogue box, press OK. The tablewill now be inserted into your Web page in the Document Window. You will then be able to placeyour cursor in each cell to add text or images.Once you insert your table, you can make additional changes to the table’s format by selecting thetable and using the Properties Panel to make change the number of rows and columns, theamount of cell padding and cell spacing, the alignment and width of your table, and the size of thetable’s border.Fall, 2007Dreamweaver BasicsPage 24
Laying Out a PageUsing TablesThe most common way of organizing a web page's layout is using tables. Starting from ablank, new Basic HTML page, insert a table as shown above. Make sure to make your table to100% wide with a border width of 0, no header rows or columns and no caption.In the following example, I have created a table with three rows and three columns. I thenselected all three cells in the first row and merged them using the Merge Cells Icon in theProperties Panel. I did the same for all three cells in the third column. This creates header andfooter rows and a three-column area in between. Make sure that all of your cells are set toVertical Alignment: Top.Fall, 2007Dreamweaver BasicsPage 25
Table cells can contain any content including headings, paragraphs, lists, links, nested tables,images, Flash animations and video clips. Table cells can use background colors andbackground images. Here is an example of a page laid out with tables:Using Dreamweaver's Sample PagesDreamweaver comes with built in sample page designs that you can use to set up your pages. Goto File - New and choose the Page From Sample category on the left hand side and StarterPage (Theme) to see a list of these sample page designs:Fall, 2007Dreamweaver BasicsPage 26
You can use any of these sample designs to create your own web pages. Just replace the sampletext and images with your own text and images.Using a Consistent Page Design for Multiple PagesOnce you have gotten your first page formatted the way you like it, you can use it as atemplate for other pages in your web site. After saving the file, click the File drop-down menuand choose Save As and save it with a new file name. Now you have a new file and a newpage. Change the content appropriately. Remember to save the page title for the title bar aswell.Fall, 2007Dreamweaver BasicsPage 27
Previewing Your SiteIt is important to preview your site in several browsers before you post your site in order to ensurethe content will be displayed appropriately. You can preview your document at any time, but keepin mind that links will not be active until the site is previewed or posted to a server.To preview your document, you must first select a browser. To do so, click the Preview/DebugIcon in Browser icon in the File Toolbar and choose to Edit Browser List.Preview/Debug in Browser IconChoose or – to add ordelete a browserFall, 2007Dreamweaver BasicsPage 28
Select “Edit” to editthe preferences in theselected browserSelect Previewin BrowserPress OKAfter the browser has been selected or changed, you can preview the site by clicking thePreview/Debug Icon in the File Toolbar. You can also press the F12 key on your keyboard todisplay the current document in the primary browser.Fall, 2007Dreamweaver BasicsPage 29
Uploading FilesOnce your site has been defined, you can publish your site. This means you can transfer your filesto a server so others may have access to your web site through the Internet.Your Site Files panel is always visible on the left side of the Dreamweaver work area. You can seeboth your local and remote files at any time by clicking the Expand/Collapse button at the top of theSite Files panel.The Expand/Collapse buttonClicking the Expand/Collapse button will open a Site Window with two panes, one for the LocalFolder and one for the Remote Site.Local FolderThe Local Folder appears on the right-hand side of the window and contains a list of the filesstored on your computer or network.Remote SiteThe Remote Site appears on the left-hand side of the window and shows a list of the files stored onthe server. Until you connect to the server, the Remote Site side of the window will remain blank.Remote SiteFall, 2007Local FolderDreamweaver BasicsPage 30
To connect to the server and view the Remote Site, click the Connect button in the Site Filestoolbar.Connect ButtonGet File(s)Put File(s)Once you have connected to the server, you can transfer files from the Local Folder to the RemoteSite and vice versa. You can do this by dragging selected files from one pane to the other, or byusing the Get File(s) and Put File(s) buttons in the toolbar.When you transfer files to the server, you will be asked if you want to Include Dependent Files.Including Dependent Files means that all the files dependent on the file you are transferring(images, external style sheets) will also be transferred to the server.Keep in mind that when you transfer files, you overwrite the existing file. Make sure you do notcopy over the most recent version, or the edits will be lost.Viewing Your Published SiteTo view your published site, open a web browser and go tohttp://www-personal.umich.edu/ youruniquename/filename.html.Fall, 2007Dreamweaver BasicsPage 31
Opening Dreamweaver . To open Dreamweaver in the PHLI Training Room, double-click the Dreamweaver icon. To open Dreamweaver in the UM Computing Labs, go to Start Programs Web Authoring Software Dreamweaver CS3.This path may vary on your work or home computer.
