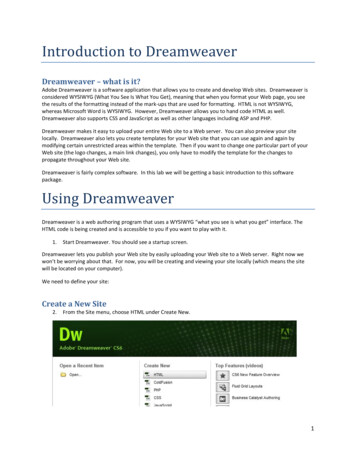
Transcription
1CHAPTER 1Dreamweaver Tutorial. . . . . . . . . . . . . . . . . . . . . . . . . . . . . . . . . . . . . . . . . . . . . . . . . . . . . . . .This tutorial shows you how to use Dreamweaver to define a local site and tocreate and edit Web documents. Use this tutorial to learn the basic skills you’llneed to develop a Web site and to learn about some of the new features ofDreamweaver 3.In this tutorial, you will create a Web site for a fictitious company, Scaal Coffee, agourmet coffee business.While visiting Scaal’s Web site, customers can read about the company, view theweekly specials, and browse through the product pages of Scaal’s online catalog.21
Along the way, you’ll learn how to perform the following tasks: Define a local site Create a document Use layers to lay out a page Convert layers to tables Attach a behavior to an image Import a Microsoft Word HTML document Format text using HTML styles Create a site map Create links Apply a template Create a jump menuNote: This tutorial demonstrates some features that are supported only in 4.0 orlater browsers.Take a guided tour of DreamweaverBefore you get started, watch the Guided Tour movies in Dreamweaver Help tofamiliarize yourself with Dreamweaver’s features.22Chapter 11In Dreamweaver, choose Help Using Dreamweaver.2In the Contents list in the left frame, click Getting Started, and then clickLearning Dreamweaver.3Click a movie title.4Close the browser when you finish.
Preview the completed Web siteNext, view the completed Web site to get an idea of what you’ll beworking toward.1Launch Dreamweaver.2In Dreamweaver, choose File Open. In the file browsing dialog box, navigateto the Dreamweaver application folder, open the Tutorial folder, and then theScaal site folder.3In the Scaal site folder, select scaal home.html, and then click Open to openthe Scaal home page in the Document window.Do not edit this page. You will create your own version of this page.4Choose File Preview in Browser and select a browser with which to view theScaal home page. (Use a 4.0 browser to view this site.)5Move the pointer over the three items on the left side of the page (Our Story,Products, and This Week), and notice that the items highlight to indicate thatthey are active links.Click the links to explore the site. To return to the home page, click the Scaallogo, which is located at the top of each site page.6Close the browser when you finish looking at the site.7Close Dreamweaver.Dreamweaver Tutorial23
How the tutorial files are arrangedBoth the completed and partially completed HTML files used in this tutorialare in the Scaal site folder in the Tutorial folder. Images and other associatedfiles for the site are in folders below the Scaal site folder. (The complete path tothe Scaal site folder will vary, depending on where you have Dreamweaver 3.0installed.)Each file has a meaningful name—for example, the HTML file for the completedScaal products page is named products index.html. The partially completedfiles—which you’ll be working on—have names similar to their counterparts inthe complete site, except they begin with DW3 ; the partially completed versionof products index.html, for example, is called DW3 products index.html.Set up site structure for the tutorialBefore you start the tutorial, create a new folder into which you’ll transfer theScaal site tutorial files. Later, you can use the Sites folder structure to store othersites you create.24Chapter 11At the root level of your local disk, create a new folder and name it Sites—forexample, C:\Sites (Windows) or Hard Drive:Sites (Macintosh).2From the Dreamweaver/Tutorial folder, copy the complete Scaal site folderinto the Sites folder.
Define a local siteBegin your site development by defining a local site for the files in the Scaal site.A site is a storage location for all the documents and files belonging to a particularWeb site. Defining a local site delineates the structure of the site you are creatingand tells Dreamweaver where you plan to store all of the site’s files. Define a localsite for each Web site you create using Dreamweaver.For this tutorial, you’ll specify the Scaal site folder as the local site folder.1Launch Dreamweaver.A blank document opens.2Choose Site New Site.3In the Site Definition dialog box, make sure Local Info is selected in theCategory list.4In the Site Name field, type my tutorial.The site name lets you easily identify and select a site from a list of sitesyou’ve defined.5Click the folder icon to the right of the Local Root Folder field, navigate to theSites/Scaal site folder, and click Open. Then click Select (Windows) or clickChoose (Macintosh).The Local Root Folder field updates to display the path to the local site.Note: The complete path to the Scaal site folder may vary, depending on where youhave created your Sites folder.6Click OK.Dreamweaver Tutorial25
7Click Create when asked if you’d like to create a cache file for the site.Caching the files in the Scaal site folder creates a record of existing filesso Dreamweaver can quickly update links when you move, rename, ordelete a file.The Site window now displays a list of all the folders and files in the local sitemy tutorial. The list also acts as a file manager, allowing you to copy, paste,delete, move, and open files just as you would in the file finder or explorer onyour own computer.26Chapter 18Leave the Site window open.9Click the Document window to make it active.
Create the Scaal site home pageNow that you have set up a structure to store the Scaal site, you’ll create a homepage for the site. As you build this document, you’ll add a page title, layers,images, text, and links; your document will contain the same design componentsas the completed Scaal home page.If they aren’t already open, open the following workspace components: The Object palette (choose Window Objects), which you’ll use to add objectsto your document The Property inspector (choose Window Properties), which you’ll use to setproperties or attributes for objects in your documentSave your documentSave the blank document you created when you launched Dreamweaver.1Choose File Save.2In the Save As dialog box, select the Sites/Scaal site folder to save the file in.3In the File Name field, type my scaal home.html.4Click Save.Dreamweaver Tutorial27
Define the title of the pageDefining a page title for an HTML document helps users identify and keep trackof a page they’re browsing. The page title appears in the browser title bar when apage is viewed in a browser. When a page is bookmarked, the page title appears inthe bookmark list. If a document is created without a page title, the documentappears in the browser with the title Untitled Document.1With the Document window active, choose Modify Page Properties to see thepage property options.2In the Title field of the Page Properties dialog box, type Scaal Gourmet Coffee.3Click OK.The title appears in the title bar of the Dreamweaver Document window.28Chapter 1
Create a page layoutYou’ll begin by opening the completed version of the Scaal home page in abrowser so that you can refer to it while working.1Choose File Open, navigate to the Sites/Scaal site folder, selectscaal home.html, and then click Open.2Press F12, to preview the page in a browser.The home page appears in the browser.Leave the browser window open in the background to refer to as necessary.3Click in the Document window of the scaal home.html document, and thenchoose File Close to close the document.Add layersLayers are ideal for creating complex page layouts, since you can easily repositionpage elements that have been placed in layers by dragging them. You’ll lay out thehome page using layers, and then convert the layout to a table layout so that thepage will accurately display in both 3.0 and 4.0 browsers.You cannot convert layers to tables if the document being converted containsnested or overlapping layers.1Choose Window Layers to open the Layer palette.2Make sure the Prevent Overlaps box is selected.Dreamweaver Tutorial29
3Click in the Document window of the my scaal home document to make thedocument active.4Choose Insert Layer.A layer is added to the document.5In the Object palette’s Common panel, click the Draw Layer button.6Move the pointer to the Document window; the pointer changes into adrawing tool. In the space below the first layer, drag the pointer to drawa new layer.7Repeat the actions in steps 5 and 6 to draw another layer.Your page should look similar to the screen below.30Chapter 1
Select and manipulate a layerYou can change the position or shape of the layers in your document.1Click the border of the layer.Handles appear around a selected layer:2To resize a layer, click a layer handle, and drag the handle to the desired size.3To move a layer, do one of the following: Use the arrow keys. Hold down Shift and use the arrow keys to move a layer five pixels in thedirection of the arrow used. Click the tab in the top left corner of the layer and drag the layer to thedesired position.Dreamweaver Tutorial31
Add an imageNow you’ll insert the Scaal logo image in the document.1Click anywhere in the uppermost layer. Clicking in a layer places the insertionpoint inside the layer without selecting the layer.An active layer with an insertion point in it looks like this:2Choose Insert Image.3In the Select Image Source dialog box, locate the Sites/Scaal site/Images folder,navigate to logo scaal.gif, and click Select (Windows) or Choose (Macintosh).The image appears in the layer.Add the navigation imagesNow you’ll add images for navigation buttons.After you add the button images, add space between the graphics: add a paragraphreturn after you insert the images.1Place the insertion point in the navigation layer (the bottom left layer).2In the Object palette’s Common panel, click the Insert Image button.The Select Image Source dialog box appears.32Chapter 1
3In the Images folder of the Scaal site, navigate to btn ourstory up.gif, andthen click Select (Windows) or Choose (Macintosh) to insert the image.The Our Story image appears in the layer.4Position the insertion point after the image in the layer, and press Enter(Windows) or Return (Macintosh) to add space between this image and thenext image you insert.5In the Object palette, click the Insert Image button, and in the dialog box thatappears select btn products up.gif, and then click Select (Windows) or Choose(Macintosh).6Position the insertion point after the image in the layer, and press Enter(Windows) or Return (Macintosh).7In the Object palette, click the Insert Image button, and in the dialog box thatappears select btn thisweek up.gif, and then click Select (Windows) or Choose(Macintosh).Your document layout should look similar to this.Dreamweaver Tutorial33
Name the imagesMake a habit of naming the elements in your documents. Later, when you need toreference or select a particular image, layer, or some other document element,you’ll be able to easily identify it. You’ll be referencing these images later in thetutorial, so name them now.1In the Document window, click the Our Story image to select it.2In the Image field of the Property inspector, type ourstory.3Repeat these steps, selecting and naming the other two images in yourdocument. Name the second image products and the third image thisweek.Add text to a layerNow you’ll add text to the remaining layer.In Dreamweaver, you can type content directly into a layer, or you can cut andpaste content from another document into a layer. In this tutorial, you’ll add textto the layer by copying and pasting content from an existing text file to a layer.1Choose File Open; then, in the Scaal site folder, open DW3 copy.txt.The DW3 copy.txt document opens in a new Dreamweaver Documentwindow. DW3 copy.txt is the file you’ll copy the text from.34Chapter 12Choose Edit Select All to select the document text.3Choose Edit Copy to copy the text.4Close the DW3 copy.txt document.5In the my scaal home document, position the insertion point in the bottomright layer.6Choose Edit Paste to paste the text into the layer.
Format textYou can format text in the Document window by setting properties in theProperty inspector. First, select the text you want to format, and then apply thechanges. You’ll change the font and size of the text.Before you format the text, you’ll create a couple of paragraphs. Add a paragraphreturn after the first sentence and after the second sentence.1If the Property inspector isn’t open, choose Window Properties.2With the insertion point anywhere in the layer, press Control A (Windows) orCommand A (Macintosh) to select all the text in the layer.3In the Property inspector’s second Format pop-up menu, which currently readsDefault Font, select Arial, Helvetica, sans-serif.4In the Size pop-up menu, select 3.The text in your document automatically updates to reflect the changes.Add a background color to a layerYou can also use the Property inspector to set the background color of a layer.You can select a color using the color picker, or you can type the hexadecimal codefor a color.1Click the border of the layer that contains the text to select it. (Handles appeararound a layer when it is selected.)2In the Property inspector, click the BgColor color box.The color palette and eyedropper icon appear. You can use the eyedropper to“pick up” any color in the visible work area, in addition to picking colors in thecolor palette.3Move the color picker icon to the Scaal logo and click the gold that surroundsthe letter S.The layer background color is updated.Dreamweaver Tutorial35
Position the layersNow that you’ve completed the design of your page—laying it out using layers—you’ll convert the layers to a table layout so the page can be viewed by users with3.0 browsers.When you convert layers to a table, Dreamweaver creates table columns, rows,and cells to fit the layers on a page. To reduce the number of table columns, rows,and cells you create as you convert the document layout, align layer elementsbefore converting a document. Use the Property inspector to position layers ina document.First, you’ll resize and move the layers as you design your page; then you’ll set theposition of the two lower layers so they align at the top.36Chapter 11Resize the top layer by dragging the layer handles in until they just surroundthe Scaal logo and the text following it.2Resize the navigation layer (the bottom left layer) by dragging the layer handlesin until they just surround the images.3Move the text layer so that it is positioned next to the navigation layer. Selectthe layer, and then use the arrow keys or drag the layer by the layer tab. (Thelayers won’t overlap, because Prevent Overlap is selected in the Layer palette.)4If all the layer property fields aren’t visible in the Property inspector, click theexpander arrow in the lower right corner of the Property inspector.
5Select the layer that contains the navigation images. Hold down Shift and selectthe layer that contains the text.Both layers are selected.6In the Property inspector’s T field, type 100px. This precisely positions bothlayers 100 pixels from the top of the document.Click anywhere in the document to deselect the layers and to see thelayers align.Dreamweaver Tutorial37
Convert layers to a tableNow that you’ve laid out the page, convert the layers to a table so that the pagewill be displayed accurately in 3.0 as well as later version browsers.1Choose Modify Layout Mode Convert Layers to Table.The Convert Layers to Table dialog box appears.2In the Convert Layers to Table dialog box, under Table Layout make sure thatSmallest: Collapse Empty Cells and Use Transparent GIFs are selected.3Under Layout Tools, make sure that Prevent Layer Overlaps is selected.4Click OK.The layers are now converted to a table.Note: Dreamweaver sets the space between the table columns and rows usingtransparent GIFs. After converting layers to a table, you’ll see the file tranparent.gif in theroot level of your site folder. Don’t move this file to your Images folder; if you do, you’llsee broken image icons when you view your page in a browser.38Chapter 15Close the Layer palette.6Save your file.
Create rollover imagesA rollover image is an image whose display changes when the pointer is “rolled”over it. You create a rollover image by attaching a behavior to an image.A behavior is a combination of an event and an action. Events are situations thattrigger actions. For example, an event called onClick can occur when the user clicksa button, or an event called onMouseOver can occur when the mouse pointer passes(“rolls”) over an object. Actions are pieces of prewritten JavaScript code thatperform specific tasks, such as opening a browser window, playing a sound, orstopping a Shockwave movie.When attaching a behavior to a page element, you specify both an action and theevent that triggers it. Dreamweaver offers several predefined actions that you canattach to page elements.In this part of the tutorial, you’ll apply Swap Image actions to the Our Story,Products, and This Week images so that the images are highlighted whenthe mouse passes over them (that is, when the onMouseOver event occurs).For example, when the Our Story image appears on the page normally, itlooks like this:After you’ve defined a behavior that includes the Swap Image action during theonMouseOver event, the Our Story image will look like this (the identical imagewith a different background color) when the mouse passes over it:You’ll continue working on the home page file to attach behaviors to thenavigation images on your page. Then you’ll preview the page in a browser to testthe behaviors.1In the Document window, click the Our Story image to select it.2Choose Window Behaviors or press F8 to open the Behavior inspector, whichlists all behaviors defined for a selected element.Dreamweaver Tutorial39
3In the Events For pop-up menu, 3.0 and Later Browsers should already bedisplayed. If it is not, select it.4Add a new action to the list by clicking the plus ( ) button and choosing SwapImage from the pop-up menu.The Swap Image dialog box appears. In the Images list, you’ll see a list of allimages on the page, with the Our Story image selected. This is the originalimage, which will be replaced with a highlight image when the mouse pointerpasses over it.5Click Browse to navigate to the Scaal site/Images folder, selectbtn ourstory over.gif, and then click Select (Windows) or Choose (Macintosh)to select the image.This image replaces the original image during the onMouseOver event.6Accept the default settings for preloading and restoring images.The Preload Images option loads the swap image into the browser’s cache as thepage loads, so that when the user first moves the mouse pointer over the OurStory image, there is no noticeable pause before the highlight image appears.The Restore Images onMouseOut option automatically assigns the Swap ImageRestore action to the onMouseOut event for this image. This returns the imageto its original state when the user moves the mouse pointer away from it.40Chapter 1
7Click OK to close the Swap Image dialog box and apply the changes youjust made.The Behavior inspector now includes the events and actions you just definedfor the image. The onMouseOver event appears with the Swap Image action;above it is the onMouseOut event with the Swap Image Restore action. (Thisbehavior was defined when you accepted the default options in the Swap Imagedialog box.)8Repeat steps 4 to 7 to attach Swap Image actions and onMouseOver events to theProducts and This Week images: Select the Products image. Then in the Swap Image dialog box, set the sourceof the Products swap image to btn products over.gif. Select the This Week image. Then in the Swap Image dialog box, set the sourceof the This Week swap image to image btn thisweek over.gif.9Close the Behavior inspector.10Press F12 to see your document in your default Web browser.You do not have to save a document before you preview it. All browser-relatedfunctions work while you preview a document.11Move the mouse pointer over the Our Story, Products, and This Week imagesto see how they change.12When you finish previewing the file, close the browser window.13Return to Dreamweaver and choose File Save to save the changes you madeto the home page.Now, you’ll start creating the files your home page will link to.Dreamweaver Tutorial41
Import a Word HTML documentThe tutorial file for the Our Story page contains a document that was created inMicrosoft Word and saved as an HTML document. You’ll import this documentinto Dreamweaver, and then clean up any nonstandard HTML code in thedocument using a new Dreamweaver feature called Clean Up Word HTML.The Clean Up Word HTML feature provides options for cleaning up or fixingHTML tags, defining CSS (Cascading Style Sheets) elements, setting a pagebackground color, removing Word-specific markup tags, and converting Wordfont sizes and headings to HTML size attributes.1With the my scaal home page still open, choose File New to open a new file.2Choose File Import Import Word HTML to import a WordHTML document.3In the Select Word HTML File to Import dialog box, navigate toDW3 ourstory word.html, and then click Select (Windows) or Choose(Macintosh) to select the Word HTML file.You are prompted to save your document.42Chapter 1
4Click OK.The Our Story document opens in the background, and the Clean Up WordHTML dialog box appears in front of the document.For the purpose of this tutorial, you’ll accept the default settings in the CleanUp Word HTML dialog box. These options set the background color of thedocument to white, retain much of the current formatting, and clean up theHTML coding in the file.5In the Clean Up Word HTML dialog box, all of the options on the Basic tabshould be selected by default. Make sure they are all selected, and click OK.The Clean Up Word HTML log appears, detailing the results of the cleanup.6Click OK.You see a blank document. This is the new document you created before youimported the Word HTML document. The imported document is behind theblank document.7Close the blank document.8Click in the Our Story document to make it the active window.9Choose File Save As to save the Our Story document; name it my ourstory.Notice that the Our Story document retains the table formatting and fontattributes of the original Word HTML file.Dreamweaver Tutorial43
Format text using HTML stylesNow that you’ve imported the Our Story document, you’ll add formattingchanges to the text. An easy way to apply formatting to a document is by usingHTML styles. An HTML style consists of one or more HTML tags; it can includecolors, fonts, size, and so on. You can create HTML styles to apply to an entireparagraph or to apply to selected text. Once you create an HTML style, you canapply it to any page in the current site.Unlike CSS styles (which are styles that adhere to the Cascading Style Sheetsspecification), HTML style formatting affects only text that you apply it to, ortext that you create using a selected HTML style. If you change the formatting ofan HTML style you have created, text that was originally formatted with that styleis not updated.Apply HTML stylesIn this tutorial, you’ll use an HTML style to format text in the Our Storydocument.1Choose Window HTML Styles. The HTML Style palette appears.Notice that the styles in the palette are for the my tutorial site. There are threeitems in the palette: The first two items are Dreamweaver commands, Clear Selection Style andClear Paragraph Style. Use these commands to clear existing styles from textyou’ve selected in your document. The other item is an HTML paragraph style named body, created for you to usein this tutorial.2Make sure the Apply option is selected in the lower left corner of the HTMLStyle palette.3In the my ourstory document, place the insertion point in the first paragraph.You can place the insertion point anywhere within a paragraph to apply a styleto a paragraph.4In the HTML Style palette, click the body style.The text in the first paragraph is reformatted in the new style.544Chapter 1Apply the body style to other paragraphs in the document.
Create HTML stylesNext, you’ll create an HTML style to add emphasis to the word Scaal inthe document.1Click the New Style icon at the bottom of the HTML Style palette.New Style iconThe Define HTML Style dialog box appears.2In the Name field, type scaal.3For Apply To, select Selection.This applies the style to a selected range of text rather than a whole paragraph.4For When Applying, leave the default setting, Clear Existing Style, which clearsany styles applied to the selected text when you apply the new style.5For Font Attributes, select the desired attributes. Here are some suggestions: Font: Arial, Helvetica, sans-serif Size: 3 Color: #CC9933 (or use the color picker to select a gold color) Style: click Other, and then select EmphasisDreamweaver Tutorial45
6Click OK.The new style is added to the HTML Style palette. Notice the a that precedesthe Scaal style: this icon identifies a style as a selection style rather than aparagraph style.When applying a style to a selection, you must select the range of text that youwant to reformat.7In the Document window, select the word Scaal in the first paragraph.8Select the scaal style in the HTML Style palette.The text displays the new style in the document.46Chapter 19Apply the scaal style to a few more selections, and then close the HTMLStyle palette.10Choose File Save to save the changes you made to the my ourstorydocument.11Choose File Close to close the document.
Create a visual map of your siteUse the Dreamweaver Site Map option to provide a high-level visualrepresentation of the structure of a local site. You can also use the Site Map view toadd new files to the site; to add, remove, and change links; and to create a graphicfile of the site that you can export to and print from an image editing application.In the Site Map window, the home page for a site always appears at the top of asite map; below the home page you can see which files the home page links to.You’ll set DW3 scaal home.html as the home page for the my tutorial site.This page is similar to the home page you created. (It’s essentially the same asthe my scaal home document, but images and text formatting have alreadybeen added.)There are a number of ways to define a site home page. The easiest way to set ahome page is by using the context menu.1Click the title bar of the Site window if visible, to make it active, or chooseWindow Site Files.2In the Site window, in the Local Folder list, locate the DW3 scaal home.htmlfile. Right-click (Windows) or Control-click (Macintosh) the icon for theDW3 scaal home.html file.3From the context menu, choose Set as Home Page.4Click the Site Map icon in the top left area of the Site window.Dreamweaver Tutorial47
The Site window now appears with two views of your local site: on the left is a sitemap, which graphically represents the current structure of the Scaal site (withDW3 scaal home.html as the home page), and on the right is a list of the localfolder’s contents.The DW3 scaal home page currently has no links. You’ll add links to this page inthe next section of this tutorial.Leave the Site window open for now, so you can see how the site map updates asyou add links to the home page.Create linksImages on the left side of the Scaal home page guide visitors to specific pages inthe Scaal site. You’ll add links from the Our Story, Products, and This Weekimages to their corresponding pages.You’ll see that there are a number of ways to create links using Dreamweaver. First,you’ll add a link from the Our Story image to the Our Story page using theProperty inspector.1In the Site window, double-click the icon for the DW3 scaal home.html filein either panel.The DW3 scaal home.html file opens.2In the Document window, click the Our Story image to select it.Don’t double-click the image, or Dreamweaver will open the Select ImageSource dialog box.48Chapter 1
3Choose Window Properties to open the Property inspector if it isn’talready open.The Image Property inspector displays information about the selected image.Note: The Link field contains a number sign (#), created when you attached the SwapImage behavior to the image. Don’t remove the number sign; it will be replaced with thefile name of the document you link to.4In the Property inspector, click the folder icon to the right of the Link field.5In the Select File dialog box, browse to my ourstory.html, and click Select(Windows) or Choose (Macintosh) to select the file.The file name appears in the Link field of the Property inspector. Nowyou’ll add a link to the Products image using the Property inspector and theSite window.6Click the title bar of the Site window to make it active, or choose Window Site Files. Resize your Document window, if necessary, so that you can positionthe left side of the Document window and the Site window side by side.7In the Document window, click the Products image to select it.Dreamweaver Tutorial49
8In the Property inspector, drag the Point-to-File icon (located next to the Linkfield) to the Site window, and point to the file DW3 products index.html.The file name appears in the Link field in the Property inspector for theproducts image.Click the Site Map icon in the Site window. The site map updates to reflect thelink you added.A plus ( ) sign next to any file in the site map indicates that the file containslinks to other documents. Click the plus sign to expand the site map treeto display the associated files; click the minus (–) sign to collapse the sitemap view.Next, you’ll change a link using the context menu.9In the Document window, right-click (Windows) or Control-click (Macintosh)
Take a guided tour of Dreamweaver Before you get started, watch the Guided Tour movies in Dreamweaver Help to familiarize yourself with Dreamweaver's features. 1 In Dreamweaver, choose Help Using Dreamweaver. 2 In the Contents list in the left frame, click Getting Started, and then click Learning Dreamweaver. 3 Click a movie title. 4
