Transcription
1CHAPTER 1Dreamweaver Tutorial. . . . . . . . . . . . . . . . . . . . . . . . . . . . . . . . . . . . . . . . . . . . . . . . . . . . . . . .The Dreamweaver tutorial walks you through the steps of building Web pages.You’ll learn how to use Macromedia Dreamweaver to define a local site, and you’lluse Dreamweaver panels and tools to create and edit Web documents.In this tutorial, you’ll create Web pages for Compass, a fictitious company thatspecializes in adventure travel. If you’re new to Dreamweaver, start at thebeginning of the tutorial and work your way through the end. If you’re alreadyfamiliar with Dreamweaver, you may want to start at “Use the Assets panel” onpage 56; this section and those that follow it focus on new or changed features inDreamweaver such as the Assets panel, Flash buttons and text, using a template,running a site report and adding a Design Note.The tutorial takes approximately one to two hours to complete, depending onyour experience, and focuses on the following Dreamweaver tasks: Defining a local siteCreating a page in Layout viewInserting an image and a rollover imageWorking with tables in Standard viewCreating a link to another documentInserting assets from the Assets panelInserting Flash Text and Flash Button objectsCreating and applying a templateRunning a site reportAdding a Design NoteNote: This tutorial demonstrates some features that are supported only in 4.0 orlater browsers.27
Take a guided tour of DreamweaverBefore you get started, watch the Guided Tour movies to familiarize yourself withthe Web development process and with Dreamweaver features.1In Dreamweaver, choose Help Guided Tour.2Click a movie title.3Close the movie when you finish.The Dreamweaver work areaLet’s start with a brief overview of the Dreamweaver work area. If you haven’t already launched Dreamweaver, double-click the Dreamweavericon to launch it.The Dreamweaver work area accommodates different styles of workingand levels of expertise. When you launch Dreamweaver, the following workarea items open:ToolbarDocument windowObjects panelFloating panelTag selectorLauncher barProperty inspector The Document window displays the current document as you create and edit it. The Objects panel contains icons you click to insert objects in your document,and to change the way you work in a document.28Chapter 1
Dreamweaver provides many floating panels, such as the HTML Styles panel andthe Code inspector, which enable you to work with other Dreamweaver elements. The Launcher bar contains buttons for opening and closing your mostfrequently used inspectors and panels. The Property inspector displays properties for the selected object or text, andlets you modify those properties. (Which properties appear in the inspectordepend on the object actively selected in the document.)To open Dreamweaver windows, inspectors, and panels, use the Window menu. Acheck mark next to an item in the Window menu indicates that the named item iscurrently open (though it may be hidden behind other windows). To display anitem that isn’t currently open, choose the item name from the menu or use itskeyboard shortcut.Working in DreamweaverDreamweaver can display a document in three ways: in Design view, in Codeview, and in a split view that shows both the design and code. (To change the viewin which you’re working, select a view in the Dreamweaver toolbar.) By default,Dreamweaver displays the Document window in Design view.In addition, you can work with the Dreamweaver Design view in two differentways—in Layout view and Standard view. (You select these views in the Viewcategory of the Objects panel.) In Layout view you can design a page layout, insertgraphics, text, and other media; in Standard view, in addition to inserting graphicstext and media, you can also insert layers, create frame documents, create tables,and apply other changes to your page—options that aren’t available in Layout view.How the tutorial files are arrangedBoth the completed and partially completed HTML files used in this tutorialare in the Compass Site folder in the Tutorial folder. Images and other associatedfiles for the site are also in the Compass Site folder.Each tutorial file has a meaningful name—for example, the HTML file thatcontains travel destination information is named Destinations.html. The partiallycompleted files—which you’ll be working on—have names similar to theircompleted file counterparts, except they begin with DW4 ; the partiallycompleted version of Destinations.html, for example, is calledDW4 Destinations.html.Dreamweaver Tutorial29
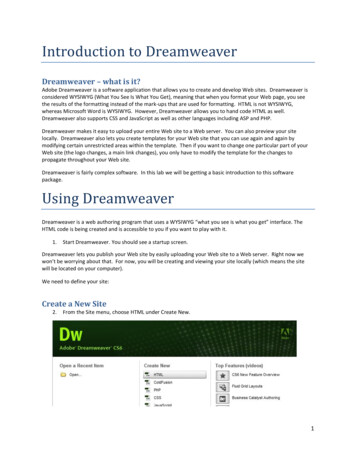
Preview the completed Web siteNext, view pages in the completed Web site to get an idea of what you’ll beworking toward.1If you haven’t already done so, launch Dreamweaver.2In Dreamweaver, choose File Open. In the file browsing dialog box, navigateto the Dreamweaver 4 folder (where you installed Dreamweaver); then navigateto Tutorial/Compass Site.3In the Compass Site folder, select CompassHome.html, and then click Opento open the Compass home page in the Document window.Do not edit this page; you will create your own version of this page.4Choose File Preview in Browser and select a browser in which to view theCompass home page. (Use a version 4.0 or later browser to view this site.)5Move the pointer over the navigation buttons to see rollover image effects.Click the navigation buttons to explore the site.30Chapter 16Close the browser when you’re finished looking at the site.7Open a new blank document in Dreamweaver, choose File Open.8Close the CompassHome.html file, which is open in Dreamweaver.
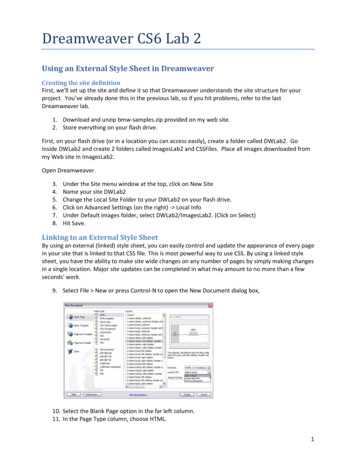
Set up the site structure for the tutorialThere are two ways you can work with the tutorial files—use a predefined localsite or define a local site. If you’re new to Dreamweaver, you may want to define the local site for thetutorial so you’ll know how to set up a local site when you’re ready to work onyour own sites. If you’re already familiar with defining a site using Dreamweaver, you may wantto use the predefined tutorial site. From the Dreamweaver main menuchoose Site Open Site, then select Tutorial - Dreamweaver. The Tutorial Dreamweaver site links to the Compass Site files located in the Dreamweaver4/Tutorial folder. After selecting the local site, skip to the “Create the site homepage” on page 34 section of the tutorial.Note: If you select the predefined site, the site name displayed in the tutorialscreenshots will not match; instead of seeing my tutorial, you’ll see Tutorial Dreamweaver as the site name in your screens.Define a local siteWhen you define a local site, you tell Dreamweaver where you plan to store all thefiles for a particular site. To work effectively in Dreamweaver, always define a localsite for each Web site you create.For this tutorial, you’ll specify the Compass Site folder as the local site folder.1If it isn’t already open, launch Dreamweaver.A blank document opens.2Choose Site New Site.3In the Site Definition dialog box, make sure Local Info is selected in theCategory list.4In the Site Name field, type my tutorial.The site name lets you easily identify and select a site from a list of sitesyou’ve defined.5Click the folder icon to the right of the Local Root Folder field.Dreamweaver Tutorial31
6In the dialog box that appears, navigate to the Tutorial/Compass Site folder,and do one of the following: In Windows, click Open, then click Select when Compass Site appears inthe Select field. On the Macintosh, click Choose to select the Compass Site folder.The Local Root Folder field updates to display the path to the local site.Note: The complete path to the Compass Site folder may vary, depending on whereyou installed Dreamweaver.7Under Cache, do one of the following: Select Enable Cache (Windows) to create a cache file for the site. Select Use Cache to Speed Link Updates (Macintosh) to create a cachefile for the site.Caching the files in the Compass Site folder creates a record of existingfiles so Dreamweaver can quickly update links when you move, rename,or delete a file.832Chapter 1Click OK to close the dialog box.
9Click OK to the cache message.The Site window now displays a list of all the folders and files in the local site.The list also acts as a file manager, allowing you to copy, paste, delete, move,and open files just as you would on a computer desktop.Dreamweaver Tutorial33
Create the site home pageNow that a site structure is set up for storing pages and assets for the Compasssite, you’ll create the first page—a home page for the site. As you build this page,you’ll add images, text, and Flash assets; your document will contain the samedesign components as the completed Compass home page.Save your documentBegin by saving the document you’re working in.1Leave the Site window open, and click the Document window to makeit active.The Site window remains open in the background.2Choose File Save.3In the Save As dialog box, select the Compass Site folder as the location forthis document.4In the File Name field, type my CompassHome.html.5Click Save.Notice that the document name now appears at the top of the Document window.34Chapter 1
Define the document page titleThough the document has a file name, notice it is still labelled UntitledDocument; that’s because it needs an HTML document name, or page title.Defining a page title helps site visitors identify the page they’re browsing: thepage title appears in the browser title bar and in the bookmark list. If you createa document without a page title, the document appears in the browser with thetitle Untitled Document.In this part of the tutorial, you’ll title your page.1With the Document window active, choose View Toolbar if the toolbar isn’talready visible.The Dreamweaver toolbar appears above the Document window2In the Title field, type Compass Home Page; then click in the Documentwindow to see the page title update in the Document window’s title bar.3Save your file.Design a page in Layout viewYou’ll start your first page while working in the Dreamweaver Design view. You’lllay out the page then insert images and text.The page you complete in this section of the tutorial will look similar to this page.Dreamweaver Tutorial35
Work in Layout viewDreamweaver has two visual design views—Standard view and Layout view. You’llstart by working in Layout view, which allows you to draw layout cells or layouttables into which you can add content such as images, text, or other media.In this part of the tutorial, you’ll lay out the page; in the next section you’ll addcontent. (Once you’re comfortable with these two tasks, you may find it easier toadd layout and content together.)1In the Objects panel, click the Layout View icon if it isn’t already selected.Draw Layout Cell iconDraw Layout Table iconLayout View iconThe Getting Started in Layout View dialog box appears and describes theLayout view options.36Chapter 12Review the options, then click OK to close the dialog box.3In the Objects panel under Layout notice the Layout options—Draw LayoutCell and Draw Layout Table—are now available; these options aren’t availablein Standard view.
Draw layout cellsIn Layout view you can draw layout cells and layout tables to define the designareas of a document. This task is easier to accomplish if you prepare a sample ofthe page you’re creating before you begin laying out a page.Look at the following sample layout to get an idea of the page layout you’recreating in this section of the tutorial. There’s a cell for the Compass logo, a tablewith three cells for site navigation buttons, a cell for another graphic, and a tablefor three cells that will hold text.You’ll draw tables and cells similar to this layout as you work in your document.First, you’ll draw a layout cell in which you’ll insert the Compass logo.1Click in the Document window of the my CompassHome document to makethe document active.2If they aren’t already open, open the following work area tools: The Objects panel (choose Window Objects), which you’ll use to add objectsto your document. The Property inspector (choose Window Properties), which you’ll use to setproperties or attributes for objects in your document. If the Property inspectorisn’t already expanded, click the expander arrow in the lower right corner soyou can see all the property options.3In the Objects panel, click the Draw Layout Cell icon.Dreamweaver Tutorial37
4Move the pointer to the Document window; the mouse pointer changes to adrawing tool (looks like a small cross). Click in the upper left corner of thedocument, then drag to draw a layout cell.When you release the mouse, a layout cell appears in a layout table.LayoutCellLayoutTableThe layout table expands to fill the Document window, and defines the pagelayout area. The white rectangle is the layout cell you drew. You can placeadditional layout cells in the gray area of the layout table.Resize layout cellsTo precisely design a page, you can set the size of cells you add in a document. Youcan also reposition cells in the page.1Click the border of the layout cell to select it.Handles appear around a selected layout cell:38Chapter 1
2To resize this layout cell, do one of the following: In the Property inspector for the layout cell, type 510 in the Fixed field to set thecell’s width to 510 pixels, then click in the document to see the cell width change.Note: If you enter a pixel width that is larger than the width of the layout table, or thatcauses the cell to overlap another cell in a layout table, Dreamweaver alerts you andadjusts the cell width to a valid width. On the right side of the layout cell, drag the middle resize handle to the rightuntil the cell is the desired width. When you release the mouse, the cell’s widthis displayed in the column header area along the top of the layout table.Add multiple layout cellsNext you’ll add three layout cells below the logo cell you just created. Later you’llinsert the page’s navigation buttons in these cells.1In the Objects panel, click the Draw Layout Cell icon; then hold down theControl key (Windows) or Command key (Macintosh).2In the Document window, position the pointer below the cell you drew for thelogo; then drag to draw a layout cell.Continue to hold the Control key (Windows) or Command key (Macintosh)and draw two more layout cells. Your screen should look similar to this.Dreamweaver Tutorial39
Move a layout cellIf you need to line up the cells next to each other you can resize and move thelayout cells as you need. You change the size of a layout cell by using one of itsresize handles.You cannot click and drag a cell to move it to a new position. If you need to movea layout cell to reposition it in a document, follow these steps.1Click the border of a layout cell to select it.2To move the layout cell, do one of the following: Use the arrow keys. Hold down Shift and use the arrow keys to move a layout cell 5 pixels at a time.Group cells in a layout tableNow you’ll create a table of the navigation button cells you just created. Groupingthe cells in a table enables you to control the cell spacing and to easily move thecells as a group if you want change the page layout. You’ll create a table for thenavigation buttons that is the same width as the logo cell above it.Use Draw Layout Table to group the navigation button images.40Chapter 11In the Objects panel, click the Draw Layout Table icon.2In the Document window, position the pointer at the top left corner of the firstnavigation button cell; then drag the pointer so the table contains the threecells and is the length of the logo cell.
3Release the mouse to see the cells grouped in a new table.You’ve created a table that contains three layout cells (the white area in thetable) and an empty space (the gray area in the table).Move the layout tableYou can select and move a layout table to other areas in a document. You cannot,however, move a layout table so that it overlaps another.Next you’ll move the table you just created a few pixels to the right to offset thealignment of the navigation buttons to the logo when they are inserted in the page.1In the Document window click the tab on the Layout table to move it.2Drag the layout table a few pixels to the right to reposition it, then drag one ofthe table’s right resize handles to align the right sides of the logo and navigationbutton layout cells.Notice that as you create new tables and cells, gridlines appear outlining thelayout area. You can use these gridlines to align the layout elements.Dreamweaver Tutorial41
Add another layout cellNext add a layout cell for the Learn More About graphic.1In the Objects panel, click the Draw Layout Cell icon.2In the Document window, draw a new cell in the space below the navigationbutton table.Your page should look similar to this:Create a layout tableIn the last section you used cells to create a table. Now, you’ll start with a tableand add cells.42Chapter 11In the Objects panel, click the Draw Layout Table icon.2Move the pointer to the Document window. In the area below the layout cellyou just added, drag the pointer to the right to align with the right side of thetopmost cell; then drag down to the bottom of the Document window.
Draw layout cells in a tableNow add layout cells into which you’ll add text about travel locations.1In the Objects panel, click the Draw Layout Cell icon and move the pointer tothe layout table you just drew.2Draw a table cell approximately one-third the space in the table.3Click the border of the layout cell to select it; then in the Property inspector’sFixed field, type 170 to set the cells width.4Draw another table cell approximately one-third the space in the table next tothe first cell.5Click the border of the layout cell to select it; then in the Property inspector’sFixed field, type 170 to set the cells width.6Draw the last table cell in the remaining space in the table. Resize or move thecells to adjust the size or position of the cells as needed.Your screen should look similar to this:Dreamweaver Tutorial43
Add content to the pageNow that you’ve laid out the areas of the page, you’ll add the graphical content,such as the logo, and rollover images.Insert imagesYou’ll learn two ways to insert images in Dreamweaver—using Dreamweaver’smain menu and using the Objects panel.1Click anywhere in the logo layout cell (the topmost layout cell).Clicking in a layout cell places the insertion point in the cell withoutselecting the cell.2Choose Insert Image.3In the Select Image Source dialog box, locate the Compass Site folderand navigate to the Assets folder, then the images folder; click thecompass logo.gif to select it.4Make sure the Relative To pop-up menu located at the bottom of the dialogbox is set to Document, then click Select (Windows) or Open (Macintosh) toselect the image.The image appears in the layout cell.5Click anywhere in the Learn More About layout cell to place the insertionpoint in the cell.6In the Objects panel’s Common category, click the Insert Image icon.7In the Select Image Source dialog box, locate the Compass Site/Assets/imagesfolder, and navigate to learnMoreAbout.gif; then click Select (Windows) orOpen (Macintosh) to select the image.The image appears in the layout cell.844Chapter 1Choose File Save to save the changes you made to the home page.
Create a rollover imageA rollover image is an image whose display changes when the pointer passes(“rolls”) over it.You’ll use the Insert Rollover Image command to create three rollover images forthe navigation buttons—Trip Planner, Destinations, and Travel Logs.A rollover image consists of two images: the image displayed when the page firstloads in the browser, and the image displayed when the pointer moves over theoriginal image. Be sure to use images that are the same size. The first imagedictates the size of the display, so if the second image is much smaller or muchlarger, the results will look distorted or unprofessional.Next, you’ll add a navigation button with a rollover image to your page.Then you’ll add the other navigation buttons and preview the page in a browserto test the rollovers.1In the Document window, click in the first cell of the navigation button table.This tells Dreamweaver where you want the image inserted.2To insert a rollover image, do one of the following: In the Common category of the Objects panel, click the Insert RolloverImage icon. Choose Insert Interactive Image Rollover Image.3In the Insert Rollover Image dialog box, type planner in the Image Name field.This gives the image a unique name, and makes it easily identifiable in theHTML code.4In the Original Image field, click Browse; then navigate toMenuTripPlanner.gif and click Select (Windows) or Open (Macintosh).This tells Dreamweaver which image to display when the page first loads.5In the Rollover Image field, click Browse; then navigate toMenuTripPlanner on.gif and click Select (Windows) or Open (Macintosh).This tells Dreamweaver which image to display when the pointer is overthe original image.Dreamweaver Tutorial45
6Make sure the Preload Rollover Image option is selected so the rollover imagesload when the page loads in the browser, ensuring a quick transition betweenimages when a user moves the pointer over the original image.7Click OK to close the dialog box.The image appears in the document.8Resize the layout cell to fit the image.Create the other rollover imagesNow you’ll add rollover images for the other navigation buttons.46Chapter 11In the Document window, click in the second navigation button cell; then in theCommon category of the Objects panel, click the Insert Rollover Image icon.2In the Insert Rollover Image dialog box, type destinations in the Image Namefield to provide the image a unique name.3In the Original Image field, click Browse, then navigate to and selectMenuDestinations.gif.4In the Rollover Image field, click Browse, then navigate to and selectMenuDestinations on.gif.5Make sure the Preload Rollover Image option is selected, then click OK to closethe dialog box.6In the Document window, click in the third navigation button cell; then in theObjects panel’s Common category, click the Insert Rollover Image icon.7In the Insert Rollover Image dialog box, type travellog in the Image Name fieldto provide the image a unique name.8In the Original Image field, click Browse then navigate to and selectMenuTravelLogs.gif.9In the Rollover Image field, click Browse then navigate to and selectMenuTravelLogs on.gif.10Make sure the Preload Rollover Image option is selected, then click OK to closethe dialog box.11Resize the two layout cells to fit the image.
Preview your documentYou cannot view rollover behavior in the Dreamweaver Document window;rollover images work only in a browser. However, you can preview the documentin Dreamweaver to see its browser-related functions. You do not have to save thedocument before you preview it.1Press F12 to see your document in a Web browser.Move the mouse pointer over the rollover images you created to see them change.2When you finish previewing the file, close the browser window.3Return to the Dreamweaver Document window and choose File Save to savethe changes you made to the home page.Dreamweaver Tutorial47
Insert textNow you’ll add text in the cells of the bottom layout table.In Dreamweaver, you can type content directly into a layout cell, or you can cutand paste content from another document into a layout cell. In this tutorial, you’lladd text to the layout cell by copying and pasting content from an existing text fileto a layout cell.1Choose File Open; then, in the Compass Site folder, openDW4 HomeText.txt.The DW4 HomeText.txt document opens in a new DreamweaverDocument window.2In DW4 HomeText.txt select the first two lines of text, “Fly Fishing”through “ravioli.”3Choose Edit Copy to copy the text.4In the my CompassHome document, click in the first layout cell in the textdescription layout table.5Choose Edit Paste to paste the text into the layout cell.6In DW4 HomeText.txt select the next two lines of text, “Level 5 Rapids”through “Siberia.”7Choose Edit Copy to copy the text.8In the my CompassHome document, click in the second cell in the textdescription layout table.9Choose Edit Paste to paste the text into the layout cell.10In DW4 HomeText.txt select the last two lines of text, “Puget SoundKayaking” through “Puget Sound.”11Copy the text, then paste it in the third cell in the layout table.12Close DW4 HomeText.txt, then click in the my CompassHome.html tomake it the active document.Format textYou can format text in the Document window by setting properties in theProperty inspector. First, select the text you want to format, then apply thechanges. You’ll change the font type and size of the text.48Chapter 11If the Property inspector isn’t open, choose Window Properties.2In the first text description layout cell, select all the text from the word “Fly,”through the last word “ravioli.”
3In the Property inspector’s second Format pop-up menu, which currently readsDefault Font, select Verdana, Arial, Helvetica, sans-serif.4In the Size pop-up menu, select 2.The text in your document automatically updates to reflect the changes.5Repeat the above steps to select and format the text in the other two textdescription layout cells.Apply color and styleNow you’ll apply additional formatting changes to the text; you’ll apply color andstyle to create heading text.1In the first text description layout cell, select the heading text from the word“Fly,” through the word “Mountains.”2In the Property inspector, click the color picker; then move the eyedropper tothe Learn More About image in the document window and select the browncolor of the text in the image.3Still in the Property inspector, click the B icon to apply bold style to the text.4Repeat the above steps to apply color and style to the heading text in the othertext description layout cells.5Press F12 to preview your page in a browser.Your page should look similar to the page below.Notice the text. There is little separation between text in one layout cell and thenext. You’ll fix that in the upcoming tutorial steps.6Close the browser window, then click in the Document window tomake it active.Dreamweaver Tutorial49
Work in Standard viewLayout view is helpful for laying out Web pages. Though you can adjust most ofyour design elements in Layout view, certain changes must be completed inStandard view. When you switch to Standard view, you’ll see how Dreamweaveruses tables to create your page structure. The Layout tables in Layout view are table tags in Standard view.Now you’ll learn how to work with tables to continue fine-tuning your design.First, you’ll switch to the Dreamweaver Standard view. In the Objects panel, click the Standard View icon.Your page should look similar to the screen below.Set cell propertiesCell height determines the height of the space within a cell row. Notice the spacearound the Compass logo. You want to remove the extra space between the logoand navigation buttons.1Click anywhere in the blank area of the cell containing the Compass logoimage (but not the image itself ).2In the cell Property inspector, in the H field (height), that currently contains avalue, delete the value.3Still in the Property inspector, click the Bg color box icon located in the bottomarea of the Property inspector; then use the eyedropper to select black.The background color is applied to the cell.450Chapter 1Click anywhere in the Document window to see the change.
Selecting a tableNext you’ll adjust the space in the navigation button table. The easiest way toselect a table in Standard view is by using the tag selector, which displays HTMLtags of elements in the document.You’ll use the tag selector to select the table containing the navigation buttons.1Click in the cell that contains the Trip Planner image.Notice the tag selector at the bottom left of the Document window.Note: The tags in your tag selector may vary based on the number of tables you createdwhile in Layout view.2In the tag selector, click the rightmost table tag.In the Document window a border appears around the navigation button table,and the Property inspector now reflects properties for a table.Set table propertiesNow you’ll use the table Property inspector to clear the extra space in thenavigation buttons table and to add a background color in the table.1In the Property inspector, click the Clear Row Heights icon. It’s the top leftbutton in the lower half of the Property inspector.The extra space is removed from the table.2Still in the Property inspector, click the Bg Color color box icon, then use theeyedropper to select the color black.The black background color is applied to the navigation buttons table.Dreamweaver Tutorial51
Add cell paddingNext, you’ll make changes to the cells that contain text. As you can see, the text istoo close the edges of the cells. You’ll add padding to the cells to leave roombetween the text and cells.1Click in the first cell in the text description table.2In the tag selector, click the rightmost table tag to select the table.3In the Property inspector’s CellPad field, type 10 to add 10 pixels of spacebetween the text and the table cells.4Click anywhere in the Document window to see the changes.5Save your document.View the site filesTo see a high-level representation of the structure of a local site, you use theDreamweaver Site Map view. You can also use the site map to add new files to thesite; to add, remove, and change links; and to create a graphic file of the site thatyou can export to and print from an image-editing application.The site map always displays the home page for a site at the top of the map; belowthe home page you can see which files the home page links to.There are a number of ways to define a site’s home page. The easiest way to set ahome page is by using t
the Web development process and with Dreamweaver features. 1 In Dreamweaver, choose Help Guided Tour. 2 Click a movie title. 3 Close the movie when you finish. The Dreamweaver work area Let's start with a brief overview of the Dreamweaver work area. If you haven't already launched Dreamweaver, double-click the Dreamweaver icon to .
