Transcription
Infor WFM For Employees8/26/2019 9:42:00 AM1
TABLE OF CONTENTSInfor WFM . 4iPad . 5Clocking. 5Clock On . 5Begin Unpaid Meal Period. 5End Unpaid Meal Period . 5Clock Out . 5Employee Transaction Manager (ETM) . 6Accessing ETM . 6Employee Self Service . 6TimeClock icon . 7ETM Home Page . 7Clock Status . 8Clock On . 8Begin Unpaid Meal Period. 8End Unpaid Meal Period . 9Clock Out . 9Change Job. 9Change Time Code . 10Change Department . 10View Clock Transaction . 10Time Approval .11Workmail Message .11Employee Data . 13Personal Info . 13Employee Balances . 13Availability . 13Work Schedule . 148/26/2019 9:42:00 AM2
Schedule . 14Timesheet. 15Transactions . 15Shift Trade . 16Self Scheduler . 17Shift Billboard . 18Vacation . 19Mobility . 20Accessing Mobility . 20Home Page . 21My Messages . 21My Schedule . 21My Profile . 22Time Off . 22My Schedule .23Give Away Shift .23Swap Shift . 24Shift Billboard . 24Timesheet .25Home Health Only: Weekly Timesheet . 26Offer Via Mobile . 28Updating Phone Number in Employee Self Service . 288/26/2019 9:42:00 AM3
INFOR WFMInfor WFM Go-Live is August 25, 2019. WFM is Riverside’s new scheduling, timekeeping and attendancesoftware. All employee schedules will be built in WFM, and WFM will be used for clocking on and off forshifts and meal periods. Staff will have the ability to self-schedule, pick up and swap shifts and requesttime off in WFM. WFM allows for timesheet attestation and transparency of pay prior to pay day. WFMalso offers mobile functionality.There are currently two clock options for staff: iPads and Riverside computers.It is important to note that exempt staff no longer need to clock on or off for their shift. If you are exempt,as long as there is a schedule built in WFM for you, you will get paid appropriately based on the hoursscheduled and time code associated with the shift.For all hourly staff, you will be paid to the minute as describe in the Time and Attendance Policy. Therefore,you will need to clock on and off for your shift as well as your unpaid meal period.8/26/2019 9:42:00 AM4
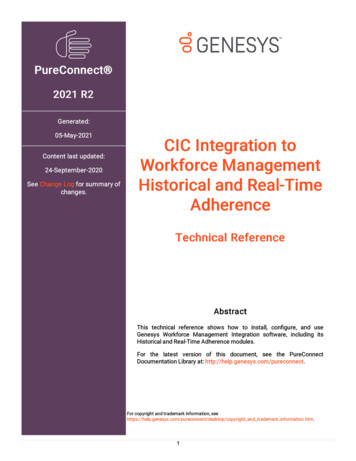
IPADThe Infor WFM iPad is available in select locations acrossthe health system. The WFM iPads will either be wallmounted, at a kiosk or on a tabletop stand. The iPad is onlyused for clocking on and off for shifts and unpaid mealperiods.CLOCKINGTo clock on and off for shifts and unpaid meal periods, youmust enter your employee ID first. Many new Riverside IDbadges have your employee ID listed on the back of yourbadge.CLOCK ON1. Enter employee ID2. Click Clock On3. You will receive an alert letting you know you have clocked on for your shiftBEGIN UNPAID MEAL PERIOD1. Enter employee ID2. Click Start Meal3. You will receive an alert letting you know you have started your meal periodEND UNPAID MEAL PERIOD1. Enter employee ID2. Click End Meal3. You will receive an alert letting you know you have returned from your meal periodCLOCK OUT1. Enter employee ID2. Click Clock Out3. You will receive an alert letting you know you have clocked out for your shift8/26/2019 9:42:00 AM5
EMPLOYEE TRANSACTION MANAGER (ETM)Inform ETM can be accessed from home or work through the ETM web page. Infor ETM has the capability forstaff to clock on and off for shifts and meal periods, send and receive workmail messages, submit availability,view your own and your team's schedules, give away and swap shifts, self-schedule, pick up shifts from theShift Billboard, submit time off requests and attest to your timesheet.ACCESSING ETMThere are two ways to access ETM: (1) Employee Self Service (2) TimeClock icon on a Riverside workstationdesktop.EMPLOYEE SELF SERVICETo access ETM from a non-Riverside workstation, you will need to open the Employee Self Service Portal fromRiverside's home page.1. Open Riverside’s home page2. Click More3. Click Employee Self Service under “For Employees”4.5.6.7.Click ADFSLog in using your Riverside network loginUse two-factor authenticationSelect the menu button on the top left of your screena. There are three icons for Infor:i. Infor WFM: web page recommended foruse by schedulers and supervisorsii. Infor WFM ETM: web pagerecommended for employees usingWFM from a computeriii. WFM Mobility: web page recommendedfor employees using WFM from a mobiledevice8. Click Infor WFM ETM8/26/2019 9:42:00 AM6
TIMECLOCK ICONTo access ETM from a Riverside workstation, you can use the TimeClock icon on the desktop1.2.3.4.Log into the Riverside workstationClick TimeClockClick ADFSUse two-factor authenticationETM HOME PAGEThe ETM Home Page displays Today's Schedule for you as an employee including the date, start and end timesof your scheduled shift, your job code, and department ID. You can click the forward or backward buttons inthe Today's Schedule header to view your schedule for different days. Your Clock Status also appears on theETM Home Page. It will display as either On in green text or Off in red text. From Clock Status, you can clock onand off for your shift, begin and end your meal period, change your job code, change your time code, changeyour department, view clock transactions and attest to your timesheet.8/26/2019 9:42:00 AM7
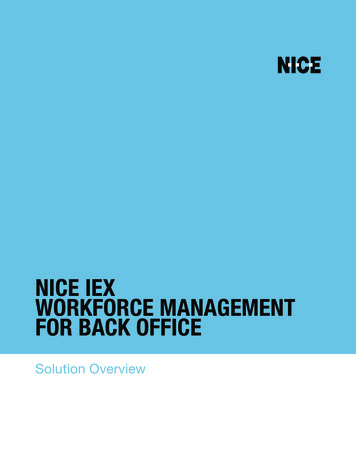
CLOCK STATUSTo use the ETM clock, you must be logged on to a Riverside workstation. If you are working from a nonRiverside location, you must either be using the firewall or you must be set up as a Mobility user.CLOCK ON1. From ETM’s home page, click Clock Ona. A confirmation message appears asking if you aresure you want to clock on2. Click Yesa. If you are not on a Riverside workstation, you willreceive an error message stating you are not on anapproved device or locationb. The fail message will appear under the Clock Status,reminding you why you could not clock on3. When you do clock on, your clock status will appear as On ingreen text with the time you clocked ona. If you forgot to clock on for your shift, you will need to clock on when you do remember andsend your supervisor a Workmail message with your actual arrival time.BEGIN UNPAID MEAL PERIOD1. Click Change Time Code2. Select Meal3. Click Done8/26/2019 9:42:00 AM8
END UNPAID MEAL PERIOD1. Click Change Time Code2. Select Work-Regular3. Click DoneCLOCK OUT1. Click Clock Offa. A confirmation message appears asking if you are sure you want to clock off2. Click Yes3. your clock status will appear as Off in red text with the time you clocked offCHANGE JOBIf you are an individual who holds multiple positions atRiverside, you can change the job you are working in currently ifit was not scheduled as such. This can be helpful for last minutechanges to your schedule when you are pulled to differentpositions throughout the course of a day.1. Click Change Job2. Select the job you are changing to3. Click Done8/26/2019 9:42:00 AM9
CHANGE TIME CODEYour schedule should reflect the type of work you will be doing andhow it will be allocated in terms of time codes. You can adjust yourtime code if you will be in orientation or education if it is not alreadyreflected in your schedule as such.1. Click Change Time Code2. Select the appropriate time code3. Click DoneCHANGE DEPARTMENTIf you will be floating, unexpectedly to another department, you canutilize change department to update the department you arecurrently working in.1. Click Change Department2. Select the department you will be working in3. Click DoneVIEW CLOCK TRANSACTIONYou can view all time punches for a specified day in this activity.1. Click View Clock Transactionsa. You are brought to the Work Schedule Transactionsactivity8/26/2019 9:42:00 AM10
TIME APPROVALAt the end of each shift, you will need to attest to your own timesheet to verify all time punches and errorscodes, if any, are accurate.1. Click Time Approvala. You can see the Work Date and Worked Hours for that day4. For each day listed, you will need to update the status to Approve or Reject. Click the down arrow nextto each day and select the appropriate status5. Click Submita. If you Reject a timesheet, you must send a Workmail message to your supervisor explainingwhat on the timesheet you disagreed withWORKMAIL MESSAGEWorkmail message is an activity within WFM that functions similar to email. You can send a new message,reply and forward messages, and view forms you've received from this activity. The types of message you willreceive in WFM are messages pertaining to a self-scheduling process opening or closing for a specified daterange, your time off approval requests and shift swaps being approved or denied, and attendance violationnotifications.1. Click Messages on the top toolbara. You are brought to your inbox. Any messages that are bolded have not been opened yet.2. To delete a message, click the trash can next to a message3. To open a message, select the messagea. When viewing a message, you have the ability to delete, forward, reply or close the messageb. Some messages contain hyperlinks to bring you to another activity such as self-schedulingc. If you have accrued enough time violations to reach disciplinary action, you will receive amessage containing a form with the disciplinary action4. Select Sent Maila. You can see Workmail messages you've sent to other staff members5. To create a new message, click Compose Message8/26/2019 9:42:00 AM11
a. This message activity should be replacing your paper edit sheets. Any time a time punch ismissed whether for your shift or lunch or any time you disagree with your time sheet, you willsend a message to your supervisor6. In the To field, you can enter theindividuals first name hyphen lastname. Or you can click the To buttonand search the dictionary7. Enter a subject in the subject lineand the message in the body of themessage8. Once the message is composed, clickSend9. Click My Formsa. Forms pertain to data submitted or received. For example, any time availability is entered orshift swaps are submitted, that is considered a form and you can see the result of that form inthe My Forms activity for whether the action was approved or denied8/26/2019 9:42:00 AM12
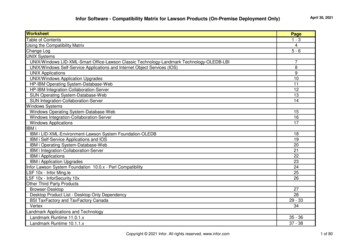
EMPLOYEE DATAEmployee Data displays information pertaining to you as an individual, your earned time balances and givesyou a place to enter your work availability1. Click Employee Data on the top toolbarPERSONAL INFOOn the Personal Info tab, you can see your employee ID, hire date, department ID among other various itemsEMPLOYEE BALANCES1. Click Employee Balancea. You can view your current andprojected end of year earned timebalancesAVAILABILITY1. Click Availabilitya. You can enter your availability for days of the week, Sunday through Saturday and for specifiedweeks2. Enter a date range you want to applyavailability for3. Enter the start and end time for eachday's availability4. Click Submita. Your availability will be sent toyour supervisor for approval.Whether approved or denied,you will receive a Workmailmessaging indicating the statusof your availability request.Once your availability isapproved, it will be displayed inthe Availability activity. If you need to update your availability, you can click New and enter newdates and times. You can also choose to look at the calendar view of your approved availability.5. Click View Calendara. You can see any time off entered as well as your approved availability. Do not confused thiscalendar view with your actual schedule8/26/2019 9:42:00 AM13
WORK SCHEDULEThe Work Schedule allows you to see your own individual schedule as well as your team's. You can also swapshifts, self-schedule and pick up shifts from the Shift Billboard.1. Select Work Schedule on thetop toolbarSCHEDULEThe first tab in Work Schedule is called Schedule. You can see your own schedule for a month at a time bydefault. You can choose to view the schedule by day or week. You can also change days, weeks or months byselecting the icons in the bottom corners. You can also view your team's schedule. Days that you arescheduled to work list the start and end times of the shift. Days that you are scheduled off list the off reasonwith an asterisk. Days highlighted in red mean that the timesheet is unauthorized for that day.1. To view more detailed information about a day, select the day.a. You are brought to the Timesheet. You can see scheduled and worked time as well as anyattendance points accumulated, if any2. To view your team’s schedule, click Teama. In list format, you can see all team members and the days that they work for the given weekyou are viewing. You can change dates by selecting the icons in the bottom corners8/26/2019 9:42:00 AM14
TIMESHEET1. Click Timesheeta. Timesheet allows you to view individual days for more in-depth time and pay details. It isimportant to note that standby and on-call pay are both coded as on-call on the timesheet. Ifyou select on individual days in the Schedule, it will bring you to the Timesheet for that day.From the timesheet activity, you are brought to today's date by default. You can change daysfrom the Timesheet by selecting the icons on the bottom corners to move forward orbackward.TRANSACTIONS1. Click Transactionsa. Transactions display clock details forindividual days. You are brought totoday's clock transactions by default.8/26/2019 9:42:00 AM15
SHIFT TRADE1. Click Shift Trade Requesta. In the Shift Trade Request activity, you can enter a 1 way or 2 way shift trade2. In the substitute field, enter the individual you are trading a shift with3. Enter the date and times of your shift that you are trading with the substitutea. If you are trading your entire shift, you do not have to enter timesb. If your shift spans midnight, click the Overnight checkboxc. You can enter a partial shift to trade by adjusting the start and end times4. If this is a two-way trade, you must complete the bottom section indicating the date and times of theshift you are picking up from the substitutea. You can add any comments that your supervisor will seeb. As long as there are no compliance rules that are violated, the shift trade will automatically gothrough. An example of a compliance rule would be shift trades that allowed an individual to gointo overtime5. Click Submita. If the shift trade automatically went through, the new schedule will be displayed8/26/2019 9:42:00 AM16
SELF SCHEDULER1. Click Self Scheduler2. Click Self Schedulinga. Schedulers andsupervisors can set upself scheduling in WFM. Self scheduling processes can be open for a set limit of time for a setamount of schedule. If there is a currently open self scheduling process, you will see it listed3. Click opena. The date range at the top lists the date range that the self scheduling process allows you toschedule yourself for. You can see any currently assigned shifts to you in blue, and any dayswhere you will be absent in orange. If any of the shifts for the week will cause you to go intoovertime, you will not see those shifts as available days to self-schedule. If the shift will notcause you to go into overtime, you will see a green number on the lower right of each dateletting you know how many shifts are available to self-schedule on that day.4. Select the highlighted day to view the available shiftsa. You can see the shifts available to self-schedule shifts5. To select the shift you want to pick up, click the check box to the left6. Click Submita. You can continue picking up shifts by selecting the date, selecting the shift, and clicking submituntil you have self scheduled yourself for your adequate number of shifts. The shifts will not bepublished to your individual schedule under the schedule tab until the self scheduling processcloses or the shifts have been published. Remember when a self-scheduling process opens orcloses, you will get a Workmail message notifying you8/26/2019 9:42:00 AM17
SHIFT BILLBOARD1. Click Shift Billboarda. The Shift Billboard is a central location where open shifts can be posted to outside of selfscheduling. If there are open shifts to still be filled, schedulers and supervisors can post theopen shifts to the billboard to be picked up. Shift Billboard is not used for last minute call-offs,but for future shifts that need to be filled. The Shift Billboards works similar to Self Scheduling.You are brought to the current month's calendar. You can see your scheduled days in blue andyour absent days as grey. Shifts posted to the billboard are indicated by a green number on thebottom middle of each day there is a billboard posting2. Click a green number in the calendara. You see a list of all shifts posted to the billboard for this day3. To pick up a shift, select ita. In the verification screen, you can review the details of the shift you are about to pick up4. Click Oka. The shift now appears on your schedule. You can continue picking up shifts from the billboarduntil you've reached your max hours without going into overtime8/26/2019 9:42:00 AM18
VACATIONThe Vacation tab allows you to submit new time off requests and view approved or denied time off requests1. Click Vacation on the top toolbara. You are brought to the current month's calendar view. You can see your approved, pending,denied and recalled days off indicated by different colors. On the right of the screen you cansee your earned time balances2. To submit a time off request, click a day in the calendar3. In the Type field, select the magnifying glass4. Select ET Sched or Special Request if you want a day offwithout using ETa. If you only want to take a partial day off, you can selectthe partial day check box and enter a start and endtime. If you are requesting multiple days off, you canupdate the from or to date to extend over multipledays. In the comments field, you can enter anycomments you would like the scheduler or supervisor tosee when responding to your time off request5. Click OKa. Your pending time off request appears on the calendar6. To cancel a time off request, select the highlighted day in thecalendar7. Click Remove Requesta. The request no longer appears8/26/2019 9:42:00 AM19
MOBILITYInfor Mobility can be accessed from anywhere with a mobile device through the Mobility web page. Mobilityallows for sending and receiving Workmail messages, viewing your own schedule as well as your teammembers', submitting time off requests and attesting to your own timesheet. Certain staff have been set up touse Mobility to clock on and off.ACCESSING MOBILITYTo access Mobility, you will need to log in to Employee Self Service from Riverside's home page on your mobiledevice1.2.3.4.5.6.7.Open Riverside’s home pageClick MoreClick Employee Self Service under “For Employees”Click ADFSSign in using your Riverside network log inUse two-factor authenticationSelect the menu button on the top left of your screena. There are three icons for Infor:i. Infor WFM: web page recommended for use by schedulers and supervisorsii. Infor WFM ETM: web page recommended for employees using WFM from a computeriii. WFM Mobility: web page recommended for employees using WFM from a mobiledevice8. Click WFM Mobility8/26/2019 9:42:00 AM20
HOME PAGEYou can view your clock status, messages and the current day's schedule.MY MESSAGESThe My Messages section of the Home Page displays how many messages you have in your inbox1. To compose a message, click on the pencil icona. Instead of using paper edit sheets, you will submit time edits through a Workmail message inWFMb. In the To field you will enter who you wantto send this message to. Only supervisorswill have the ability to adjust timesheetsc. In the subject line, enter a brief descriptionabout the messaged. Enter the body of the messagee. Click Sendf. Click Ok2. To view the messages in your inbox, you can clickthe Arrow from the Home Pagea. All messages are listed with the sender'sname, date and time message wasreceived, and the subject of the message.You can view a message by selecting on itb. The message itself opens up for you toread, reply, forward, delete or take actionon the messageMY SCHEDULEThe My Schedule section on the Home Page shows you today's current schedule and date.1. To jump to the full schedule activity, you can click the schedule icon.2. To view this week's schedule, click the arrow.a. The circular icon indicates a time off day.8/26/2019 9:42:00 AM21
MY PROFILEMy Profile displays your employee data information as well asearned time balance information1. Click the Menu button2. Click My Profile3. You can view your employee details including youremployee ID, hire date, job and department IDs,birthdate, mobile phone number and work email.4. You can also view your individual earned time balancesas well as projected balances at the end of the yearTIME OFFThe Time Off activity is where you can submit time off requests as well as view approved, denied and recalledtime off requests1. Click Menu2. Click Time Offa. You are brought to the current month's calendar view. You can see your existing time offrequests and the pending or final status of those requests3. To submit a new time off request, clickthe highlighted day in the calendar4. In the Type field, click the magnifyingglassa. Choose ET Sched for days ortimes you want off that youwant to use Earned Timeb. Choose Special Request fordays or times you want off thatyou do not want to use EarnedTime5. You can adjust the start and end day ifyou want to extend this time offrequest over multiple days. You canalso choose to submit a request for a8/26/2019 9:42:00 AM22
partial day by changing the Absence field to Partial and entering a start andend time for the request. You can add any comments you'd like thescheduler or supervisor to see once this time off request is submitted6. Click Apply Time Off7. Click Submit Time Off8. The request appears with a blue dot on the calendar9. To cancel a time off request, select the highlighted day in the calendar10. Click Cancel Time Off11. In the confirmation screen, click Ok12. The time off request no longer appearsMY SCHEDULEMy Schedule displays a weekly view of your schedule, allows for swapping shifts andpicking up shifts from the Shift Billboard as well as viewing your team members'schedules1. Click the Menu button2. Click My Schedulea. You are brought to the current week's schedule displaying shifts you areworking on each day, as well as days listed as not scheduled and daysthat you are scheduled off which are designated by a circular icon. Youcan jump backward and forward weeks by using the arrows next to thedate rangeGIVE AWAY SHIFT1. To give away a shift, click on the highlighted scheduledshift, click the shift give away button2. You can choose to give away only part of the shift byadjusting the start and or end time.3. Click Search employee to choose an employee to giveaway this shift to4. Select an employee5. Click Continue6. Click Submit8/26/2019 9:42:00 AM23
SWAP SHIFT1.2.3.4.5.6.To swap a shift with another employ
Infor ETM has the capability for staff to clock on and off for shifts and meal periods, send and receive workmail messages, submit availability, view your own and your team's schedules, give away and swap shifts, self-schedule, pick up shifts from the Shift Billboard, submit time off requests and attest to your timesheet. ACCESSING ETM