Transcription
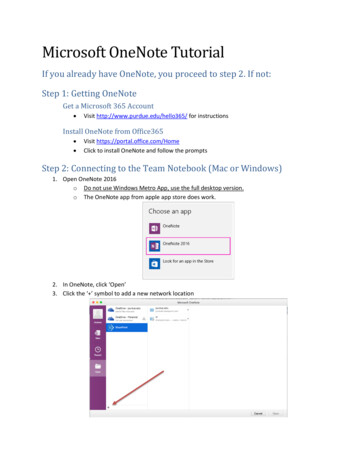
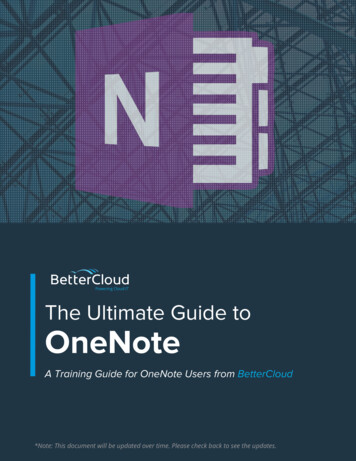
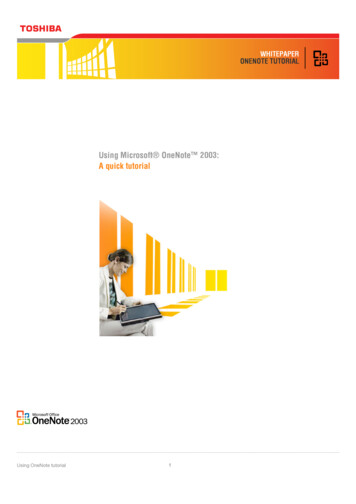
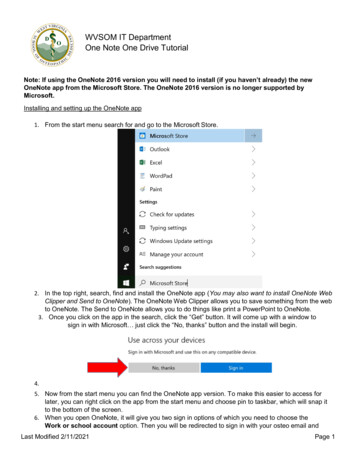
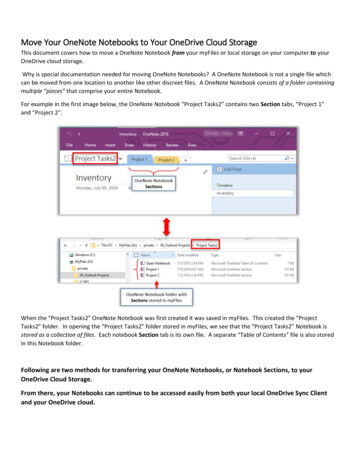
Move Your OneNote Notebooks to Your OneDrive Cloud StorageThis document covers how to move a OneNote Notebook from your myFiles or local storage on your computer to yourOneDrive cloud storage.Why is special documentation needed for moving OneNote Notebooks? A OneNote Notebook is not a single file whichcan be moved from one location to another like other discreet files. A OneNote Notebook consists of a folder containingmultiple “pieces” that comprise your entire Notebook.For example in the first image below, the OneNote Notebook “Project Tasks2” contains two Section tabs, “Project 1”and “Project 2”.When the “Project Tasks2” OneNote Notebook was first created it was saved in myFiles. This created the “ProjectTasks2” folder. In opening the “Project Tasks2” folder stored in myFiles, we see that the “Project Tasks2” Notebook isstored as a collection of files. Each notebook Section tab is its own file. A separate “Table of Contents” file is also storedin this Notebook folder.Following are two methods for transferring your OneNote Notebooks, or Notebook Sections, to yourOneDrive Cloud Storage.From there, your Notebooks can continue to be accessed easily from both your local OneDrive Sync Clientand your OneDrive cloud.
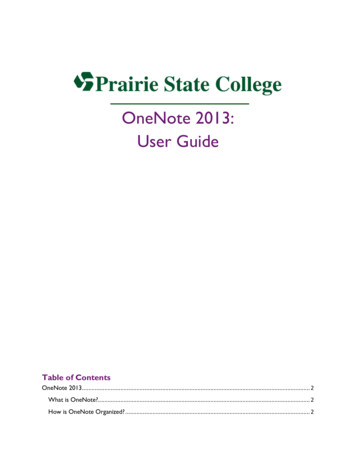
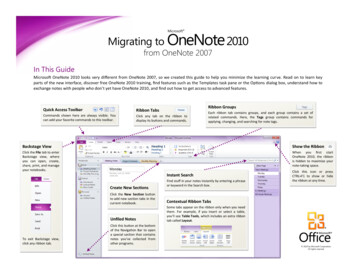
Method 1: Move OneNote Notebook Sections to a New Cloud NotebookUse these steps to move selected Section tabs from your original Notebook to a Notebook in your OneDrive Sync Client.Moving individual Sections allows you to separate them into different Notebooks or aggregate Sections from multipleNotebooks into one.Note: If you do not yet have a OneNote Notebook on your OneDrive to hold the Sections you will move, create one inOneNote by going to File New. Create the new Notebook in your OneDrive Sync Client folder structure.To move your Notebook Sections,1. Right-click a Section tab and select Move or Copy from the short-cut menu.2. In the Move or Copy Section box that opens, select a Notebook that is stored in your OneDrive.3. Click Move. This moves your Section tab and opens the Notebook that received the moved Section.
4. To move another Section from your original Notebook, you must re-open the original Notebook from yourOneNote Notebook list.Once you have completed moving your OneNote Sections, open your OneDrive Cloud Storage and test to ensure thateverything has moved successfully. IT IS THEN IMPORTANT to: Delete the old OneNote folder from its original location by selecting it and pressing Delete on your computerkeyboard, Or right-click and select Delete.Then Close the old Notebook by selecting File in your OneNote. With the Info tab at the left selected, locate theold Notebook at the right. Click Settings for the Notebook and select Close to remove the old Notebook fromyour Notebook list.
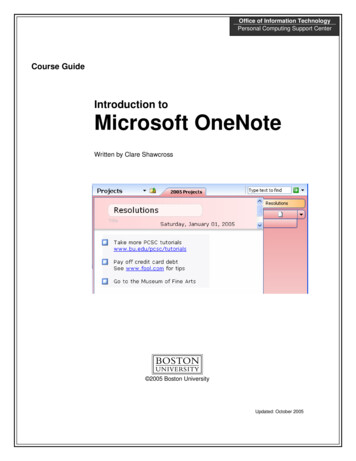
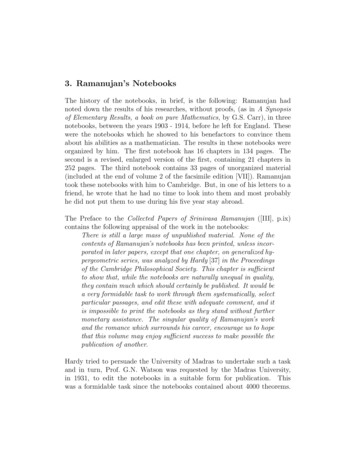
Method 2: Change Your Notebook LocationThese steps copy a OneNote Notebook to a new location. You should save the copy into your OneDrive Sync Clientfolder structure.1. Open your OneNote application.2. Click File at the upper-left.3. Select the Info tab to view the list of your recently accessed OneNote folders.4. Click Settings for the OneNote folder you want to move5. From the dropdown that opens select Properties.
6. In the Notebook Properties box, click Change Location 7. In the Choose a sync location for this remote notebook box, locate your OneDrive-UWSP - Sync Client andselect a synced folder location for your OneNote.8. Click Select.9. Give your OneNote folder a few minutes to copy. Click OK to the pop up box that opens.1. Once you have completed the copy, open your OneDrive Cloud Storage and test to ensure that your OneNotecopied successfully.2. IT IS THEN IMPORTANT to delete the old OneNote folder from its original location by selecting it and pressingDelete on your computer keyboard, or right-click and select Delete.
Method 1: Move OneNote Notebook Sections to a New Cloud Notebook Use these steps to move selected Section tabs from your original Notebook to a Notebook in your OneDrive Sync Client. Moving individual Sections allows you to separate them into different Notebooks or aggregate Sections from multiple